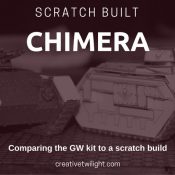
Hello all,
In my last post I started building a chimera from the GW kit while also scratch building one using any bits I could squeeze out of the kit. This week I will show how I finished both builds and compare the results.
I ended the last post with one GW chimera, and one scratch built chimera with the basic structure, tracks, and weapons built.
After that I finished the track guards, turret hatch, and some other details on the scratch build. I won’t cover those in detail here, as you can see the same kind of work in the third part of my Devil Dog build.
Magnetizing a Dozer Blade
The Chimera kit comes with an optional Dozer Blade. I don’t always take them, but they can be very handy when you need one, so I want to magnetize it. The first thing I did was attach the dozer blade to the mount. Then I drilled two 1/8″ pits and glued the magnets into them.
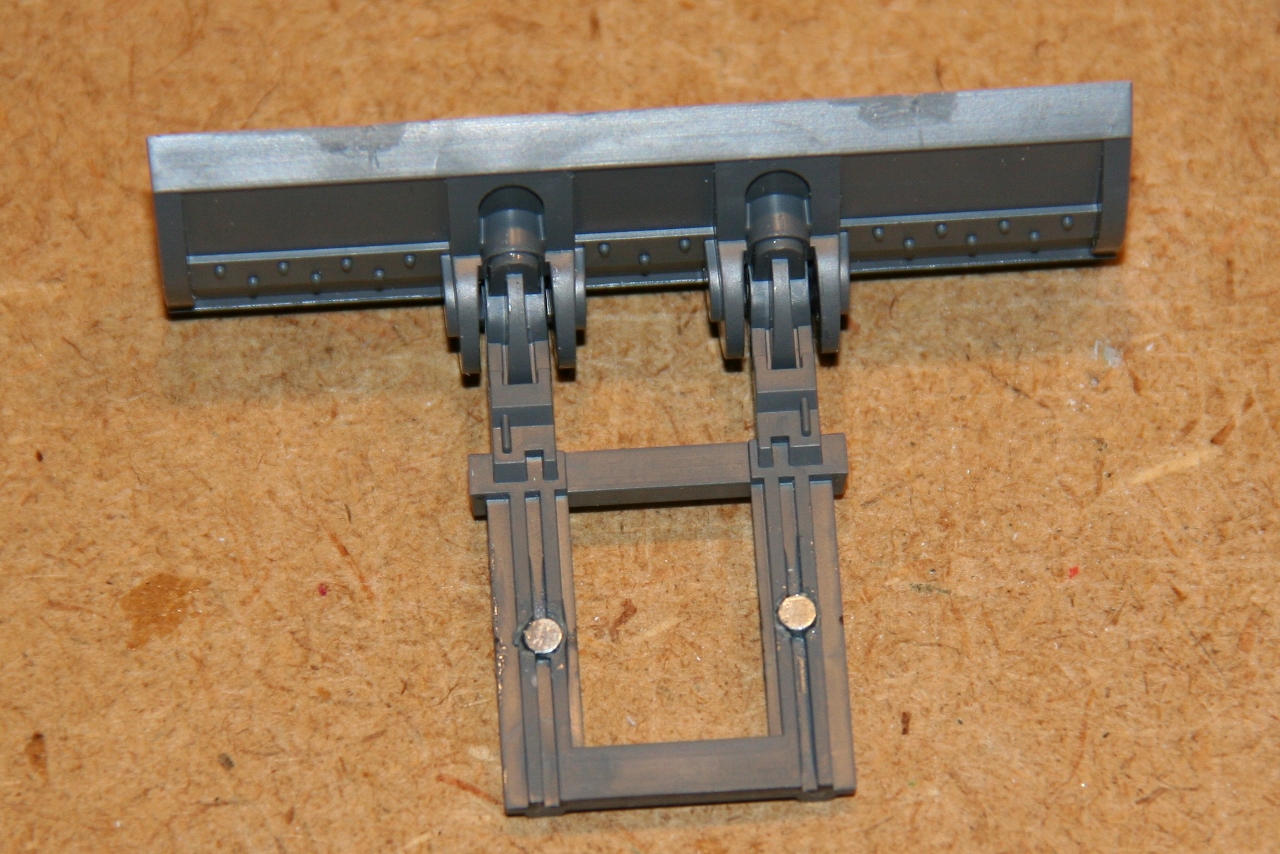
I added marks to the sides so I can see where the magnets are from the other sides. Then I dry-fit the assembly to the GW chimera and transferred marks to the tank. Then I drilled two holes and glued in magnets to hold the blade in place.
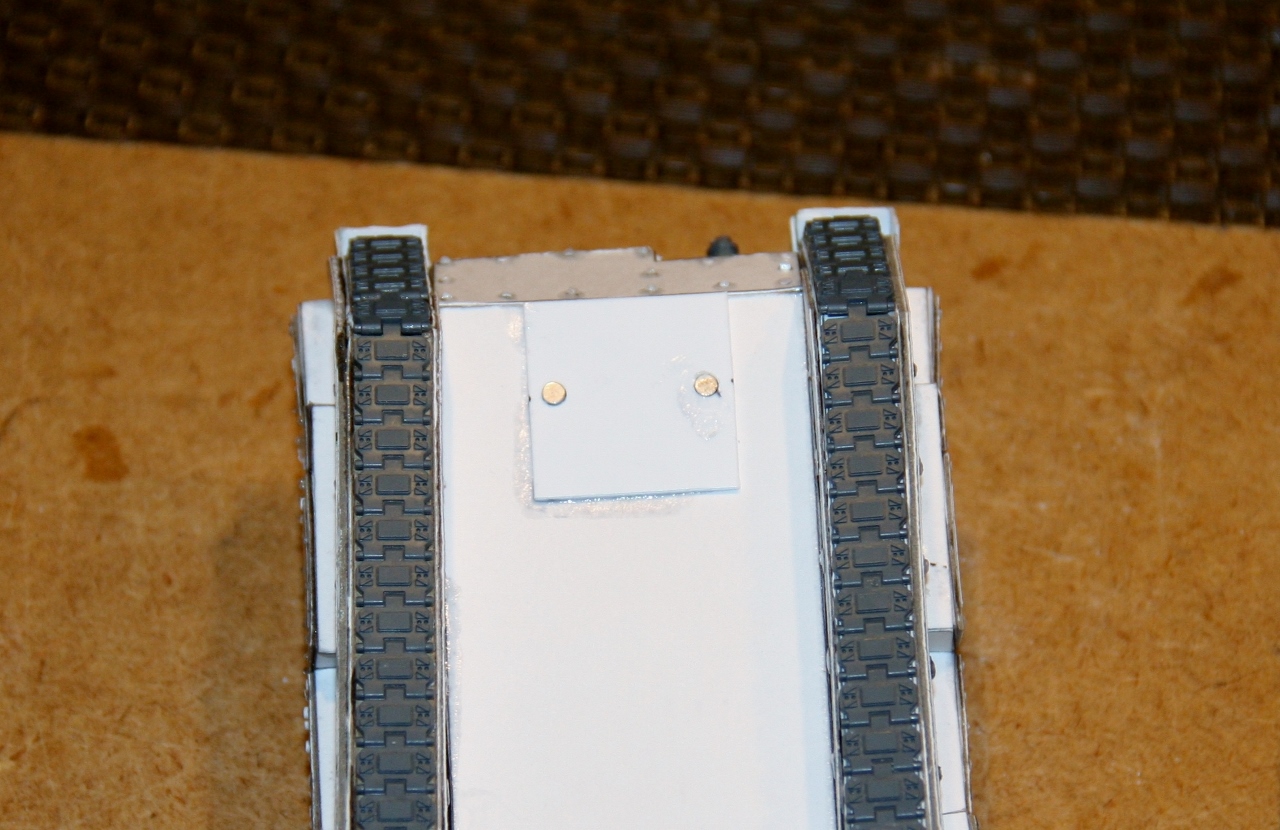
For the scratch build I added a plate of .040 styrene, punched two holes with a 1/8″ hole punch, pressed the magnets into the holes, and glued it all to the bottom of the tank. Now I can pop the dozer blade onto either tank.
I didn’t grab a picture of the magnets on the GW chimera, but it doesn’t look much different from the scratch built one.
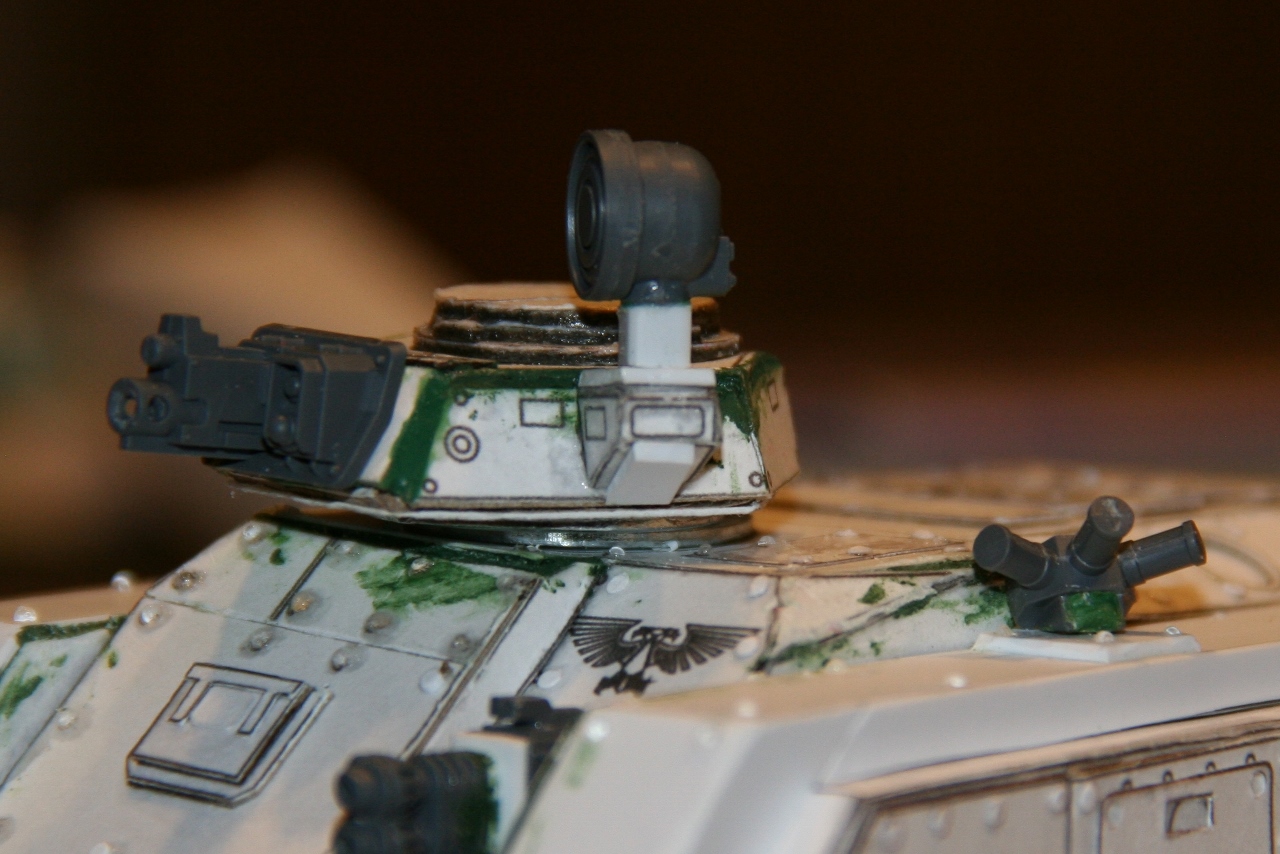
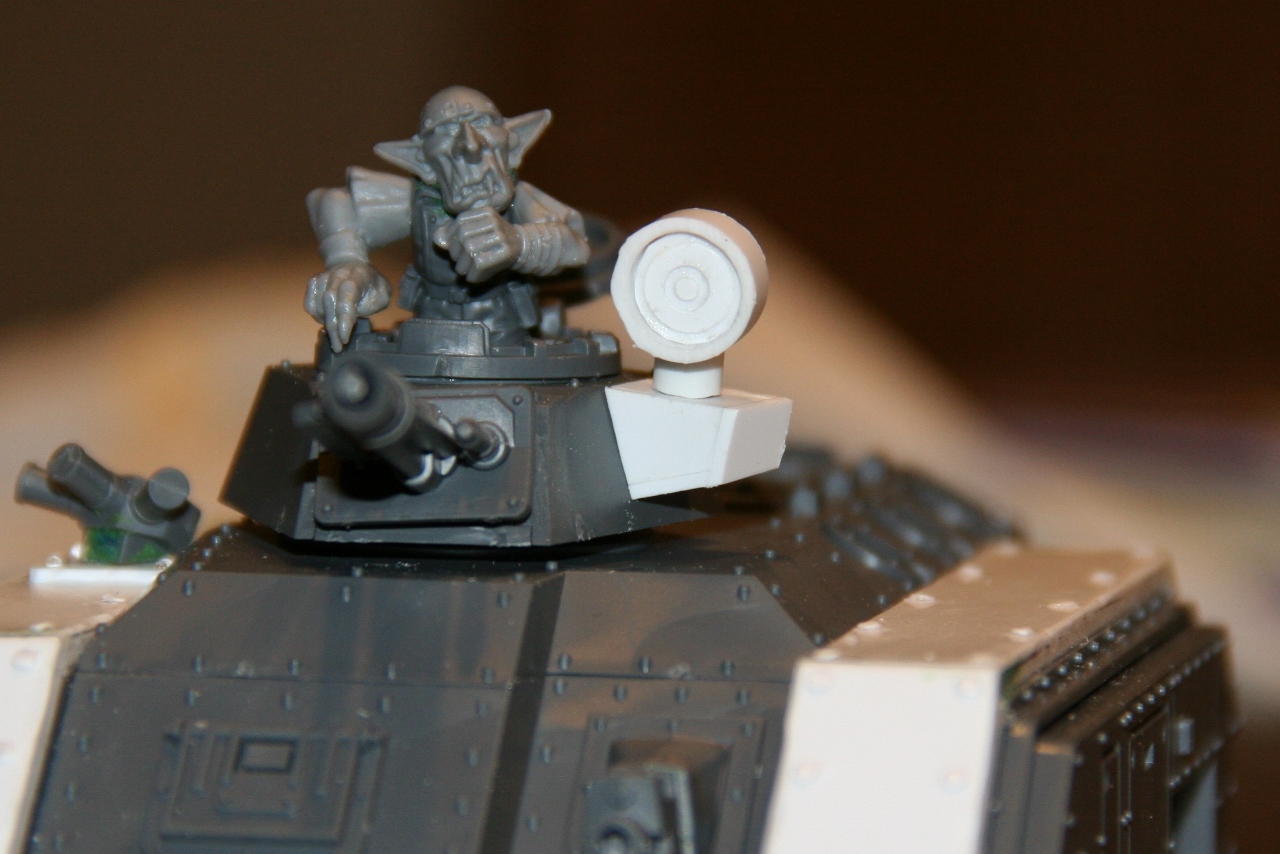
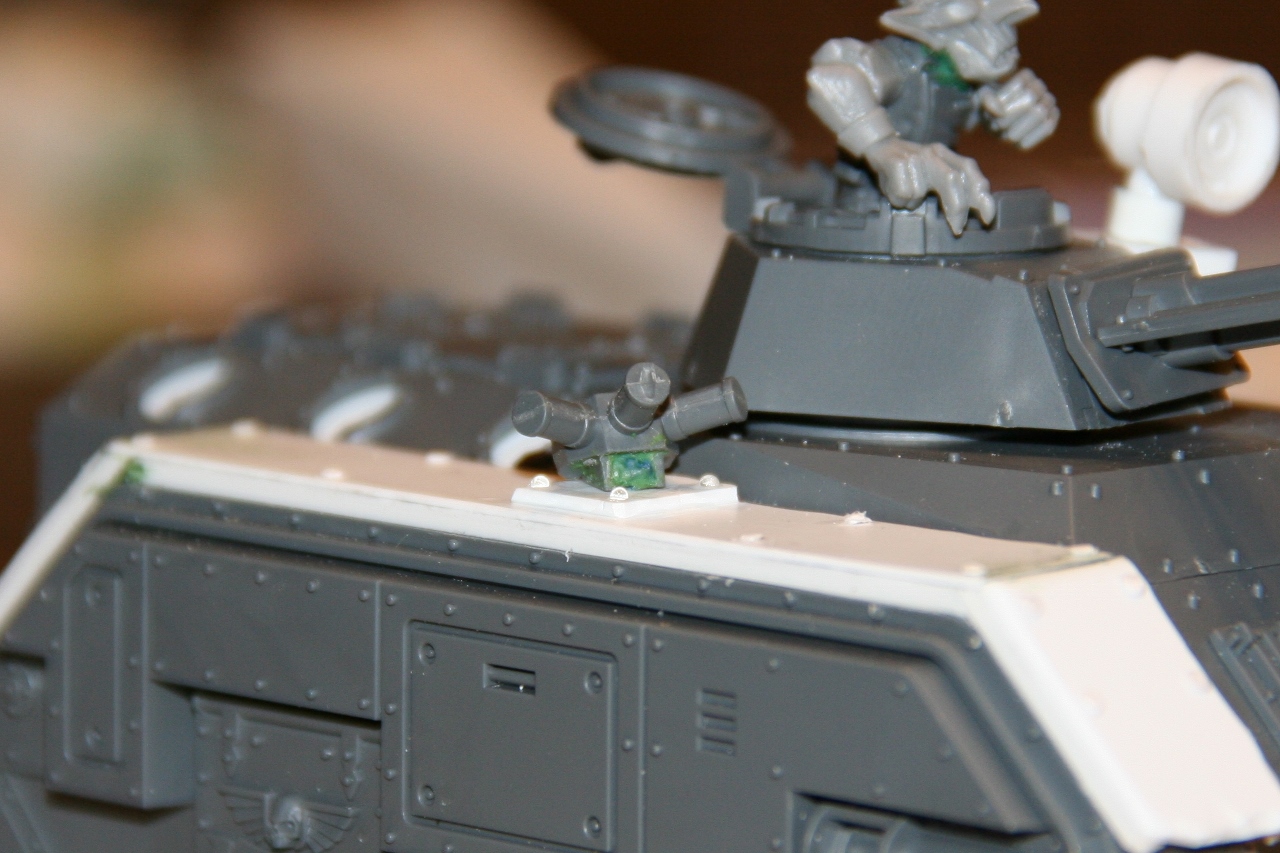
Adding a Searchlight
I found a little piece in the template that fits nicely on the side of the turret to use as an accessory mount. It’s actually supposed to go on the back as a communications piece but I like it here.
I reinforced it with some styrene on the top and bottom, and sank a magnet into the top piece. I also added an attachment point on the track guard to hold another magnet. I added magnets to the searchlight and smoke launchers from the kit, so they will fit on any of my attachment points.
I used .040 styrene sheet to build a similar accessory mount on the GW turret.
The searchlight in the picture is the one I scratch built for my Devil Dog, you can see how I did it in that tutorial. I also added an attachment point on one track guard to hold the other searchlight. These points could also be used to hold a pintle mounted heavy stubber if I chose to.
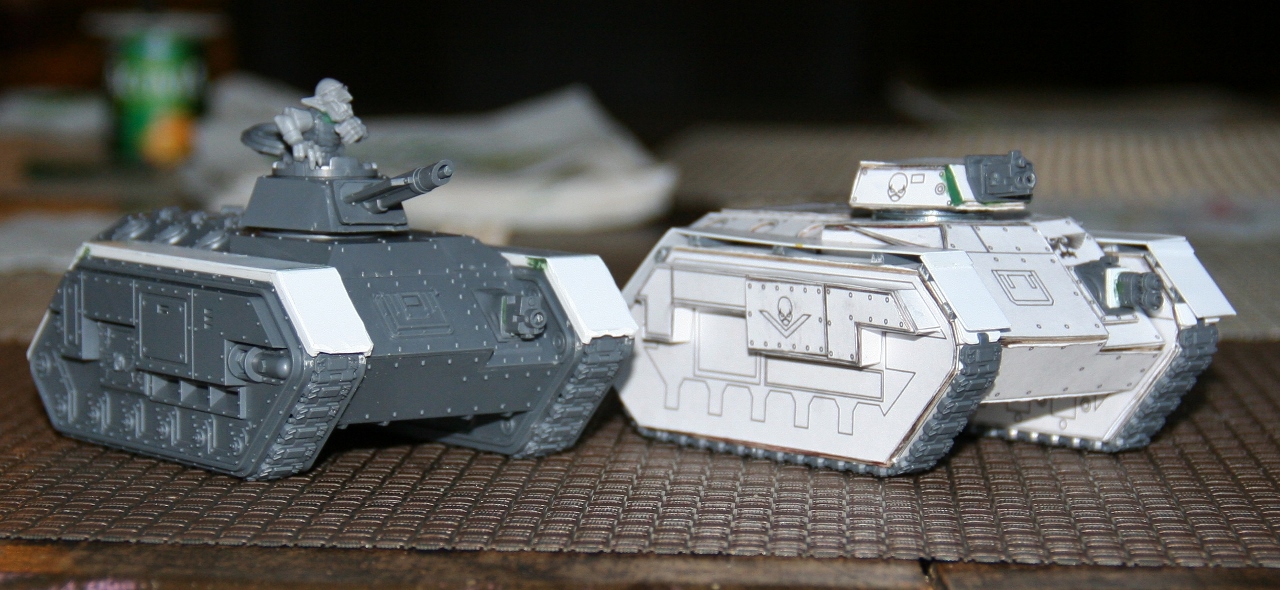
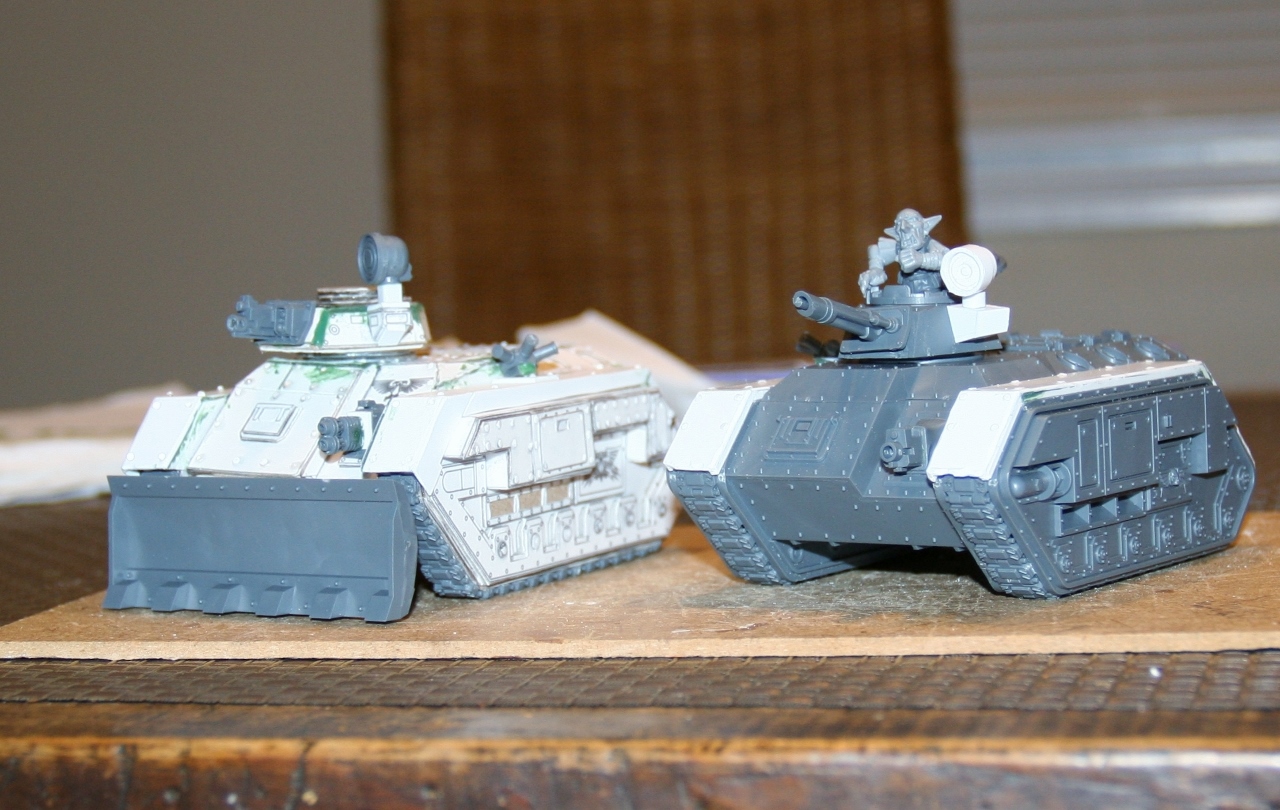
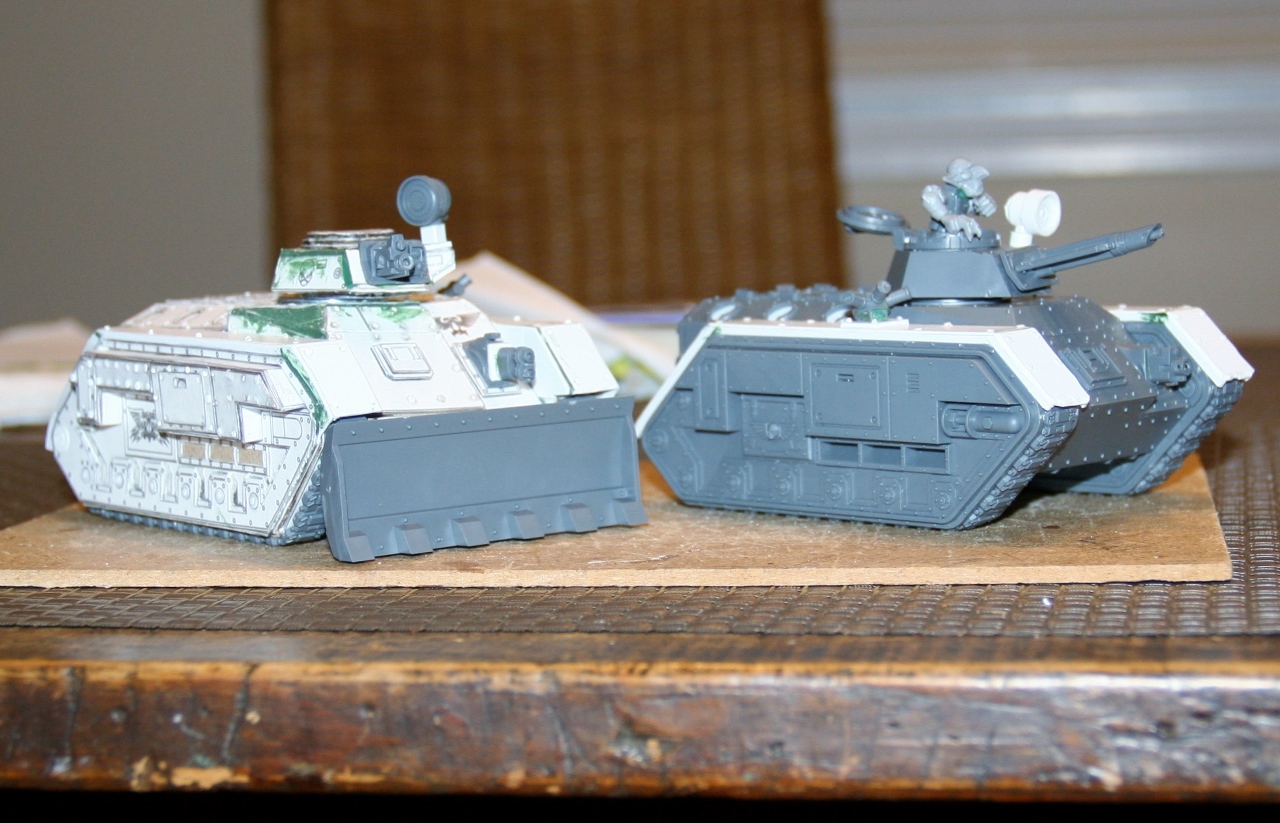
Final Comparison
Now that I have both tanks basically finished, you can see a good side by side comparison. The GW bits add a lot of detail to the scratch build for relatively little effort. Once they are painted it will be difficult to tell which is which without looking closely.
Before painting these I will add some more attachment points, so I have room for all of the upgrades I’m likely to take. I’ll also add some storage, damage, and grotty decorations.
I’m at the point with these that everything else is conversion work beyond the standard kit, so this is a good place to make the direct comparison. As I said in the last post, the scratch build was about four times as much work as the GW kit. It looks pretty good, but it isn’t quite as square or as detailed as the GW kit.
If you have the cash you’ll get better results from the GW kits with much less effort. But, if you’ve got the time and patience you can save a bunch of money by scratch building, and still have some good-looking tanks.
If you go this route I definitely recommend you sprinkle in a couple of kits, or just some bits, as having those few extra details can make a big difference to your scratch build.
Scratch Building Tanks
- How to Make a Wargaming Table & Terrain Cheaply & Easily - November 6, 2017
- First Rebel Grot Armored Sentinel Painted! - December 19, 2016
- Assassinorum Execution Force Product Review from Games Workshop - May 6, 2015

Looks good.
Is the extra plate for the dozer just for reinforcement? I have a couple of those IG dozers I want to magnetize for my Rhinos, but have never gotten around to it.
Where’d you get the 1/8″ hole punch?
Thanks.
Since I built the hull from cardboard there isn’t really anything to drill into. The styrene plate allows me to countersink the magnets for a more secure mount.
You should be able to find 1/8″ and 1/16″ round hole punches in the scrap booking section of most decent sized craft stores. I think I bought mine at Jo-Ann Fabrics.
I got my 1/8″ hole punch at Jo-Ann’s.
Well done!
I wish the Rhino kit had an setup like the Chimera for the dozer blade. The Rhino kit has no mounting area, you just glue it to the face of the Rhino. I’ve never bothered to magnetize mine because of that, hate to have exposed magnets when it’s not in use, or have to create some sort of magnet ‘filler’ when not in use.
Thanks!
Did the razorback kit come with a dozer blade or just the spiky ram? It’s been a while since I put mine together. TheRhino’s plan to use IG blades would work well since you can put the magnets under the rhino. I think they’re easy bits to come by.
They just come with the spikey ram, which is cool and I’d count as a dozer blade except for the mounting issues. Then again, Chaos now has destroyer blades (a wimpy deffrolla), which the spikey ram is more suited for. All things considered, the IG blade would certainly work out better.
I considered building a dozer blade for mine and using the spiky ram as a filler when not taking the blade. Since I usually ran a drop pod force with my marines I didn’t get around to doing anything with it!
5 years late but what a superb tutorial! Fantastic effort!
I think it was 5 years ago he last touched them too. Then again, I haven’t been playing any 40K for a while either so I can’t say much.
Thanks! It has been a few years since they’ve seen the table top but I’m sure I’ll get back into the game eventually. In any case, i’m really glad you enjoyed the article!