This is something I wish I had when I got into painting miniatures, a glossary of terms.
Like any hobby, there’s a lot of terminology involved, more than you’d think, so I’ve put together a list of those terms, what they mean, and examples of them when possible.
Not everything in the list is a painting term. Some of the things covered are painting items and tools. I felt I had to cover a few of them as they are referenced in the terms explained.
Disclosure: Some of the links below are affiliate links, meaning, at no additional cost to you, I will earn a commission if you click through and make a purchase. The commission earned helps maintain this site.
‘eavy Metal
These are the folks who paint miniatures for Games Workshop. The miniatures they paint are used in the White Dwarf magazine, online, put in display cases, etc.

‘eavy Metal has also become synonymous with a style of painting. The ‘eavy Metal style is to edge highlight everything on a model. While this isn’t a realistic style of painting, it does define a model really well and creates some nice contrast.
Base Coat
A base coat is the first coat of paint that you put on a miniature, specifically parts of a miniature. So, the first coat of paint I put on the skin is a base coat. The first coat of paint I put on a weapon is a base coat. You get the idea.
Often a base coat is a mid-tone color so that you can darken it where needed for shading, and lighten it for highlights.
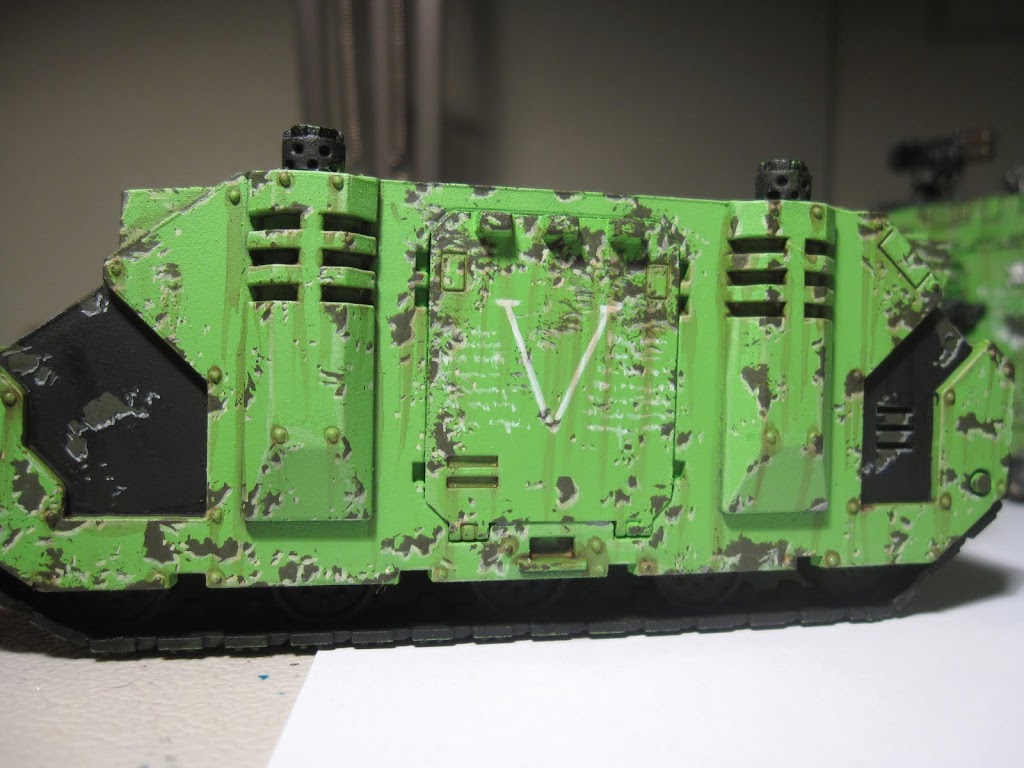
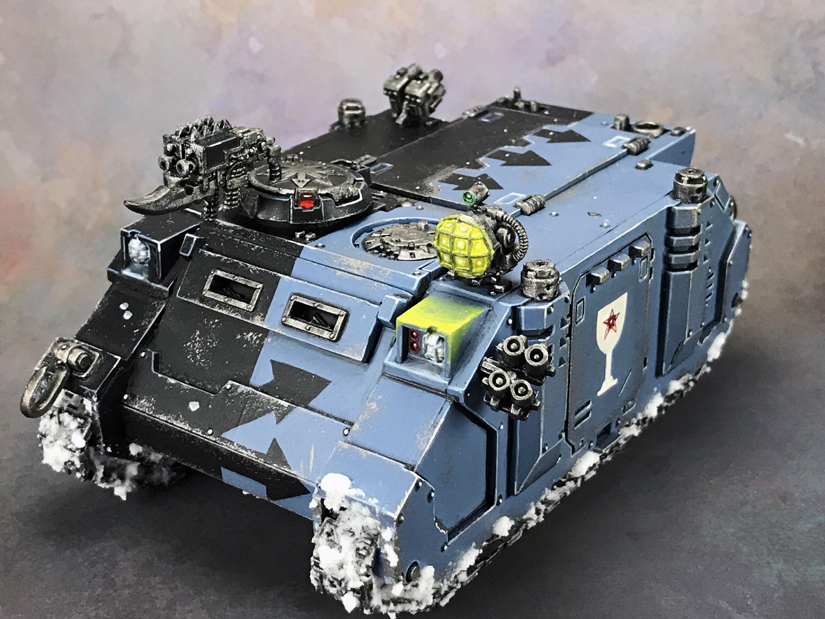
Battle Damage
The process of creating damage on a miniature from combat is battle damage. Things like chips in armor, scratches, scuffs, burn marks, etc. are all examples of battle damage.
Battle damage could be subtle or bold depending on what you’re after.

The scratches and scuffs on that Land Raider tank is a more subtle type of battle damage, and also more on the realistic side.
Here’s another example of battle damage painted by Real Genius.
Real Genius’ approach is much more bold because it has a lot of contrast.
I do have a battle damage tutorial that will help guide you through the process.
Blending
This is the process of creating a gradient of color. Blending can be used to create a smooth transition between two different colors, to darken a color, or even to lighten it.
Blending is used in a lot of ways, and there’s various types of blending techniques, but ultimately blending is that process of creating a nice smooth transition of color.
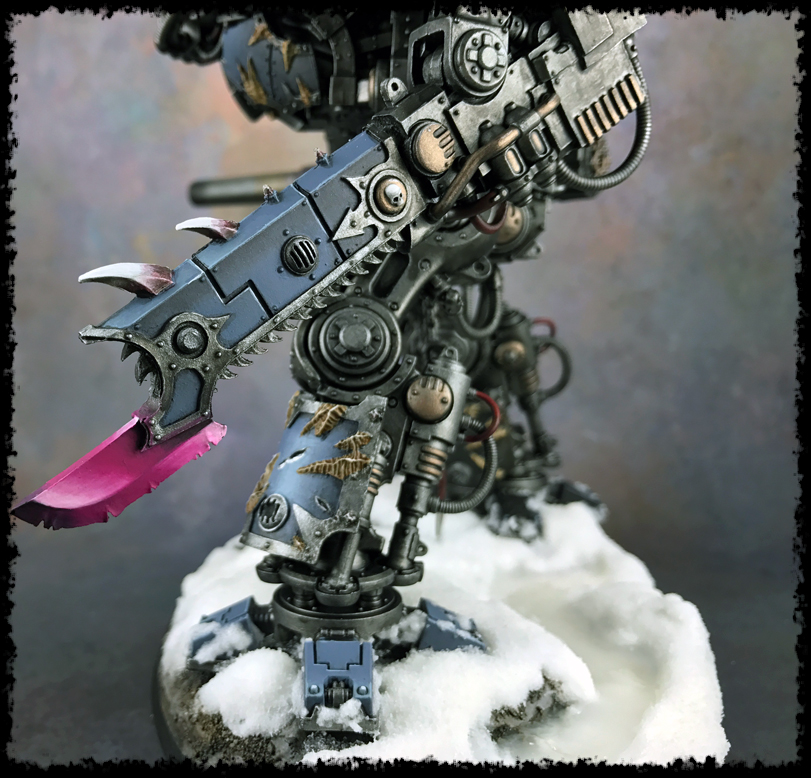
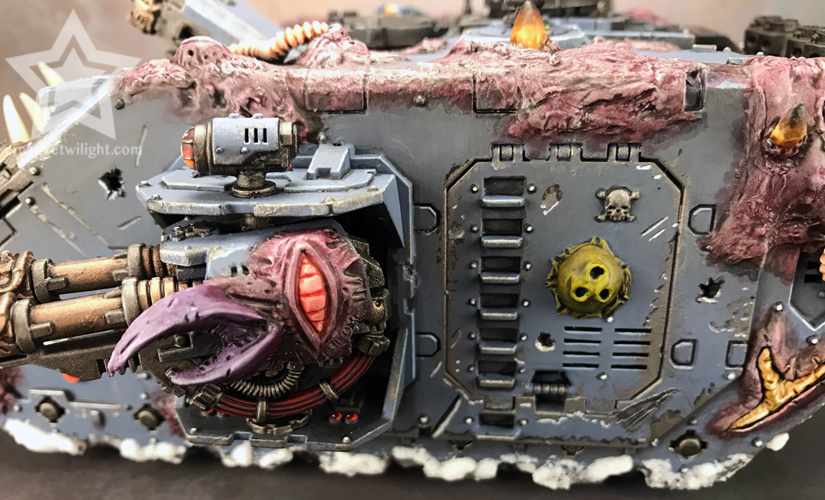
The color transitions you see on the pink weapon to the right were done with blending. Also, the shading and highlighting you see on the blue armor was done with blending.
Color Theory
This is the art of understanding colors, how they work together, and how to combine colors, and more that I probably don’t realize. On the surface it’s simple, but there’s a lot of depth with the concepts and theories involved with it.
I’ll be honest, color theory is not my strong suit, but Dave over at Wargaming Tradecraft has a great series of articles covering color theory with examples that’s definitely worth checking out.
Color Wheel
Very much like what it sounds like, it’s a wheel of colors!
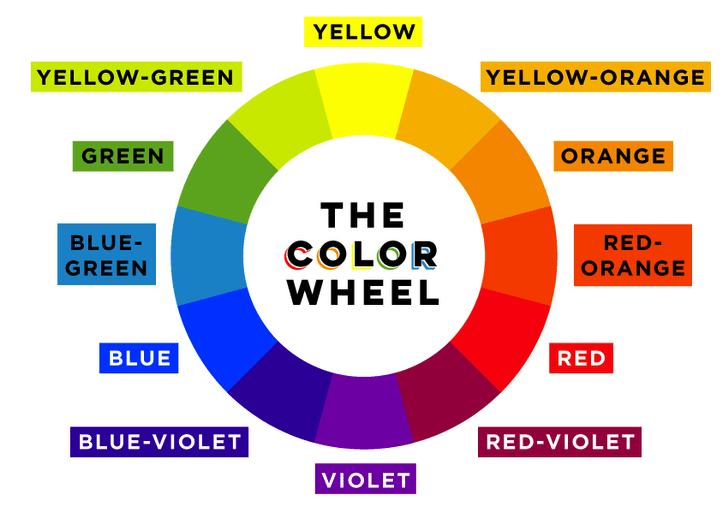
A color wheel is used by painters to visually gauge color combinations. Basically, it’s a reference of colors and is used in color theory a lot.
While you don’t need a color wheel, they are handy to have for quick reference and can save you some time trying to figure colors out.
Contrast
Simply put, contrast is the degree of difference between two colors. Black and white are two colors with extreme contrast, where red and orange have a very small amount of contrast.
With miniature painting we will often talk about contrast as a way of drawing the viewer’s eye to elements on a model. If you want something to stand out, like a magical sword, then you might paint the sword with a high contrast compared to the rest of the model.
Contrast can also be used as a way to balance out a model visually.
The color wheel is great for working out contrast too. The color that sits opposite on the color wheel is the color with the most contrast, referred to as a complimentary color. So, the most contrasting color to violet would be yellow.
Dry Brushing – #drybrushingisnotacrime
This is a painting technique where you take a brush, preferably an old one, put paint on it, and then wipe most of that paint off on a towel. Then, you take the brush and lightly brush it over the miniature.
What this will do is leave a thin layer of paint on the surface you brush. The light brushing, combined with very little paint on the brush, makes the effect subtle, and it’s a great way to highlight very textured surfaces quickly and easily.
In general, it’s a great way to highlight anything quickly and easily.
The downside to dry brushing is it leaves a slightly textured, powdered look to the surface.
Now, this doesn’t matter so much on textured surfaces, however, on flat surfaces it may be unappealing.
However, using washes and glazes is a great way to overcome this and to create a blended look to the dry brushing.
I do also have a dry brushing tutorial if you’d like some more info.
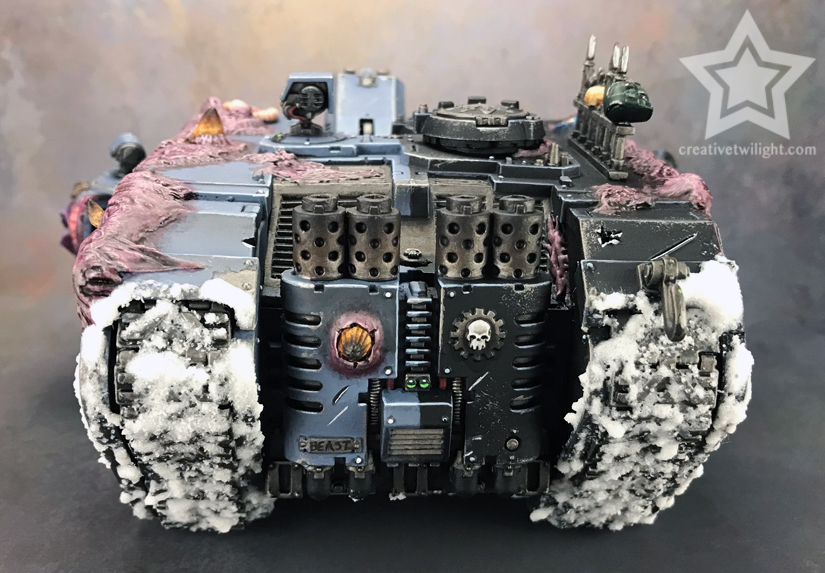
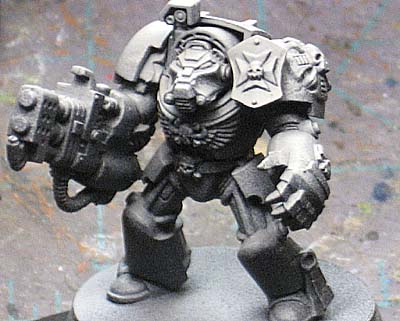
Edge Highlighting
This is a specific type of highlighting where you highlight the edge of something to represent light hitting it. Makes sense, right?
Generally edge highlighting is used on very flat and perpendicular surfaces, like the edges of a tank.
Edge highlights tend to be very thin, just catching the utmost part of an edge.
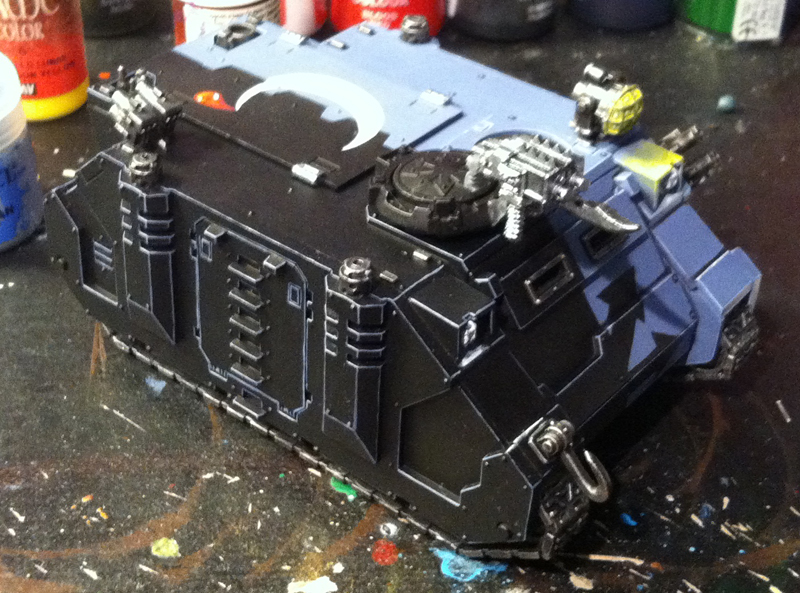
I know the above image isn’t great, but it’s a perfect example of edge highlights. You can see the light blue color on the edges of the black armor. Those are edge highlights.
I do also have a tutorial on painting edge highlights if you’re looking for help.
Feathering
This is a blending technique that takes a color and feathers it out, blends it, over another color. This technique only uses the color that’s being blended, unlike the loaded brush technique that uses two colors.
Pirate Monkey has a great article covering feathering in more detail. That’s their image above.
Flow Improver
A flow improver is a liquid that you can mix into an acrylic paint that will help thin it out and improve the consistency of the paint at that thinned out state.
Flow Improver can be found in most art stores and, of course, online.
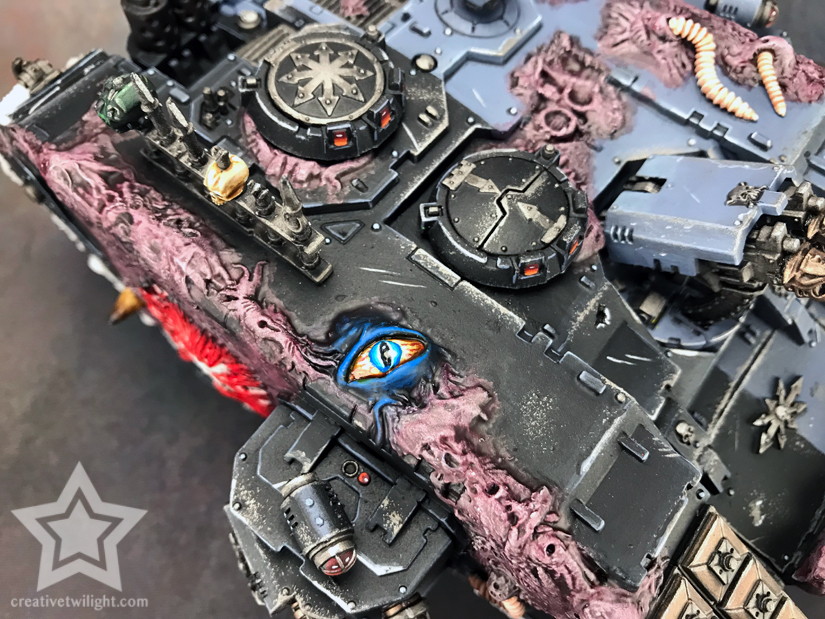
Freehand
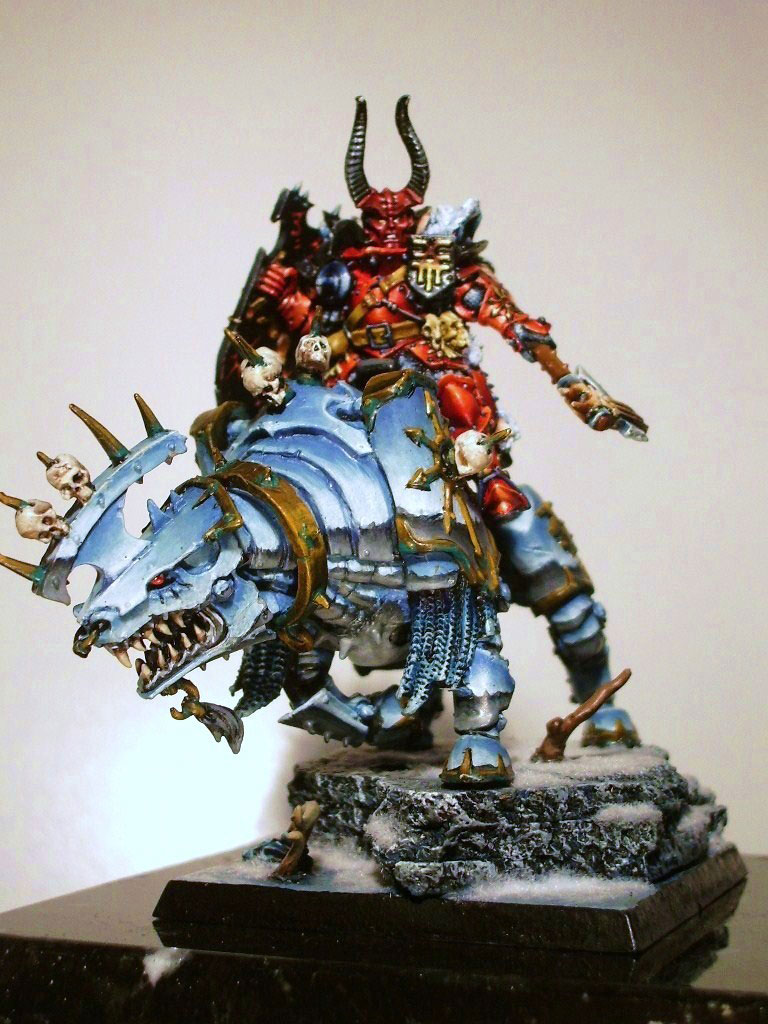
The process of painting a design, logo, icon, etc. on to a model is known as freehand. Basically, if you’re painting in something that wasn’t already there then you’re freehanding.
Here’s an example with my Chaos Defiler where I painted some icons on the armor plates.
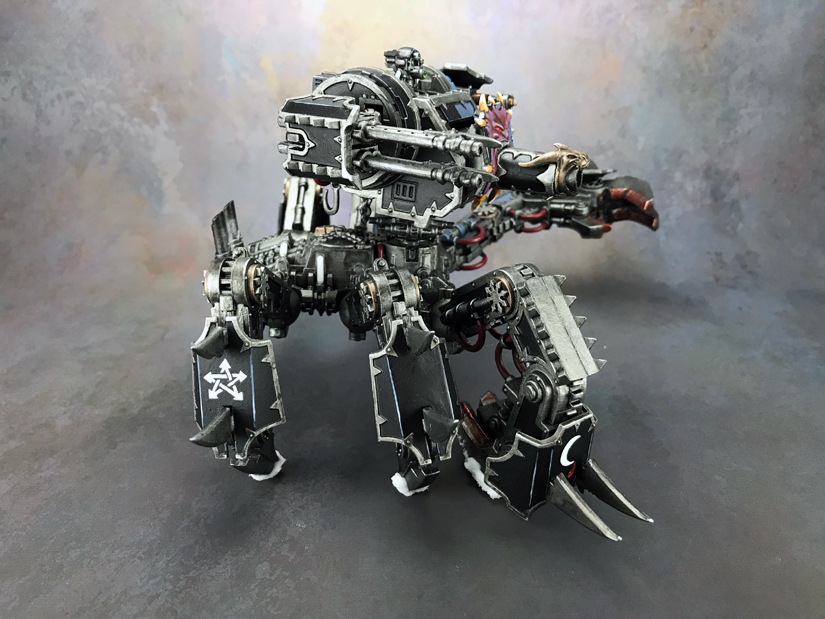
Freehand can be a bit of an advanced technique, but learning the basics is really simple. I even have a tutorial on freehand if you’d like to check it out.
Glazing
Glazing is the process of taking a color and painting it over another color to tint it. Unlike layering, glazing is just trying to modify a color, not cover it.
Glazing is great to slightly alter the look of a color and can be used for blending. It’s also a great way to radically alter a color as well.
What makes glazing different than layering is that a glaze is a very translucent paint. It’s similar to a wash but less watery and more of a controlled consistency; hard to explain well.
When you apply a glaze, you do so in a very controlled way, unlike a wash, and are not trying to leave excess in recesses.
A glaze can be made very easily by just thinning paint out a lot. You can thin the paint with water, but for a much better glaze you’ll want to use a medium of some sort. Lahmian Medium from Citadel is great for this.
I do also have a tutorial on glazing that explains this a bit more and shows you how to use it.
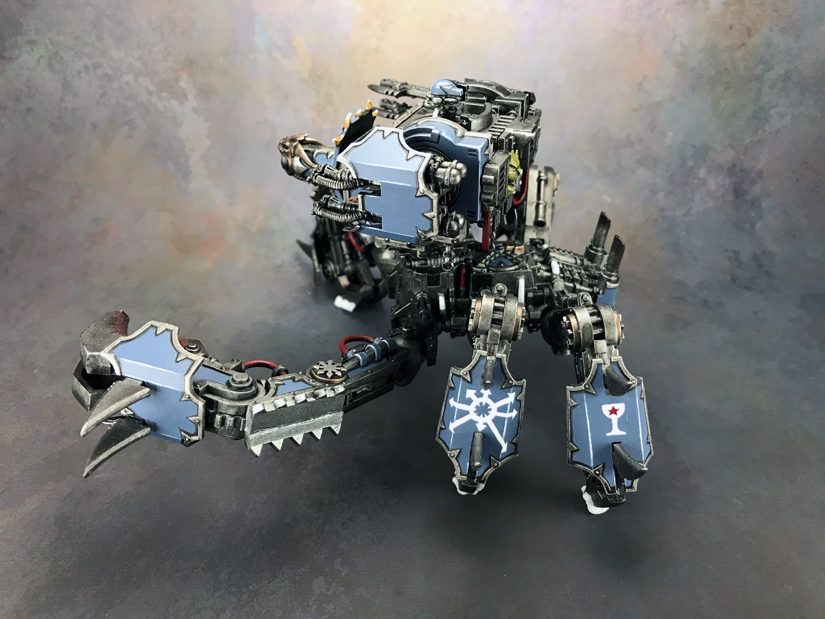
Highlighting
Highlighting is applying a brighter color to another color to represent lighting. If the color you’re painting is grey then you might use a lighter grey, or even white, for highlights on the grey to show where the light hits the miniature.
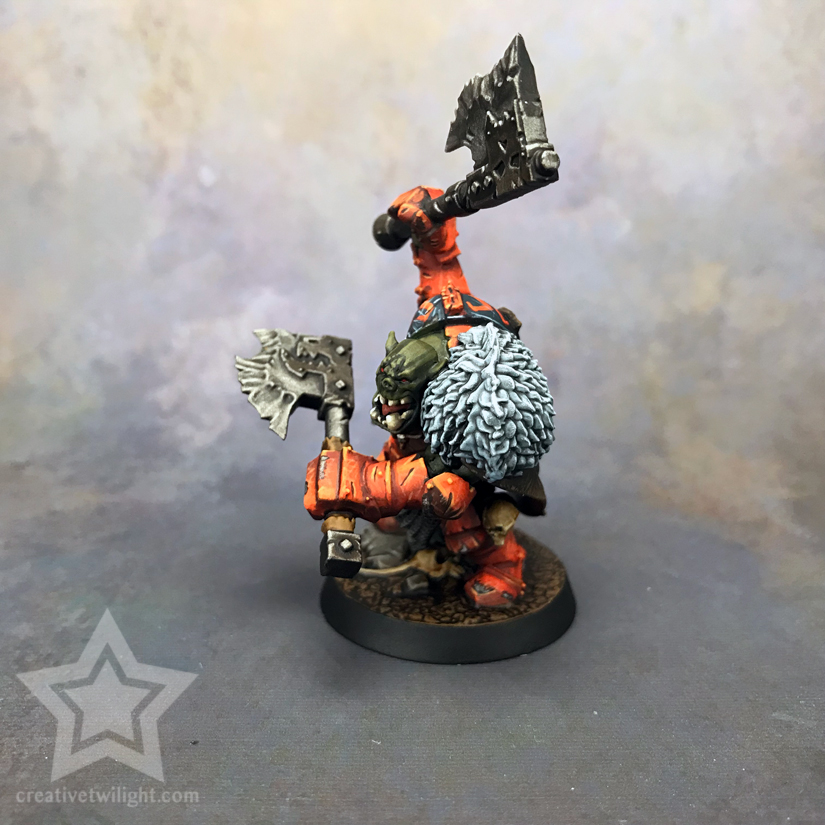
The lighter red you see on the shoulder pad is highlighting. Also, the lighter grey tones you see on the black is highlighting.
There’s a few approaches to highlighting. Some people like to edge highlight everything. It’s not a realistic approach, but it is visually interesting and draws the eye.
Another way people will highlight is using zenithal lighting. This is a more realistic approach where you only highlight what is actually getting light.
There’s a lot of approaches to highlighting and I’ve put together a guide that should help you with this.
Layering
This is a painting technique of applying a layer of paint over another layer of paint, typically leaving some of the previous layer showing. This is used a lot in the Games Workshop style of painting, especially the ‘eavy Metal team.
Standard layering will often involve building up colors to create shading and highlights.
If you were painting black armor then you could add a layer of a dark grey on top of the black, leaving the black showing in the deeper areas for shading. You could then add another lighter grey over the darker grey, leaving some of that darker grey showing, to create a highlight.

This image shows what layering would look like up close. Each slightly different color you see would be another layer added to the previous to create a transition.
I also have a tutorial that covers the basics of layering.
Layering can also be used as a form of blending as well by taking very thin layers of paint and repeatedly adding layers to create a smooth transition.
The color blending on this model was done with advanced layering.
Loaded Brush
Another blending technique.
This particular technique involves loading a brush with two colors and then using a feathering motion to blend the colors out where it creates a natural gradient/blend.
This technique takes a bit of practice, but it does create some really smooth blending once you get the hang of it.
Pirate Monkey is where I learned how to do loaded brush. It’s a great explanation and walkthrough of the technique. That’s their image used above.
NMM (Non-metallic Metal)
This painting technique uses non-metallic colors to create a metallic looking effect. This is used in canvas painting where metallic paints are hard to come by. Also, it’s how metal is represented in comic books since there’s no metallic ink in the printing.
NMM has since been adopted into the miniature painting community and is a sign of great skill.
So, instead of using a metallic paint, like Leadbelcher from Citadel, to paint a silver, the painter would instead use black, greys, and even white to create the look of metal. If painting gold the painter would use browns and yellows to create the look of gold.
The technique is hard to learn and even harder to master. NMM can also give a cartoony appearance if desired.
Some people don’t like the look of NMM because it looks best when viewed at particular angles as the shading and highlights are painted on, where with metallic paints it will often shade and highlight itself.
Kujo Painting has a great video where he shows you the lighting concepts behind NMM. I learned a lot from this video and it’s well worth a watch.
I also have a tutorial showing you how to paint NMM easy.
OSL (Object Source Lighting)
This is when your miniature has a light source on it, say a lamp, and you paint the appearance of light from the lamp onto the miniature. Basically, creating the illusion of a light source.
The yellow lighting that’s painted on the light cover above is an example of OSL from the yellow lamp.
OSL can be done in more subtle ways too, like a glowing lense on a helmet.
I have a tutorial on painting OSL that explains the theories and concepts behind it, as well as showing you step-by-step how to paint it.
Over Brushing
This is identical to dry brushing with one minor difference. Instead of wiping the brush off almost completely, you leave a little more paint on the brush. That way, when you lightly brush the miniature, more paint comes off than dry brushing.
The place I use over brushing the most is when I paint chainmail armor. I don’t dry brush it, which I could, because the paint wouldn’t be the right color, as I find dry brushing goes on a shade darker. Instead, I over brush it so the chainmail is the right metallic color, and it’s still quick and easy to do.
Painting Handle/Grip
Painting handles are used by many painters to allow them to paint the miniature without having to hold the miniature itself. Painting a miniature by holding it directly can be problematic for a few reasons, so a painting handle helps with that.

The most popular painting handle on the market right now is the Citadel Painting Handle. I even did a review of it as well.
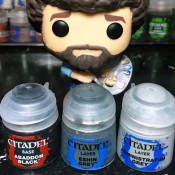
Paint Thinning
Duncan from Games Workshop has made this sort of famous by constantly saying “Two thin coats.”
Thinning your paints out is a way to achieve a smoother finish on your miniature. By not thinning out your paint, the paint can go on thick and obscure details on the model.
To thin out your paint for everyday painting, just use a little water. I like to keep my brush a bit damp, so when I put it into the paint on my wet palette it thins itself out that way.
Paint can be thinned with other things as well, like Citadel’s Lahmian Medium or a flow improver.
Priming/Undercoating
Priming your miniatures, or undercoating at some people refer to it as, is an essential part of painting. A primer is a special type of paint that prepares the models surface to be painted. Basically, a primer is made to absorb paint and help it adhere better on the miniature.
If you were to paint a model without primer then you would find that the paint rubs off easily to the touch. Primer prevents that rubbing off.
I have a very thorough article on primers and how to prime if you’d like some more info.
Saturation
The intensity of color is what saturation is. A neon green would be a color with a lot of saturation where a grey is a color with little saturation.
Colors with a lot of saturation tend to be pure colors. By pure I mean colors that aren’t mixed with other colors. When you start mixing colors, unless you’re mixing two very saturated colors, the colors will start to desaturate.
So, if you ever need to tone down a color, desaturate it, try mixing in another color. Warm, earthy colors are great for desaturating colors.
Sealer/Varnish
Sealer or varnish (the term used seems to be regional) is a protective layer that is applied over a miniature once it’s painted to help protect the paint. This is especially true for models that get a lot of use, like those in wargames.
You can buy sealers at local hardware stores, art stores, and even stores like Walmart. It’s affordable and will save you from having damaged paint.
I won’t go into too much depth here, as I do have a more in-depth article on sealer, but it’s something I recommend everyone does with their models.
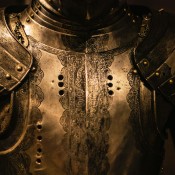
SENMM (Sky, Earth Non-metallic Metal)
This is a form of NMM (non-metallic metal) painting that will use sky tones for highlights and earth tones for shading.
When you look at really shiny chrome and see the sky reflected in it and the ground/earth, that’s exactly what SENMM tries to replicate.
Most commonly you’ll see it used when representing chrome on a miniature, but it can also be used for other types of surfaces as well.
This can be a very tricky technique to get right. Getting the proper balance of blues for sky, and brown tones for the ground, while actually reflecting objects onto the surface, is not an easy thing to do.
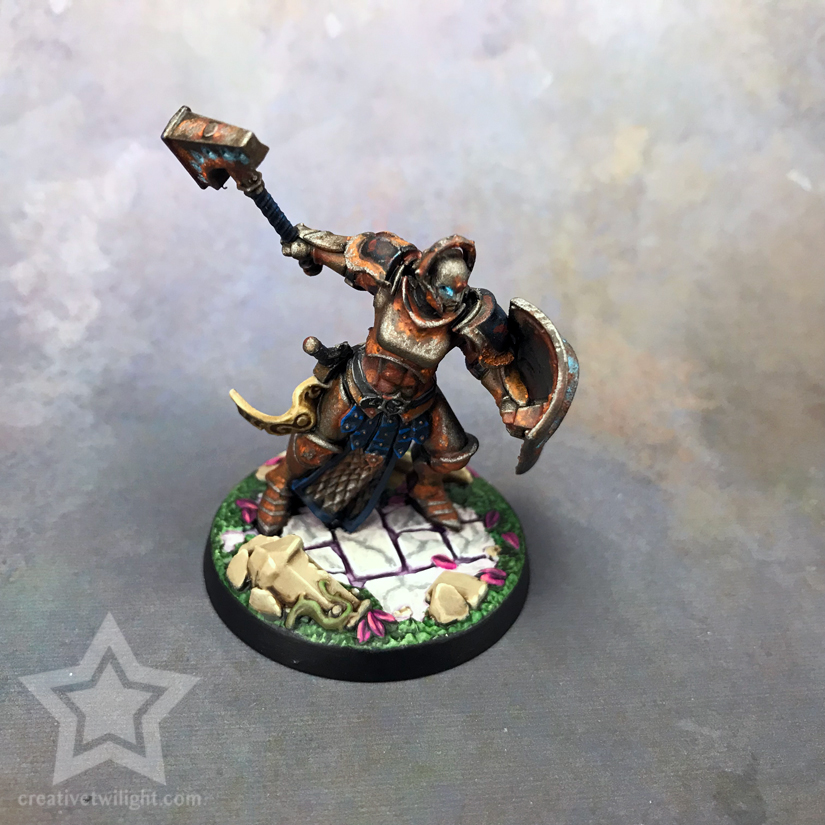
That model to the right is a great example of SENMM. You’ll notice how the blues blend to white near the horizon, and then the color jumps drastically to dark browns for the distant horizon, and fades to lighter browns for the earth that’s closer to the model.
That takes talent.
Shading
Shading is applying color in some form to darken another color. The darker color you apply could be done with layering, glazing, washing, etc. If I’m shading a red then I’m darkening the red.
Other than simply darkening a color, shading is used to create shadows on a miniature.
I do have a guide on shading that covers this in more detail.
Sponging
This painting technique is not unique to miniature painting, and it’s also very much as it sounds. Sponging is where you take a sponge, apply paint to it, and apply the paint from the sponge on to the miniature.
A sponging painting technique creates a textured look, which is great for say rocky textures or even worn leather.
Honestly, you can use sponging for a whole lot of things, like weathering and battle damage. It’s easy to do and the results can be very impressive.
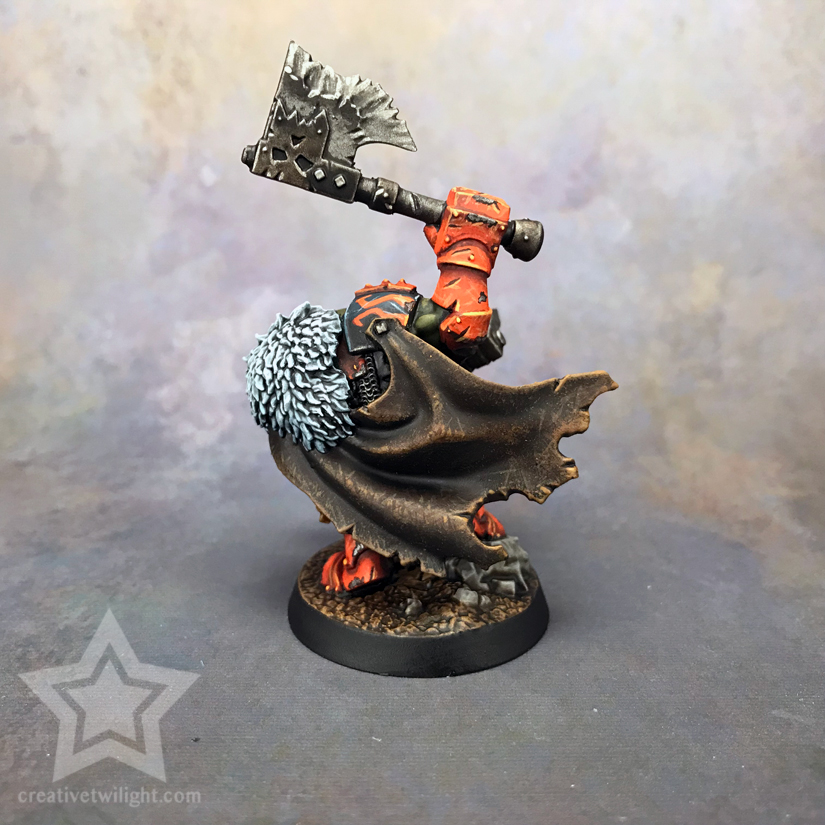
The leather cloak on this model was done with sponging. You can see the textured look it created. By using different colors and sponging them on, I was able to create some depth to it.
Learning to sponge is pretty easy. It takes a little practice, especially getting just the right amount of paint onto the sponge (the key is to sponge most of it off on a towel), and applying it.
This is a great little technique to change things up a bit.
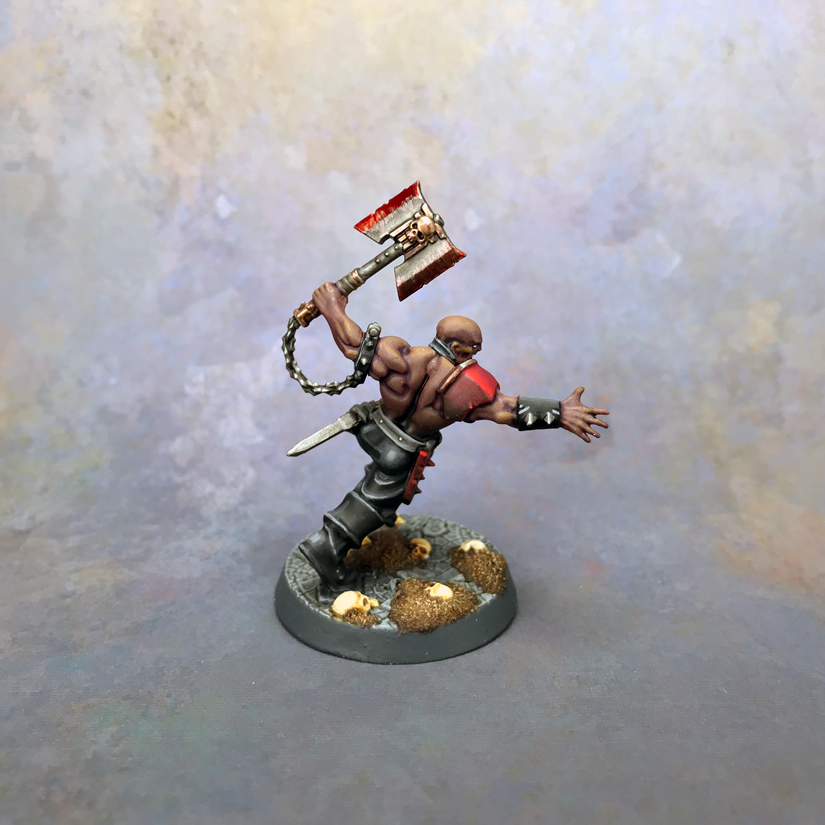
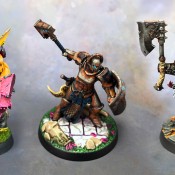
Stippling
Stippling is a lot like sponging, at least in the sense of the objective – to create a textured look.
Stippling is when you take a brush and more-or-less stab it at a model. You do this repeatedly to create a textured look to the surface you’re painting.
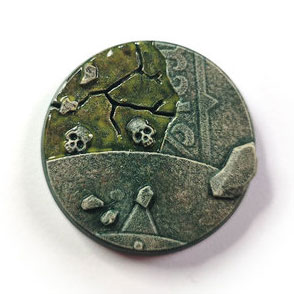
The base above was painted by Jamie the Jasper from over at Realm of Plastic. The base is a great example of stippling. You can see the texture it creates, and combined with using different colors, you can create a lot of depth.
Again, it’s very much like sponging but it’s a more controlled technique.
Sprocket’s has a great explanation and walkthrough of stippling.
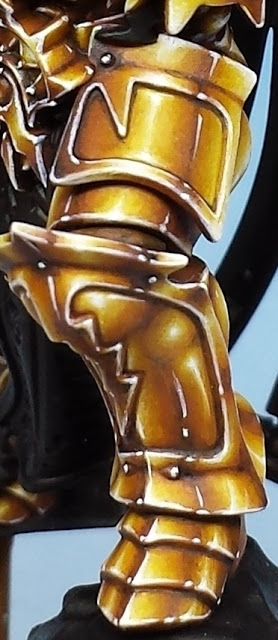
TMM (True Metallic Metal)
Similiar in approach to NMM, TMM is the same concept in terms of lighting and style, only it uses metallic paints where NMM does not.
TMM is something I like to do. I enjoy the look of metallic paints, but I also love the style you get with NMM, so TMM is perfect to bridge that gap.
The way TMM is done typically is by base coating the area with a metallic paint, and then using non-metallic paints to shade, and often highlight, the surface.
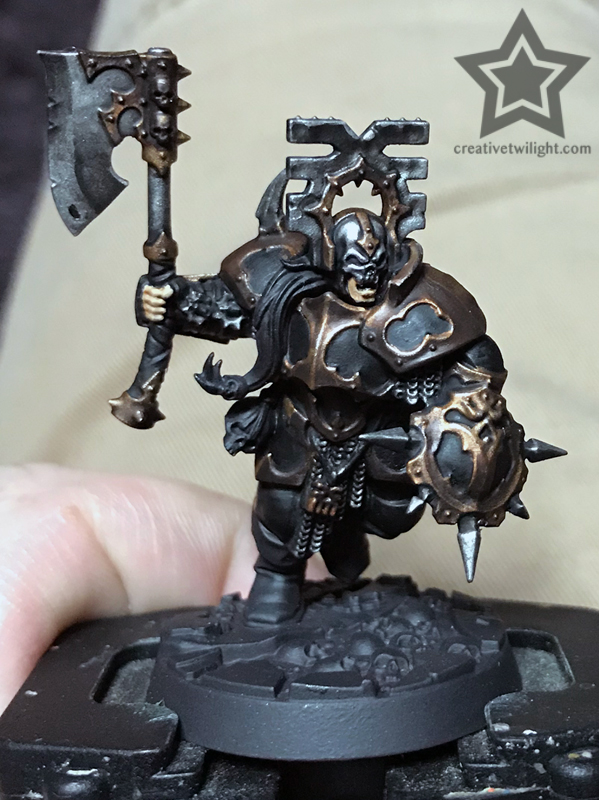
The model above and left is one I was working on that shows TMM pretty well I feel. The silver areas were base coated with a metallic paint and then shaded with black. The brass areas were base coated with brass and then shaded with a dark brown and black.
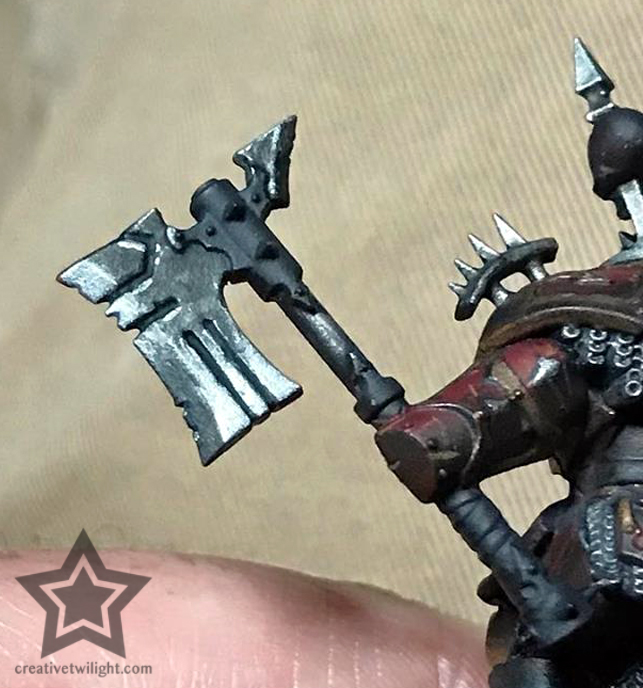
The above right model is a close-up of some TMM work I was doing on another model. You can better see the drastic shift from metallic color to black.
Two-brush Blending
There are no shortage of blending techniques!
Two-brush blending has kind of been made famous by Privateer Press. It’s very close to feathering, but it relies on a second damp brush, with no paint on it, to feather out the color and create the blend. Hence, it’s called two-brush blending.
Here’s a good video by Dallas, who paints for Privateer Press, showing the two-brush method.
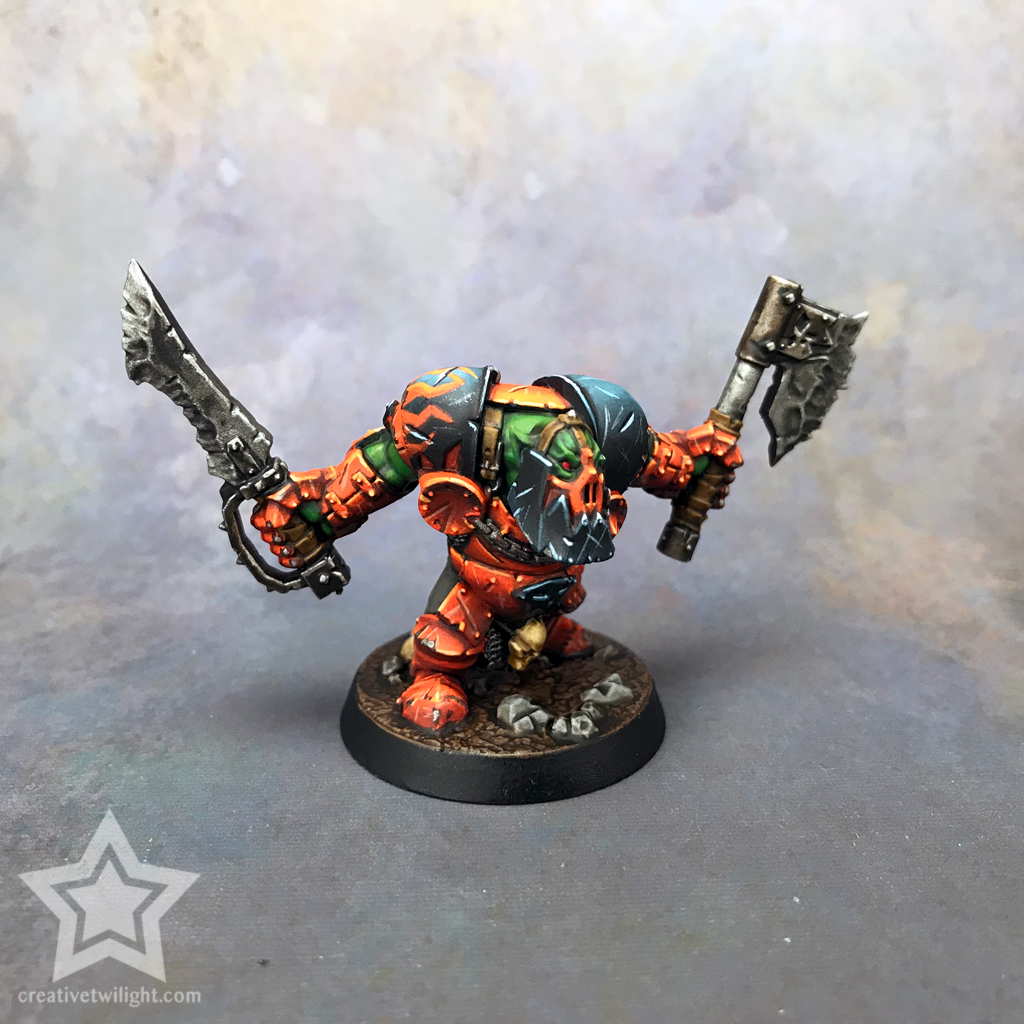
Washing
There’s a few companies who make washes, but most people know Citadel for their washes.
Anyway, a wash is a special type of paint that’s very watery. It’s not really a paint, but I’m not sure what else to call it. You apply a wash over a miniature to add shading and depth to it.
See, what a wash does, because it’s so watery, is it settles into the recesses on a model. By doing so, the wash will dry darkest in the depths of a model, in turn creating shading very quickly and easily.
Here’s a video I did years ago showing a Grot I painted just by base coating areas and using washes. Pardon the quality of the video as my setup was terrible for it.
Washes are great for beginner painters to easily add some depth to their miniatures, and many veteran painters use washes just to speed up the process of painting in general. It’s something I highly recommend everyone have, a good set of washes.
I do also have an article covering washes with tips and advice. I’ve learned a lot over the years with washes, so that’s a collection of everything I’ve figured out.
Weathering
The process of making a miniature, or elements of the miniature, appear worn and weathered is referred to as weathering. It’s like battle damage in approach, making something not appear new, but weathering is a more natural look.
Where battle damage is damage directly inflicted, weathering would be like rust that happens from metal being left in water too long. It could be the oxidation of copper or brass armor from neglect, or even leather that has been worn out.
Weathering can be subtle or bold.
The rust on the model to the right I painted is a great example of bold weathering.
Also, I do have a tutorial on how I painted that rust as well. Plus, I have a tutorial that covers weathering in general.
Wet Blending
Yet another form of blending!
Wet blending is very much what it sounds like, it’s the process of blending colors while they are both wet.
This is a technique I don’t do often, however, Pirate Monkey has an awesome article on wet blending and shows you how to do it. The image above is from that article.
I also have a tutorial on painting flames that is done with wet blending if you wanted to check that out.
Wet Palette
A wet palette is a special kind of paint palette that helps keep your paints wet and prevent them from drying out while you’re painting. Really, it’s a sponge with a layer on top of the sponge that you put your paints on. The wet sponge keeps the paints moist.
I do have a tutorial on creating your own wet palette as well.
Zenithal Lighting
This is a term you’ve probably seen tossed about a lot.
So, zenithal lighting is the idea of painting a miniature where the light source is above the model. Picture the sun directly overhead at noon, that’s what zenithal lighting is.
Where this comes into play is with highlighting and shading. A common painting technique taught by Games Workshop is what we’ve dubbed ‘eavy Metal style. An ‘eavy Metal style isn’t very realistic where creating highlights and shading based on zenithal lighting is.
There are people who will prime their models using a zenithal approach. What they do is prime their model models black, and then they take a white primer and spray it top down onto the model. What this does it lightens the areas of the model in a natural way as the sun would hit it. That gives you a guide to use as you paint your miniature.
Ron over at From the Warp has a good article on the topic. Unfortunately, From the Warp is a now defunct blog, but Ron still has a lot of awesome articles to discover there.
Conclusion
If I missed any terms, and no doubt I did, then please let me know in the comments and I’ll add it to the list!
We have a painting FAQ you might like. It covers a lot of common questions related to painting with tips and resources.
Also, if you made it this far then you may be interested in my article on essential painting supplies too ;)
I love painting miniatures and teaching people how to paint. I also really love blogging, so I've combined those two passions here.
- Creative Twilight’s Future and My Thoughts (Feedback Welcomed!) - December 4, 2021
- My Top Gift Ideas for Miniature Painters & Hobbyists + Gifts to Avoid - December 2, 2021
- The Year That Was 2020 and Where I’ve Been - January 17, 2021

Excellent resource for starting painters! As soon as I saw the title, I realized that this was really an un-filled niche. Great that it was put together by someone who knows their stuff when it comes to SEO as well, so it’s actually likely to show up when newbies first start poking around for tips online, and then they can use it to figure out more specifically what they want to work on.
On Washes, I would also add a mention of Army Painter’s washes. Not the stuff in cans, but their ink washes. Hands down the best range I’ve used.
Thank you. This was a ton of work, coming in just over 4,000 words (never mind images and links), but it’s definitely something I’d have LOVED to find when I started painting. I was very surprised to see, as you mentioned, that it really had not been done yet. You’re also right that I put in the work to ensure this is found :)
I have yet to try their washes out. Not for lack of interest, just that it requires online ordering as nobody carries it around here. I have a list of stuff I want from Army Painter, so I guess I just need to suck it up and place the order.
Availability is definitely an issue with their stuff. I’m not sure entirely why. I know a number of places that carry the gross thick canned Quickshade, as well as their brushes, basing supplies, and even some sprays, but no one seems to have the washes. I had to order them online myself. Totally worth it, tho.
Yeah, Quickshade we have but that’s it. Definitely going to check out their stuff.