Using washes when painting your miniatures can save you a ton of time. They’re great at quickly shading a model to give it depth, and it’s really easy to do. It’s perfect if you’ve got to batch paint a lot of stuff, or you just want to save some time.
Like anything in miniature painting, there’s a few tips and tricks that will go a long way to helping you get the result you want.
I’ll show you how to wash your miniatures and share what I’ve learned over the years. Using washes isn’t complicated, but there are a few little tips and tricks that will help you achieve the best result.
Disclosure: Some of the links below are affiliate links, meaning, at no additional cost to you, I will earn a commission if you click through and make a purchase. The commission earned helps maintain this site.
Where Do You Buy Washes?
First things first, where do you buy washes for your miniatures?
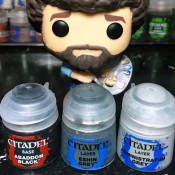
You can find them at pretty much any local gaming store. The ones you’ll most commonly see are from Citadel/Games Workshop. They come in tall pots. Another popular line you’ll often find is from The Army Painter, as well as those from Vallejo.


For the most part, miniature washes are the same regardless of who makes it. Some are a little different from others, but the objective of each one is the same, even if they have different coverage or behavior. So, don’t worry about who makes it and buy whatever is available to you.
If you’re on a budget, or just can’t afford to buy every wash all at once (basically most of us), then you can get away with just having a black wash and brown wash for most everything. Those are the two I recommend first, and from there just buy what you can when you can.
Having a green wash and sepia wash are also very handy. Most of the other colors are very situational, but useful to have at some point.
I also wanted to mention the gloss washes that Citadel has. If you’re sealing your miniatures, which you really need to be doing, then there’s no point in getting a gloss wash. Once you seal the miniature it will tone down the glossy effect.
If you want a glossy look on something, then after the miniature is sealed you can use a brush on gloss varnish for the areas you want shiny.
Now, here’s a great video by Vince Venturella where he talks about, and shows, the difference between the different washes and inks for miniatures by different companies.
What is a Wash?
So, what is a wash exactly?
Well, you can think of it as thinned out paint. It’s very watery and you won’t apply it in the same way as a normal paint.
The way it works is that when you apply it to a model, the wash will build up in areas that have seams or depth to it. Then, when it dries, those areas where it was the heaviest will have a darker shade to them.
See, with a wash being so thin and watery, when your brush goes over the model it will naturally pool up in edges, seems, textured areas, and deeper areas to create a natural looking shade.
Depending on how thick you apply a wash will depend on how long it takes to dry. If you go really heavy then it can take an hour to dry. Most of the time though, you won’t be going that heavy, and it should dry in about 15 minutes, even less sometimes.
Quick Tip: Let a wash fully dry before painting over it. If it’s not fully dry then you will lift up the paint with your brush and ruin the area.
How to Use a Wash
You’ll want to load up your brush pretty heavily with the wash. I like to use the Citadel Medium Shade Brush for most things I work on. The advantage of the shade brush is that it has a large belly. So, it can hold a lot more compared to a standard layer or detail brush.
However, you can use a normal layer brush as well; I did for years and years.
Once your brush is loaded you’ll want to drag your brush over the miniature to deposit the wash. Now, the way you want to do this is by dragging the brush into and up against the areas that should have the most shading.
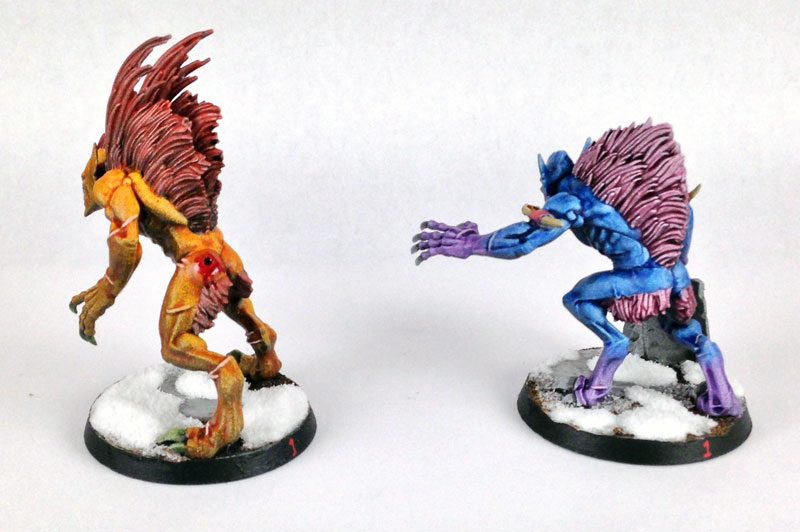
Let’s say you have a cloak you’re working on. You’ll want to drag the brush towards the folds of the cloak. What that will do is leave the wash on the sides of the fold where it should be darker.

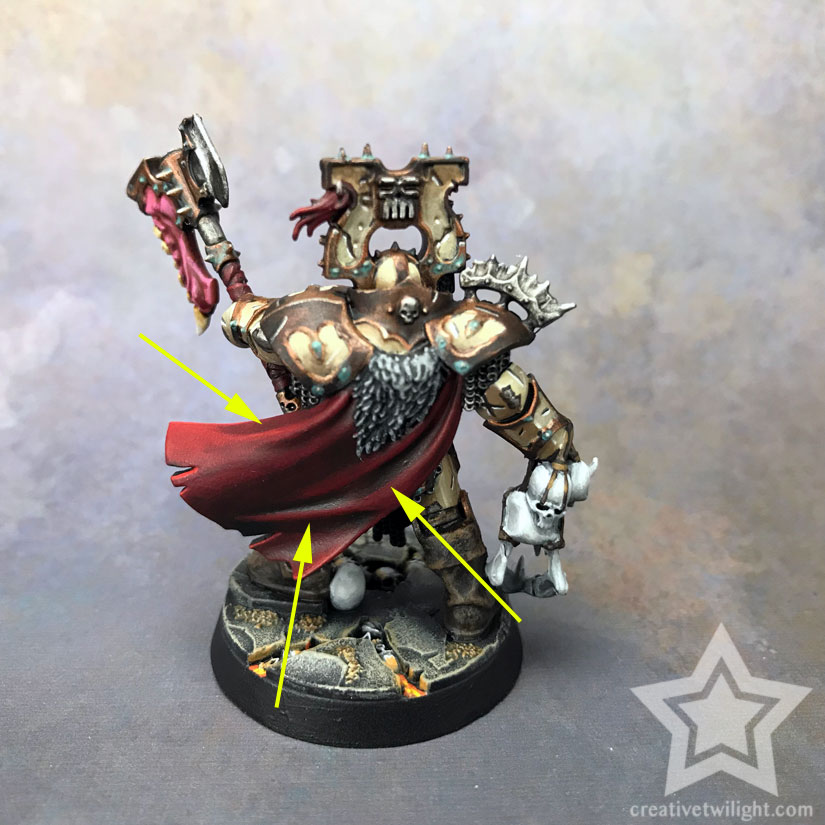
The arrows point at the high points, the folds, of the cloak. When I washed the cloak I pulled the brush towards those folds, depositing it in the lower areas, and shading it as you can see above.
Here’s another example but on flesh.
Again, using the arrows I’m showing some of the areas I pulled the brush towards to let the shading build up.
Think of it like wood, if you’re familiar with woodworking, and you want to go against the grain.
Video Tutorial for Washes
I recently did a quick’ish video showing how to use a wash. It covers most of what’s mentioned in this article, though this article does go in depth a bit more.
Layering and Cleaning Up a Wash
It’s also worth mentioning that in both of those examples I painted other layers of paint after I washed the area.
See, there’s two common approaches when you’re using a wash. One is to simply apply it to the area and call it good. Another approach is to wash an area and then to layer it up afterwards; typically with the same base coat color.
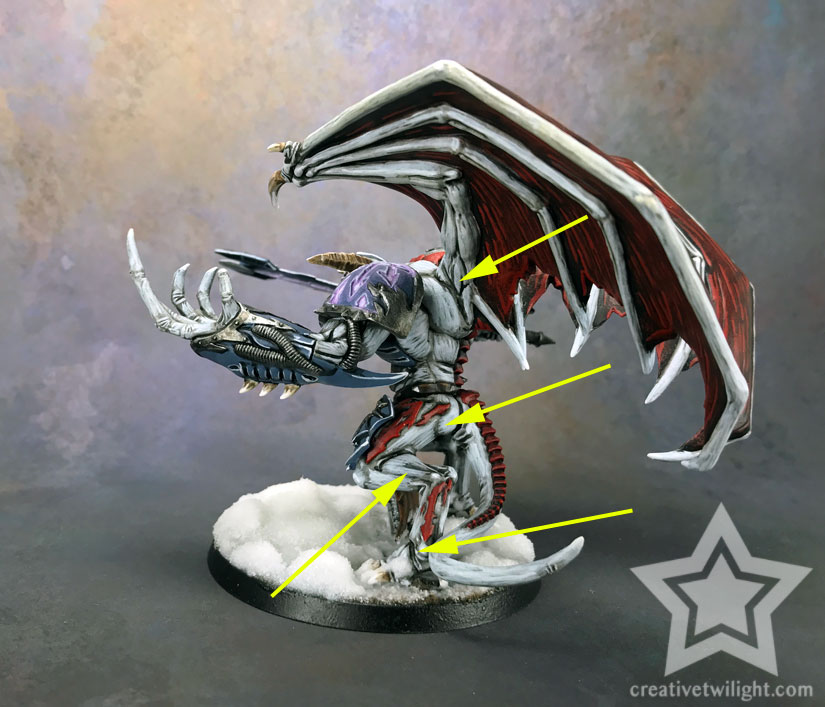
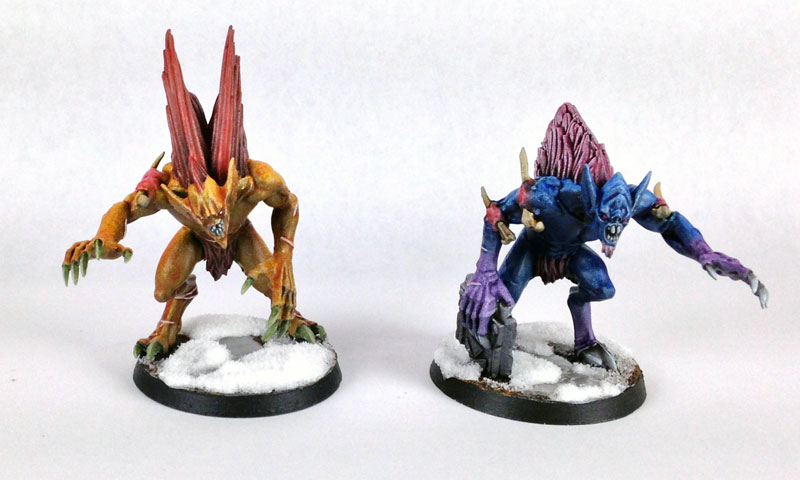
So, the Daemon Prince above, I painted the flesh a blue-white color. I then washed it all with black. Afterwards, I came back with that same blue-white and layered the skin while leaving the recesses shaded. That’s how you get a nice clean look.
In fact, everything on that Daemon Prince was washed and then layered up: armor, wings, skin, horns, etc.
I did the same for that red cloak above as well. It was base coated in red and washed with a brown. I then layered red over it after to clean it up and bring the color back up.
Miniature Washing Tips
Some useful tips and advice I’ve learned over the years. I’ve made a lot of mistakes while learning, so maybe I can save some of you those headaches.
Also, it gets a little technical below and there’s some painting terminology being used. If you’re unfamiliar with some of the terms then be sure to check out my glossary of miniature painting terms.
Don’t Go Too Heavy
Most of the time you don’t want to go too heavy with a wash. It’s better to do it lighter a few times to get it just right than to put too much on and have it not look right.
That being said, most of the time I only find I need one coat. Once you’ve done it quite a bit then you get the hang of how much you need without overdoing it.
If you go too heavy then the wash can pool up too much in areas and instead of shading it, it will change the color to that of the wash you used. Nothing wrong with that if it’s your intent, but it sucks when it’s not.
With that, once you’ve applied it to the areas you want it, glance over it before you set it down to dry. Make sure there’s no areas with too much wash. The wash will naturally move around a bit while you’re painting (more on that below).
If you see an area that has too much on it then just grab your brush and drag it around to thin out that spot. You do want to do this quickly though. If the wash has started to dry, and you drag your brush over the area, then you’re going to lift the paint from the model and create a bare spot.
There’s no easy undo with washes once it’s dried on your miniature. If you mess up then you’ll need to repaint that area and try again. You can use blending techniques to correct some issues, but it’s often a long and tedious process; been there, done that, and it sucks.
Thin Out the Wash for More Control
If you want even more control with your washes then add in some Lahmian Medium, or some other acrylic paint medium.
What this does is thins it out and gives you much better control over it. The medium will break down the surface tension in the wash and spread out the pigment more. It’s great for very thin coats with fine control.
Basically, it turns it into a glaze at that point.

By using a medium like this, it also lets you do some blending pretty easily. You’ll be able to apply multiple thin layers in succession to create a blend. This would be similar to the blending technique I like to use but instead uses washes. It’s actually how I started learning to blend.
Using Washes for Skin
One of my favorite ways to paint human skin is by using a thinned out flesh wash, like Reikland Fleshshade. By adding the Lahmian Medium and thinning it out, it lets me get the shading just right by doing a few thin coats.
I find straight wash over human skin tones doesn’t look very good; it’s often a bit too strong and also too dark. So, I thin it out and build it up as needed.
Here’s two examples:
Washing Large Flat Surfaces
Using a medium is also ideal if you’re trying to wash large areas. Trying to wash something with large flat surfaces, like a tank, can come out looking splotchy. It’s just hard to move the wash around evenly and get a consistent coat on the model. However, with a medium you’ll thin it out and have more control. It makes you less likely to have splotchy looking areas.
Some painters will even use a drop of dish detergent in their washes. Like a medium, the dish detergent will break the surface tension and allow for more even coverage.
Work in Sections, Not All at Once
While it does take a little time for a wash to fully dry, you do want to move quickly when applying it. In only a few minutes it can start to dry in areas. If you’re still moving your brush around then you can hit one of those drying spots and lift the paint; in turn ruining everything. It sucks.
To avoid that I like to work in sections. So, using that Daemon pictured above, doing one arm up to the shoulder pad is a good section. Because the model is wearing a tabard of sorts, from the waist down is another good section.
Newton’s Law of Gravity
The other reason to work in section is gravity. Gravity is going to pull the wash down, which is pretty naturally how shading works – not in every situation of course, but mostly.
So, if you’re washing a lot of sections at once then you’re moving and tipping the model to reach different areas. While you’re doing that, the wash you’ve already applied is also moving around on the miniature. The result can be it drying in places it wasn’t intended to be, like running into parts of the model it wasn’t meant for, or simply drying in an unnatural way.
That’s the biggest reason I like to work in sections, to let my wash dry naturally without being moved around too much. It takes more time when you’re working on the model to work in sections, but you’re less likely to have any mistakes as well.
Choose the Right Color
This is more of a color theory thing but it’s still worth mentioning.
As I said above, you can get away with just a black and brown wash to start. However, it is nice to eventually have most of the basics covered and have a selection to choose from.
The reason I say that is you can get some really interesting looks with certain washes over certain base coats. Also, most colors tend to be a darker version of themselves, so using a black over red works but it’s not ideal.
Speaking of, an example would be that using a green wash over a red base coat gives you a very natural looking darker red. You can even use a purple for an interesting look.
Also, using a blue over green can give a more natural shade as well. I like using a purple or crimson over gold metallics to really give it an interesting depth.
In fact, Sable Warlord did a great tutorial on painting gold where he shows his use of washes for a great result.
I will admit that color theory is not my strong suit at all, so I learn a lot about this from experimenting – basic trial and error. My point is more about trying something different and realizing that shadows aren’t just black.
How to Make Your Own Wash
If you mix in some Lahmian Medium, or another acrylic medium, with a normal layer paint then you can create a wash from it. I find a ratio of 50/50 works pretty well for most paints.
So, you aren’t stuck with the colors that companies put out, you can create your own washes for your miniatures to suit your needs. I do this quite a bit and is just another reason why I love Lahmian Medium.
Painting a Miniature with Only Washes
This is something I’ve done a few times and I love doing it – painting a miniature with only washes.
How you do it is very, very simple. First, you prime your miniature in white. You could use grey primer too, depending on the tones you want, but I like to use white because you can darken it all you want but you can’t lighten a color with a wash.
After the model is primed, just wash away!
You’ll need a good selection of washes to make this work well, or make your own, and oftentimes you’ll need a few layers of different washes to get the desired color, but that’s part of the fun I feel. You just experiment and have fun with it.
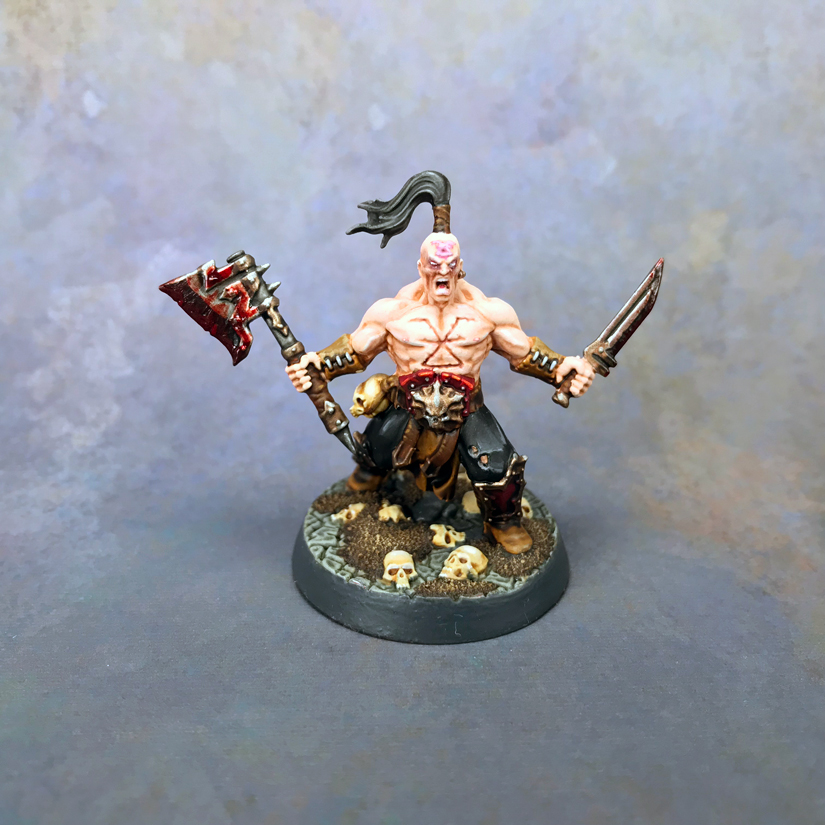
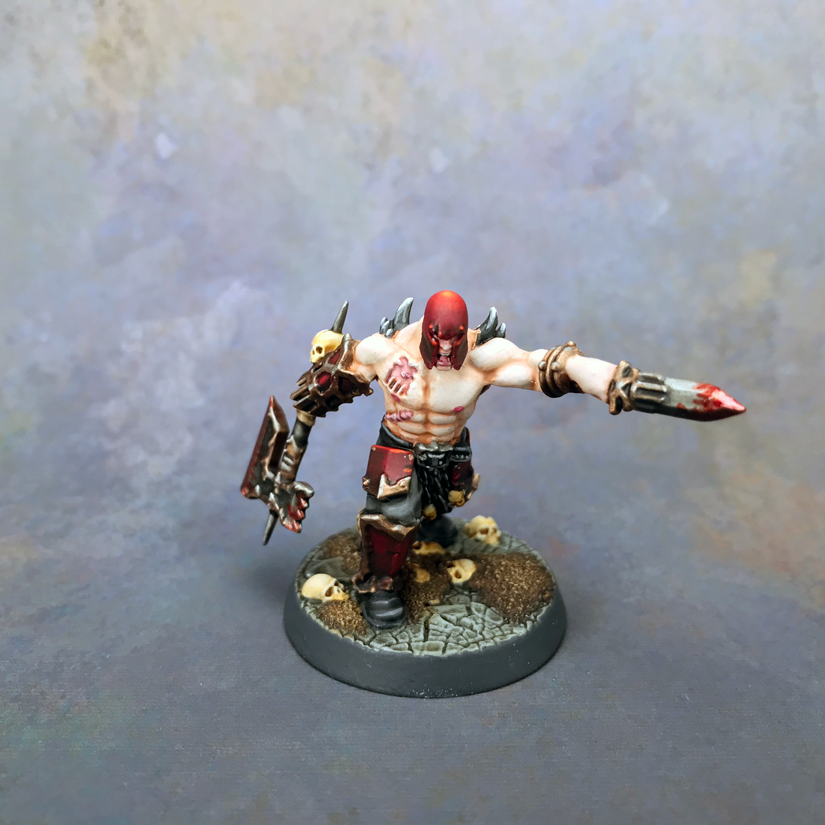
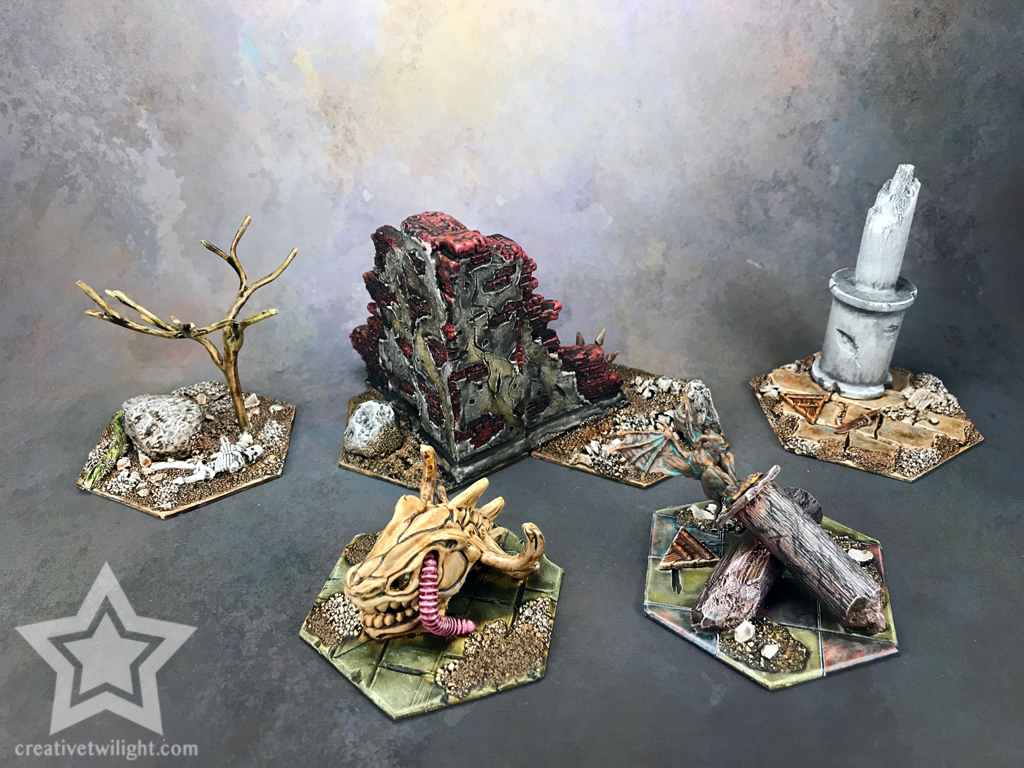
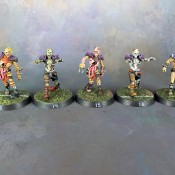
Here’s a few miniatures I’ve painted in this way to give you an idea of what you can accomplish with just washes. I did also use some glazes in these, as well as a little dry brushing for highlights. All very basic techniques.
Tabletop Quality Painting with Washes
This is a video I shot in 2013, so a while ago. It’s actually the first video I ever did for Creative Twilight.
Anyway, the video shows me painting a Grot with washes for some quick and easy tabletop quality work. There’s some tips and advice in there as well.
Conclusion
If you’re a new miniature painter then definitely try washes. It’s easy to get some good-looking shading on your models with minimal effort. Even if you’re a veteran painter you should consider using washes if you haven’t. It’s a huge time saver when you’ve got a lot to paint.
Also, it’s worth noting that as with other simple painting techniques, using washes for miniatures has a bit of a stigma to it in the painting community. Some people look down on it and feel that if you didn’t spend hours shading your miniatures then you’re doing it wrong.
Ignore that crap. Paint however you want as long as you’re happy doing it. Paint to please yourself and not everyone else. It’s the result that matters, not the technique you used to get there.
For more tutorials check out the links below. I also have a guide to miniature painting that serves as a singular resource for every painter.
Lastly, if you’re a new painter, or even a veteran, then check out my list of supplies every painter needs. That covers the basics that you need to have, as well as some premium tools that are handy when you can get around to it. You might find something there you hadn’t thought of before.
Anyone else have some tips and advice for using washes on miniatures?
Miniature Painting Techniques & Guides
Learn the basics, as well as the advanced techniques, of miniature painting.
I love painting miniatures and teaching people how to paint. I also really love blogging, so I've combined those two passions here.
- Creative Twilight’s Future and My Thoughts (Feedback Welcomed!) - December 4, 2021
- My Top Gift Ideas for Miniature Painters & Hobbyists + Gifts to Avoid - December 2, 2021
- The Year That Was 2020 and Where I’ve Been - January 17, 2021
Some solid advice there, cheers.
Thanks.
I thought about doing a video tutorial for washing and then realized it’s not really needed. I think we all figured out the basics easy enough, it’s more the little details that took longer to understand. So, figured I’d focus on that.
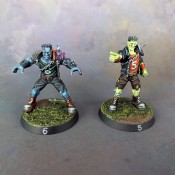
Awesome article! I’m just getting started and looking to achieve the kind of skin tone you have in your examples of those two (reavers? barbarians?) using the Reikland Fleshshade. What other paints did you use for those models? Many other “light skin tone” tutorials I’m seeing are much darker than I’d like. Trying to get a very light look on some vampires. Thanks!
Thank you!
On my showcase article for that unit I have the list of paints I use for each model, as each one is unique. There’s a mix of Citadel paints and Vallejo paints, but it’s easy enough to substitute in either direction.
https://creativetwilight.com/garreks-reavers-painting/
Great advice. I’m painting puppets at the moment, and looked up these techniques because I used to paint minis in my teens.
A nice tip for inspiration: there is a theme park in the Netherlands called ‘de Efteling’ that has some great puppets and animatronics that arte sculpted and painted really well.
Some pics here: https://www.instagram.com/explore/tags/efteling/
Thank you and that looks like a fun park.
I lived in the Netherlands for 2 months a long time ago for a college exchange program. Wish I had known about the park then; would have been great to see.
Question: Does it make sense to lighten areas in the base coat before you add the wash? I thought it might spare the work you describe under the header ‘Layering and Cleaning Up a Wash’.
Absolutely! You can fully paint the area from base coat to highlights, and then go in with the wash to blend it all together and add shading. Of course that means it will all darken down, so you might need to use brighter colors than expected to get the end result you want.