Every wargamer needs access to a good wargaming table to play on. Technically you can get by with any flat surface and a bunch of objects to break up line of sight.
However, a good-looking table adds a lot to the experience of the game. Not everyone lives near a well-equipped game store, or has the space and resources to build a dedicated table in their own home.
I set out to build an inexpensive wargaming table and terrain set. I wanted it to be easy to construct and easy to store when not in use.
In this article I will demonstrate how to build a 4’X6′ folding table top, terrain mat, and three-dimensional terrain set for around $50 and with minimal modelling skills required.
Item 1 – Gaming Mat: $10-$14
After reading Eternal Wargamer’s review of the Cigar Box table mat, I started thinking about the benefits of a fleece mat.
A gaming mat looked like an easy way to turn an arbitrary rectangle into a nicer looking wargaming table.
The mat used in the review has some really nice details printed on it, which looks great. Overall the review sold me on the benefits of a fleece mat. But, I wanted something a bit more generic, and less expensive, so I started thinking about making my own.
My plan was to buy some plain fleece and spray it in mottled colors to create a decent base for the rest of my terrain.
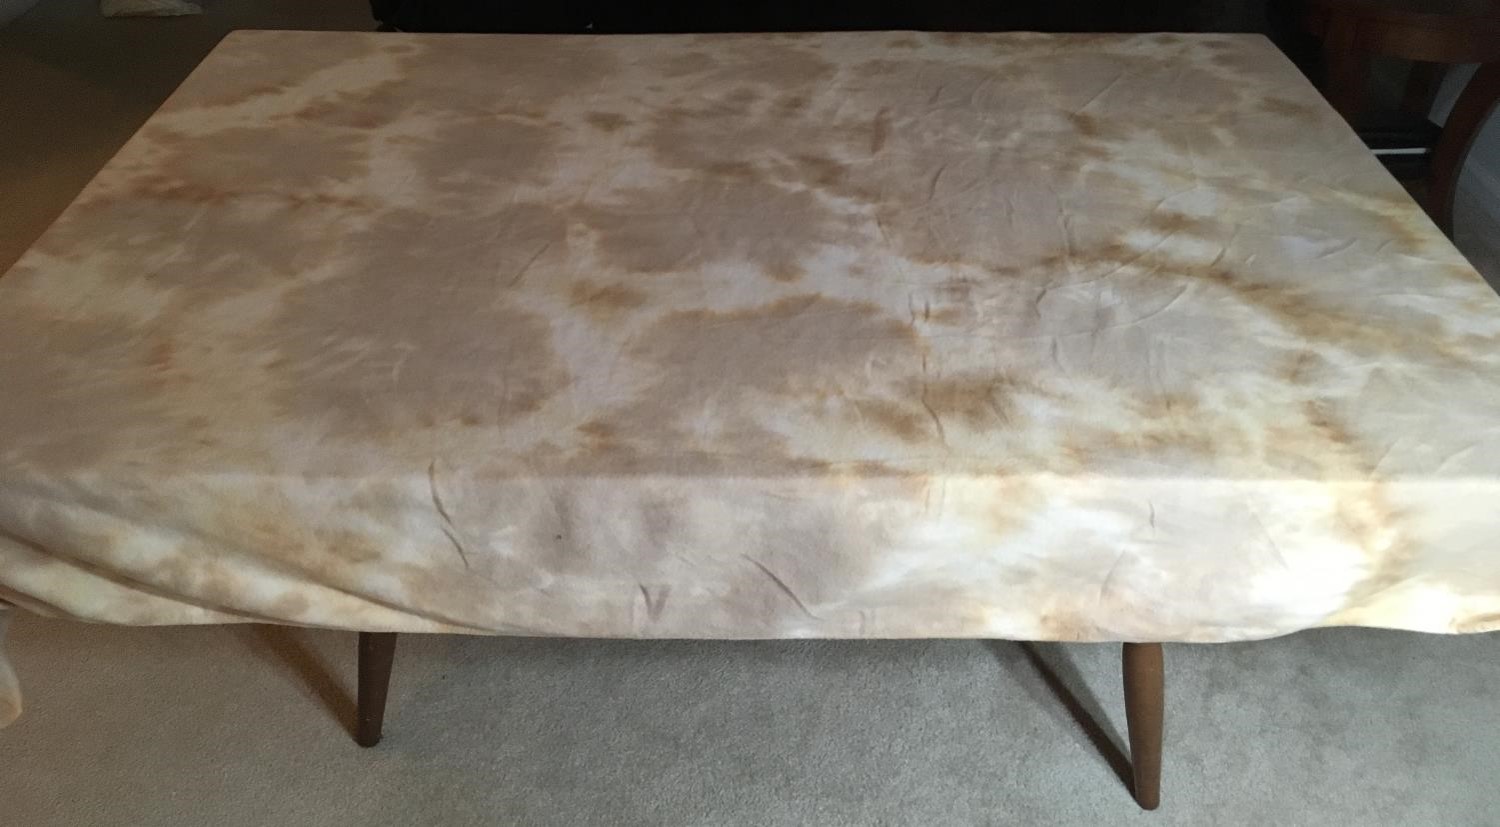
Tie Dye Pattern Fabric
I was hunting around online for fleece in a decent base color when I came across some “tie dye” patterns. They already have some nice color variation to them.
The green version would have gone well with the grassland/forest terrain I already have. However, I decided to go with Khaki Tie Dye and start building a set of desert terrain.
The fabric is 59″ wide. So, if you buy 2.5 yards you’ll have plenty of extra to hang over the edges of your tabletop. The retail price on this is $10.99 per-yard, but it’s almost always available on sale for $5.50 per-yard. So, 2.5 yards should run you $14. When I found this it was on sale for $3.99 per yard, so mine was only $10!
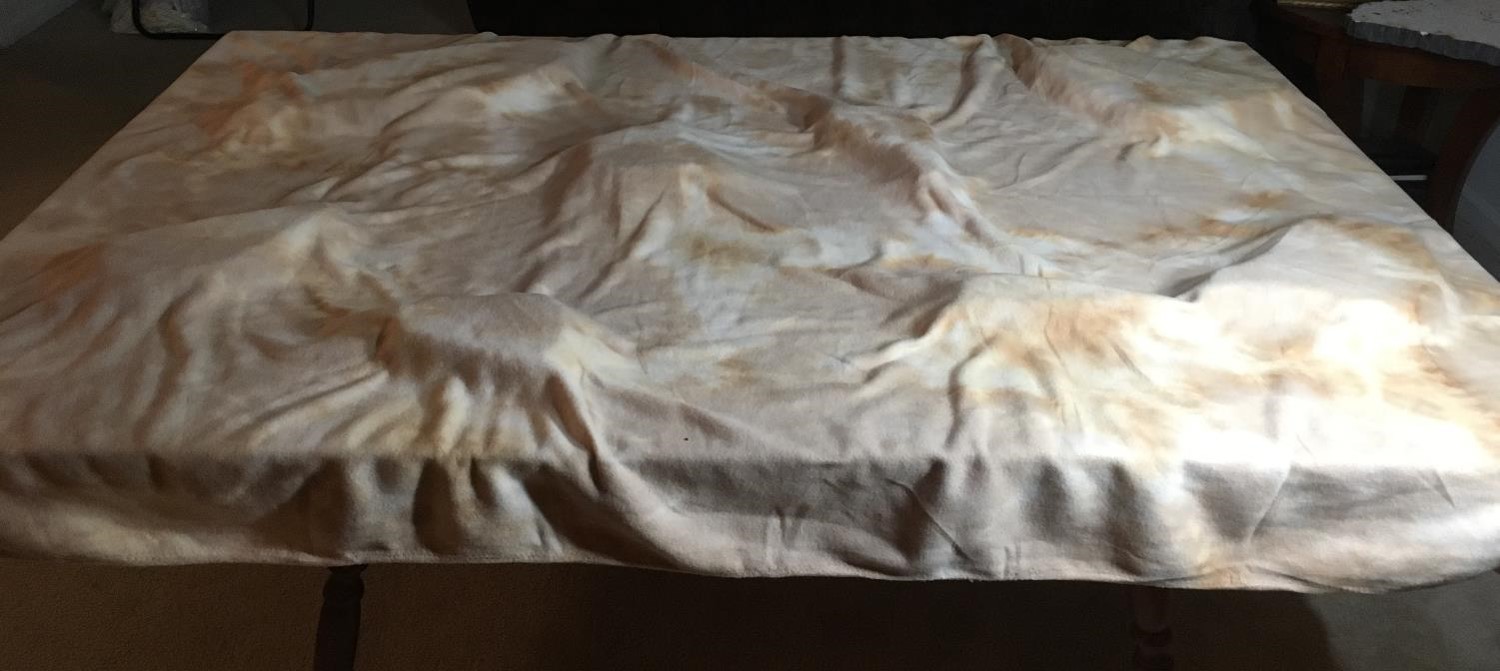
One nice thing about a fleece gaming mat is that you can lay it over objects to create hills. So, you can just scatter some books around the floor and lay the fleece mat over it and you’re ready for a game:
As a side note, this also makes for a very comfy blanket on those chilly nights when you’re not playing a game ;)
Item 2 – The Wargaming Table Top: $24-$39
As a Warhammer 40,000 player I tend to consider 4’X6′ to be the “standard” wargaming table size. This is larger than your typical dining table.
So, unless you want to play on the floor (not really an option for those of us with aging knees!), you’ll need a specialty table top. If you’re okay with playing on the floor you can save thirty bucks and skip to the next section.
There are plenty of ways to build a nice wargaming table, but I’m looking for cheap and easy.
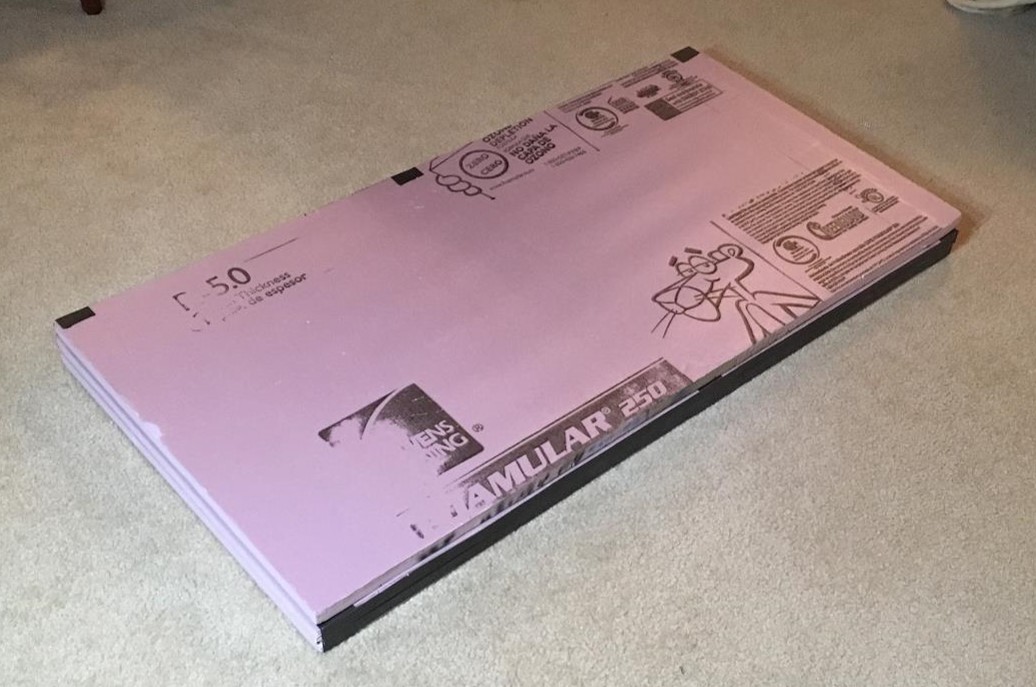
So, I built a folding top made of styrene insulation foam. This is light enough to be easily portable and to lay across your dining table without scratching it up.
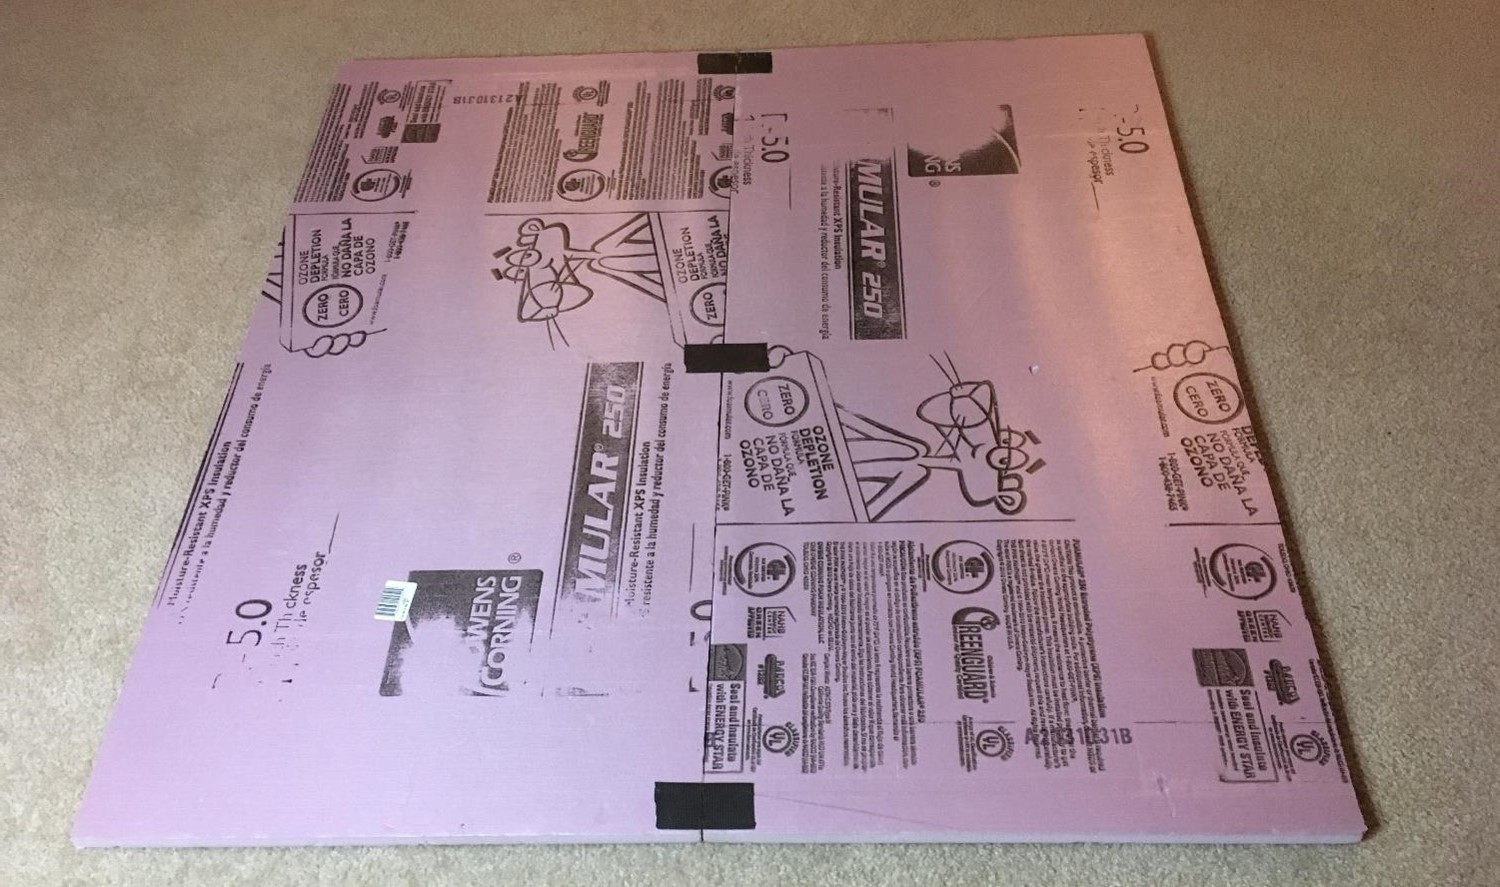
It’s also sturdy enough to support a couple of armies and some terrain. You can buy a 4’X8′ sheet of 1.5″ styrene foam insulation at Home Depot for $24. This is also available in 2″ thickness which will be stronger but cost you another $10.
Creating the Wargaming Table
Whichever you chose, cut this into four 2’x4′ pieces and set one of them aside.

I used duct tape to form hinges to hold these together. If you don’t already have this sitting around, you can pick up a roll almost anywhere for $3 – $5.
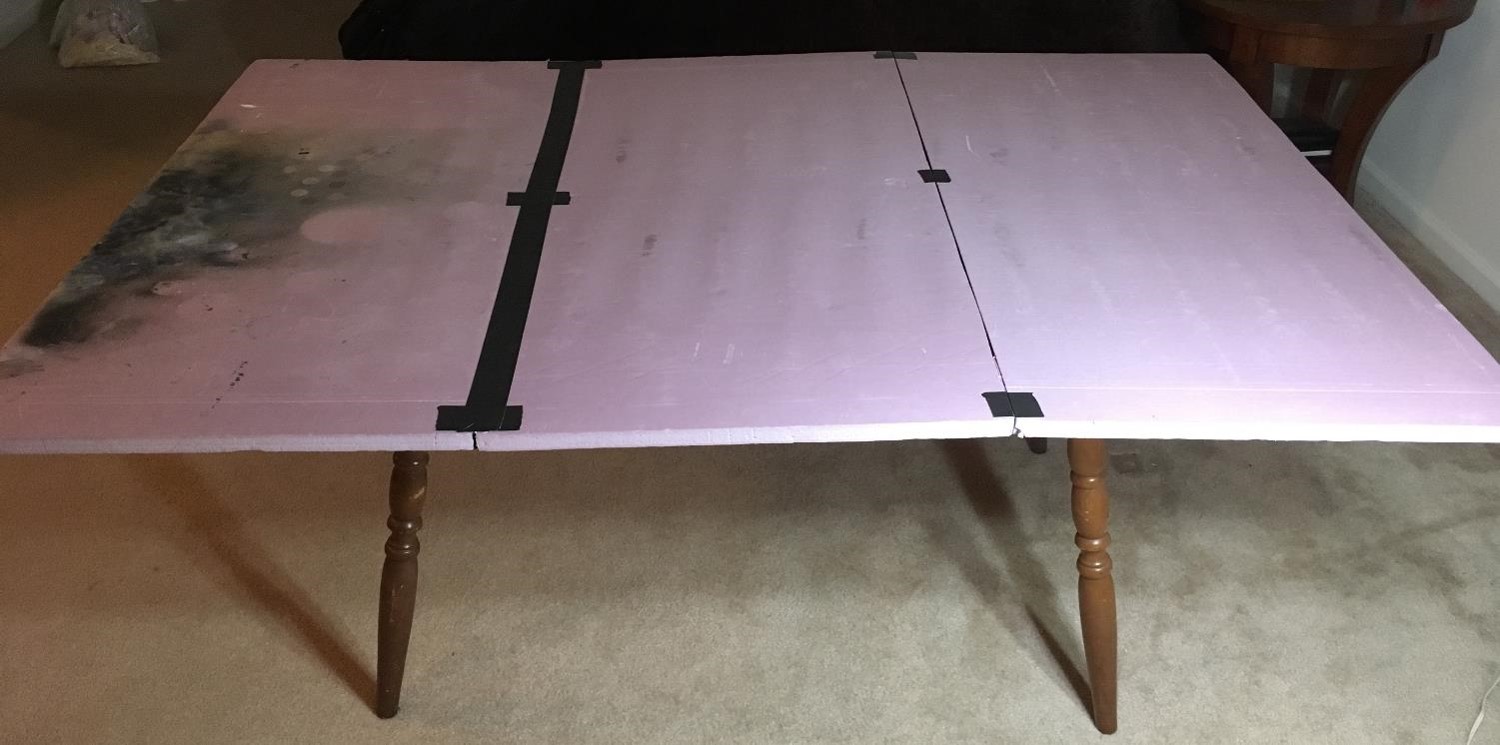
I started by laying two pieces flat with the long edges together. I used three short pieces of tape to connect the long edges. Then I ran a single long piece across the whole seam:
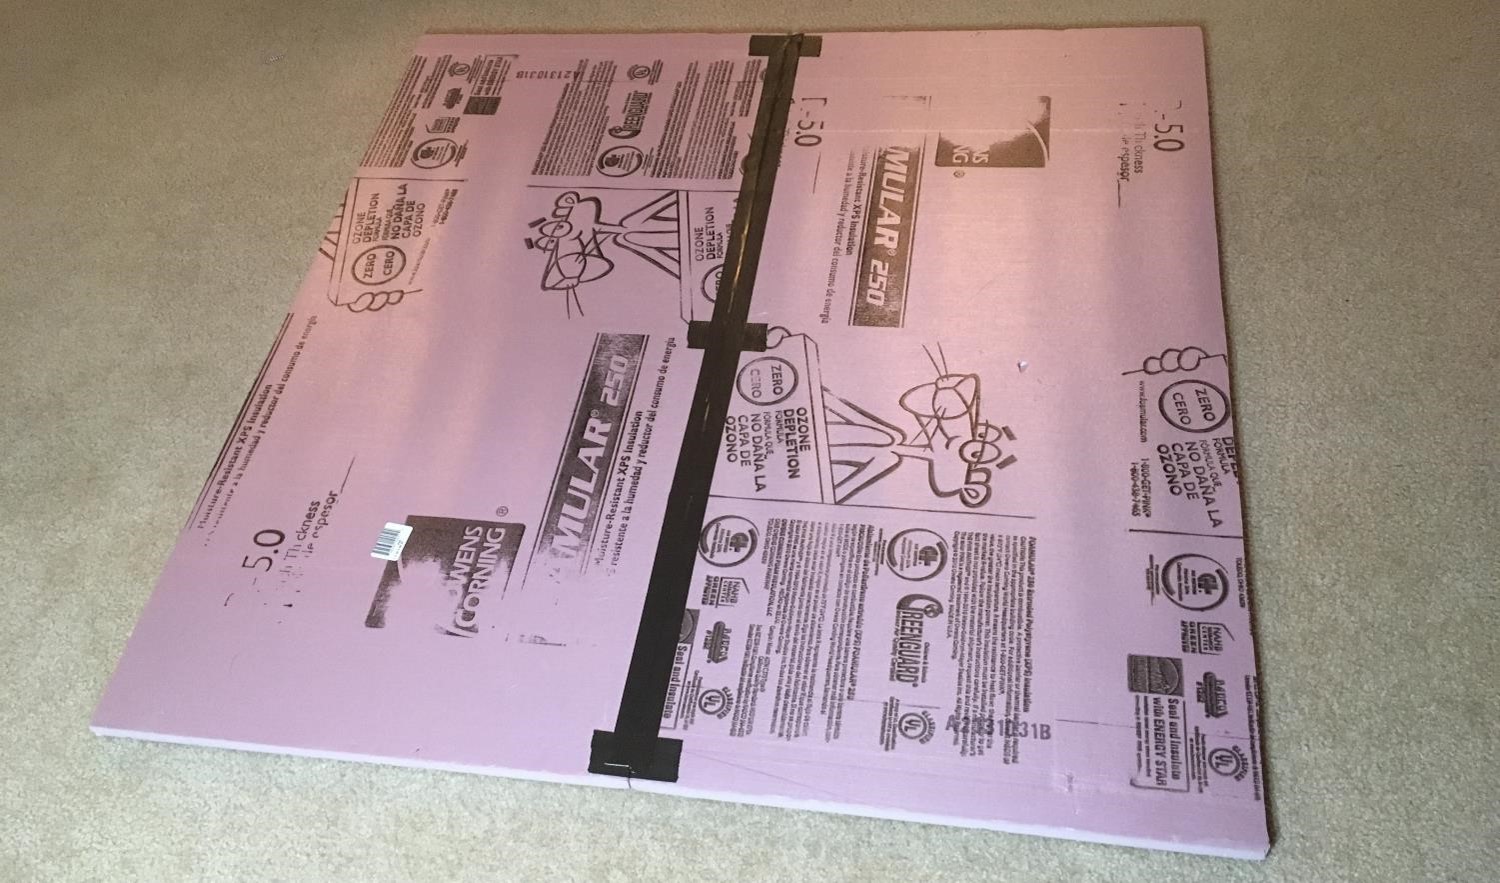
Then I folded the two pieces face to face along this tape.
On the inside of this hinge I added three pieces of duct tape across the seam. Then another long piece along the seam. This keeps the two pieces from pulling apart when the table is folded.
Now I have a sturdy hinge holding these two pieces together:
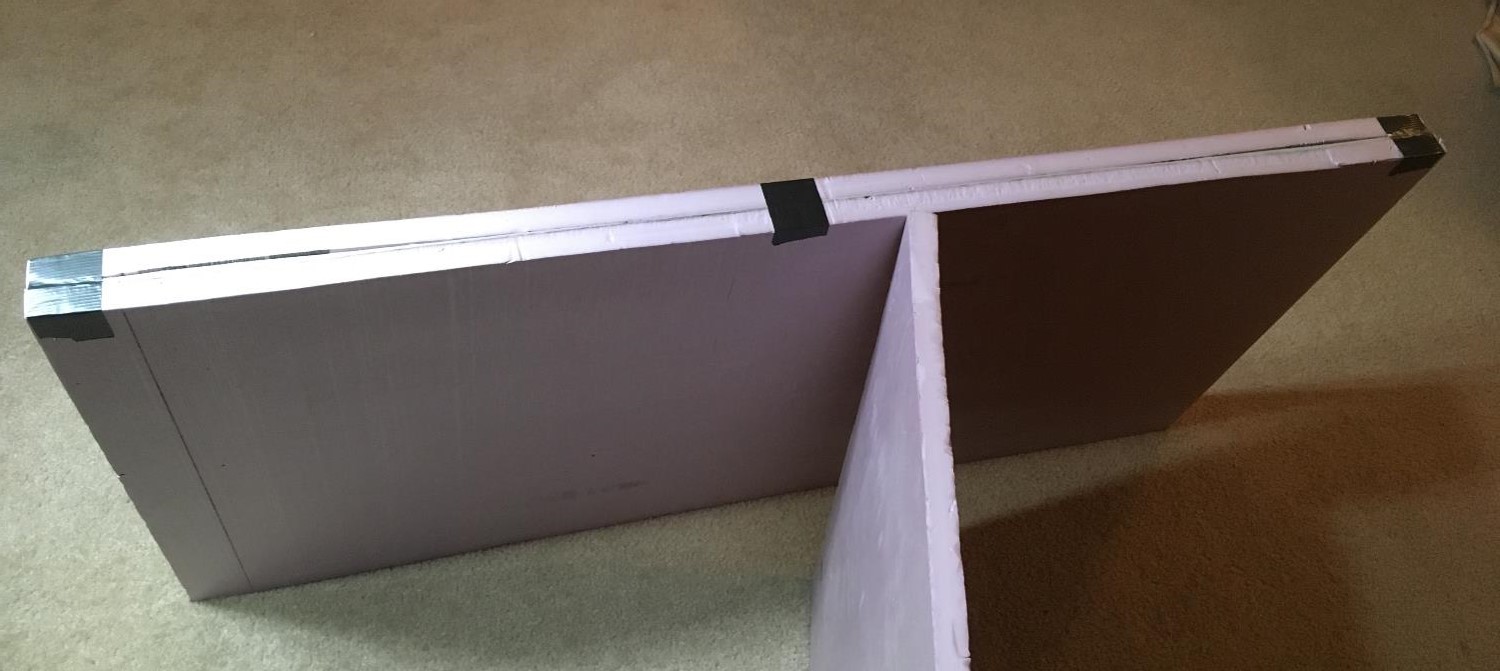
Next, I added the third piece with another hinge made the same way. I made sure that it folded the opposite direction of the first.
The Result
The end result is a 4’x6′ sheet of styrene that you can lay across almost any decent sized table to create an appropriate surface to support your gaming mat.
When you’re done playing it folds into a 2’x4′ block that can fit in a closet, behind/under a couch, or under a bed for storage:

You could also use two 3’x6′ pieces with a single hinge. This would be a bit more stable if you had to use a smaller table. It will also be thinner but wider when folded so it may change your storage options slightly.
*This can also be done with MDF or plywood, as cadianshock did for his table.
Item 3 – 3D Terrain: $8 – $14
In some rare cases you might want to battle across a flat desert expanse, but most of the time that’s not going to cut it.
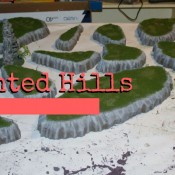
As I showed above, you can create hills by putting some books or something similar under the mat.
If you’ve built the table top per my instructions you should have an extra 2’x4′ sheet of styrene insulation left over. That’s enough to cover up to 33% of that table in hills!
Cut that into hill shaped chunks using a knife, saw, or foam cutter, and place them under the gaming mat for quick hills. No painting or gluing required.
You can even double up some of the pieces to vary the height if you want.
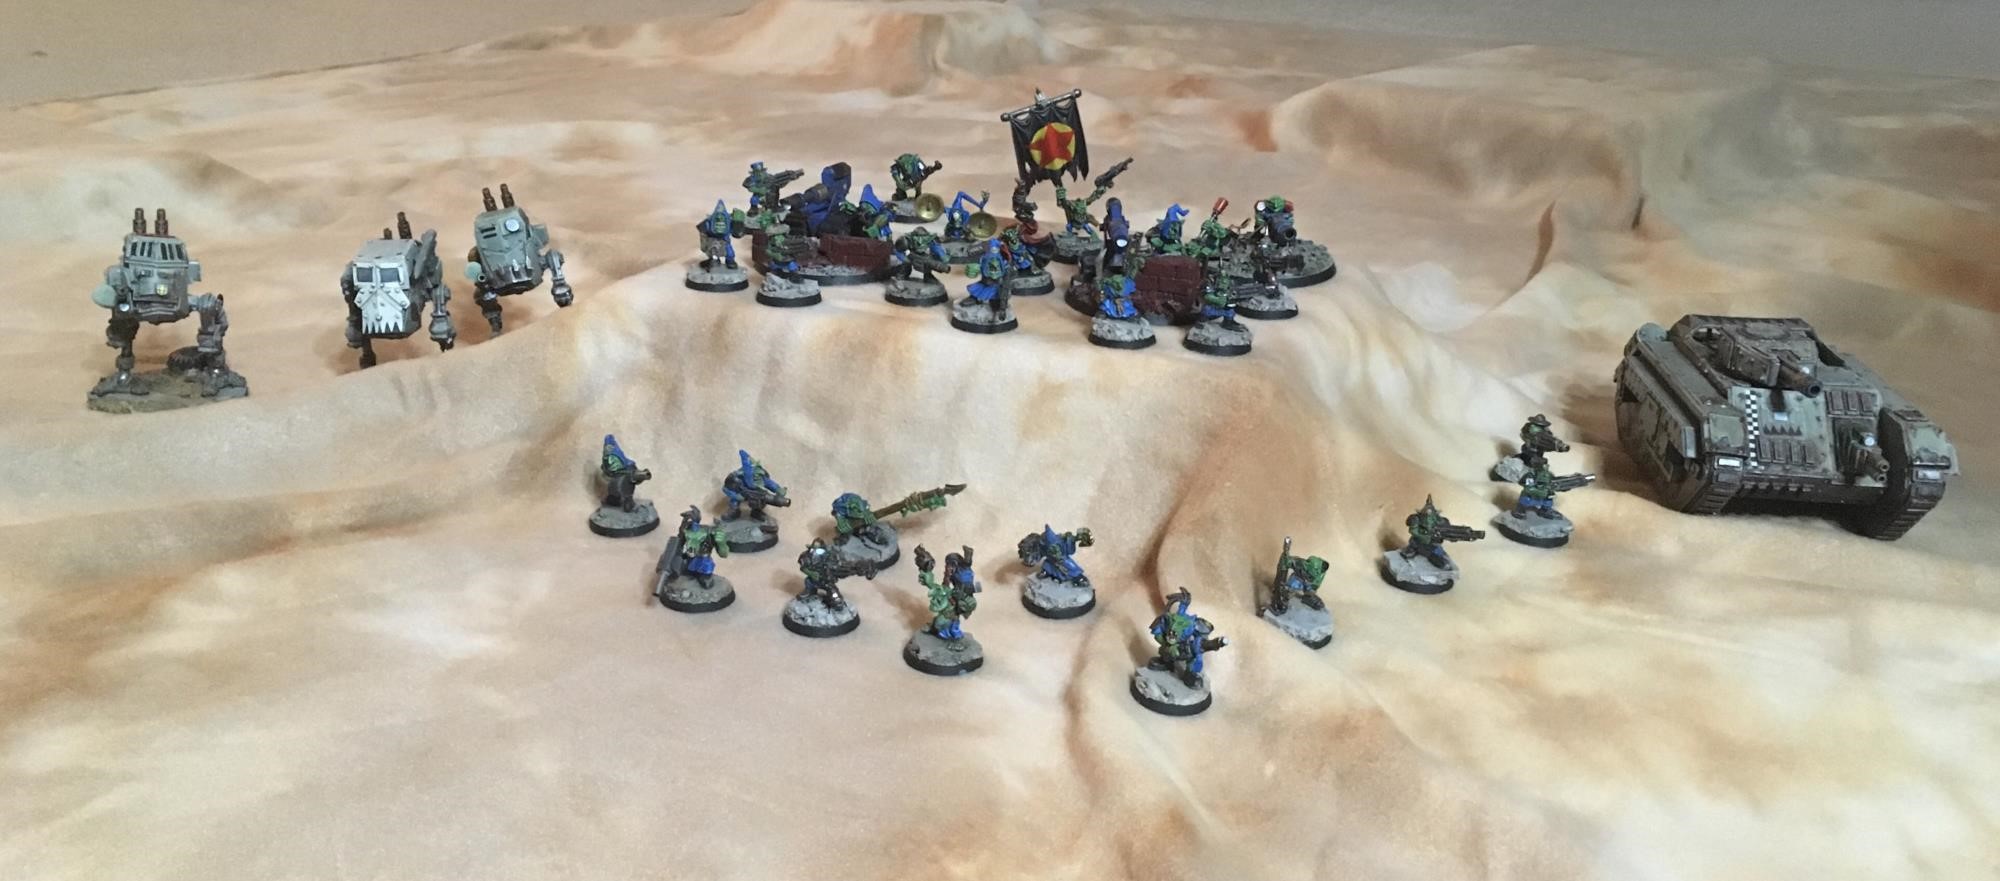
Now it’s starting to look like a decent battlefield! You can dress this up with any other terrain you have available.
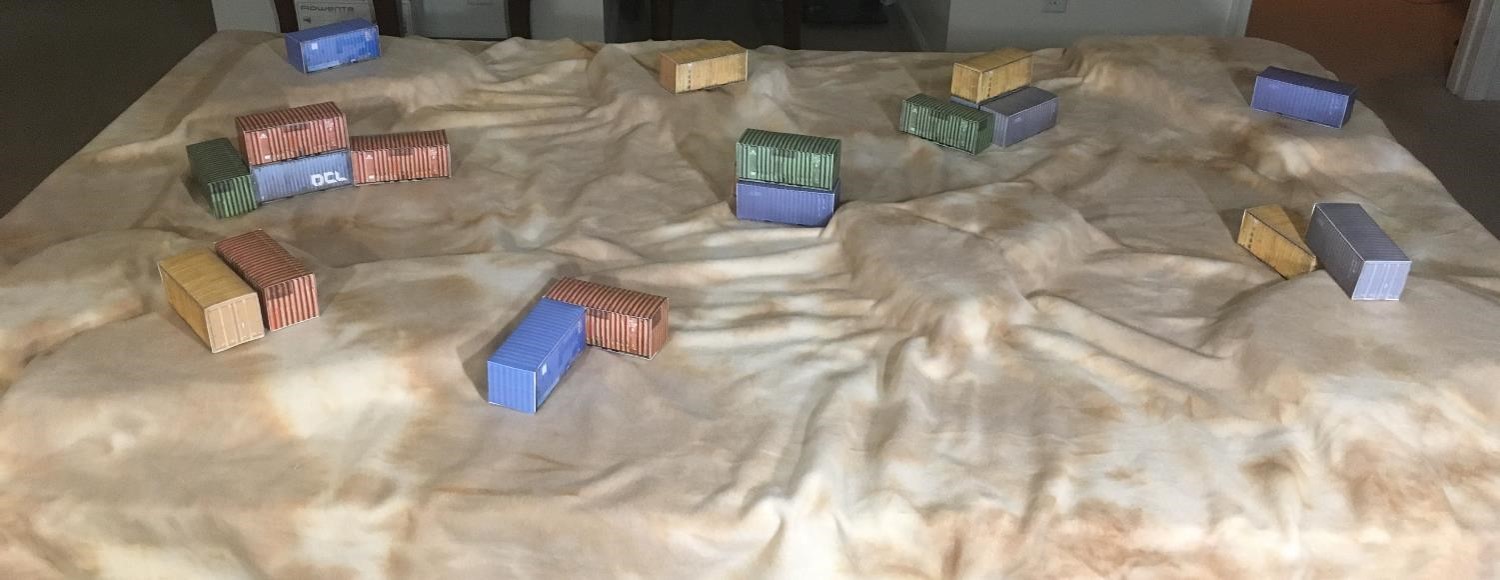
Cheap & Easy Shipping Containers
In the spirit of cheap and easy, I went on a search for some printable shipping containers. I found these O scale 20′ containers at krafttrains.com. You can download their free PDF file which has 150 different containers. They even have a video tutorial for how to assemble them.
I picked through to find the ones I felt were most generic and printed 20 of them on 110 card stock. This is the same stuff I use for a lot of my scratch built vehicles, so I had some sitting around already.
Using a typical desktop printer these cost about 40 cents per-sheet in paper and ink, so about $8 for 20. Or you can take the file to Staples and they’ll charge you $14 to print 20 color sheets on 110 card stock.
Container Terrrain Assembly
Since there’s already a tutorial from the creator I won’t go into detail about how to assemble the containers.
I will point out that these are designed to be open bottomed. I modified the templates in PowerPoint to add colored bottoms.
You could also just print the original file and leave extra tabs when you cut it out. Or you could use this template instead, which I found after making all of my containers.

Continue 20 times and you’ve got plenty of containers to dress up your table with.
Visually these add a lot of nice color. Tactically they help break up the lines of sight and travel, as well as providing some more elevated vantage points.
Conclusion
This is how I managed to build a very workable wargaming table for under $50. If you pay to have the templates printed, and opt for the thicker 2″ polystyrene foam, you’ll probably come closer to $60.
In either case, that’s a pretty good deal for a full-sized wargaming table that’s easy to build, easy to store, and reasonably attractive.
Although this gives you everything you really need for years of gaming use, I look at it as more of a starting point. After I built all of these containers I found this site with lots of cool paper terrain that you could use with, or instead of the shipping containers to get more variety without any extra work or cost.
I’m definitely planning to build some of them in the near future! Other scratch built or manufactured terrain will look good mixed among the paper models too.
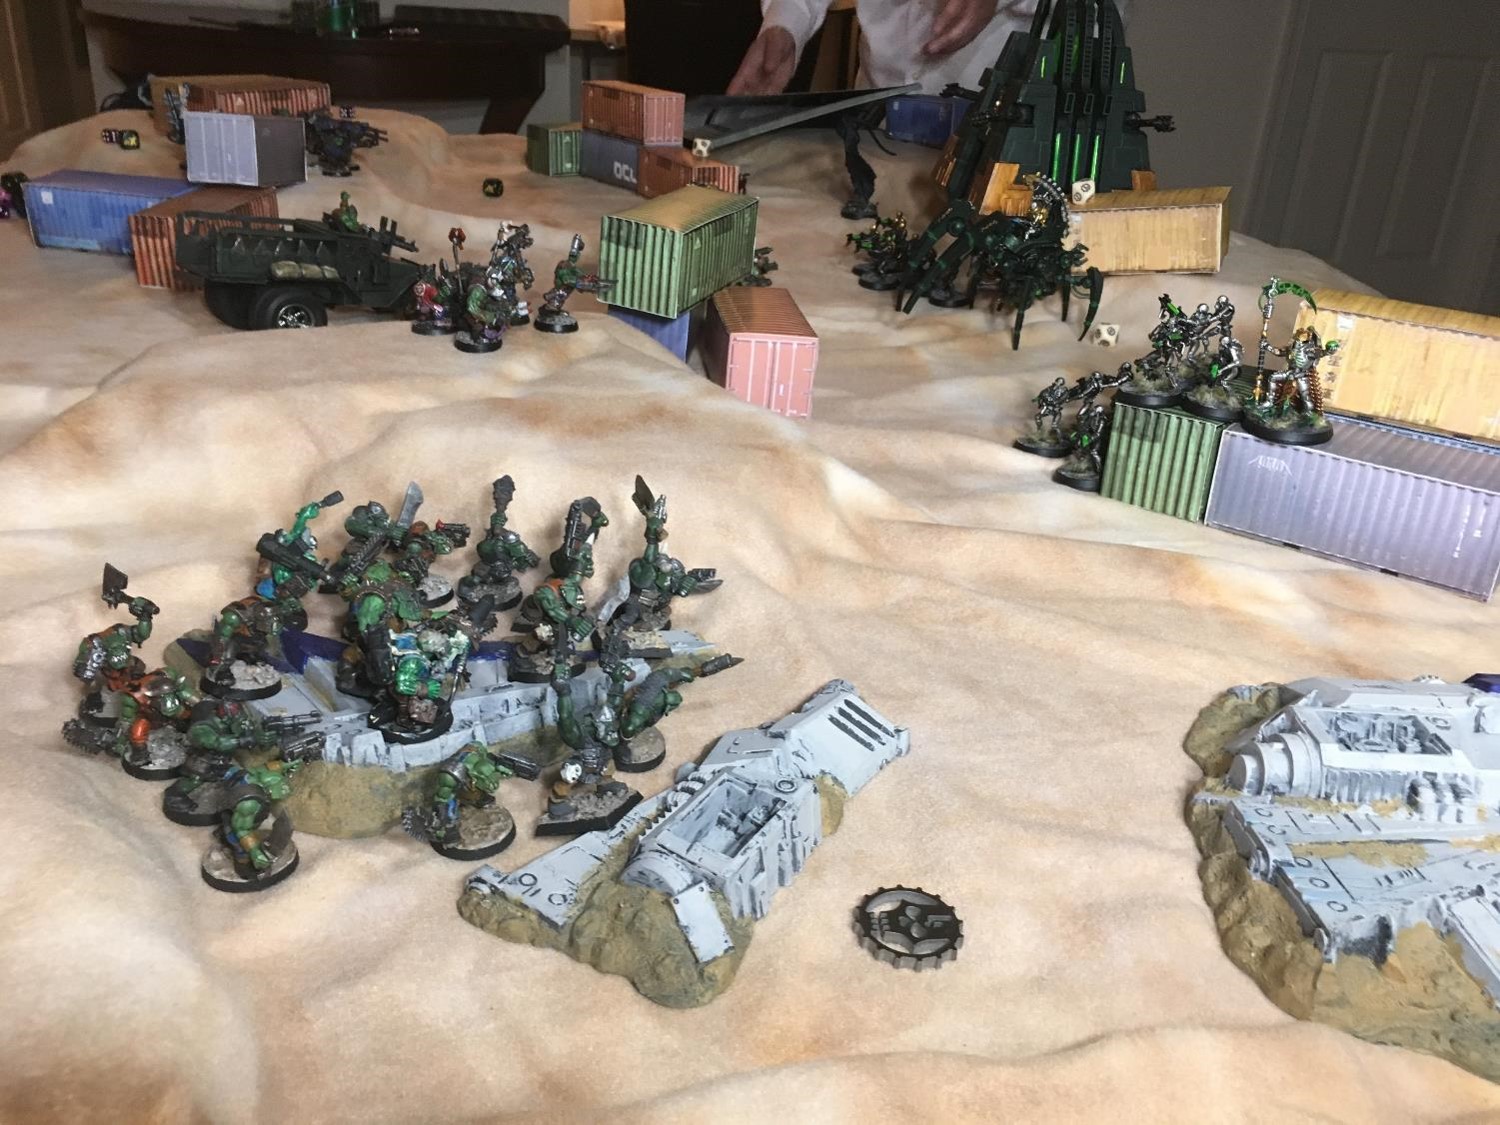
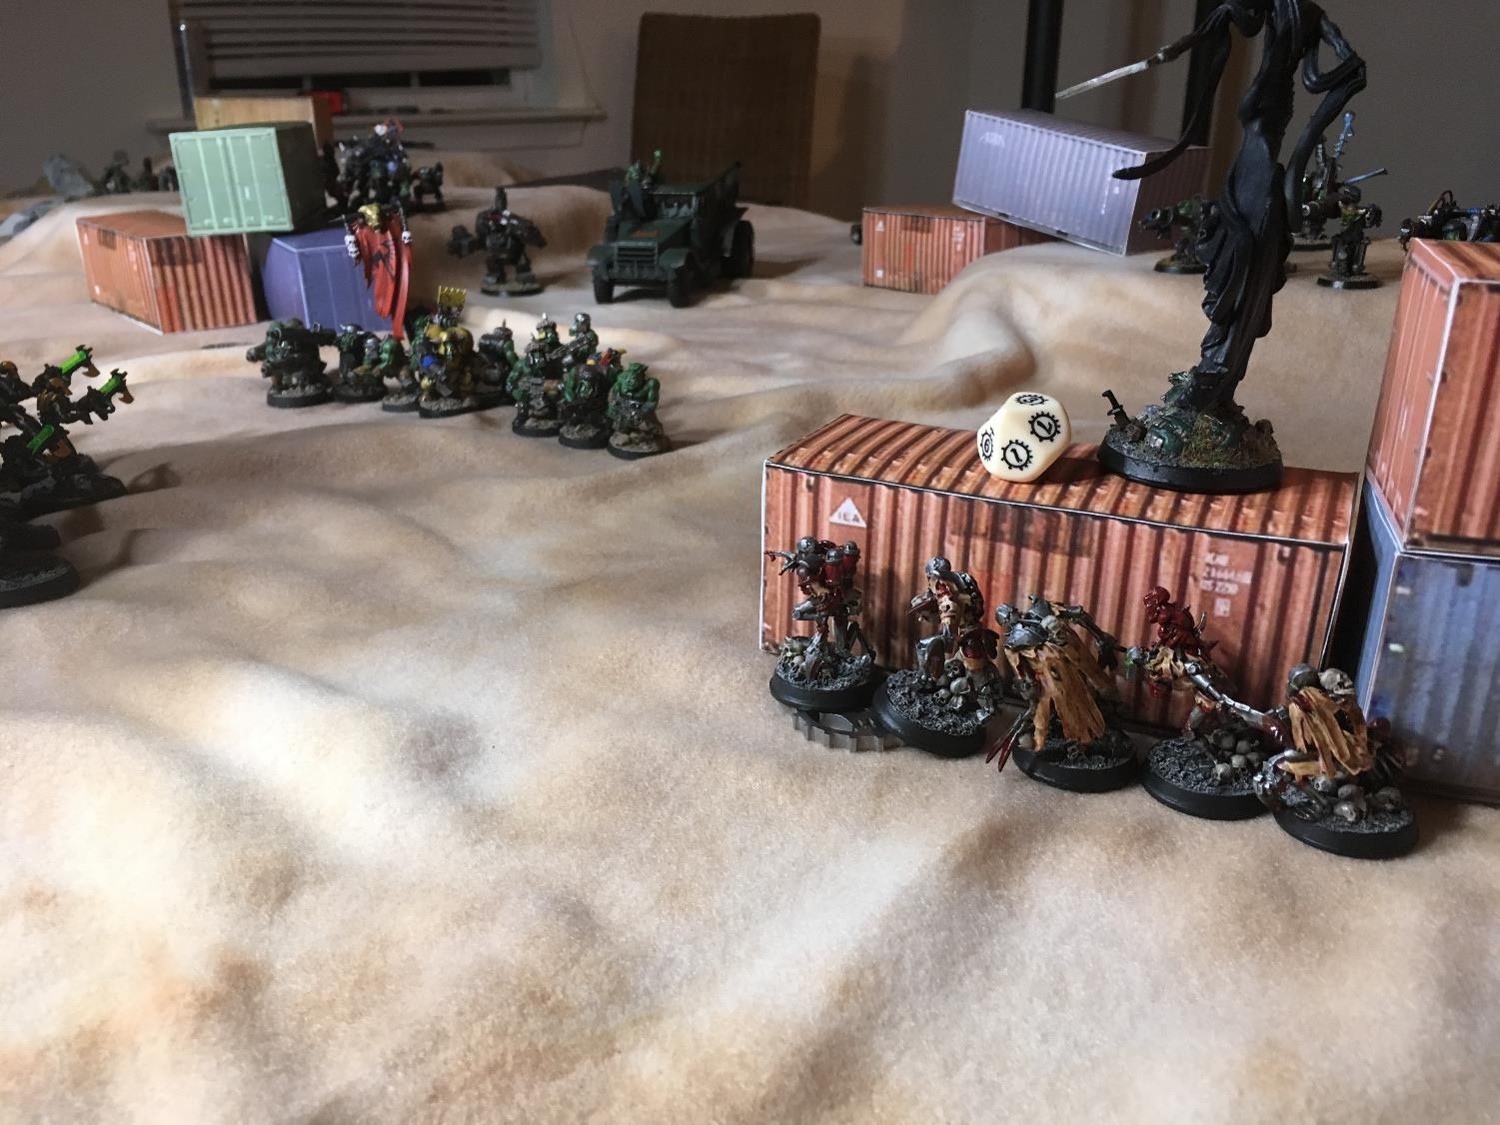
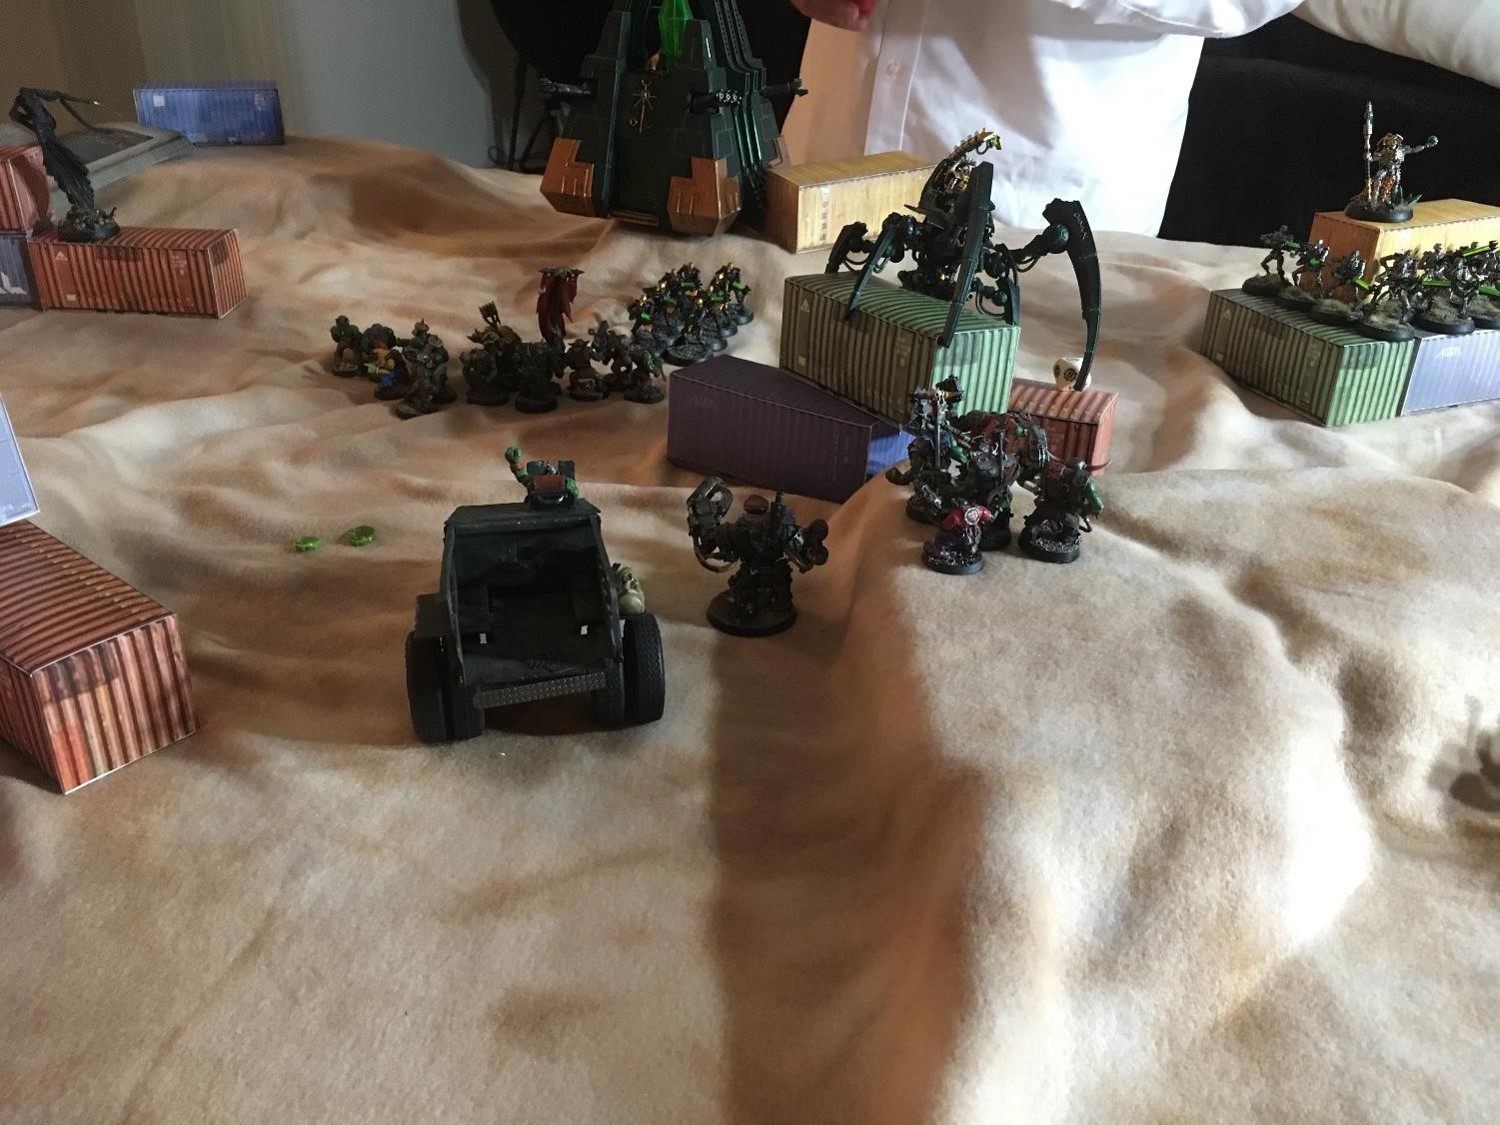
Wargaming Table & Terrain in Use
I’ll wrap up with some action shots from the first game I played on this setup. I did add the wrecked Aquila lander from Battle For Macragge, but everything else is from this tutorial.
You can see that the containers provide nice areas of cover from firing. They’re also sturdy enough to support most reasonably sized models.
If you want some more easy wargaming terrain then check out my tutorials on making easy tank traps and DIY barbed wire.
For $50 I’m very happy with this setup! Questions and comments are welcome as always!
Wargaming Terrain & Scenery Tutorials
Tutorials to help you create a great wargaming table.
- How to Make a Wargaming Table & Terrain Cheaply & Easily - November 6, 2017
- First Rebel Grot Armored Sentinel Painted! - December 19, 2016
- Assassinorum Execution Force Product Review from Games Workshop - May 6, 2015


Nice job on the tutorial and putting together the table itself. For the cost I think it looks great.
Were you rolling dice on a tray or something? I can’t imagine you can roll on that table very well.
Thanks. It’s not the most impressive setup but it should fit the budget and skills of pretty much any gamer.
We were rolling on the table. The folds can be problematic but where it’s flat it’s actually a nice surface for dice rolling.
This is cool
Thanks! I hope people find this helpful!
Good article! It is always worth looking at ways to game which are less expensive, as we all need a surface to game on, and saving money on the gaming table means more money for minis! I will have to post a photo of my Man O’ War ocean mat – 5′ x 4′ of crushed velour for not much money at all, but looks awesome.
Thanks!
I agree, more money for minis is always a good thing! Please do post a picture of your mat. I’m sure other sea battlers will appreciate the idea.
Found the photo – this was about £4 from the local market fabric stall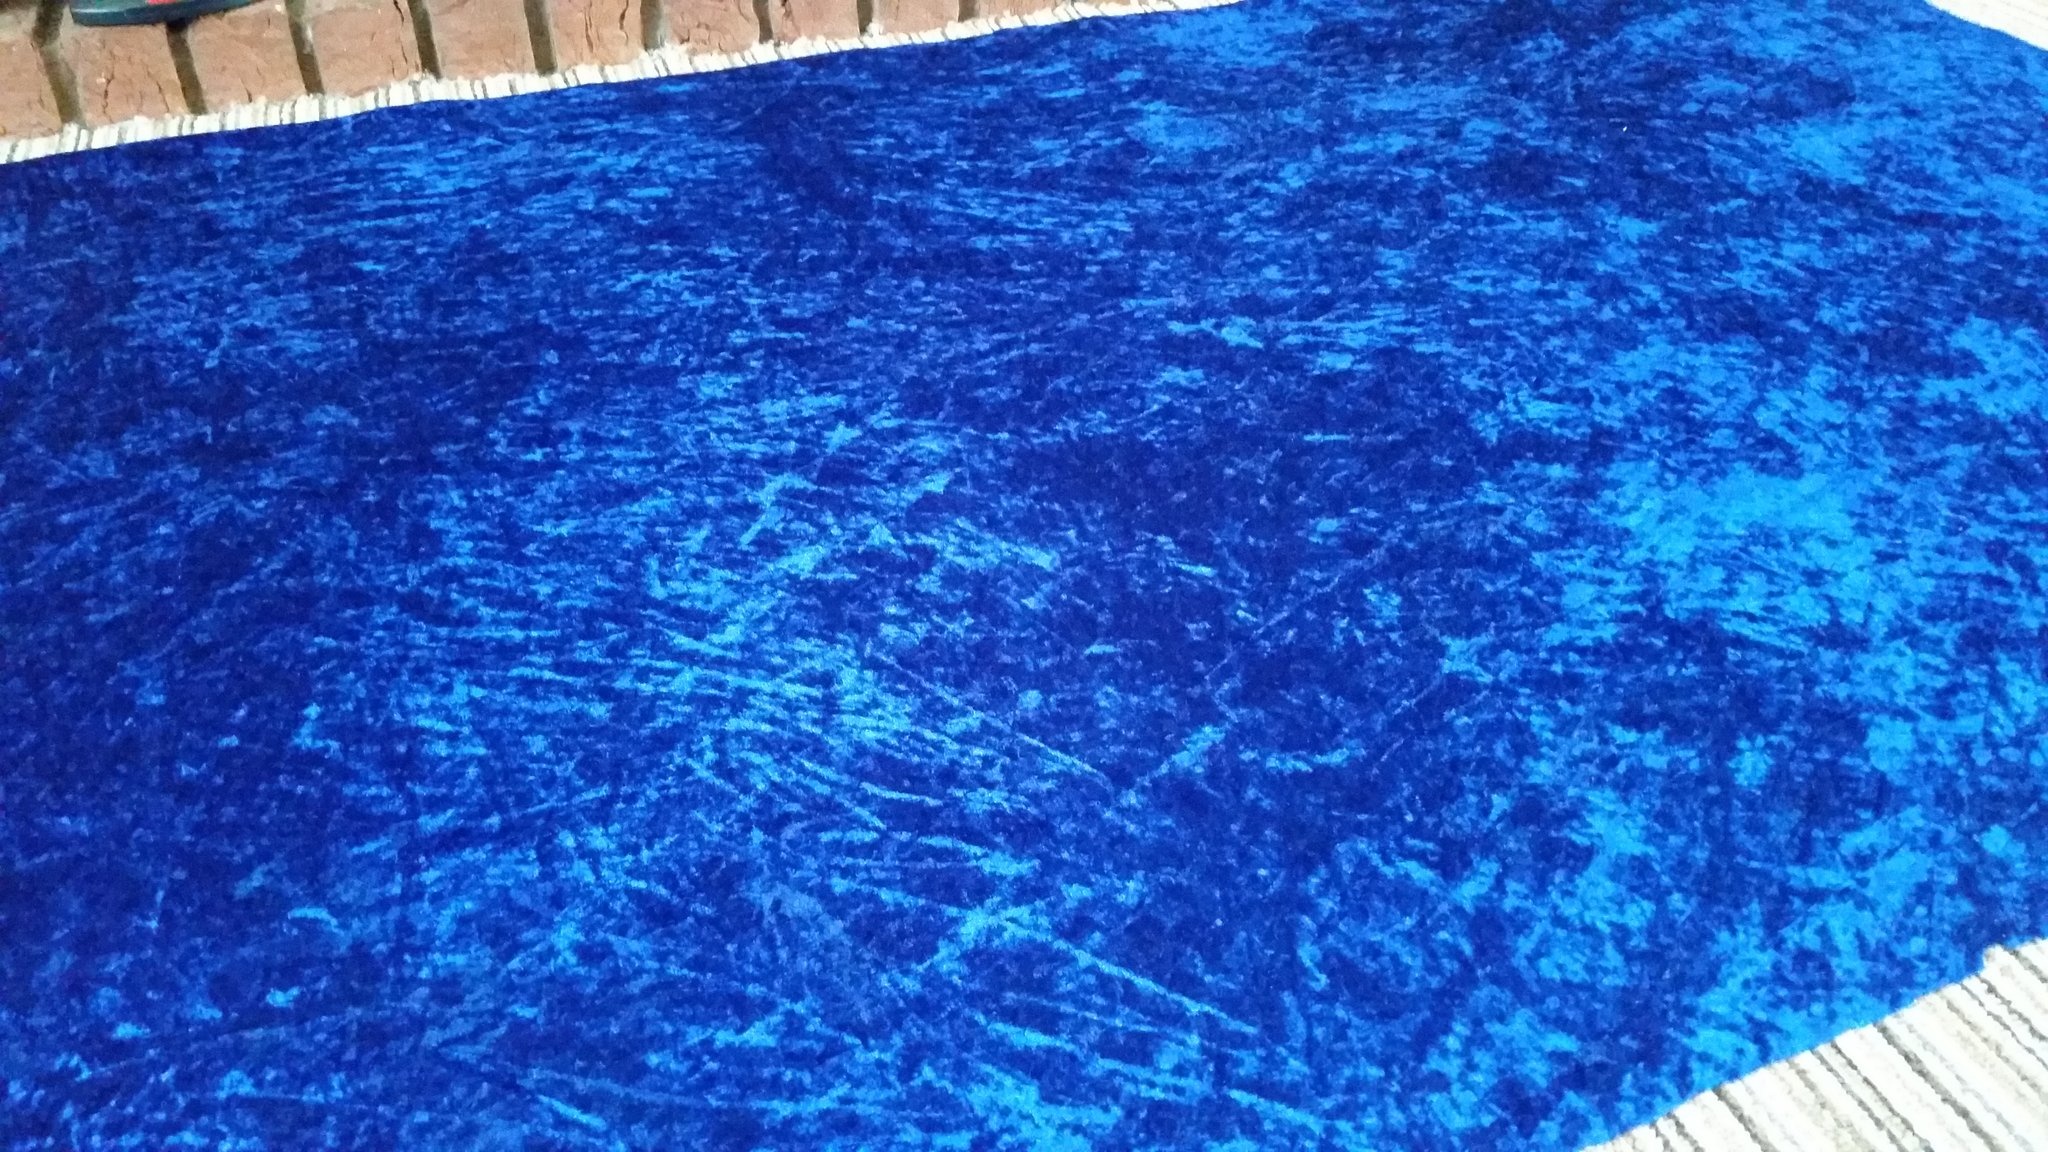
That does make a great looking patch of open sea! Is the color variation a printed pattern or is that from the nap of the fabric?
It’s just the nature of the fabric. Amazing how good it looks naturally.
Yes, it looks great!
So, I like this enough that I figured out how to get my tablet to login to Disqus and maybe I’ll read more blogs from here. (Since out frustrated me not to comment on stuff)
The idea with the sheet tossed over a bunch of stuff gave me an idea. You could make a permanent but moveable and paintable battlefield in the same vein by heating warbla over a bunch of stuff. Hmmmmmmmmmmm…….
Also, while I’m at it, here’s a method I used..
http://www.wargamingtradecraft.com/2012/01/building-yourself-cheap-tabletop.html
I’m glad I inspired you to improve your tablet connectivity :)
That’s a great tutorial, nice job covering all of the necessary details. Your top will be a bit heavier than mine but much sturdier. It’s a great option if you’re willing to put in just a little more effort than I did.
The worbla table sounds interesting. If you build one make sure you post a tutorial!
This reminded me that I’ve seen a post about making a folding table top from MDF and heavy duty tape. It still won’t be as sturdy as a rigid table top but it’s another option: http://cadianshock.com/making-a-6ft-x-4ft-table-top-gaming-board/
Oh, Pink Foam! Is there anything you can’t do? That’s a sweet setup. Well done!
Thanks! Pink Foam is good for house building and absolutely fantastic for wargaming!
I’ve been looking for a table topper but I’m always concerned about someone leaning on the table and flipping it. How stable if just the foam?
It’s sturdy enough to handle being bumped when someone is reaching across the table and it’s strong enough to hold the typical amount of books and drinks but I wouldn’t expect it to support anyone’s weight. If it hangs more than six inches past the table edge it is likely to flip or break when someone puts their full weight on it.
The 2 inch foam is much more sturdy than the 1 inch I used here but if you’re worried about people putting their weight on it I would recommend you go with plywood and maybe find a way to clamp it to your table.
Great article! I’ve been looking for a cheap way to make a table and this will work perfectly. Thanks for sharing it!