This tutorial on how to make miniature trees easy will demonstrate the process I settled on to get reasonably convincing miniature trees without breaking the bank.
Disclosure: Some of the links below are affiliate links, meaning, at no additional cost to you, I will earn a commission if you click through and make a purchase. The commission earned helps maintain this site.
How to Make Miniature Trees Easy – Item List
First up, here’s a list of items you’ll need:
- Garden Twist ties
- PVA glue (like Elmer’s or Mod Podge)
- Superglue
- Epoxy putty
- Clump foliage
- All purpose joint compound
- And some basing materials
Some of this stuff is basic supplies you should already have.
Making the Wire Armature
The wire armature is the primary component of the miniature tree. I am using plastic coated garden twist tie to make my armatures because it’s a cheap way to get lots of material.
You can use any twist ties, or even pipe cleaners, you have available. Un-coated wire could be used but you’ll need much more of it to build up bulk.

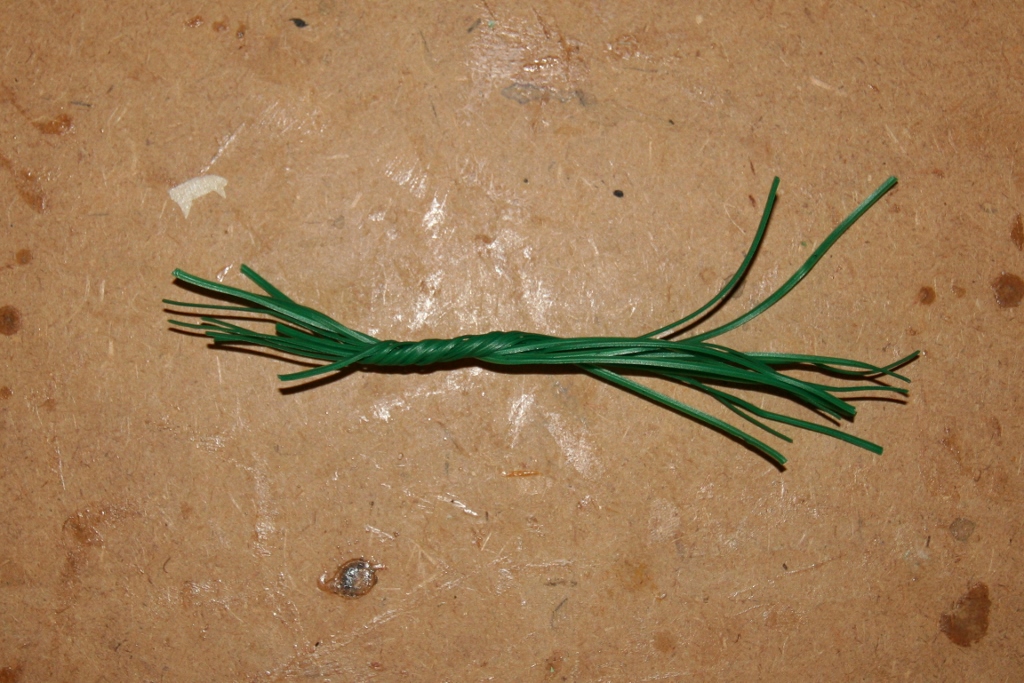
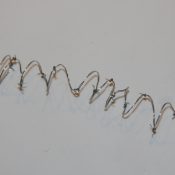
Start with a bundle of twist ties. The number you use will determine the girth of the tree and number of branches. The length will determine the height.
For this miniature tree I am using 12 strands cut 6-8 inches in length. Don’t worry about lining them up as you bundle the twist ties. Just group them up and twist the whole bundle to start forming the trunk. Leave about an inch untwisted at one end and work toward the other end.
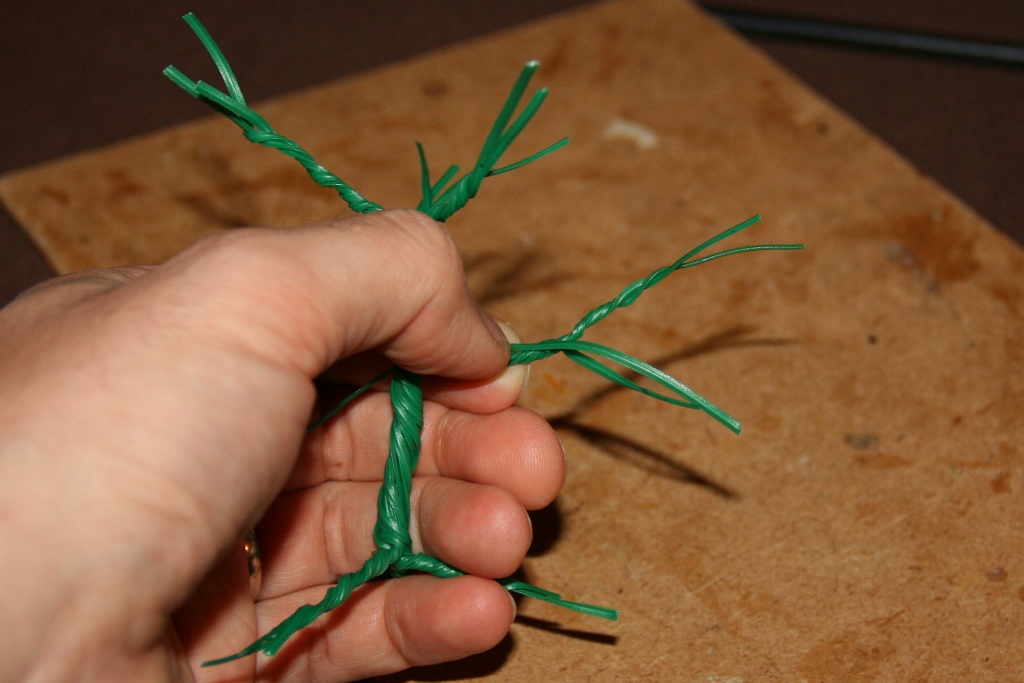
After you form the trunk you can start forming the branches. Separate a few strands from the bundle, making sure to take one or two from the opposite side, and pull them through the bundle. This will help lock the branch in place. More strands means a thicker branch.
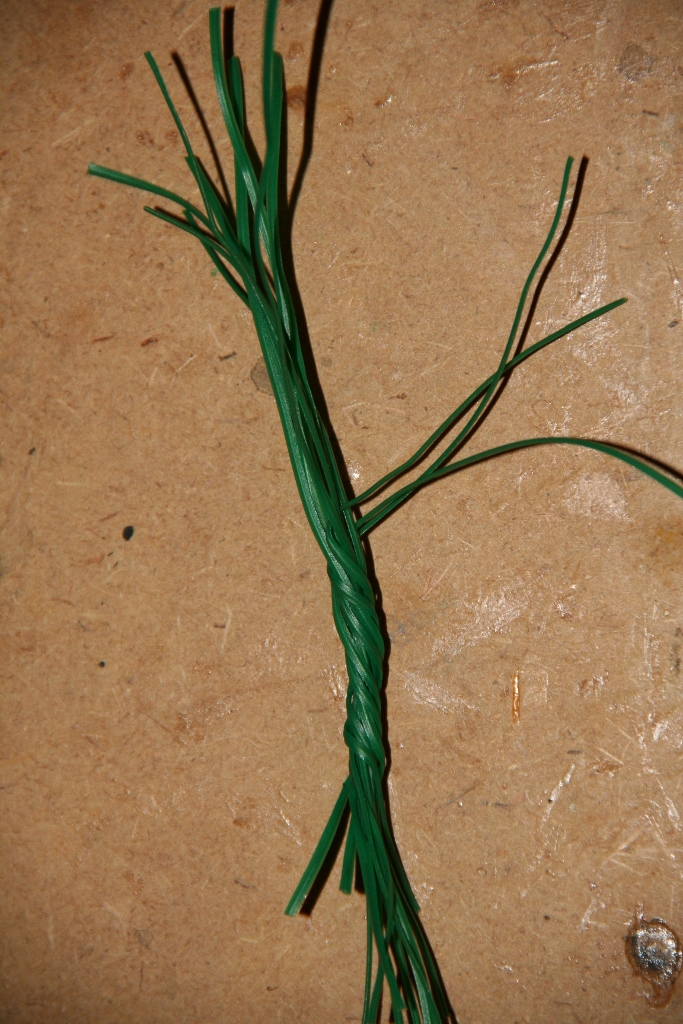
Twist the branch, starting from the trunk, and moving toward the end.
As you work away from the trunk you can further split the bundle to form smaller branches off the first. Leave about a half inch to one inch of each strand untwisted so you have something to glue the foliage to later.
If you’re making dead or winter trees you can twist them all the way to the end so they aren’t so flat.

After forming the first branch, continue twisting up the trunk and splitting branches off as you go. Continue this process until you’ve twisted all of the strands into branches.
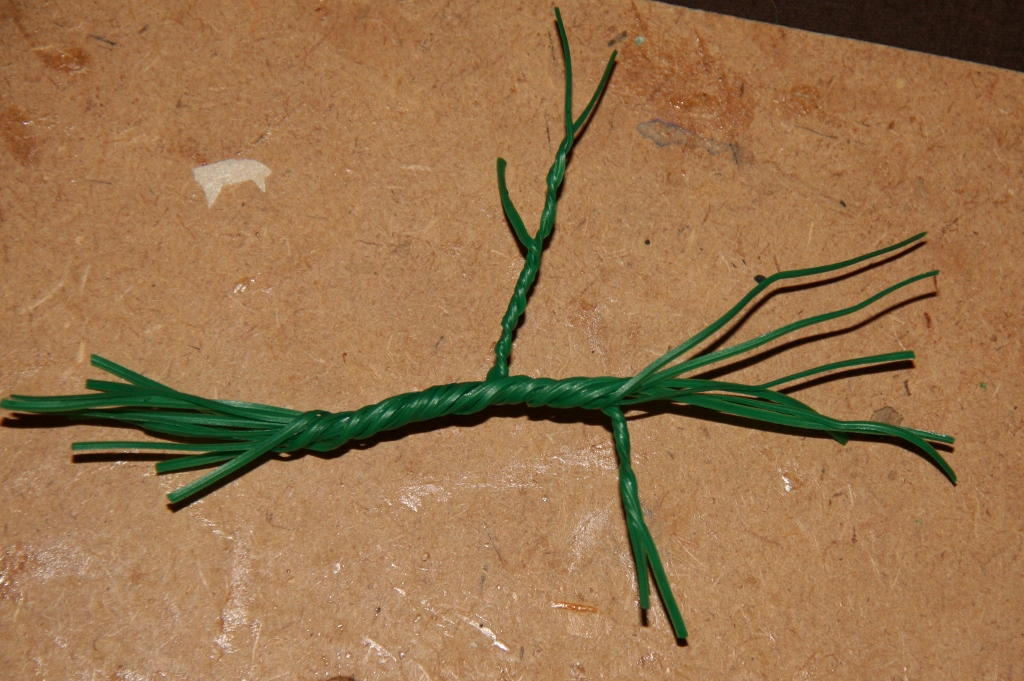
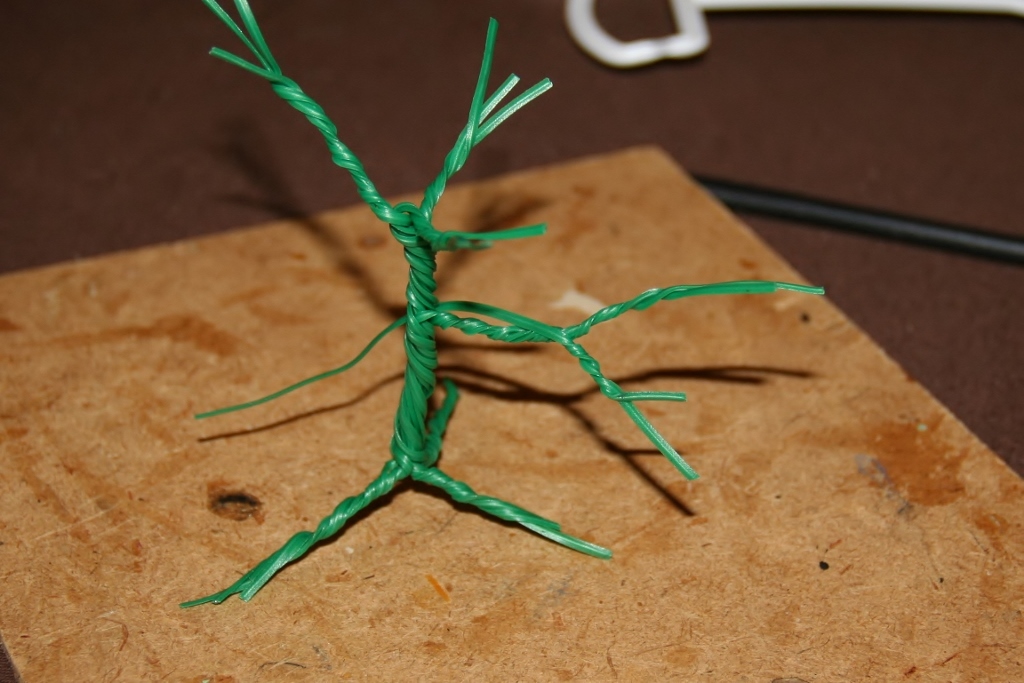
Now that you have the basic miniature tree formed, you can address the loose strands where you started.
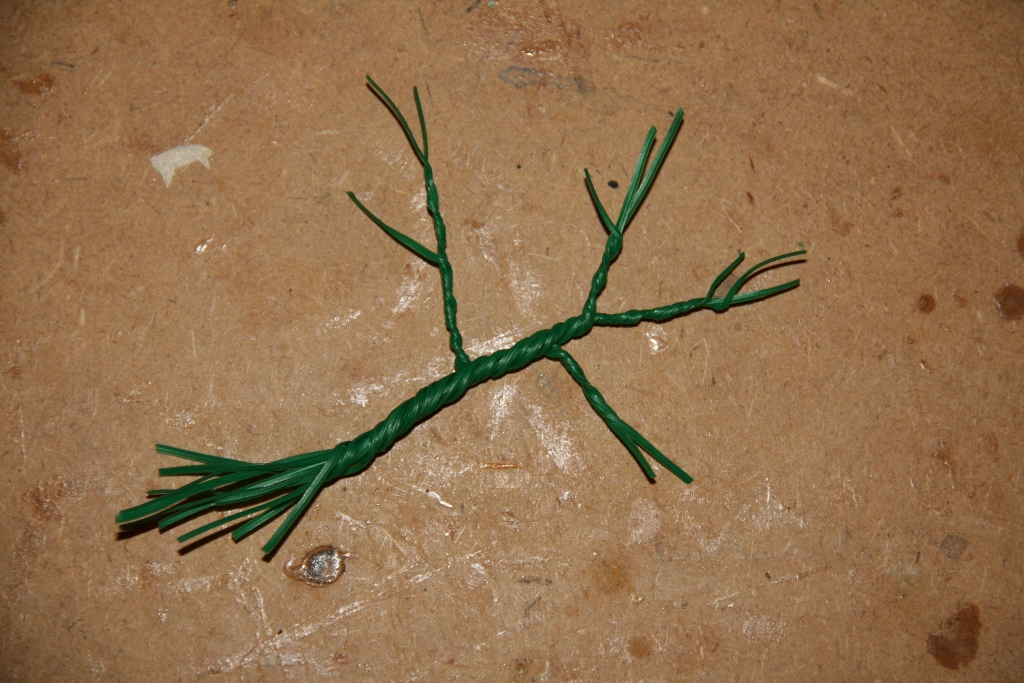
Split these into two or more groups and twist each into a root. These will create the impression of exposed roots, and they also give you something to glue down to the base.
If you don’t want an exposed root system you can spread the bottom strands out without twisting them, so they are easy to cover up after gluing down.
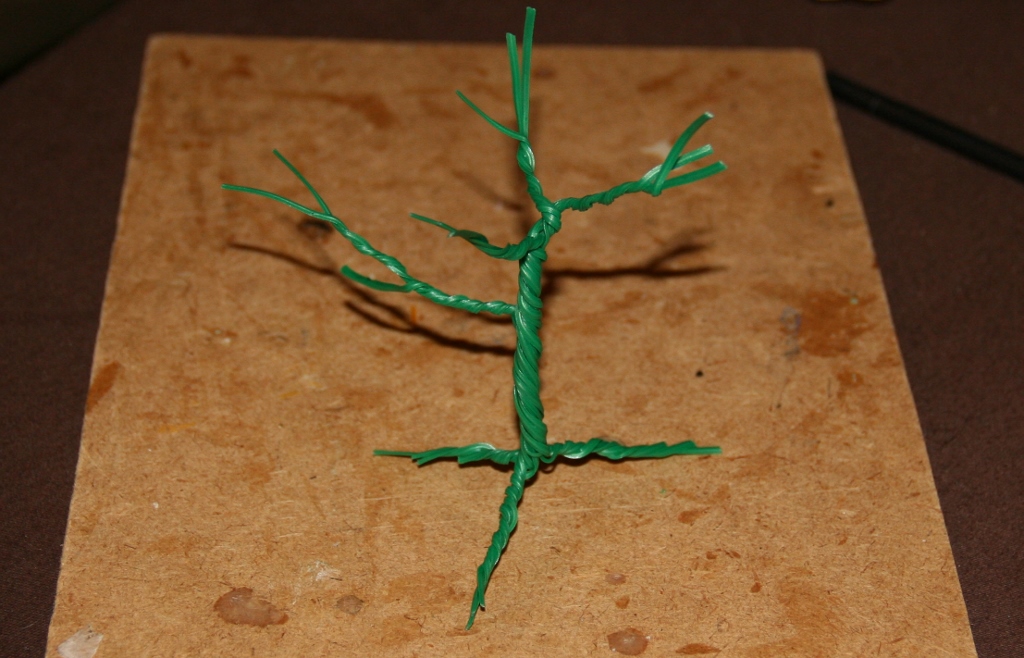
With the roots formed you should be able to stand the tree up.
Bend the trunk and branches around until you have the miniature tree shape you are looking for.
I decided that the lowest branch looked a little too thin. If you want to bulk out your tree at this point it is easy to add more twist ties. I start by lining the new strand up with an existing branch.
Then I twist the new strand onto an existing branch to make it thicker.
I continue to work my way down the branch and trunk until I’ve twisted the rest of the strand around the tree.
You can add as many new strands as you want to thicken branches or even add new ones. Make sure the strands you add are long enough to make it all the way down the trunk. This will ensure that the trunk appears thick enough to support any branches you thicken/add.
Base Mounting the Trees
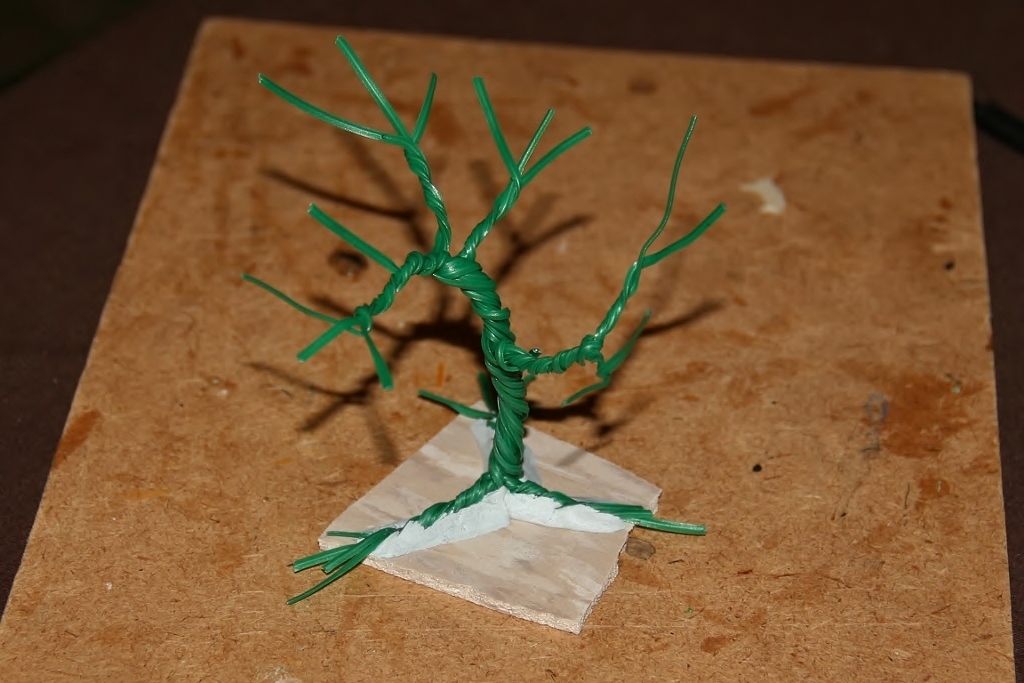
Now that I have a tree shape I am happy with, I am ready to mount it on a base.
Whatever you use as your base, make sure it is large enough to be stable. The only reason trees stay standing in real life is that they have extensive root systems hidden below the surface. Without that in your favor, you need a wide and/or heavy base to keep your miniature tree stable.
For the test trees in my earlier post I used some flying bases I had sitting around. For this one I decided to use a chunk of vinyl composite flooring because it’s heavy and the more random shape is fitting to scenery bases. It’s also pretty cheap at 70 cents per square foot.
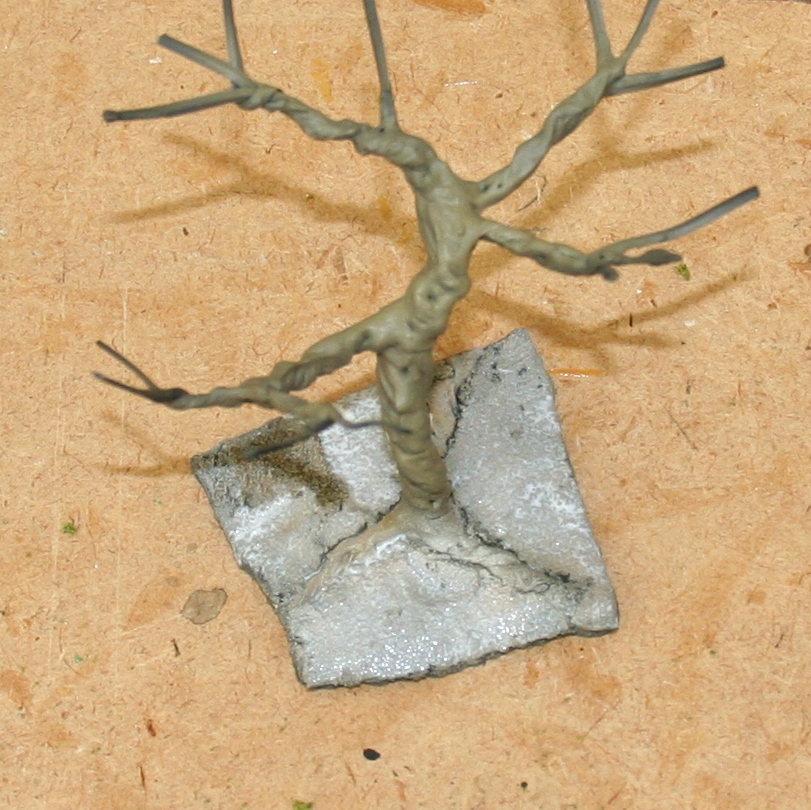
There isn’t much flat surface on the roots so I used an epoxy putty to attach the miniature tree to the base. This is a two-part putty similar to Kneadatite (green stuff), but it is stickier and only has a 5-minute work life. It’s crap for sculpting but it’s great for holding things together.
Coat the Trees
After the putty is fully cured, I trimmed the root tips flush with the base. Then I used pre-mixed grout to add “dirt” to the base, leaving the tops of the roots exposed.
Then I coated the tree with all-purpose joint compound. This hides the twist ties and creates a nice, knobby bark texture. It also makes the tree more rigid.

Step #4) Painting the Miniature Trees
Now, it’s time to paint our miniature tree!
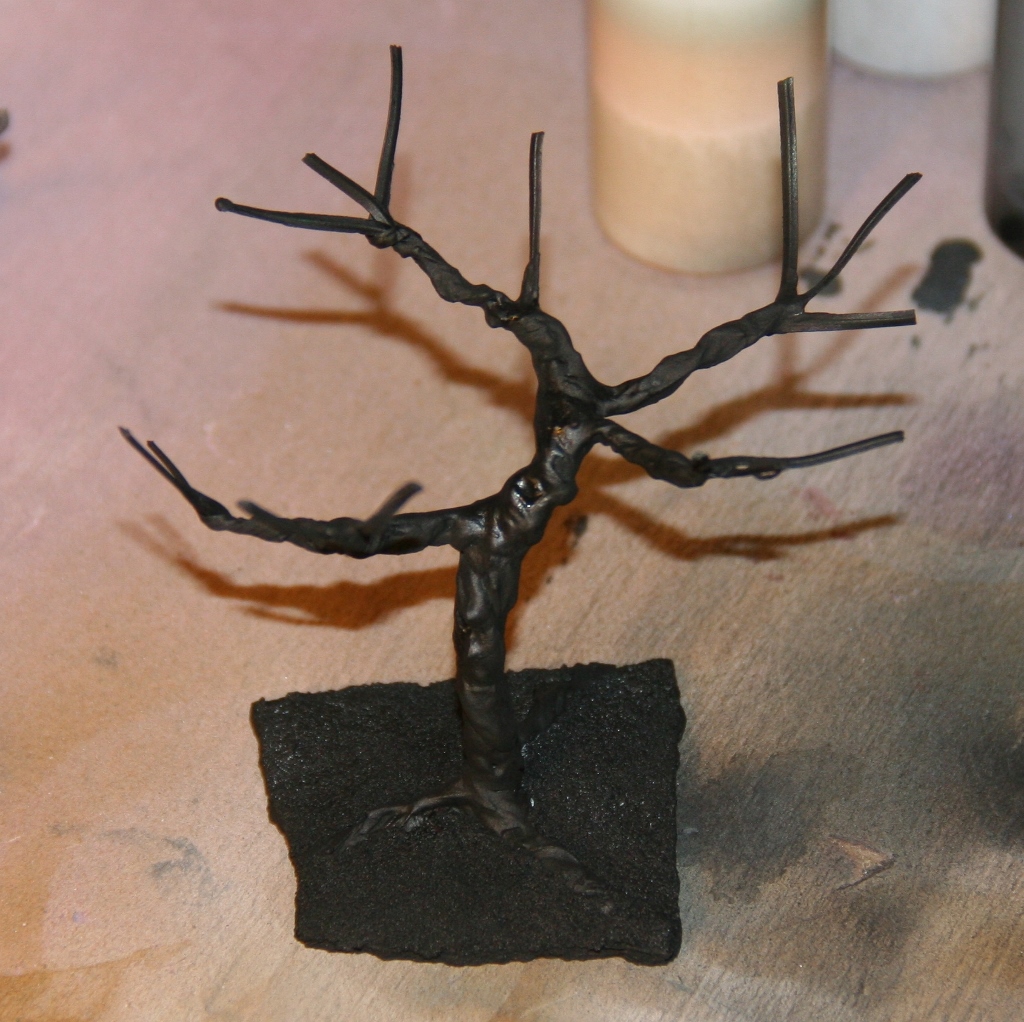
I used an airbrush for this but you can go with bristles or spray cans if you prefer. First a couple of coats of black primer.
Then brown…
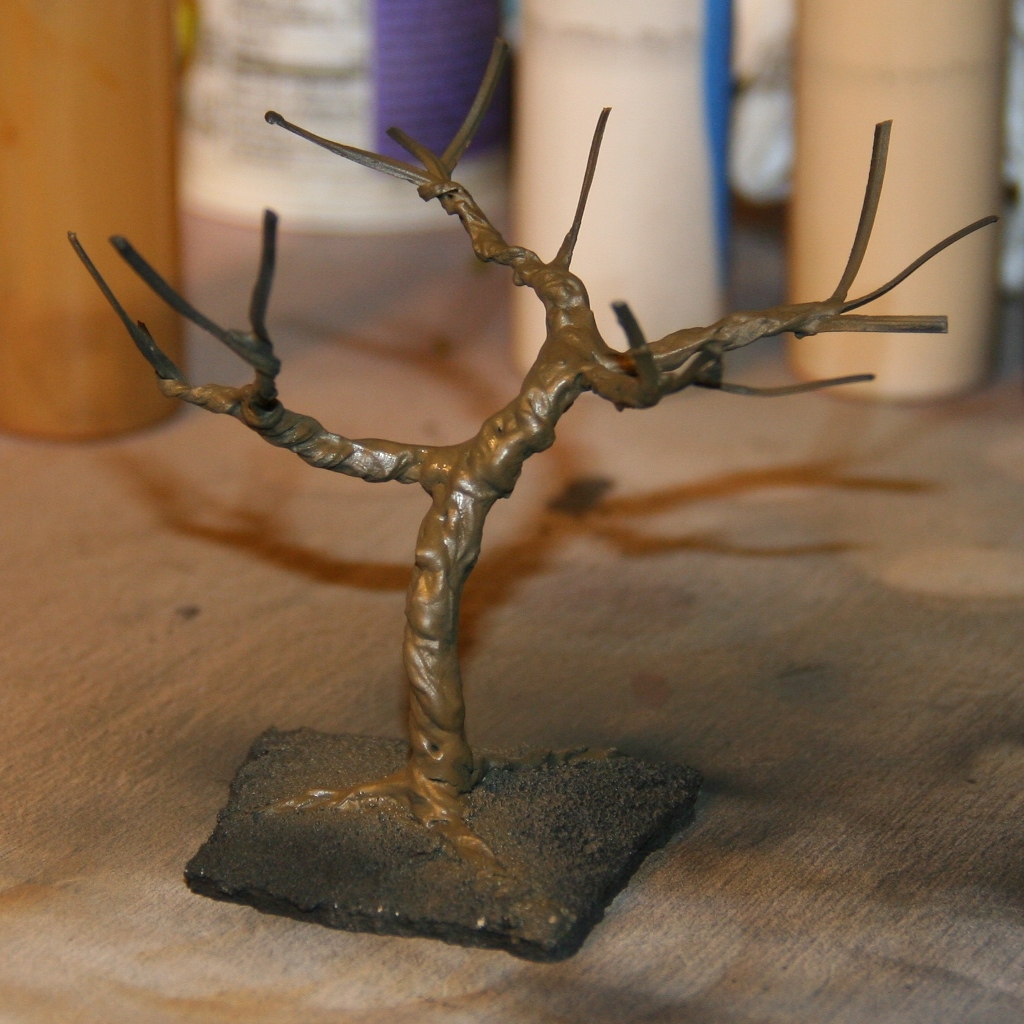
and a tan highlight…

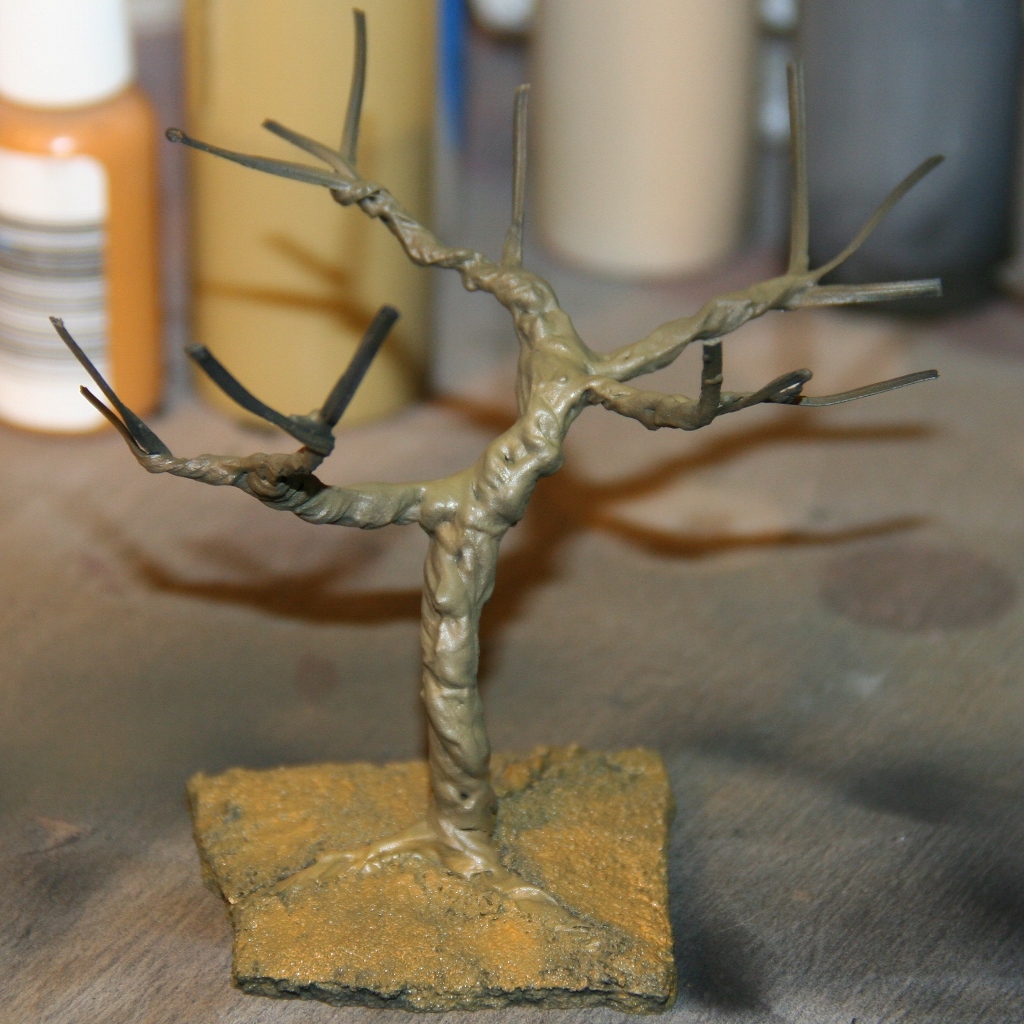
Then some golden brown for the base.
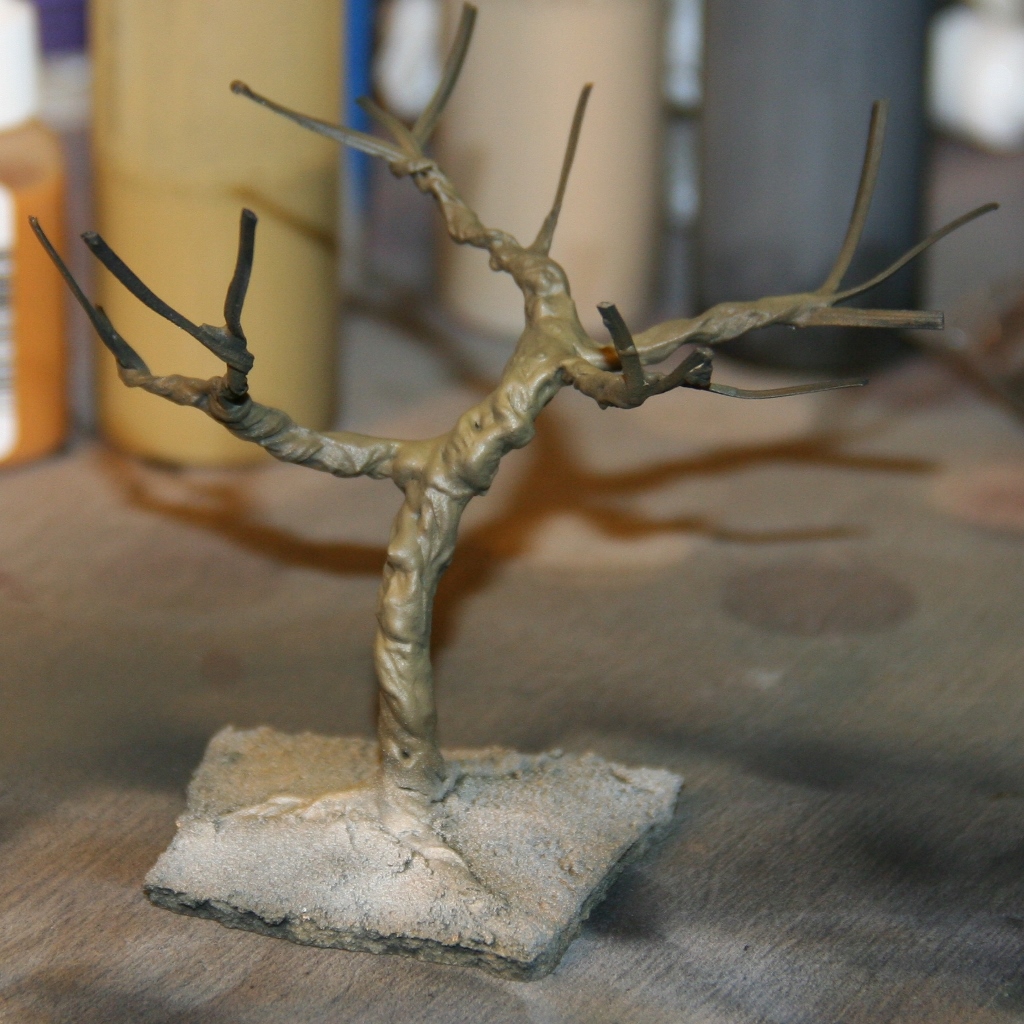
And finally a light tan highlight for the base.
Step #5) Details & Foliage for the Miniature Trees
I don’t worry about getting as detailed, or clean a paint job as I would with most of my other models. Trees don’t require much to look good.
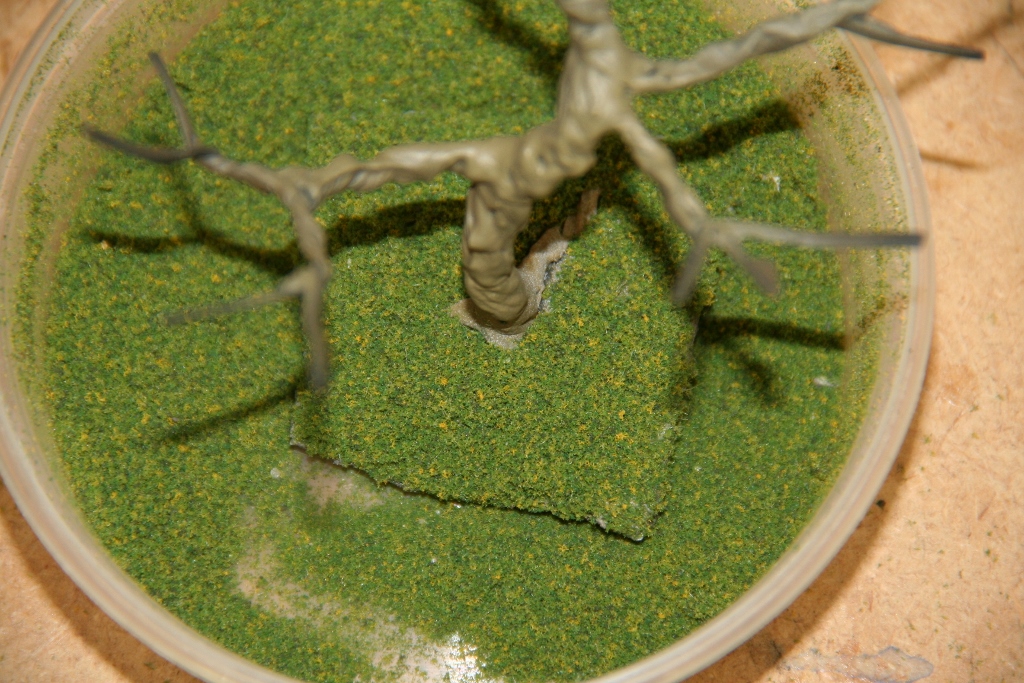
Next I decorate the base using similar methods as I used on my stepped hills. I coat most of the base with watered down PVA glue (Mod Podge in this case.)
I add clumps of static grass.
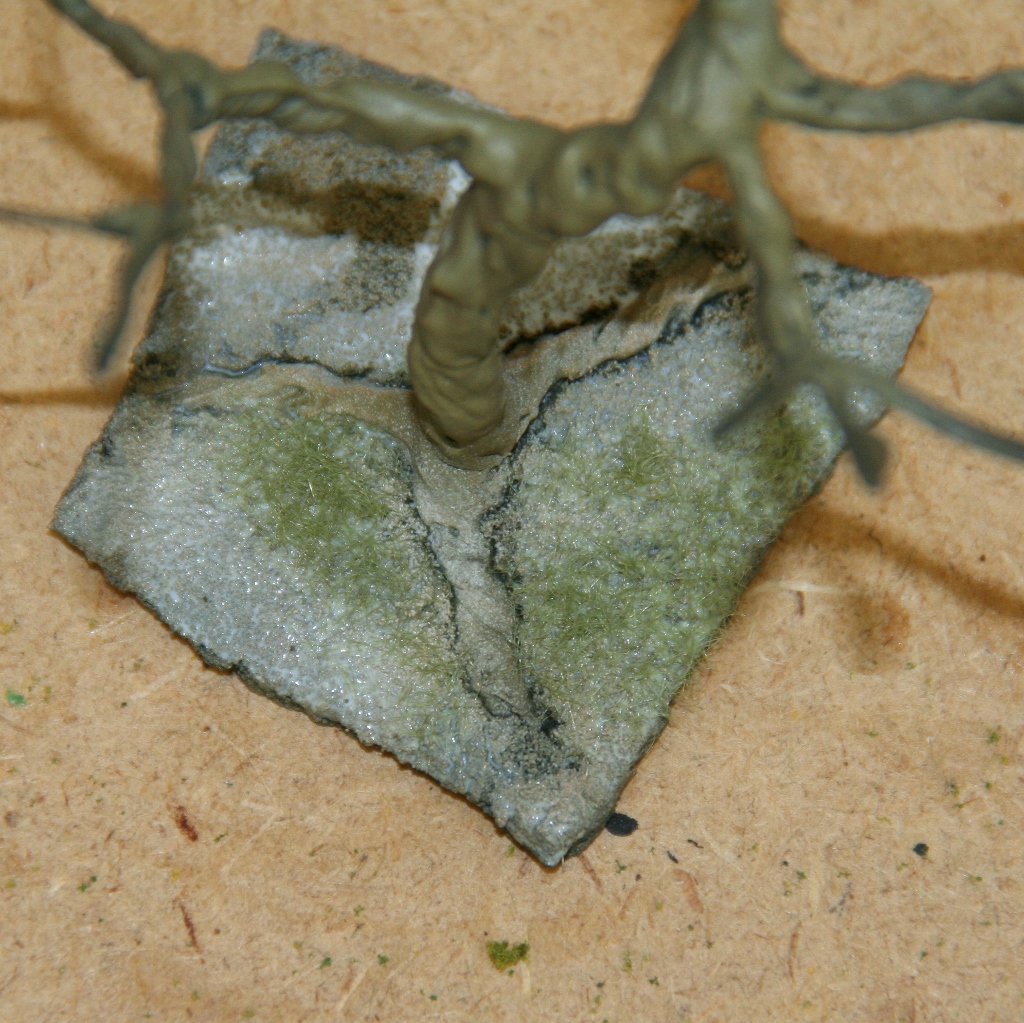
And with the glue still wet, I submerge the base in a small container of green flock. I hold the base over the container and tap it to knock off any excess.
Next I add foliage. I am using clump foliage for this. It’s a lot like flock but in big chunks.
I separate some nice big pieces from the smaller bits.
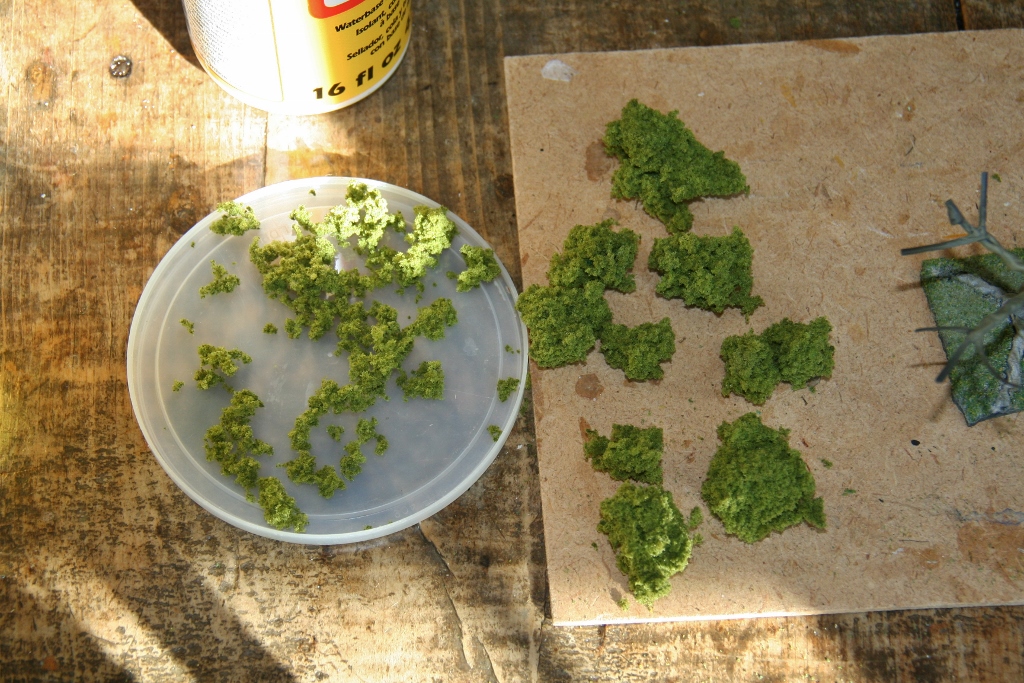
Then I use superglue to attach them to the ends of the branches.
First I glue a piece to the top side, then I add a second piece to the bottom. I haven’t had great luck using PVA for this, but it does work well to attach clumps of the foliage together.
I put a little superglue on the twist tie, then add some PVA to the clump foliage itself.
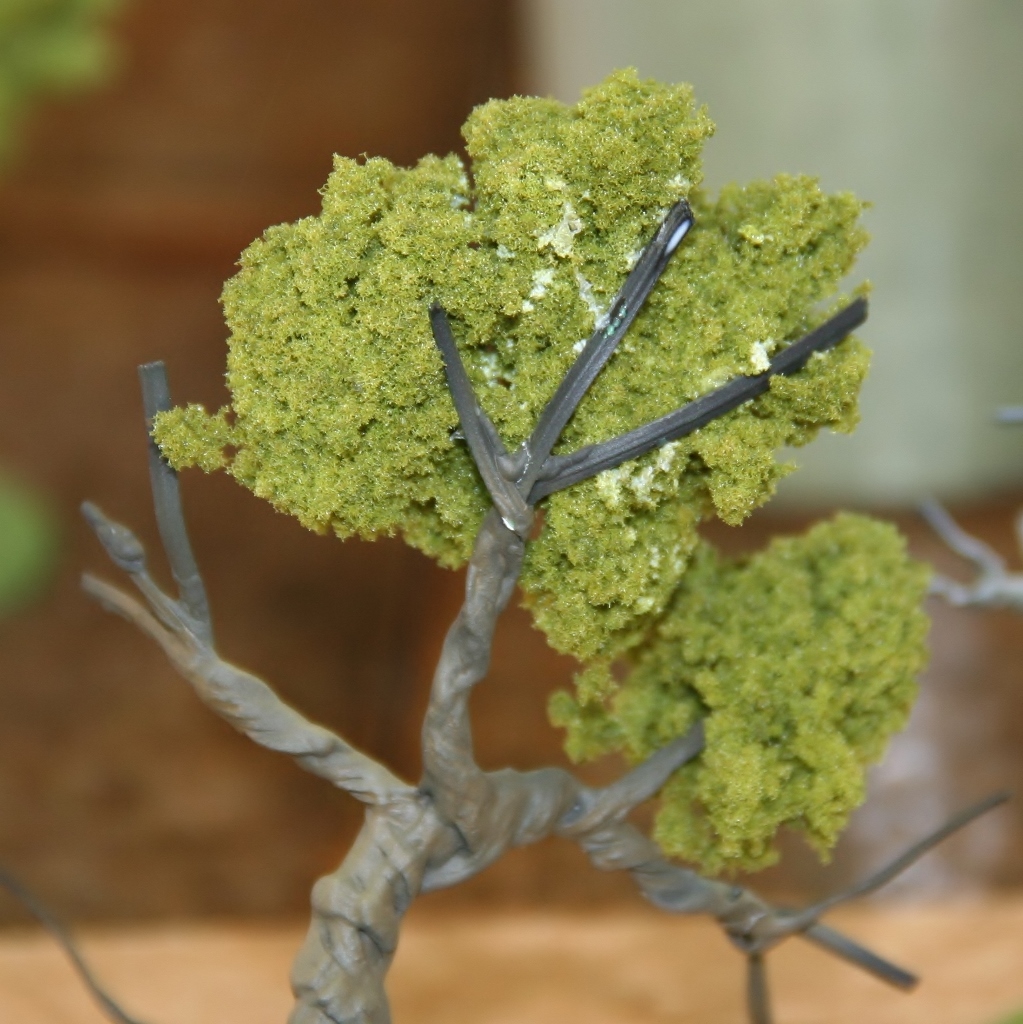
Keep adding foliage to the branches until they’re all full voila, tree!
In some places I’ve used PVA to add more foliage directly to the larger clumps to bulk them out a bit.

After all of the glue dries, I give this a coat or two of matte sealer to protect the paint and help hold all of the foliage together.
Completed Miniature Trees
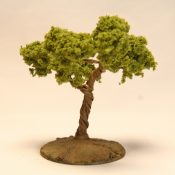
Here’s a shot of the finished miniature tree in the sunlight.


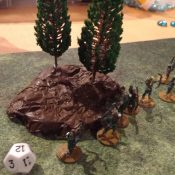
In this last photo you can see the new miniature tree next to the two test models. The middle tree shows how this process looks with leafless trees. The tree on the left was done without coating the twist ties before painting. As you can see the tree still looks good without it, just different. I plan to use a mixture of these three looks to add some extra variety to my forests.
If you’re after more simple wargaming terrain then check out my tutorials on making tank traps and DIY barbed wire. I also have a complete tutorial on a cheap wargaming table with terrain as well.
So, there’s my method for how to make miniature trees easy. It’s dirt cheap and looks decent.
Materials List
Here’s the materials list again to save you from scrolling up.
- Twist ties
- PVA glue (like Elmer’s or Mod Podge)
- Superglue
- Epoxy putty
- Clump foliage
- All purpose joint compound
- And some basing materials
How do you like them? Do you have any ideas to improve the process?
Wargaming Terrain & Scenery Tutorials
Tutorials to help you create a great wargaming table.
- How to Make a Wargaming Table & Terrain Cheaply & Easily - November 6, 2017
- First Rebel Grot Armored Sentinel Painted! - December 19, 2016
- Assassinorum Execution Force Product Review from Games Workshop - May 6, 2015

Great job. Very easy to follow tutorial with great results. I can’t think of anything I’d do differently.
Thanks! Now I just need to make a couple dozen more to replace my old aquarium plants…
This is a fantastic tutorial. Just wow. Your trees look much better then most I’ve seen online.
My only suggestion to improving the process is going to be artist based. Using a bit of variety in the foliage in the tree would change your season, or give you different effects.
Thanks! I agree that different foliage would add some nice variety. I currently only have the one color but clump foliage is available in a wide variety of colors. It would be easy to mix in different shades of green or to add some autumn colors to mix it up a bit. Using different materials such as lichen to create foliage would add even more variety without a lot of extra work.
I will do a little experimenting in the future. If I find anything that I like I’ll be sure to post it.
Hah! That’s awesome. I went all out with my trees, making them from cardboard tubing, but that made larger trees than this (shameless self promotion: http://www.spruegrey.com/wargame-scenery-trees-ii/ ). The twist ties made for excellent trees and I plan on stealing this idea. So ner.
Thanks, loot away!
I’ve actually seen that post before! It’s a great use of cheap materials and a very interesting piece. Giant tree trunks like that are a nice way to break up shooting and movement lanes on a wooded table.
yeah, solid stuffs here.
I gotta start getting a 6×4 foot table together (my Infinity table won’t cut it for FoW and 40k), so I see some projects like this in my future…
Thanks!
If you build them assembly line style these can go together quickly. I like buildings and ruins but trees and hills are much easier for me to slap together.
Hello. Great model making idea. Looks simple and comes out looking like a great tree! Where does one buy vinyl composite flooring? I live up in Canada so I don’t know if it’s different than in the States? Walmart? Home Depot?
Thanks, I’m glad you enjoyed the article!
I believe the vinyl tiles are common so you can probably find them in the flooring section of most decent sized home improvement stores. I know that Lowes and Home Depot both carry them. The tiles I bought were about 1/4 inch thick and did not have any pre-applied adhesives.
Hi. I just purchased some of the tools needed to build miniature trees using this method. I still have some stuff to buy. I was wondering, for using the pre-mixed grout how did you apply it to the base? What tools did you use to apply the grout to the base? A butter knife? sculpting tools? fingers? Please let me know.
I used one of my larger bladed sculpting tools. A butter knife would work about as well. I don’t recommend fingers unless you wear gloves, some people react very badly to skin contact with grout.
How did you apply the joint compound to the tree? What tools did you use to apply it? I am going to be buying a brand of joint compound that is pink but hardens white.
I used a stiff brush to glob the joint compound on and smooth it around a bit. Mine was one of those cheap plastic 1” brushes you find at the hardware store for around a dollar. A spatula or sculpting tool would also work. I think you could achieve different bark textures depending on the tool you choose.
Could you take a picture of your tree(s) with a miniature model in the picture? I would like to see how they look next to each other.
I haven’t played in quite some time but I’ll try to dig these out and get some reference pictures.
When I apply the joint compound to the tree, I will be using a 1″ wide art brush I bought at Michael’s craft store. Will this be suitable for applying it?
I think a brush like that will work well enough. That’s a good size to use. If the bristles are too soft you can thin the joint compound with a little water or you could apply it with a popsicle stick/ butter knife/ spatula then use the brush to smooth it out. Different application methods could give you different textures so play around a little until you find what you like most.
Hi. I bought some clump foliage from Woodland Scenics but I think it is too small chunks to work with. When you say clump foliage in big chunks, did you buy the largest chunks from Woodland Scenics? There is a large size but I did not buy this size. Can you please let me know as I may have to reorder my Woodland Scenics Foliage clusters.
I’m not really sure what size I have but there’s a range of sizes mixed in the bag. The biggest ones are around an inch or so. Larger pieces are going to be easier to work with but if necessary you can glue smaller clumps together using PVA glue (such as Elmer’s or Modge Podge.)
Great tutorial. I’ve made similar trees using green (round) wire instead of the garden ties. The biggest challenge is finding a material to smooth out and bulk up the trunk and branches. Joint compound seems like it would be a bit fragile. Although materials and adhesives can change a bit, this is definitely the way to make trees.
I’ve used joint compound in a few things and you’re right in that it can be fragile. I’ve used it on some terrain in the past and it’s been good but does tend to chip after a few years of constant use.
Thanks!
I’m sure the round wire works nicely, the single strands probably make better looking branches than the flat garden tie.
There are definitely other options for finishing the bark. I use joint compound quite a bit on terrain because I always have some left over from whatever home improvement I’ve done most recently. So far it’s held up well on my hills through a fair amount of use. I usually use either gesso (which contains some adhesives) or interior latex primer. I think both add a little durability. I also use interior latex to paint most of my terrain. So overall my terrain is a little more construction grade than my miniatures. You could also fortify it with a coat of pva glue before painting.
Vinyl spackle might work well. I think it’s a bit flexible when it cures so it might be less prone to cracking and chipping. Paintable silicone would be very durable; you could smear it on and use a damp stick or brush to smooth it into shape.
Or you can just paint the wire. The tree on the left side of the last picture in the article was done this way. It saves a step, won’t chip, and still looks decent.
I made these trees for my son years ago. I used a thin wire cut to length (same as your twist ties). Instead of coating the tree trunks I used floral tape (which is inexpensive and easy to use) and wrapped the trunk and branches. The floral tapes is very thin so I had to wrap several times, pulling tight. Gave a really cool effect and easy to paint and highlight. Just a suggestion that I thought you might like to consider.
Great idea. The floral tape has a bit of texture to it too that helps sell the effect.
If any one would ask me how to start in the miniatures wargames hobby my first piece of advice would be consider the scale based on how much your willing to spend on trees!
Trees sold in shop’s cost a fortune and are awful.
The other thing to consider is storage! Any European theater you choose means your gonna need hundreds of the suckers.
In a jungle forget about it.
So this tutorial is probably the most important gift anyone can give the potential wargamer in the set up of a table.
Things to consider in the construction of a vaguely realistic Forest.
In reality a man is 28/32mm tall the average tree is gonna be about 12inchs high! And have a canopy of at least 8inchs across! Obviously this is to much for the average gamer my self included.
My point being is your trees can’t be too big.
A forest is an invasion! From the ground in to our world the trees are at war with each other their objective is grab as much light as possible. Clump your tree’s together in small group’s of 2 to 3 trees together on one base. Even in the middle of a dense forest you will have fallen trees that will be quite happy. These fallen trees will make great cover for your men.
Any forest near man will be farmed at least in any medieval/fantasy setting.
In game turns this will be coppiceing! A coppice is a man made clearing which promote’s bio diversity. The benefit to man are two fold, first and most obviously is lumber.
Secondly are long thin shoots that spring forth from the stumps, for man this has number of uses from wicker basket’s to fence’s. Gabions are made from these shoot’s and filled with earth. So on the board this can be represented be a group of tree trunks in the middle of your forest.
A coppice is part of a larger group of coppice’s which are part of a 14 year rotation which will be dotted around any “managed” forest which will range from bare stumps to stumps looking something looking like a bush.
Anyway how much of this is practical is up to you.
Its amazing