Non-metallic metal (NMM) can be a very overwhelming technique to learn. There’s a lot of considerations to be made and choices you’ll be faced with.
Today I want to show you how easy it is to understand the basics of NMM. Using this basic understanding you’ll be able to paint your first piece quickly and easily. With some more practice you can step up your painting game and create some beautiful pieces.
The Basics of NMM
Before we can begin a tutorial on NMM we have to cover what NMM is. Non metallic metal is a way of painting a metallic area using non metallic paints.
This is a technique is used by traditional painters where there isn’t a metallic paint available. It’s also used in comic books for the same reason – no metallic inks. Oh, and video games. There’s no such thing as metallic digital paint ;)
To create the look of metal there’s one trick – contrast. Metal is highly reflective. Where metal catches light it will shine very bright, often to a white, and where there is no light the metal will be very dark, nearly black.
The trick with creating the contrast is in putting your lightest colors next to your darkest colors. Metal will jump from very bright to very dark with little to no transition.
Another thing to consider is that light will skip across a reflective surface and create multiple highlights. This can be very tricky to learn, and I’m admittedly not a pro here, but the concept is simple.
Metals that are less reflective won’t have as extreme of a contrast. If you wanted to paint a battered and worn metal then you wouldn’t create as strong of a contrast.
How to Highlight NMM by Kujo Painting
I’ll share with you a video that started me down this road. Kujo Painting has a great video that goes over how to highlight NMM and covers in more detail the things I was just discussing.
Kujo explains the basics, shows how light reflects of different surfaces, and gives examples.
If you’re looking to learn how NMM works, and I suggest you do, then do check this out. It makes everything you’ll see below make more sense.
Why Paint NMM?
I can only speak for myself, but I’ve seen this said from other painters as well, and that being the reason we enjoy painting NMM is the control you have with it. Let me explain.
If you paint with a traditional metallic paint then you have very little control over the reflectiveness of the area. Metallic paint is inherently reflective. Even if you wash metallic paint you will find it still has a reflectiveness to it.
Have you noticed that if you highlight metallic paint that it can be hard to see that highlight? You have to move the model in certain ways to see what you’ve done, be it shading or highlighting, because the area is just bouncing light.
When you paint with NMM you are controlling exactly where the light is because you aren’t using metallic paint. The light bounces where you told it to bounce and the shading is exactly where you put it.
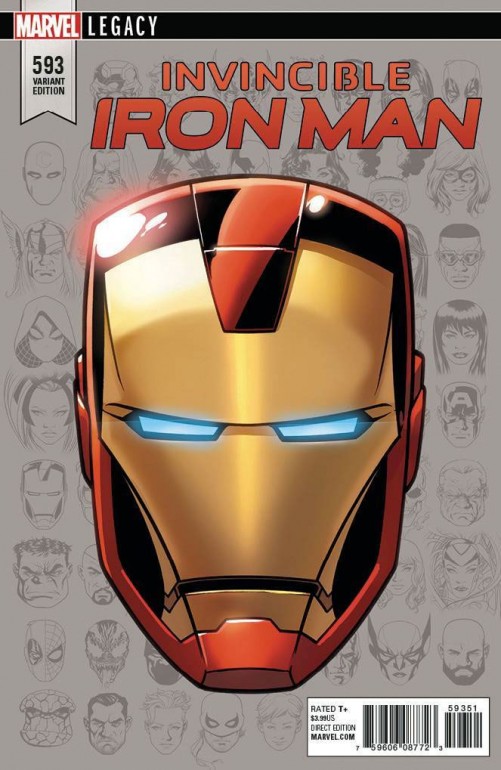
Take the image above, which is one my favorite miniatures painted with NMM by Darren Latham. Darren put the shading and highlighting exactly where he wanted it. If you turn that model at any angle, with any varying degree of light, then those highlights stay where you see them and shading remains as you see it.
The other thing I like with non metallic metal is that you can play with the colors more. You can use blues in your silvers to give a cooler look to the metal. Maybe you use some reds in your golds to give a warmer look. Instead of shading silver with grey you instead use browns to give an earthy tone.
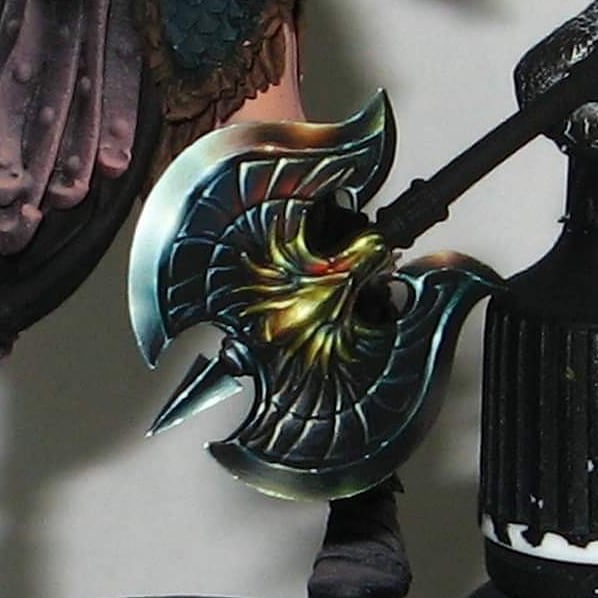
With that above axe you can see how the painter reflected nearby elements onto the surface, used cool blue tones to reflect the sky, and used warmer tones below for the ground.
These are all things you have full control over when you paint NMM. You can pull it off with traditional metallics but it’s much, much harder to control and have the camera capture your work.
Disclosure: Some of the links below are affiliate links, meaning, at no additional cost to you, I will earn a commission if you click through and make a purchase. The commission earned helps maintain this site.
Quick & Dirty NMM Tutorial
My style of painting is gritty. There’s a lot of techniques that I enjoy, namely blending, where I don’t want to spend a great deal of time doing it. While I enjoy painting, I can reach a point of frustration where things aren’t going as quickly as I’d like. I’m not sure why this is, as it’s very counter to my personality, but it’s there.
This has led me to a very dark and gritty style of painting. I won’t spend hours blending a single blade edge on a sword or blending out some OSL work so the transition is seamless.
My approach is faster, uses some tricks, and gets results that I enjoy. I want something that looks like I painted, has my style, and doesn’t look like something everyone else is doing.
Sorry for the preface here but I just wanted to be clear with what this is. This isn’t a tutorial to teach you the absolute most perfect blends for creating a vibrant, eye-catching NMM. This is for those who want to start learning NMM, get the basics of NMM, or just learn some shortcuts for NMM. This is my style of painting.
Immediately below is the quick version of painting NMM. If you continue down you’ll see the steps explained with images.
How to Paint Steel NMM
Time needed: 5 minutes
I’m going to quickly paint this choppa (sword). I’ll be focusing on keeping everything relatively grey on this instead of going into more pure colors for a vibrant weapon. I want something dark and gritty, not super bright and shiny.
I could use blue-greys for highlights if I wanted something shinier. Also, I could use browns for shading as well to give it an earthy and dirty look. The fun part of NMM is that you have complete control over the color palette, so just experiment and have fun.
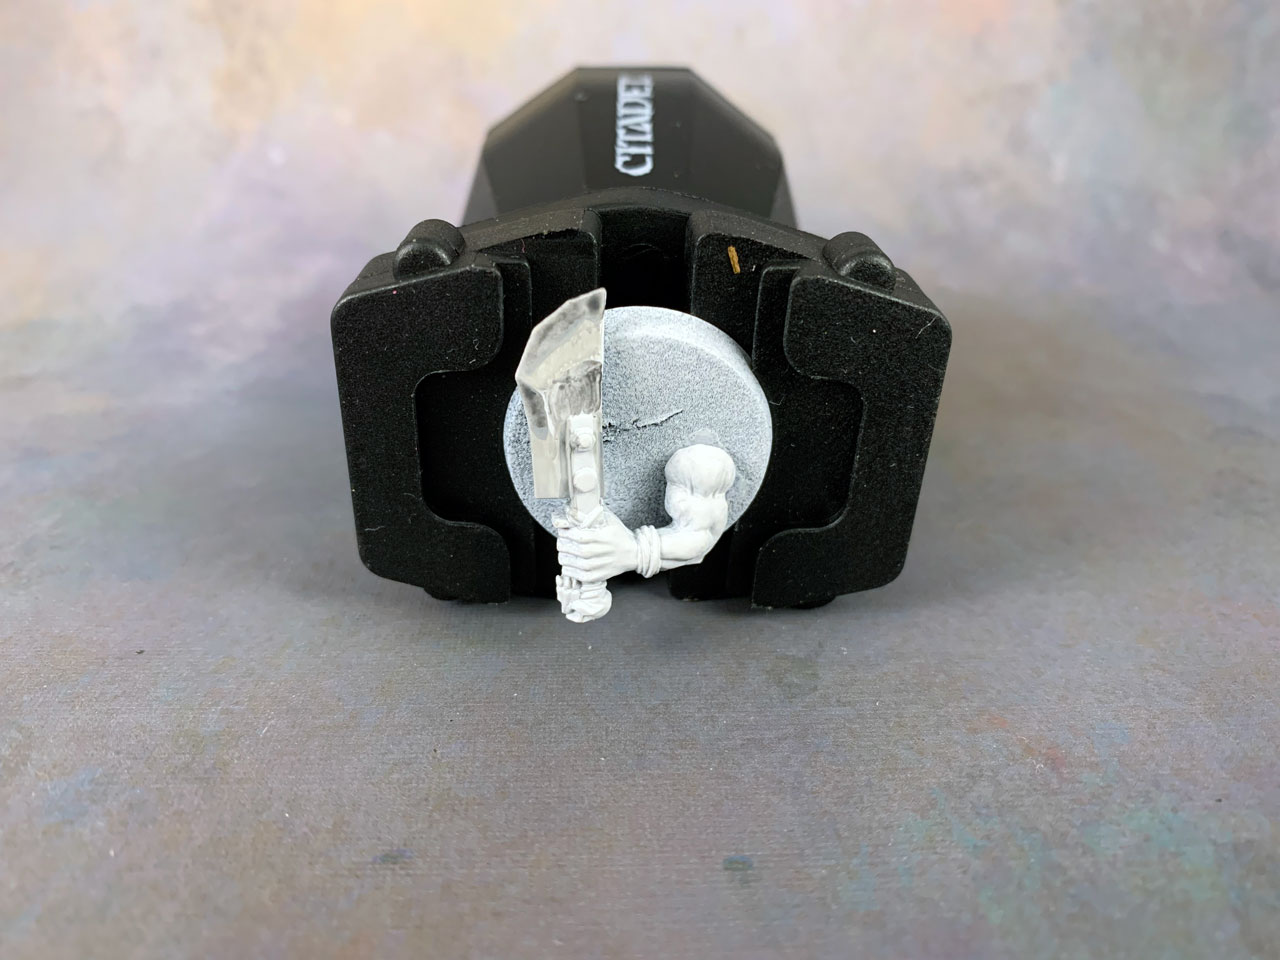
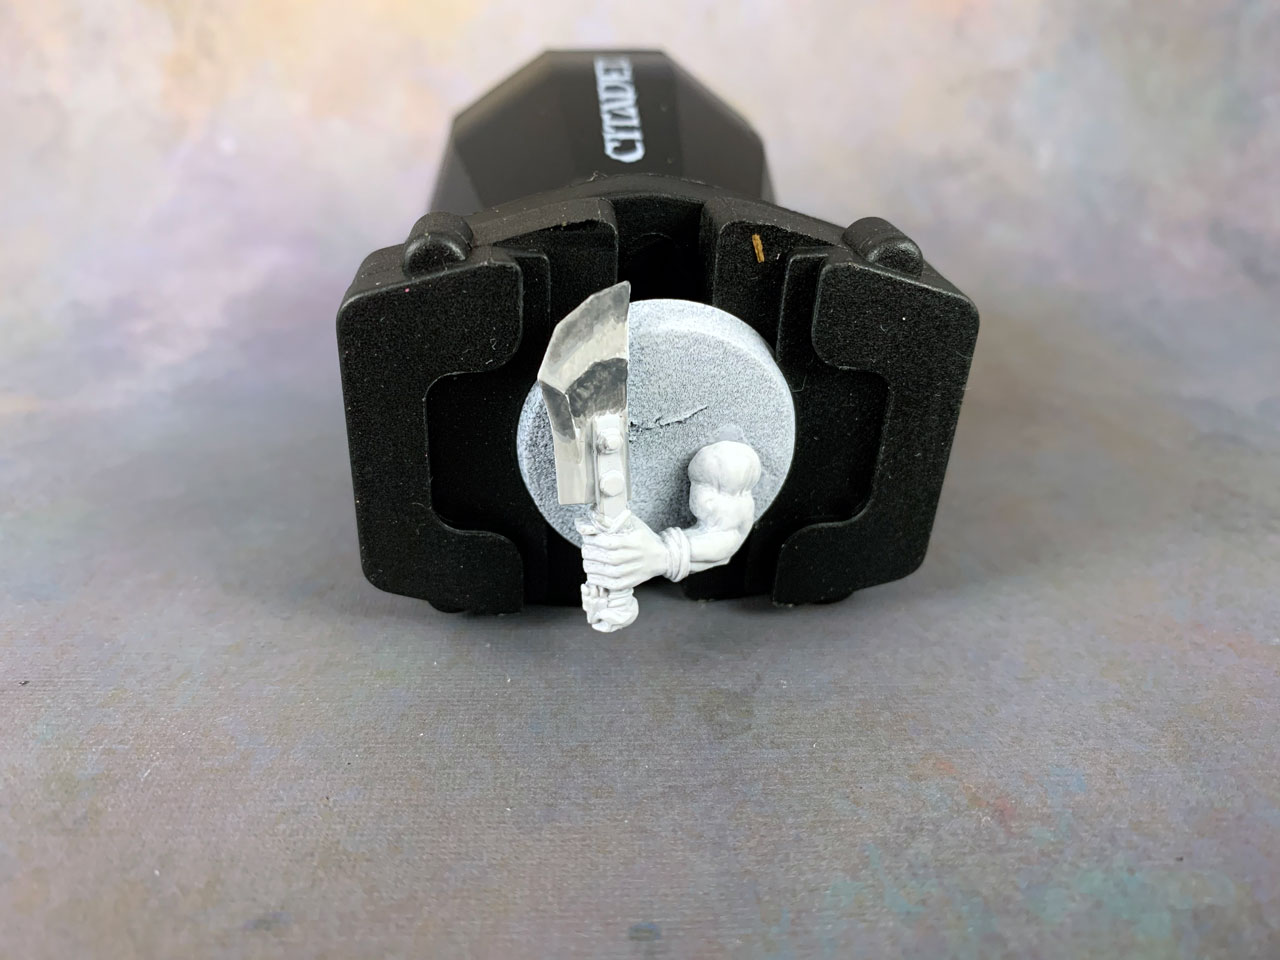
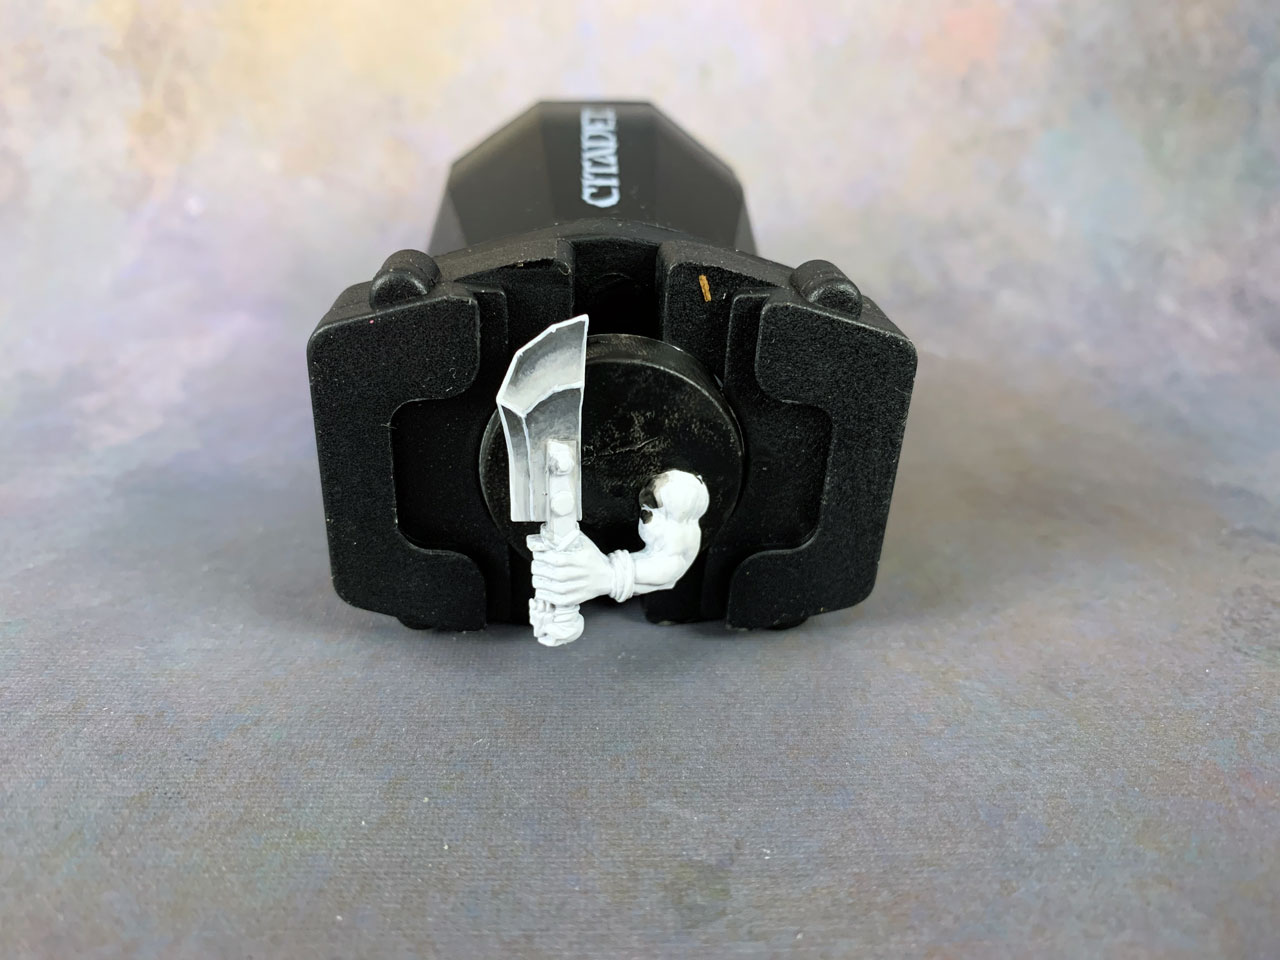
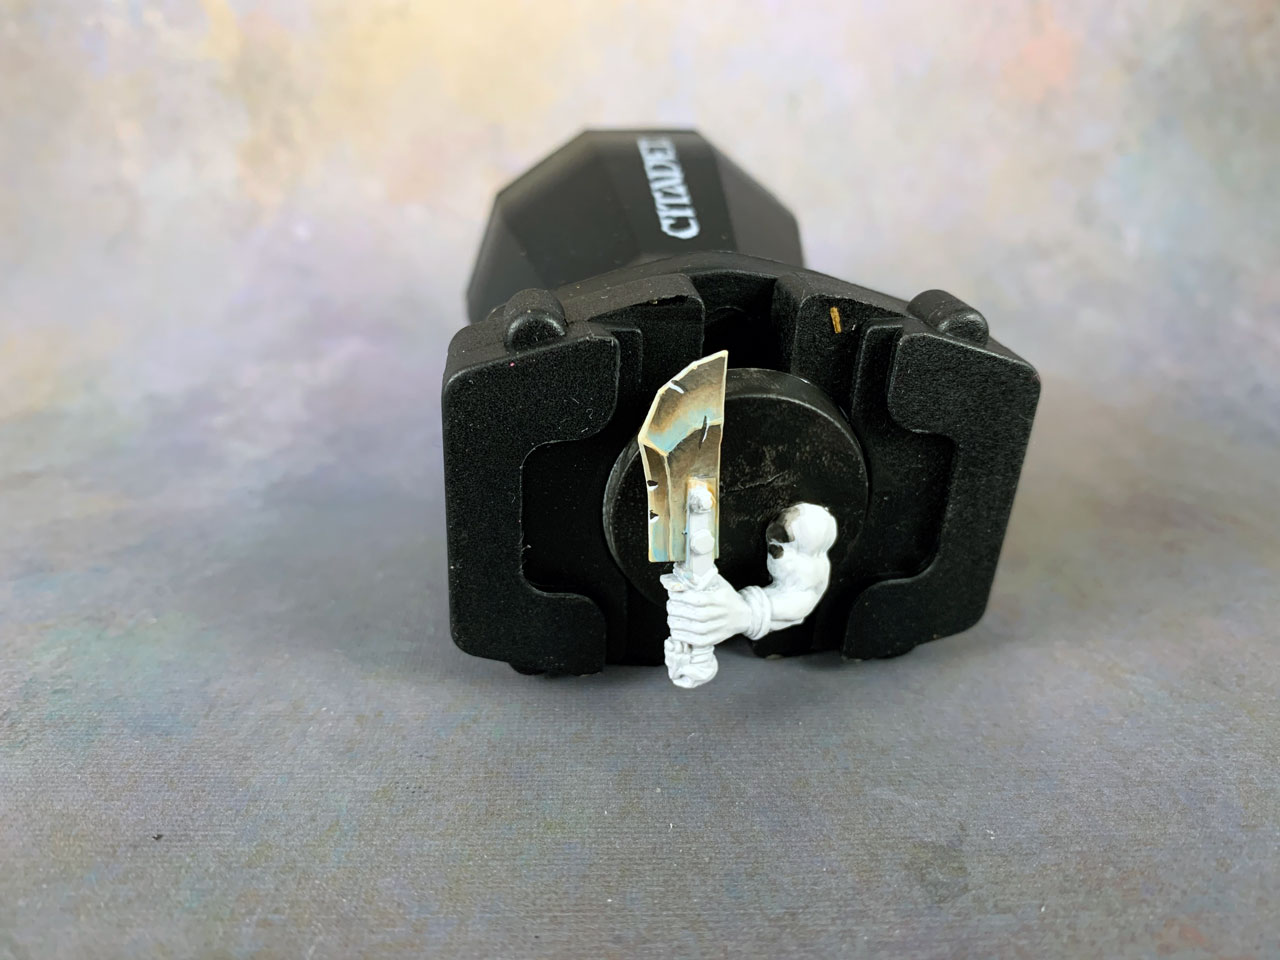
- Sketch the Colors
I like to start by sketching the colors where I feel they should go. I drop in the dark shadowed areas and the lightest areas. Oh, I’m working over a white primer. I just find it’s way easier for what I’m doing.

It looks messy at this point and that’s fine. I want to make sure my transitions are going to look right before I commit to blending it all out.
The dark grey is Eshin Grey and the lightest grey is Grey Seer.
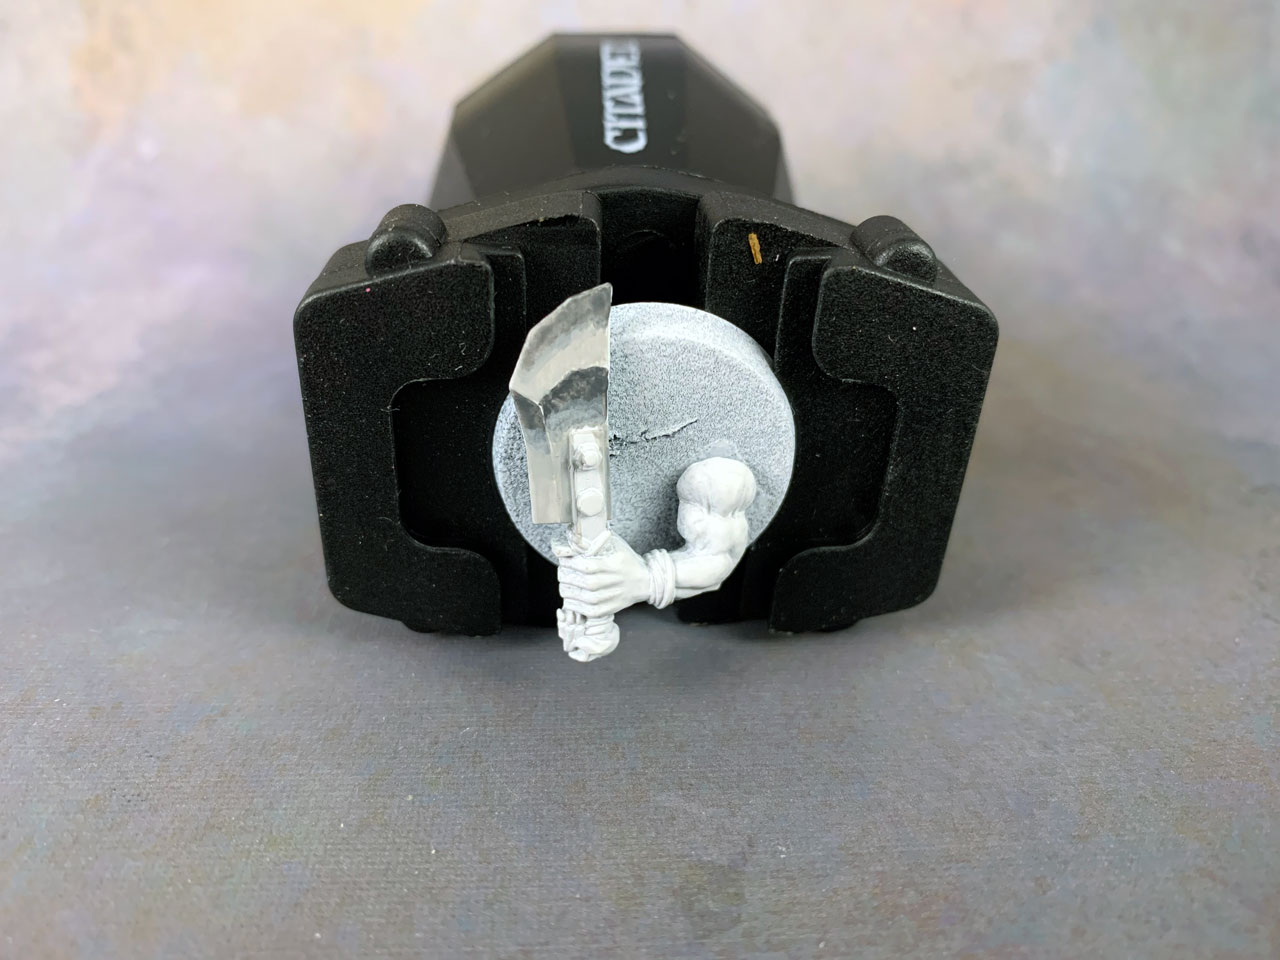
It’s important for this to work that the darkest areas are next to the lightest areas – that’s NMM. - Darken the Shadows More
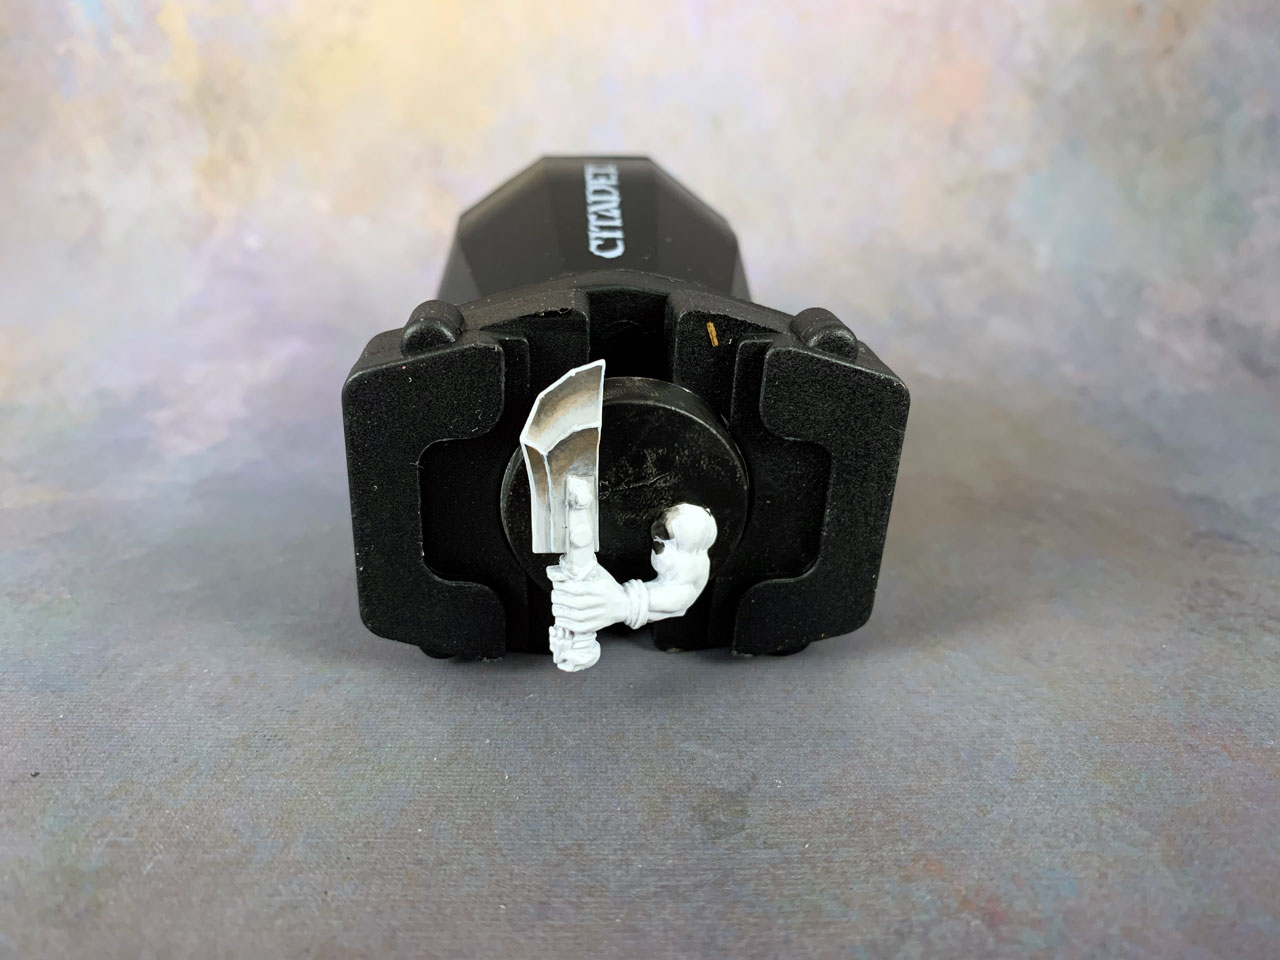
Next I start smoothing out the darkest areas to get a solid color there.
- Refine the Mid-tone
I then work my mid-tone color (Administratum Grey) to start some messy blends on that darkest grey.
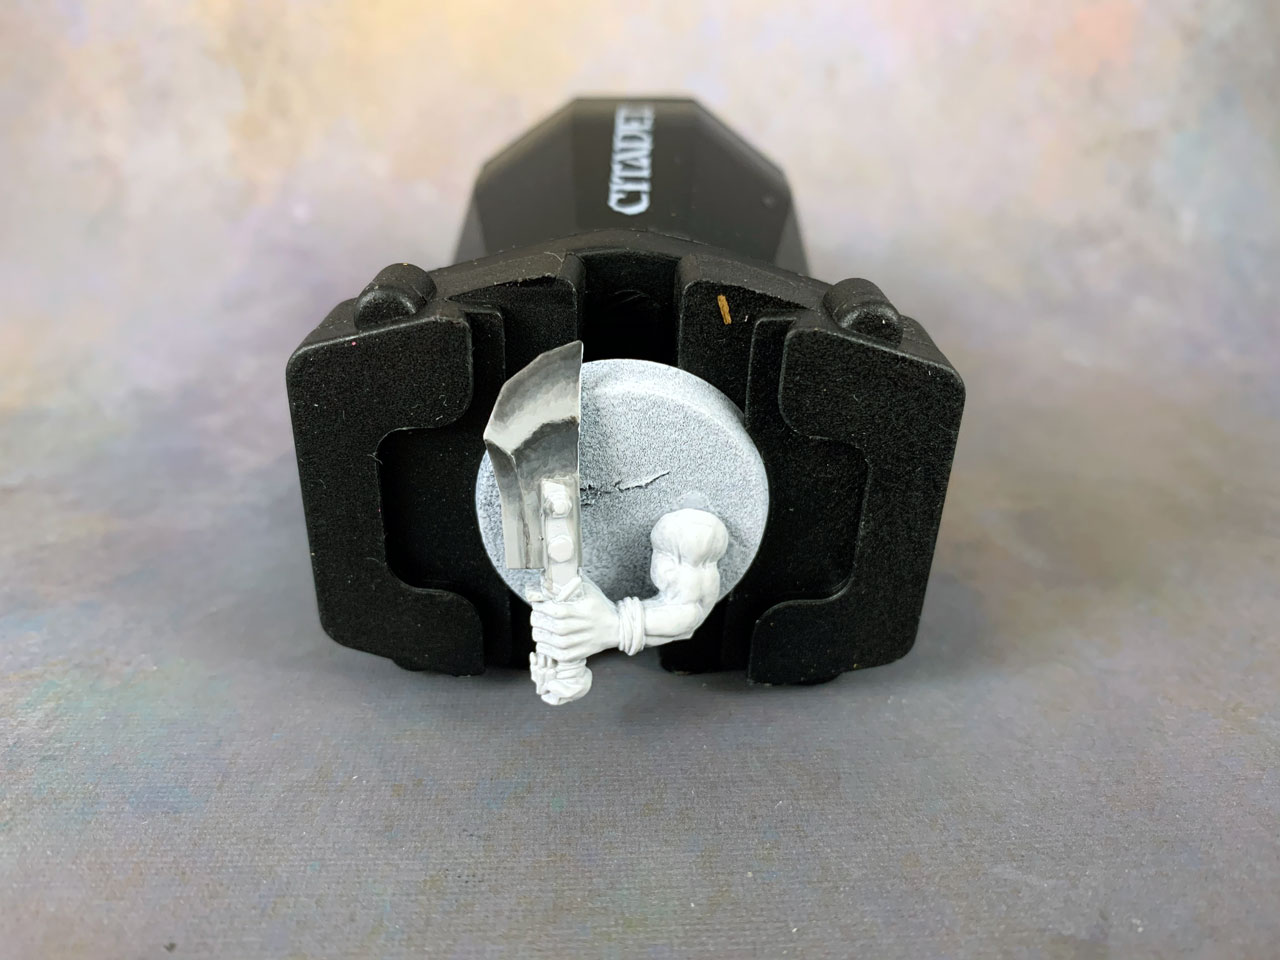
Again, still messy and that’s fine. - Strengthen the Light
Now I lay down a more solid coat of the lightest grey and things are looking like I want.
- Blend the Transitions
At this point I spend some time blending the transitions to smooth them out. It’s just thin layers of paint over and over until I’m happy. I’m not looking for perfection here either, just something that’s a good tabletop quality.
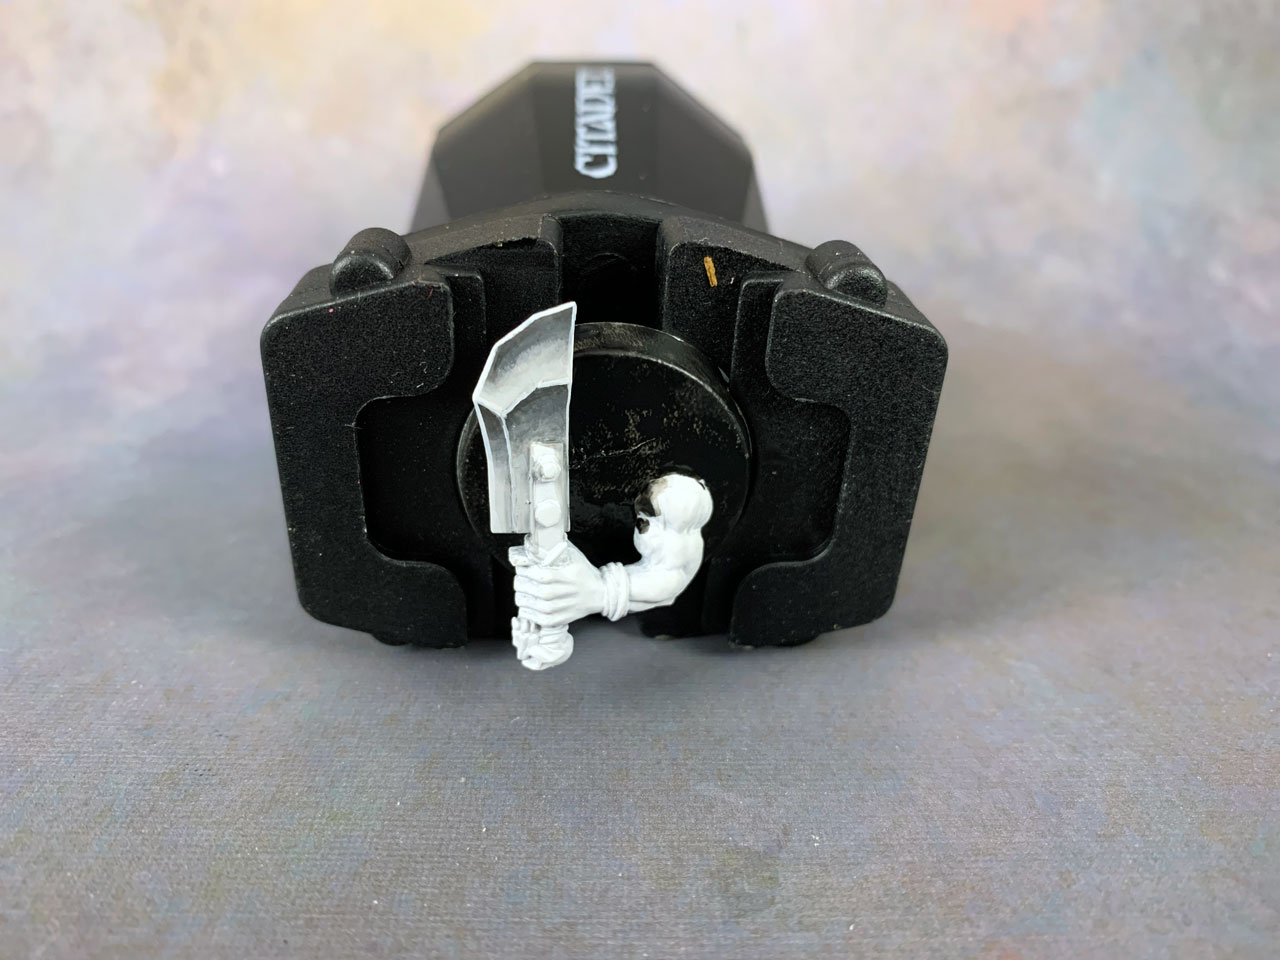
In this step I also blended in a little black to darken some areas of the Eshin Grey even more. - Do Some Edge Highlighting
If you were aiming for something more realistic, then the highlights wouldn’t be entirely necessary in every place I put them. You would focus on the top areas that catch the most light.
However, I like a more cartoony look, something with more contrast, so I tend to highlight most edges.
For the highlights I use Corax White. It’s brighter than my previous greys, so it will show up next to the Grey Seer, and also create big contrast against the darkest areas. - Add White Highlights
Lastly, I take a pure white and hit a few points to create even higher contrast and a reflective look in spots. The final shot is the same but zoomed out to a more normal viewing distance.

The End
That’s it. That’s my quick and dirty way to do NMM. It’s a good tabletop standard without a ton of work. To take this up a level you just need to spend more time on the blends.
Bonus: Taking it Up a Notch
I talked about using other colors in the NMM process so I wanted to show that a bit.
I took the sword and blended some dark brown (Mournfang Brown) into the dark grey areas. You can already see how it changes the composition.
Taking it a step further, I washed it all lightly after with sepia to give it a rusty, dirty look, perfect for Orks.
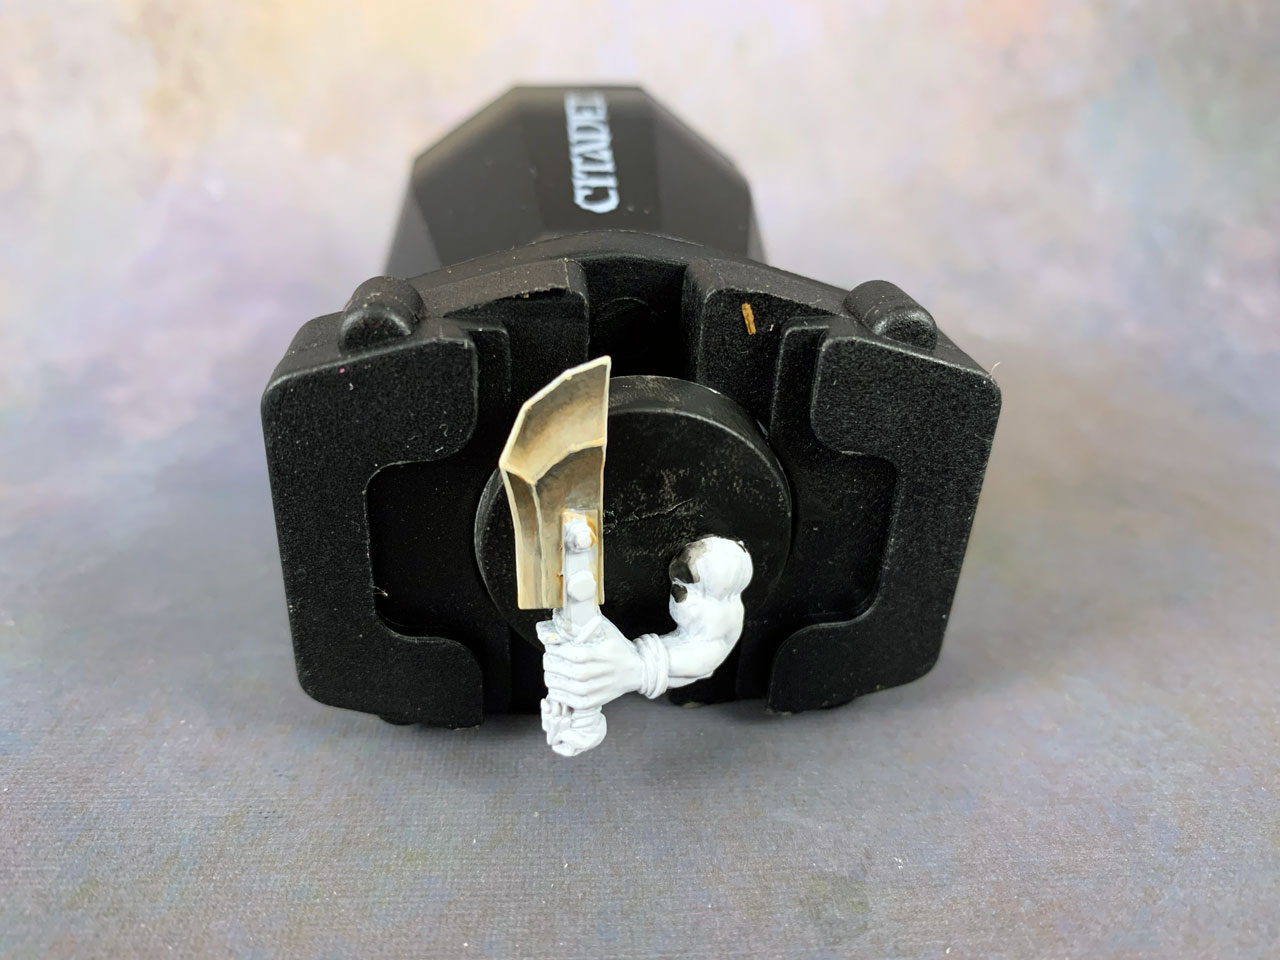
The sepia wash also did a great job smoothing out my blends earlier. Glazes and washes are great for this.
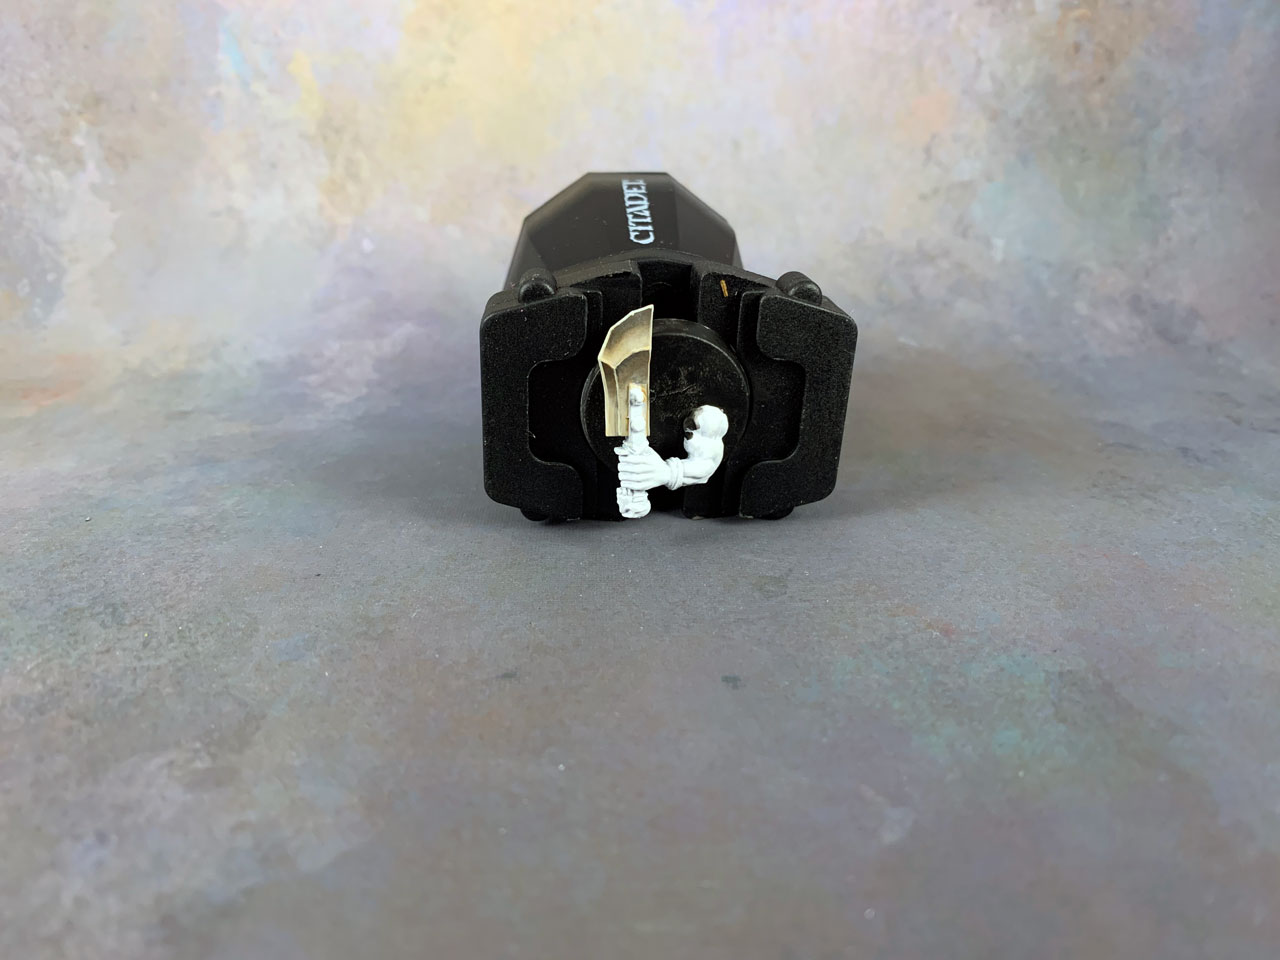
I decided to play a bit more to try out something I haven’t done, and that’s to create what’s called SENMM (sky/earth non metallic metal). The idea being, as the name implies, to reflect the sky and earth in the metal.
I took a light blue and glazed it around the lightest areas. Nothing fancy, just a quick touch.

Doesn’t look too bad and just shows you how some subtle glazes can really change the look.
The last thing I did was to add a few chips in the blade and a scratch on the sword.
Overall a pretty good looking weapon I think.
Video
To wrap this section up, if you prefer to see a video, then here’s a great one by Minotauro Studio. It’s my favorite NMM video I’ve seen.
Gold NMM
Doing NMM gold is no different than the silver I did above. The colors used is the only change to the process.
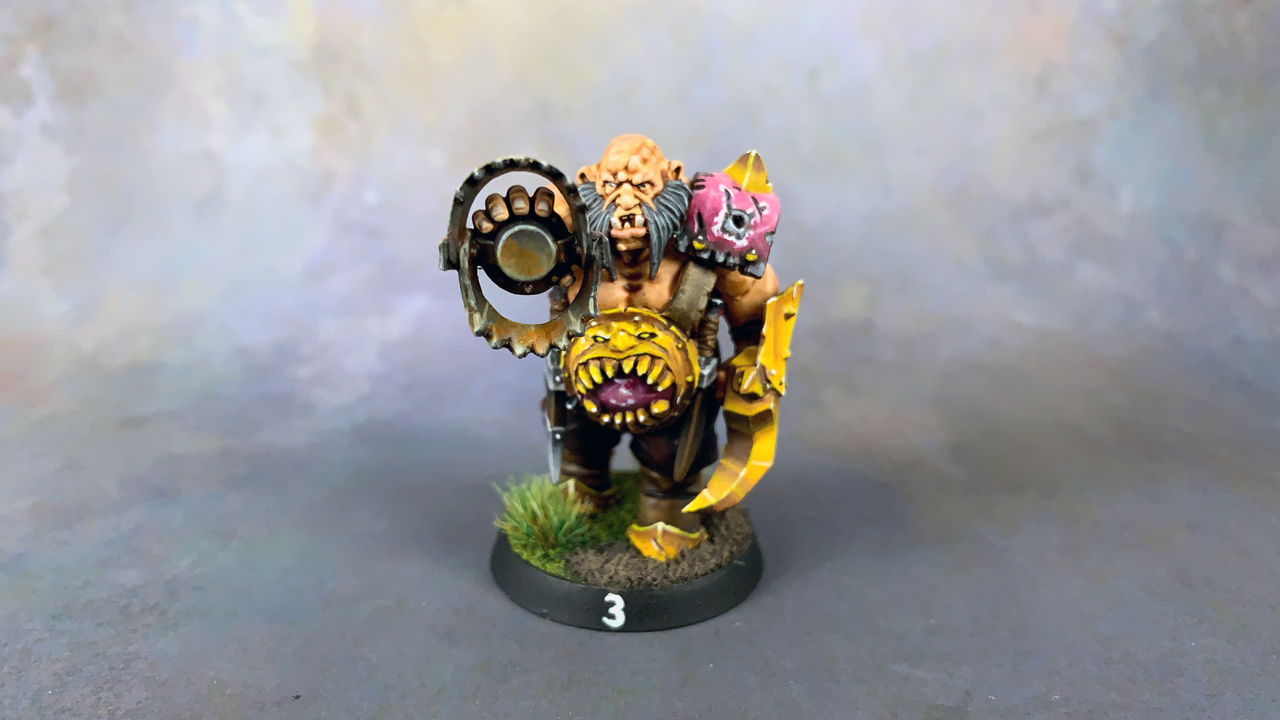
NMM Gold Examples
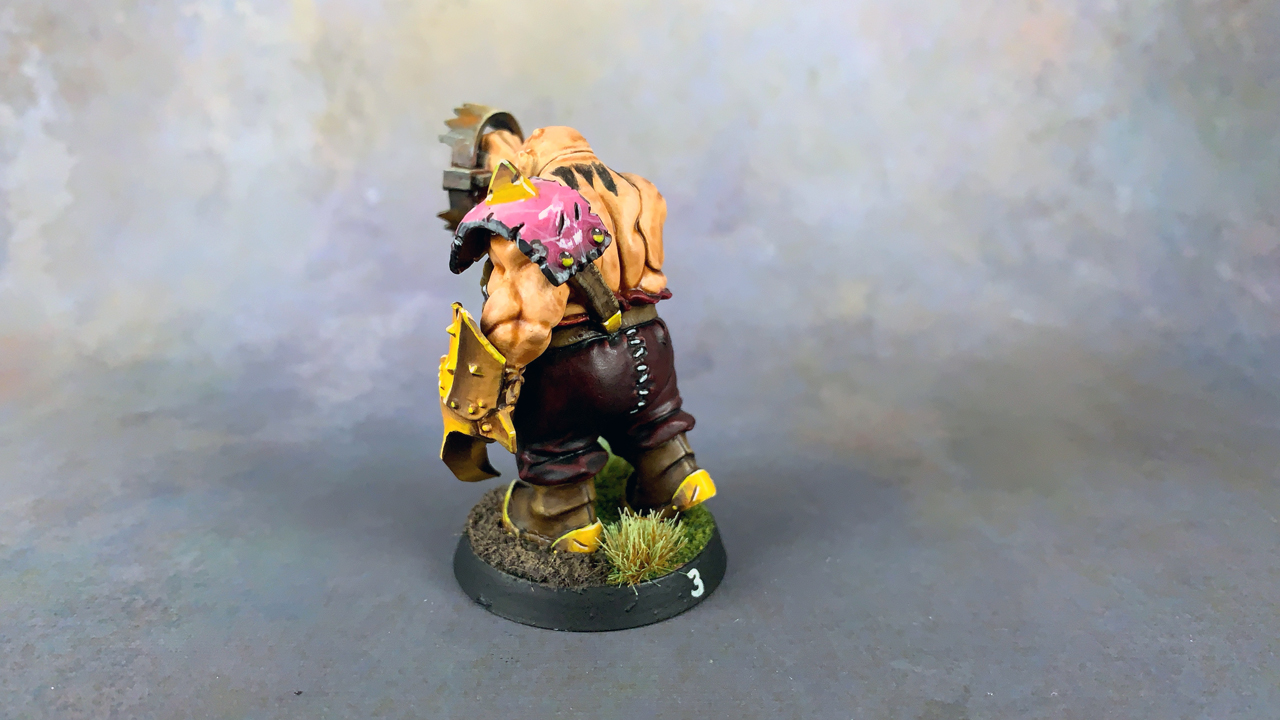
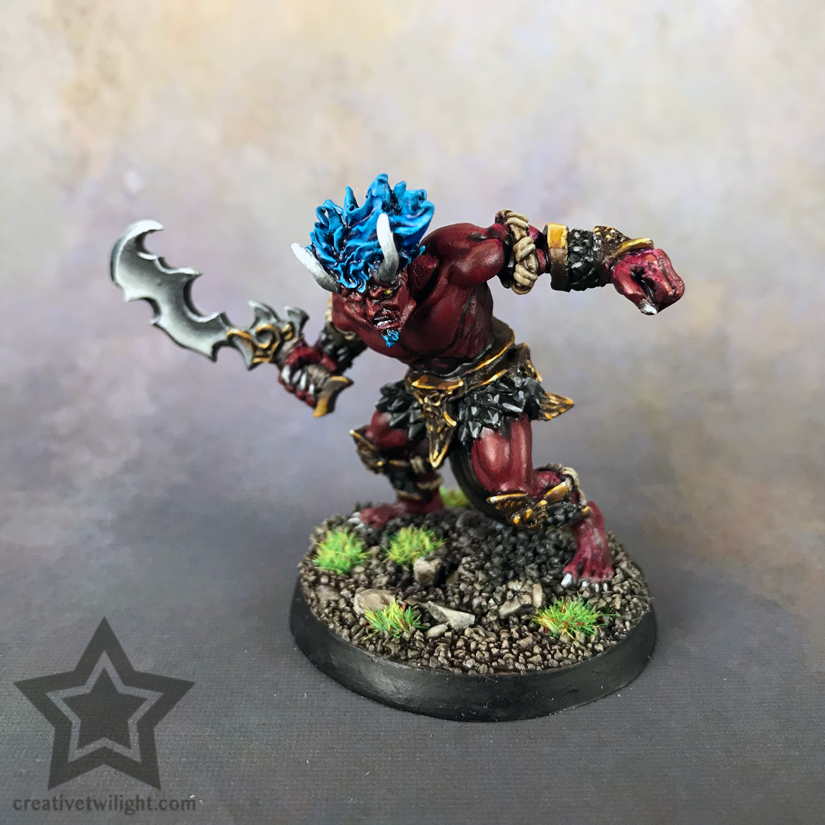
I recently painted up some Ogres for a Blood Bowl team and worked on gold for the first time. The colors I used are rather vibrant, which is what I wanted to play off the pink armor I did.
Again, it’s the same stuff from above but applied on a larger scale with different colors. It’s also worth noting that I spent more time blending the NMM on these Ogres than the tutorial above.
My formula for that gold was:
- Rhinox Hide for the very darkest areas.
- Mournfang Brown for the majority of the shading.
- Tau Light Ochre for the mid-tone.
- Most of the brightest gold is Yriel Yellow.
- Flash Gitz Yellow where I really wanted to push the brightness.
This isn’t the most realistic looking good but suited my needs. A more realistic gold would work more in warmer yellows and browns, not so much the golden yellows as I used.
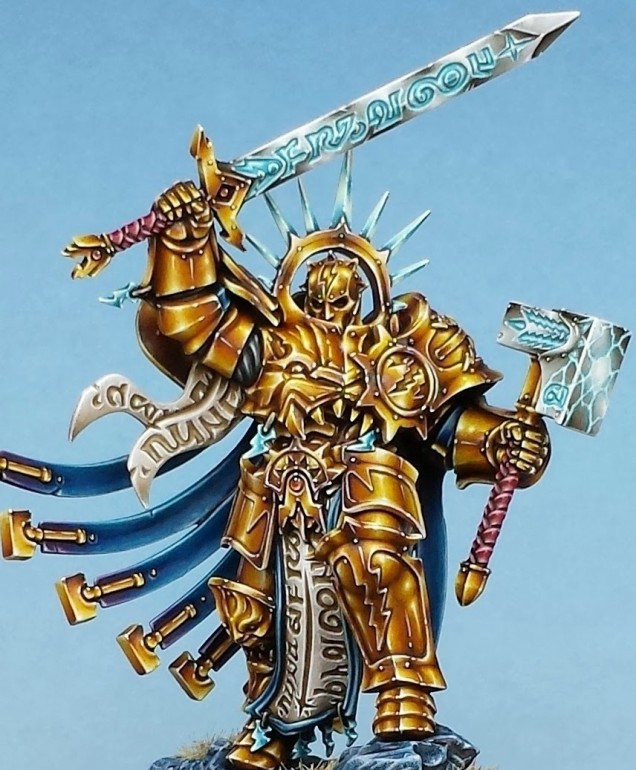
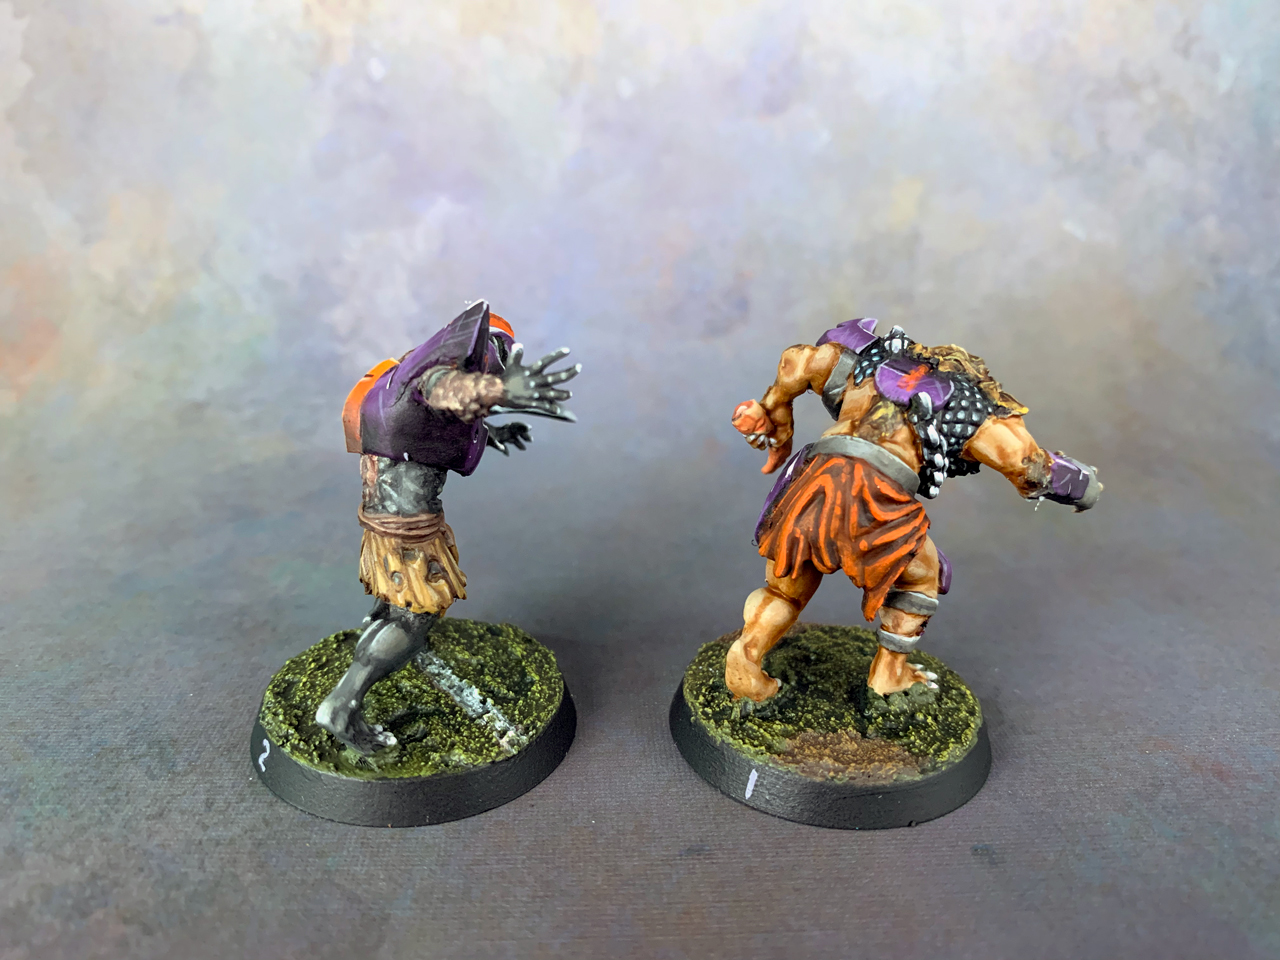
Here’s a more recent example with a bust I painted. This gold was done almost identical to the method above.
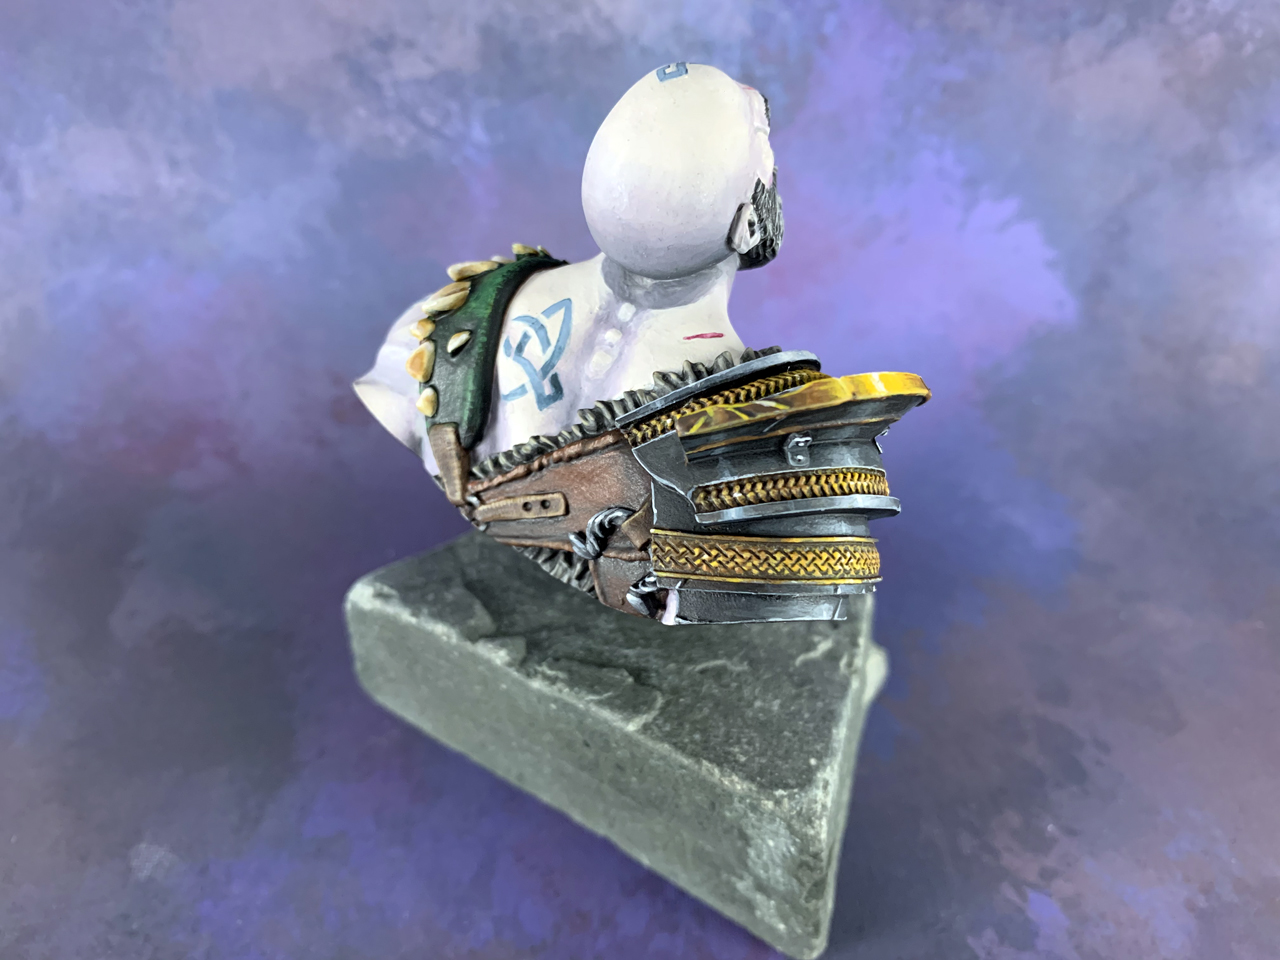

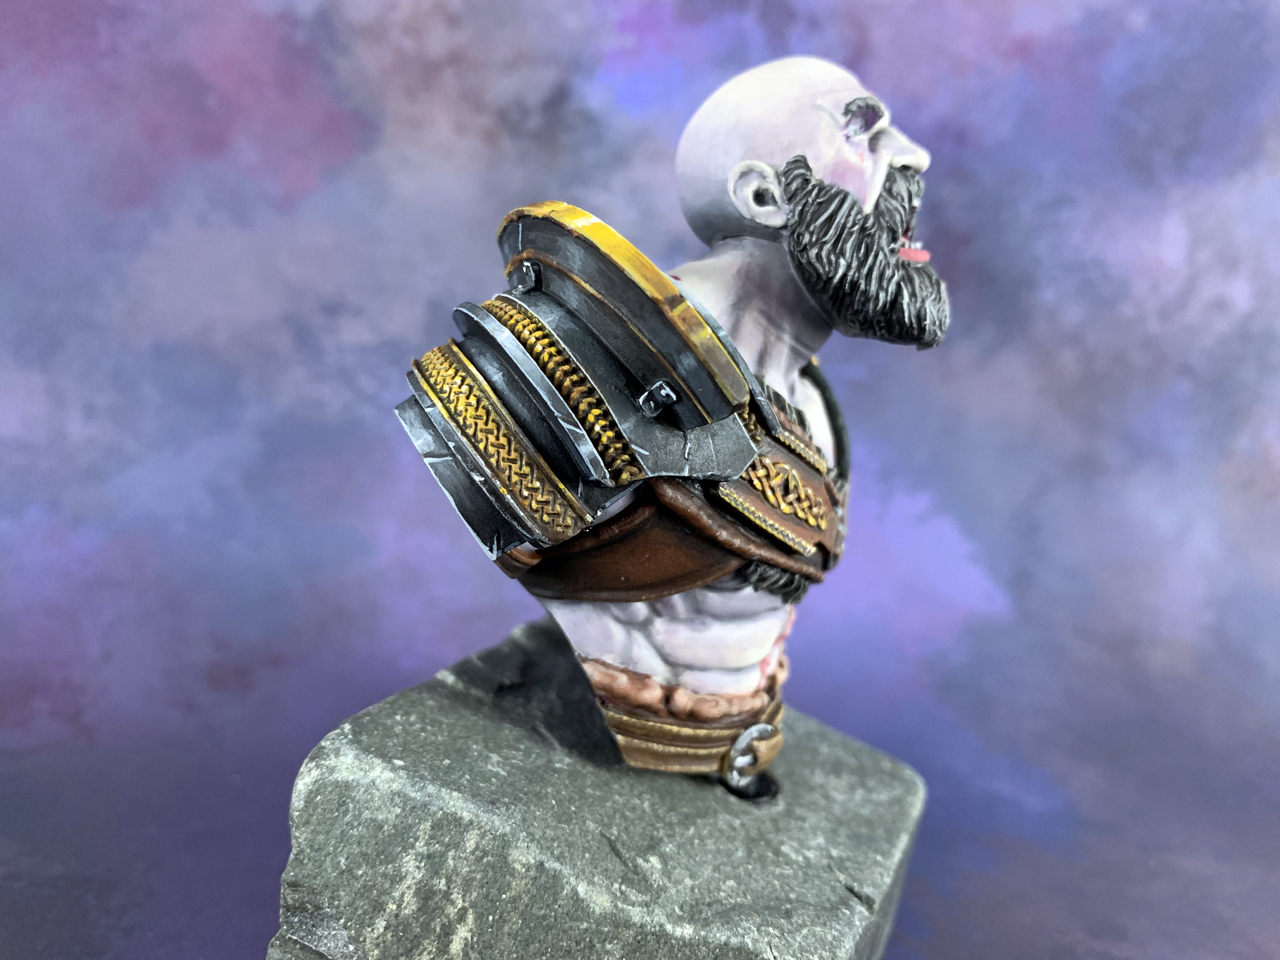
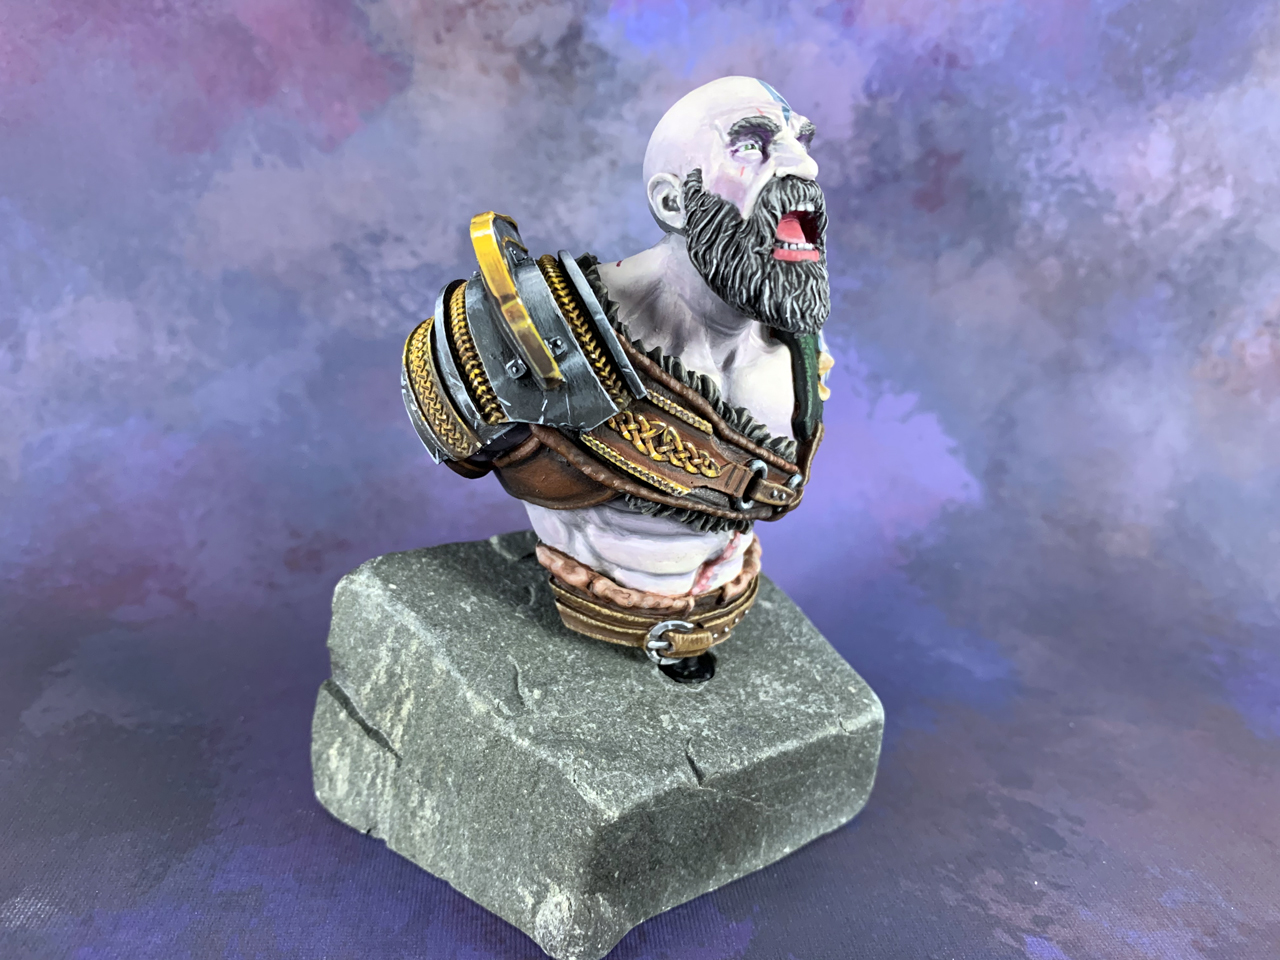
The big trick with working with large areas, or anything that has a lot of areas coming together, is to make sure each surface contrasts with those it’s next to. That’s what sells the whole NMM effect.
So, if you look at the gold gauntlet you’ll notice that each flat surface has a strong contrast with those around it. As mentioned above, it’s about having the dark meet the light.
Video
If you want to watch someone do a great looking NMM gold, then check out this video by Vince.
Tips & Tricks for Painting NMM
Here’s a few things I’ve learned while practicing to paint NMM.
Don’t Stress Over Realism
This was the biggest thing I struggled with. I felt if I was taking the time to learn a realistic approach to painting metal then I had to get it perfect.
Reflective surfaces are hard to master. If you’re going super reflective, like chrome, then it’s going to bounce a lot of light, reflect nearby objects and light, and have a lot going on in general. Perfect is nearly impossible because you’re having to ultimately guess on how it would bounce light.
However, if you stick to the basics of creating a lot of contrast, then you’ll sell the effect easily. Having that high contrast will trick our eyes into thinking it’s a metal object. We’re not going to question the precise qualities of that NMM as long as the illusion is there – the contrast.
This is the biggest trick I use in my painting – I focus on contrast, not realism. I don’t spend 5 minutes staring at an object I’m going to paint NMM to determine where the perfect highlight spots should be. I attack it like any other NMM object and just feel it out as I go. As long as there’s some bright highlights and dark shading then it will do the trick despite realism.
Perfect Blends Aren’t Needed
We’ve all seen those folks who blend flawlessly. It’s amazing to look at but I haven’t got that time and you probably don’t either. The thing with NMM is that it’s not all about perfectly smooth blends either.
This is especially true if what you’re painting is small. Larger objects need more work on blending compared to small ones. With small objects I’ll usually just layer it with very minimal blending, and it still looks good.
Light will bounce around metal and reflect nearby objects. Those reflected objects, and the shadows they create on the surface, aren’t blended in – they just appear. While blending makes things look cool, it’s not essential to painting good NMM in my experience.
There’s a big caveat there though. If you’re painting a full suit of Knight armor and want the utmost realism, then that’s another story, and you’d also not be reading this tutorial ;) However, for your run of the mill stuff you can get away with imperfect blending.

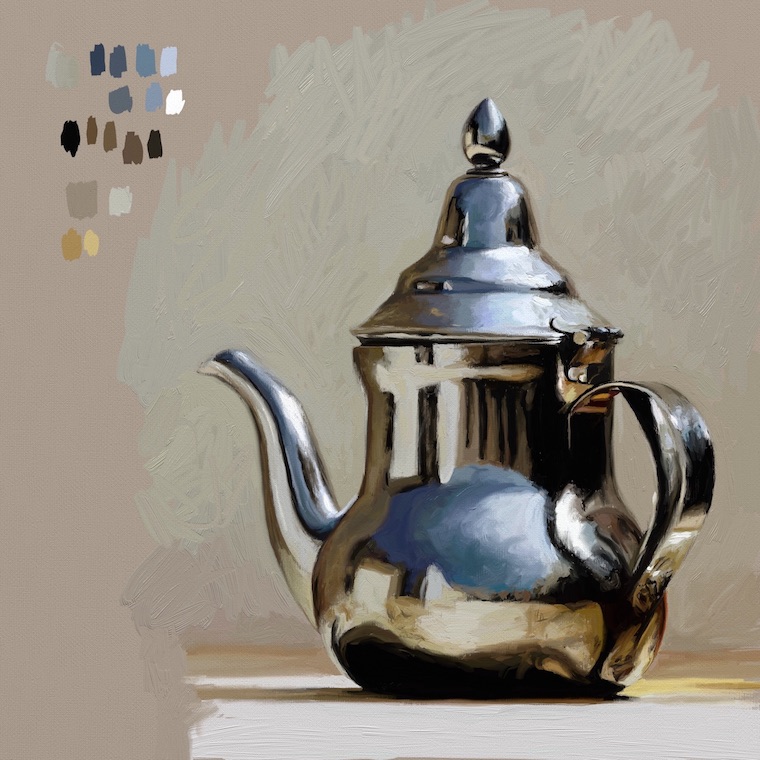
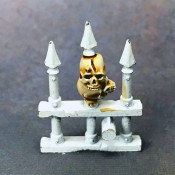
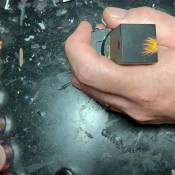
Take this kettle. See how the brightest reflections just appear? The reflection isn’t blended out into the shadows. Same with the shading, it appears abruptly next to the highlights and midtones.
So, just because you aren’t great at blending doesn’t mean you can’t paint NMM.
Don’t Overwork It – Learn and Move On
Like learning any new technique, you can’t expect to be 100% happy the first time around. The goal is to learn, to improve, then move on to the next project.
If you try to paint something so it’s exactly how you envision it the first time, then you’re going to get frustrated when it’s not. You have to learn when to call something good enough and move on.
Experience is the best thing for getting better at anything, so don’t overwork something because odds are it won’t get much better and you may end up ruining something that was already good, just not perfect.
A Good Brush Really Helps
Now, a good brush isn’t required but it sure makes life easier.
When I started working with blending, which is what NMM is, I was using a typical Citadel brush, and it did the job. However, I had some problems getting things where I was really happy.
Fast forward a few years, I finally bought myself some Raphael 8404 brushes: Size 2, 1, and 0. The impact was immediate.
Really good brushes are a higher quality, which goes without saying, but they hold a point very well. Blending with the Raphael brushes was easier because they held more paint, they had a good point, and the bristle softness just made the blending easier.
I have since also tried out the Winsor & Newton Series 7 brushes and those have been fantastic as well.
Again, this isn’t required, but if you really plan on getting into blending (NMM), then definitely consider the investment.
Some More of My Examples
Here’s some more examples of my NMM work.
This is Efreeti and the first time I attempted to do NMM. I do have a showcase if you want to see some more shots.
I’m not going to say that my first attempt was bad but it needs some work. That being said, I feel it all works because of the contrast if nothing else. The bronze is done well enough but that sword isn’t quite right. I couldn’t get it so I was happy with it. Still, it comes across as metal.

On these models there’s a few spots that I did NMM. You’ll notice one Werewolf have a blade and on the other there’s a chain. These examples are where I started pushing contrast more. The blending isn’t perfect but the concept is there.
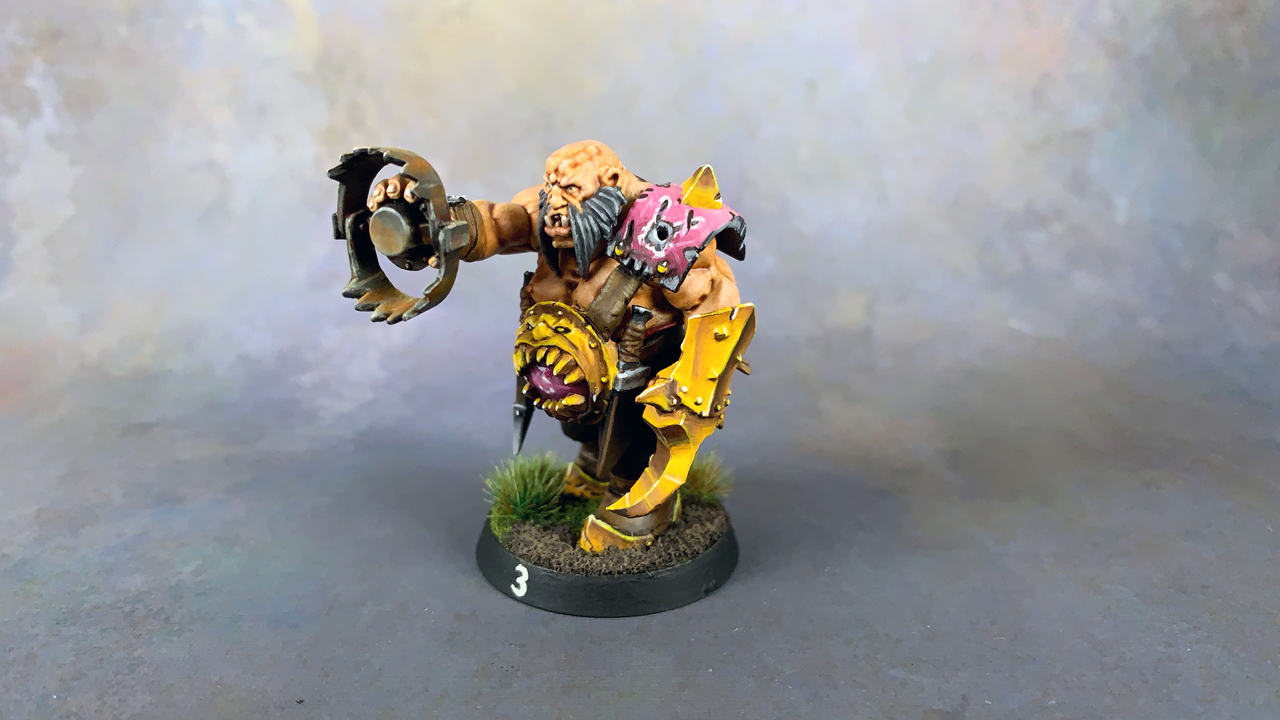
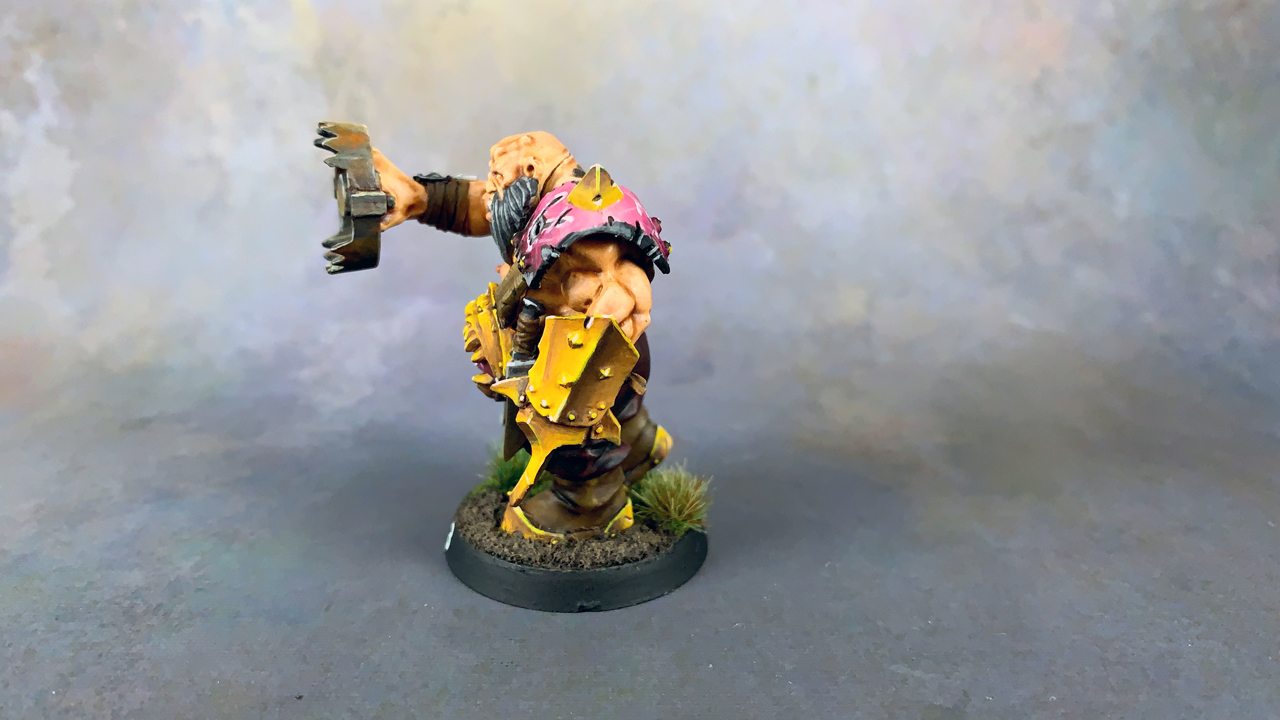
As shown above, this Ogre is where I started to feel like my NMM was finally coming together. I’m really happy with the gold I did on this. Again, there’s no perfect blends but the effect is still apparent. As I’ve said, I like a gritty cartoony feel to my painting and I felt like I got that with this.
If you want to see more of the work on the Ogres then check out my painting showcase.
Also as shown above, this is the first bust I ever painted. This is a great example of what I call dirty blends – blends that aren’t perfect. It has a sketched appearance to it, which I wanted to do so the metal seemed worn and interesting.
So far this is my favorite NMM work I’ve done. I’ve got a lot more pictures for you to check out if you like what you see.
Conclusion
As I say with every technique, just experiment and play around. Seeking perfection is a pursuit in frustration and really it’s just not needed. My approach to painting is to paint until I’m happy with something. It doesn’t have to meet everyone else’s standards, just mine.
If you get the bold contrast on there, regardless of the colors you’re using, or how it stands up against another person’s NMM, then you’ll do just fine. Don’t overthink NMM and make it seem like something unachievable.
I would like to point out that this is the same technique I use to create cool looking power weapons too. The only change is the colors you use.
I do recommend having a good paint brush for this. You’ll be doing some blending and looking to get good clean edge highlights. I cover my paint brush recommendations if you’re not sure where to start.
Related, I do also cover my recommended list of painting supplies as well in this article. Tools aren’t everything but they do make life easier.
For more painting tutorials you can check the links below, and you can also check out my miniature painting guide.
If there’s another technique you’d like to see me cover, then please let me know in the comments.
Miniature Painting Techniques & Guides
Learn the basics, as well as the advanced techniques, of miniature painting.
I love painting miniatures and teaching people how to paint. I also really love blogging, so I've combined those two passions here.
- Creative Twilight’s Future and My Thoughts (Feedback Welcomed!) - December 4, 2021
- My Top Gift Ideas for Miniature Painters & Hobbyists + Gifts to Avoid - December 2, 2021
- The Year That Was 2020 and Where I’ve Been - January 17, 2021

What does it mean when it mean when it says ‘blend’ or ‘smoothen’! are we meant to layer, wetblend, glaze??
Honestly, any of those techniques work to varying degrees. I use really thin paint, like watery thin, and do lots of thin layers like you would if you were just doing normal layers; just thinner paint. You can also do the same with glazes. Wet blending is an option too but it takes more practice to do well in my experience.
I have an article that goes over how I do blending here: https://creativetwilight.com/blending-layering/
This article on NMM does kind of assumes you’re familiar with blending already.