Learning to do edge highlighting is one of those things that will push your miniature painting from mediocre to good. There’s some basic principles you need to follow for painting a miniature well. One of those is shading to create depth, and on the other side of that is highlighting to show light.
Today I’ll explain edge highlighting and show you how to do it for your miniatures. It really is easier than you think if you follow a few simple, basic rules.
Why Edge Highlight?
Painting a miniature without shading or highlights will give you a very flat looking model. By shading and highlighting you breathe a ton of life into the model.
Also, since many of us paint for tabletop gaming, having your miniatures stand out at a distance is needed. This is one of those things that differs between painting for a competition and painting for tabletop.
When you paint for a competition you are usually doing very subtle blending, shading, and highlighting. That miniature is going to be looked at very close up where all the subtleties will be seen.
However, when you’re playing a game of Warhammer 40K (for example), and you’re standing 4 feet from the model, you need to push things a bit brighter, a bit darker, to see it from the distance.
How to Do Edge Highlighting
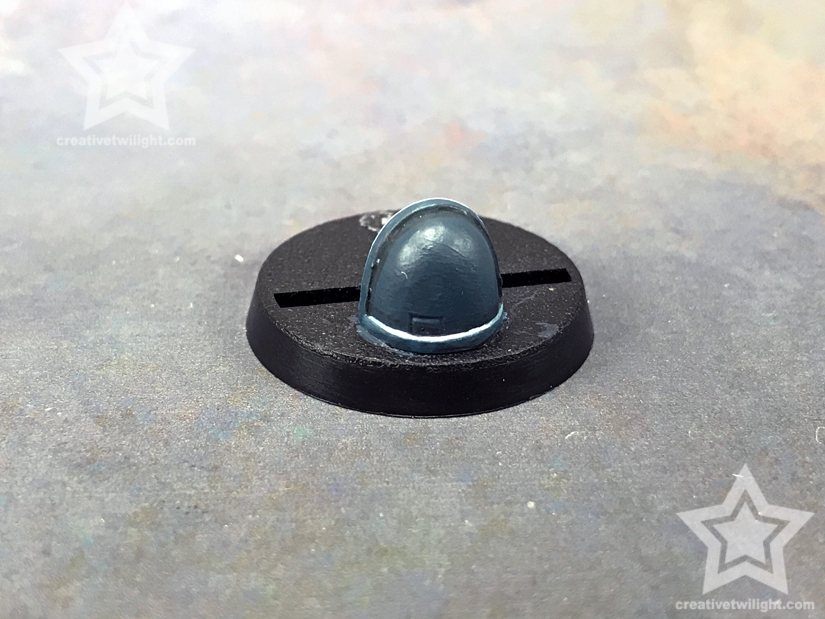
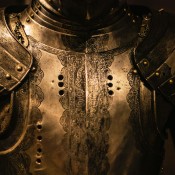
I’m going to use a Space Marine shoulder pad for the demonstration, something many people reading this are probably familiar with.
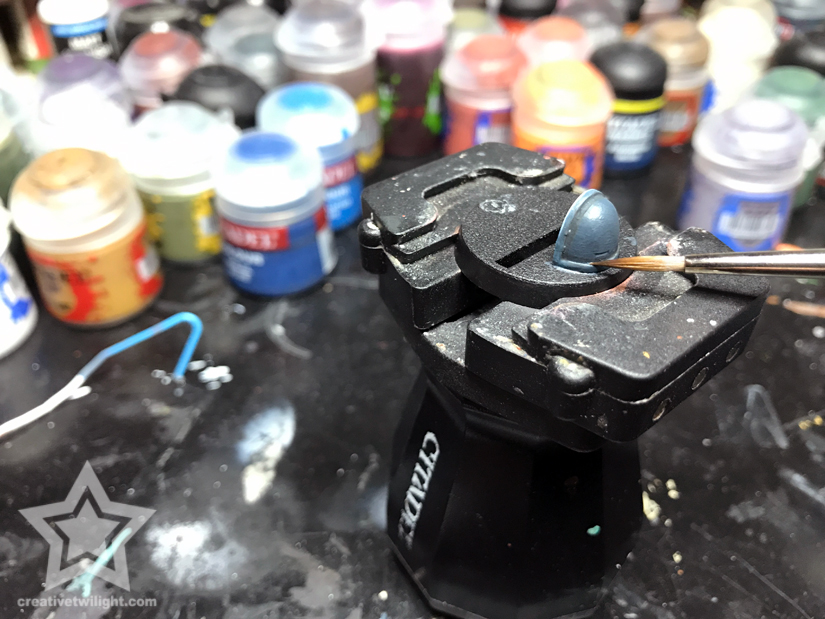
Want to know the trick to a good, clean edge highlight? Using the side of your brush. Yep!
The other trick is making sure your brush has enough paint loaded. Because you’re using the edge of your brush for this, you want to make sure paint is about 1/3 of your bristles.
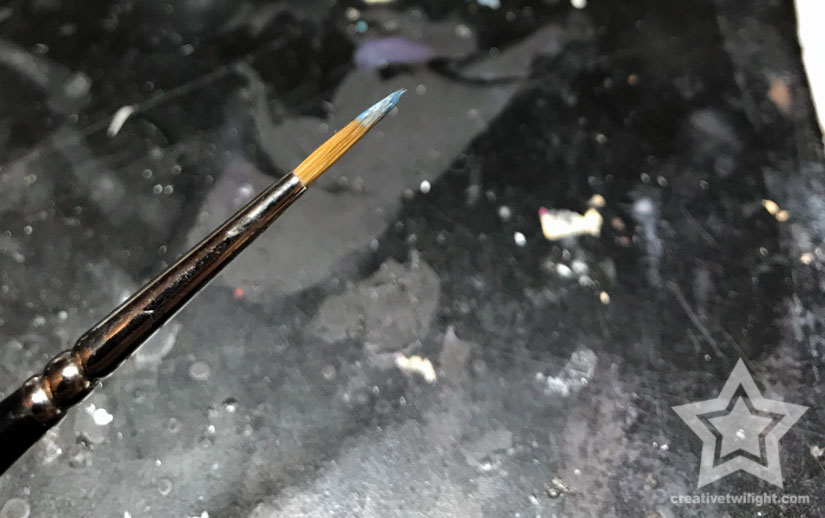
The size of the brush you use is important as well. You don’t want to use one too large, as the highlight will bleed out, and one too small won’t hold enough paint to run the edge.
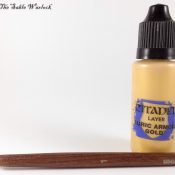
I’m using a Raphael 8404 size 0 for this, as pictured above.
Before I bought this brush I would routinely use the Citadel Small Layer brush with success.
I do also have an article that covers miniature paint brushes in more detail as well.
Also, if you’re a beginner then I recommend doing edge highlights with paint that is not thinned out. You can highlight with thin paint, it’s great for blending your highlights, but it’s trickier and takes some practice.
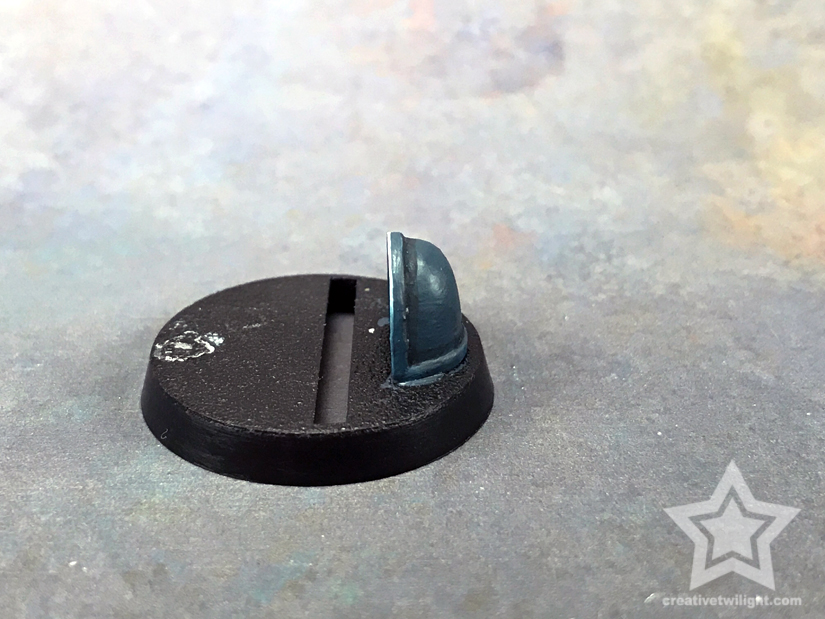
So, all you do is take your brush, place it on the edge at an angle, and drag it lightly along the edge. Lightly is key here.

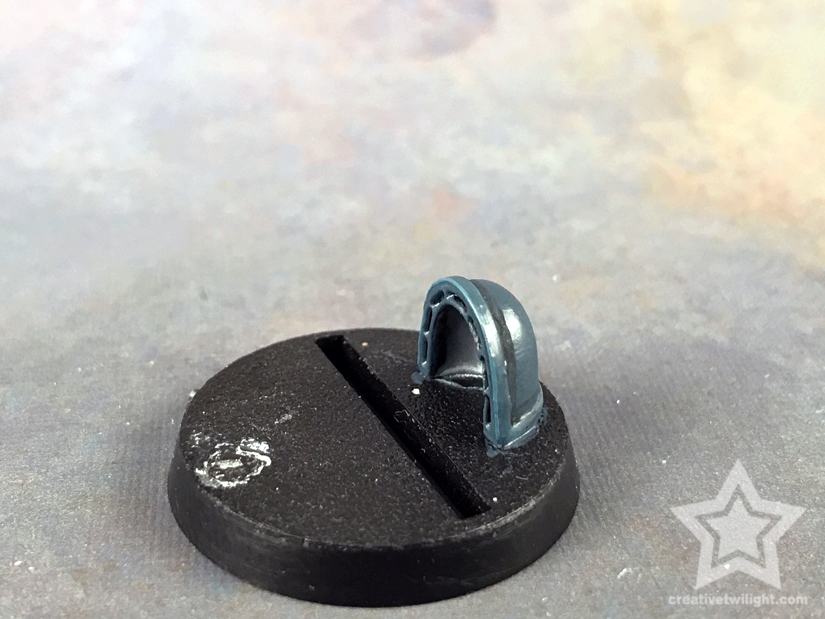
The highlight is pretty subtle. I refer to it as a base highlight, but I’m going to build it up, so I don’t want to start off too strong.
If you have too much paint in your brush then you’ll notice some unevenness with the highlight. It’s not big deal and easy to fix.
All you do is take your base coat color and carefully clean up the edge highlight. That’s it!
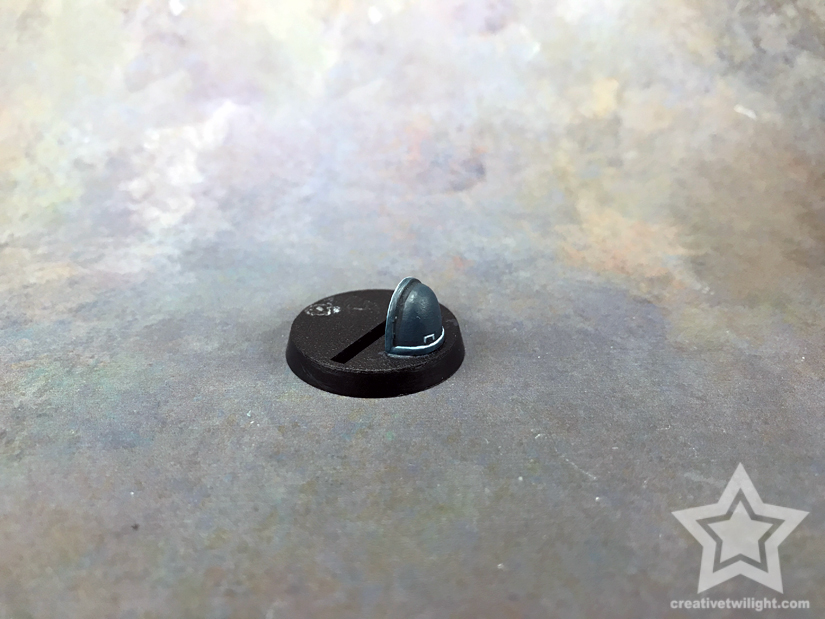
This principle is the same for any edge you want to highlight, be it a tank, the edges of armor, a sword, etc. It doesn’t matter if that edge is straight or rounded.
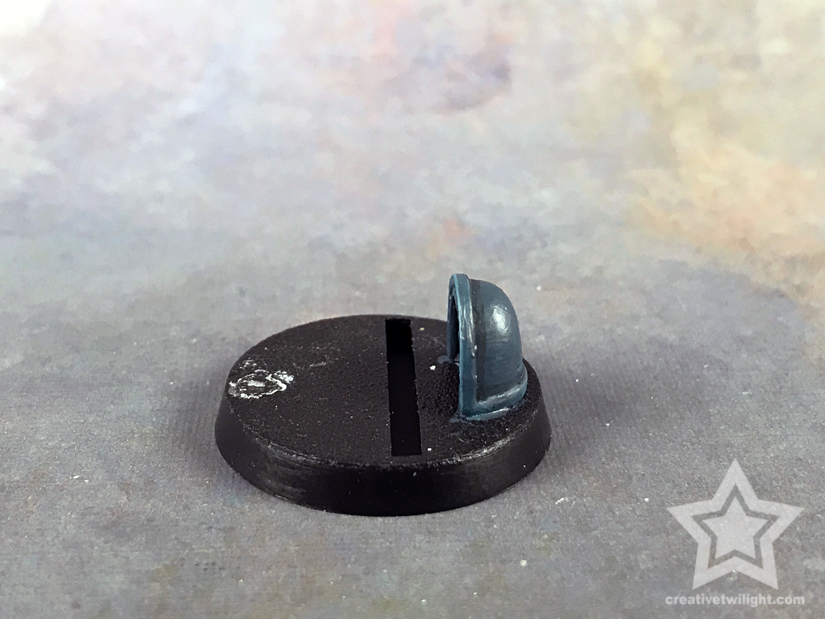
Progressive Highlights
Now, you can stop there and call that good. If you were going to just do a single edge highlight though, then I’d suggest using a brighter color than I did, well, unless you wanted subtle.
However, if you really want to sell the highlight then you need a few layers.
What you do is find the color that’s one shade up from your first highlight. Take that color and do the same thing where the edge is closer to the light. You’re going to leave some of the previous highlight visible.
I call this a mid-highlight.
I like to then do a final highlight that I call an extreme highlight. Same process, go a shade up from the last highlight and repeat; again leaving some of the previous layer visible.


The camera isn’t quite picking up the difference with this layer over the last. It’s more noticeable in person.
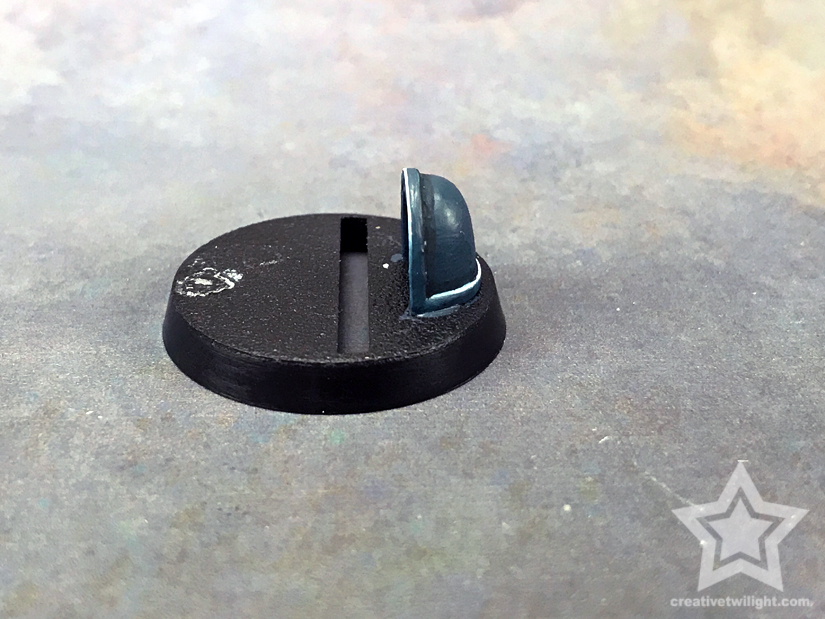
Now there’s 3 layers of highlights on there that really help sell the effect. You can see the highlights get brighter the closer to the light they are, which I’m painting as overhead.
You can do as many layers as you like, but I tend to stick to 3 for most of the tabletop stuff I do.
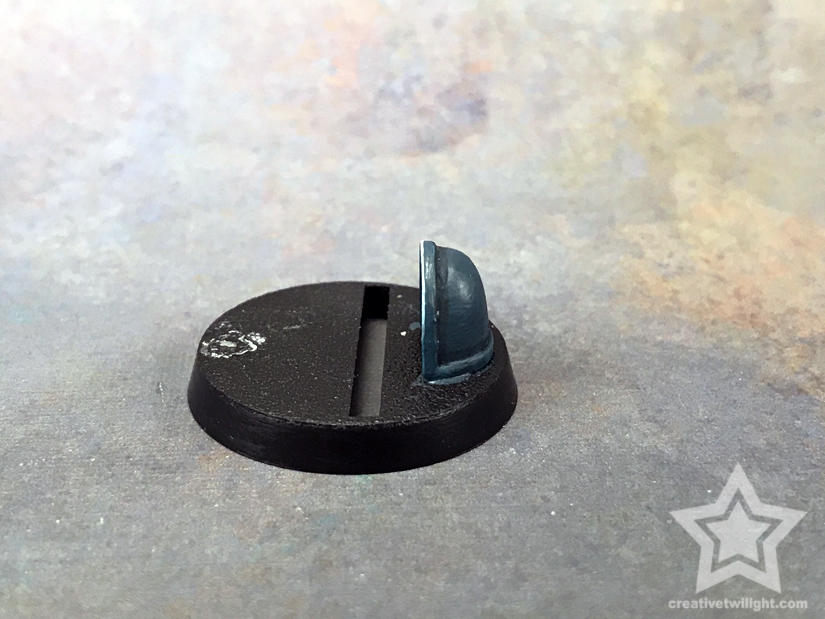
Blending it Out
Now, I mentioned earlier about thin paints for blending highlights, so why not show you?
Taking what I did earlier, I’m just going to improve it a bit by blending things together.
So, this time I’ve thinned my paint out a bit and loaded my brush.
I make sure I don’t have too much paint in the brush so it doesn’t just pool up when I drag it along the edge. Just wipe your brush on your towel for good measure.
Also, I’m going to start blending down from the extreme highlight color, so my brush is loaded with mid-highlight. You’ll find it’s easier to blend colors darker than lighter.
I do have a blending tutorial that covers this more in depth if you’re interested.
I start the brush on the extreme highlight, back a bit from mid-highlight, and then lightly drag it towards the mid-highlight. Basically, at the seam of the two colors.
Now, I do the same for the next highlight. I load my brush with the base highlight and blend that one out.
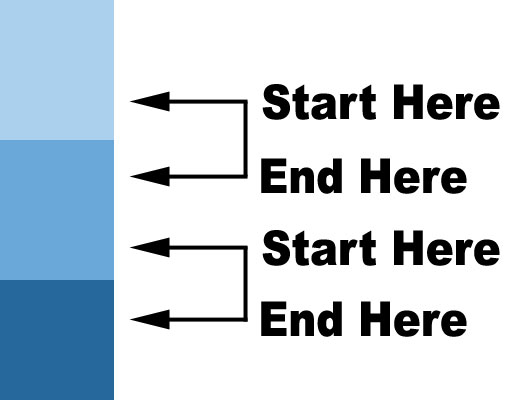
You can see the highlights are much smoother now. You can get even smoother by using even thinner layers and doing it a few times.
I know my explanation is a bit confusing so here’s a picture to help.
Dealing with Trickier Areas
Not all edge highlights are on nicely pronounced areas like my example. Sometimes you have to do a highlight in an area where you can’t run the side of your brush on it.
This is the trickier part of edge highlighting to learn and will take some practice.
My best advice for this is a good brush, one that keeps a sharp point. Now, you don’t need an extremely expensive brush for this. I’ve had some good luck with the Citadel Small Layer Brush.
I do currently own some Raphael 8404 brushes that are amazing for this but they aren’t required. The first 13 years of my painting career were spent with cheap to mediocre brushes. It’s all down to practice and patience.
So, I’m going to run a highlight along the other side of the shoulder trim. You’ll notice there’s not a big edge there, so I have to change my approach a bit.
For this I’m going to do the same thing but using the tip of my brush. So, I’ll run the tip of the brush along the edge at an angle.
If I get sloppy then I can clean it up with the base coat color.
From here it’s just more of the same and I build up two more layers of highlights.
You’ll notice that I painted this edge with only the two brightest colors. The reason being the edge is going to catch a lot more light, so I don’t need the darkest highlight color here.
Even Trickier!
The most extreme of examples is when you can’t run your brush along an edge at all.
The should pad has an inset detail on it and there’s no way I’m getting to an edge there.
So, what you do in this instance is to paint straight lines.

There’s no magic trick here other than a good brush, patience, and some experience.
Here’s a zoomed out shot so you can see it all from a more typical distance.
Looks good to me!
‘Eavy Metal Style
‘Eavy Metal is the team of painters who work for Games Workshop and paint all the models displayed in print, online, miniature boxes, and anywhere GW is showing their miniatures.
The ‘Eavy Metal style has evolved over the years, but one of the things they made famous was their style of edge highlighting.
The ‘Eavy Metal style uses the same concept I demonstrated, but they add another element to it. What they do is run a thicker highlight along the edge on the flat surface. Then, they come in and do like I showed.
What this does is creates a layer that blends the color out towards the edge.
It’s easier to show.
You have to look close, but you’ll see that wider highlight they do around the edges. At the very edge is your typical edge highlight and you’ll see how it creates a blended look that way.
The other thing you’ll notice with this style is that every edge is highlighted. That’s the other distinctive quality.
More of the same on this one, though the thicker edge highlight is more subtle. However, notice how every single edge is highlighted.
This leads me to…
A Word of Caution
A common thing new painters do is highlight every edge on their model, like the ‘Eavy Metal style.
If you want to paint in a more realistic manner then you do not want to highlight every single edge. You want to focus on the edges where the light is going to catch it.
For example, if your light is overhead then you’ll focus on those top facing edges. The edges on the bottom, say the lower panel of a tank near the ground, or the bottom of an armor plate, you would not highlight. The light is not directly hitting those edges.
Edge highlighting everything isn’t wrong, it’s a choice in style. What it does do very well is to create a lot of visual separation on the model. It also tends to make a model look very clean.
Plus, hitting every edge really makes the model stand out. While it’s not realistic, there’s nothing wrong with doing it. If you like the way it looks then do it. Paint for yourself and nobody else.
Another note on this is that when edges are really close together and you highlight both, then it can have a very Tron look to it. That shoulder pad from above, you’ll notice I didn’t highlight the other side of the vertical trim.
That’s a choice I made because I just find it confusing when there’s too many highlights too close together. Instead, you may have noticed I had a little shading on that side. I did that to give depth on that side without having a highlight.
Also, normally I’d paint the trim a different color than the shoulder pad, so it would have more separation anyway. I just did it this way for the tutorial.
It would be totally realistic to have highlighted both sides, but like I was saying about stylistic choices, that’s mine.
Wrapping it Up
That’s all there is to edge highlighting. Hopefully you learned a thing or two and if you have any questions then please let me know in the comments.
If you’re a beginner painter and you’re after some more tips, then check out my tips for becoming a better painter.
I also have a full guide that covers everything in miniature painting. I put that together to serve as a singular resource for painters with lots of information and resources.
You may also find interesting my common painting mistakes. I cover the things a lot of beginner painters do and ways to avoid those pitfalls.
Do you have any tips for edge highlighting? Is there something else you’d like to see me cover? Leave a comment below!
Miniature Painting Techniques & Guides
Learn the basics, as well as the advanced techniques, of miniature painting.
I love painting miniatures and teaching people how to paint. I also really love blogging, so I've combined those two passions here.
- Creative Twilight’s Future and My Thoughts (Feedback Welcomed!) - December 4, 2021
- My Top Gift Ideas for Miniature Painters & Hobbyists + Gifts to Avoid - December 2, 2021
- The Year That Was 2020 and Where I’ve Been - January 17, 2021

Good stuff, edge highlights are something I am trying to work on in my current painting as is. So nice to have some tips and pointers.
Hopefully it helps. I felt like this is a topic that’s easy to over explain, so just trying to get people on the right track with it.
I get why the ‘Eavy Metal team edge highlight absolutely everything, it shows off the details on the Models and photographs really well. But that look really drives me nuts. Good edge highlighting needs to pay attention to light sources, like you show with your example.
Yeah, I’m not a fan of the style either. Their shading is non-commital to light direction as well, which pairs with the highlights, and I just find it disconcerting. Choose a light direction, paint with it in mind, and you get a much better model for it.
Good tutorial.
I found the best way to do something new is to practice it. I have never considered doing edge highlighting until I started working on my diorama project. I used a dark blue to edge highlight the armour on a group of deathwatch marines as the pure black look wasn’t doing it for me. (thanks for the raw materials conquest magazine, As I can then mix in the primaris marines as a more truescale reference point.)
I utilized a tiny brush and ran it carefully along the edged of the black armour plates where they would meet during the marines movement and where the light wound catch. It really added to the look of the squad.
It’s all about practice, absolutely. You raise another good point too, having a need to do something. Doing a technique just because someone said you shouldn’t doesn’t work very well for motivation. However, having a need to do it because of some vision you have will absolutely drive you to learn.
Great read! My first attempt at edge highlighting was pretty rough, but even that made my guys stand out a lot on the table. I appreciated the detail you went into, it helped me think through my next attempt a little more. Any tips of edge highlighting on more rounded features, like cape folds or the crown of a head?
Thank you.
For stuff like that you’re layering, so no big tips as far as technique goes. Those are things that aren’t highlighly reflective, so more subtle highlights are the way to go. Cloth and skin don’t bounce light like metal does.
However, if you mean tips in terms of blending out the highlight, washes are great and so are glazes. They do well to blend together multiple layers.
If you want to up your game even more, then I use a blending technique that uses layers. I did a tutorial on that as well: https://creativetwilight.com/blending-layering/
That’s how I approach painting and highlighting anything that’s not an edge.