In this article I will be discussing my style for how to paint gold, and my tips in painting my style of gold.
Obviously, this being my first “tutorial”, I would appreciate any feedback on the layout and general appearance of this tutorial. I want to make these tutorials very easy to follow, with simple visual guides, so hopefully I hit the nail on the head!
Without further ado – how to paint gold!
Tutorial on How to Paint Gold
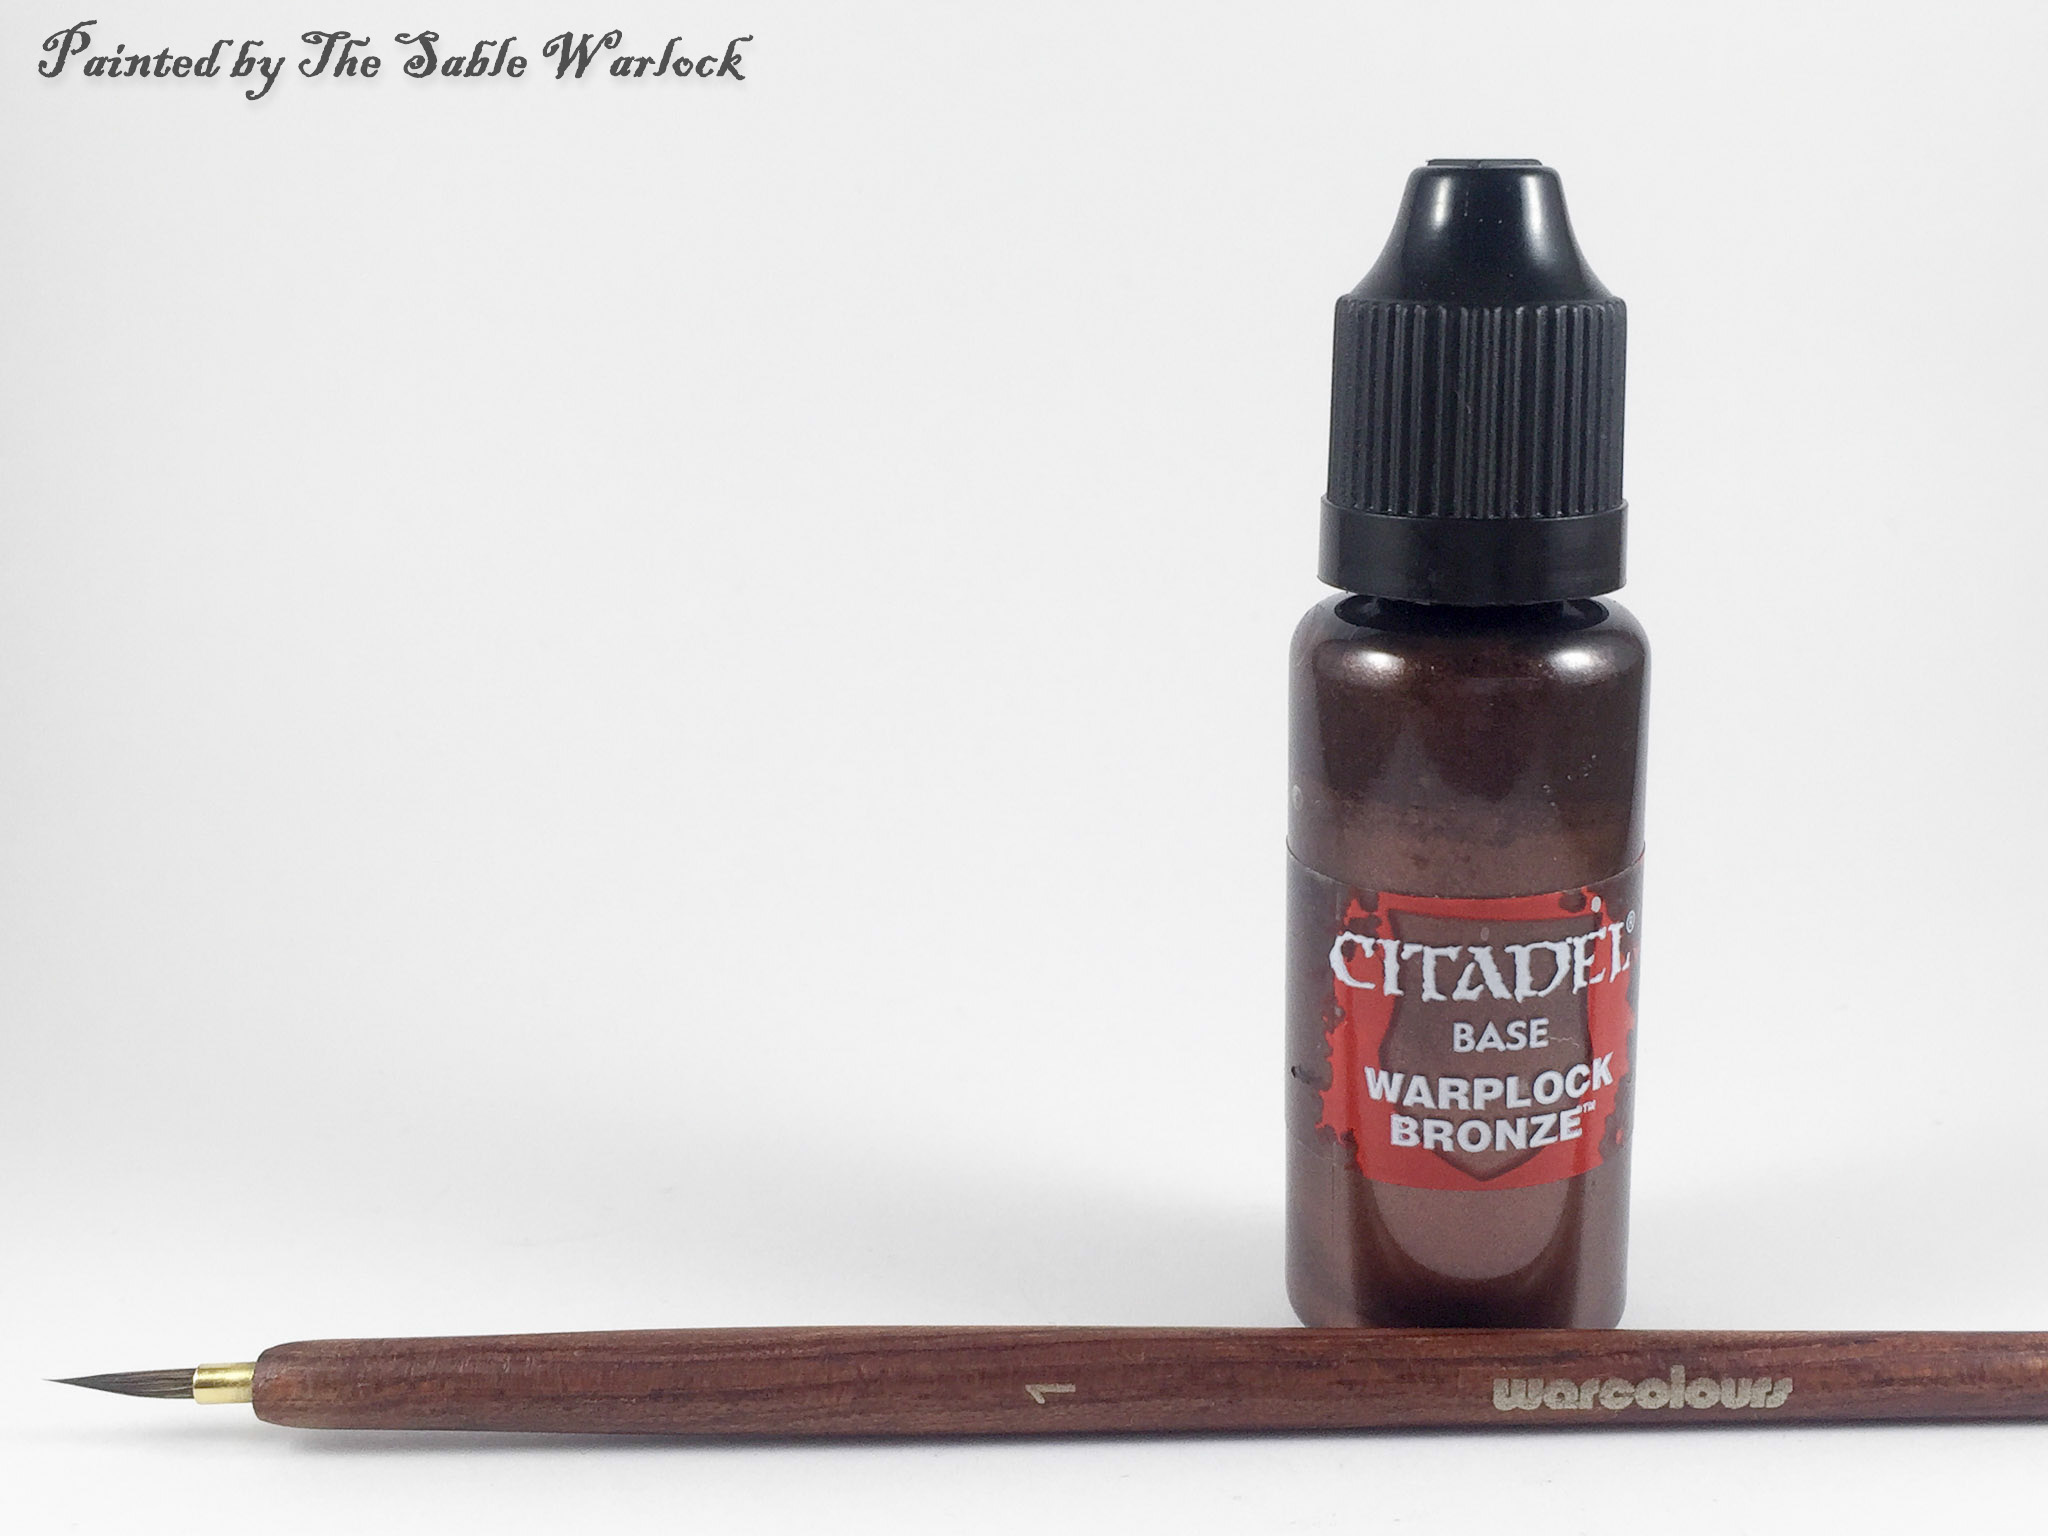
First Layer
Over a primer surface (in this case white) my first layer is Warplock Bronze applied using a Warcolours Size 1 Sable brush.
In my opinion this colour gives great coverage and adds a really great deep metallic feel to any metal you paint over it. I also occasionally start off with a layer of Rhinox hide under this layer, but I have realised that this doesn’t add much effect to the end product.

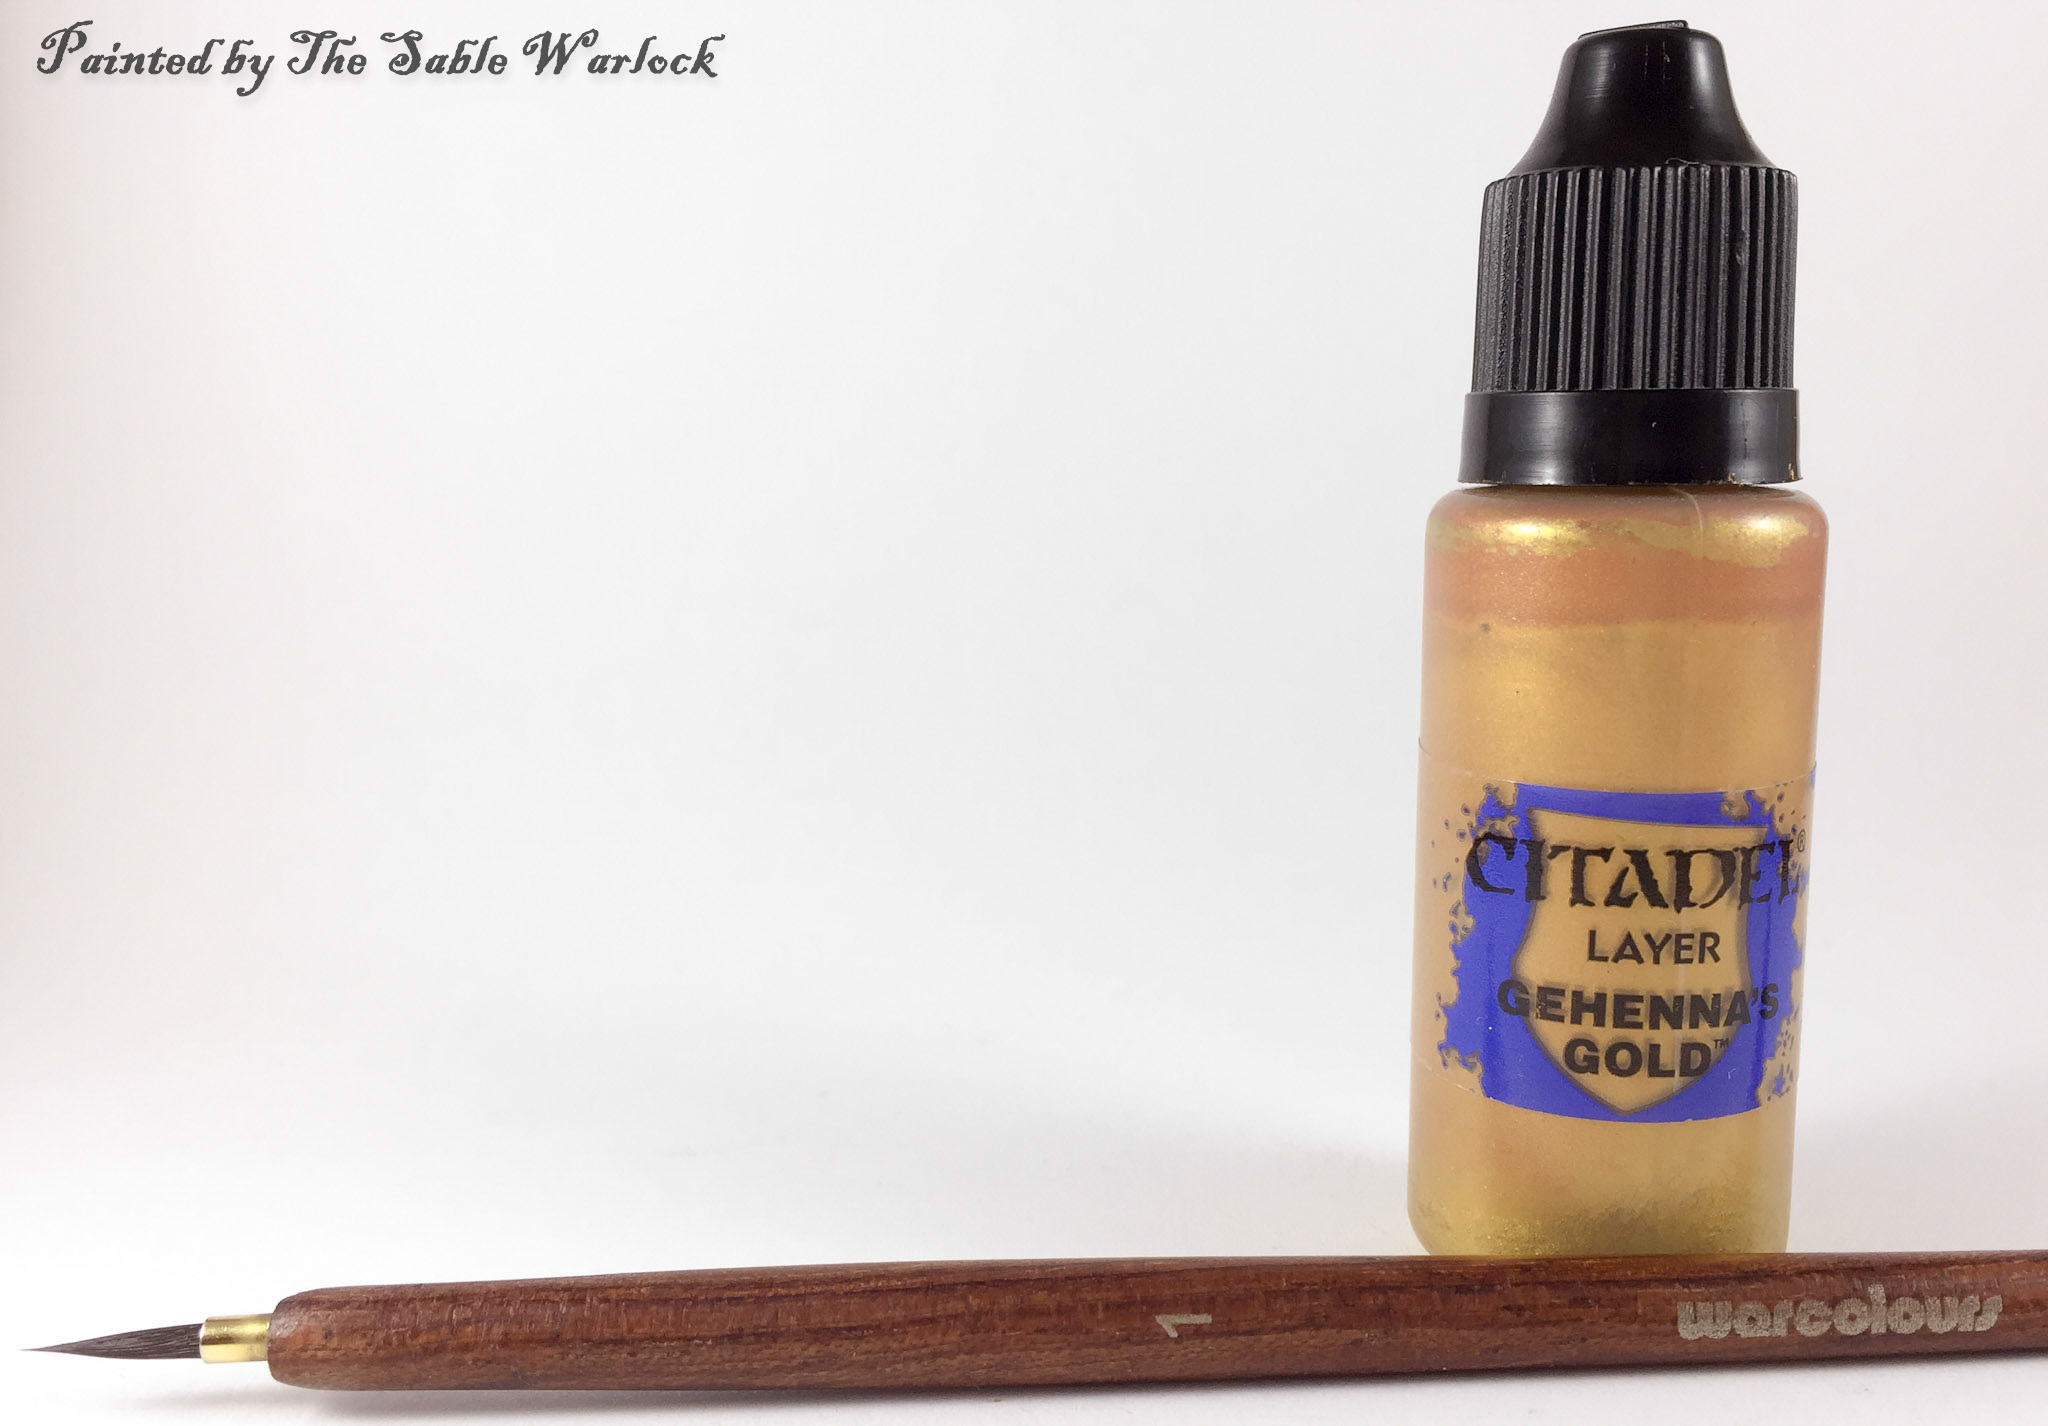
Second Layer
Over the basecoat we completely cover the Warplock Bronze with 2 thin layers of Gehenna’s Gold. This is a very liberal application and is meant to cover the Warplock Bronze, however if a small piece is missed, no harm done, just call it a “shadow” ;)
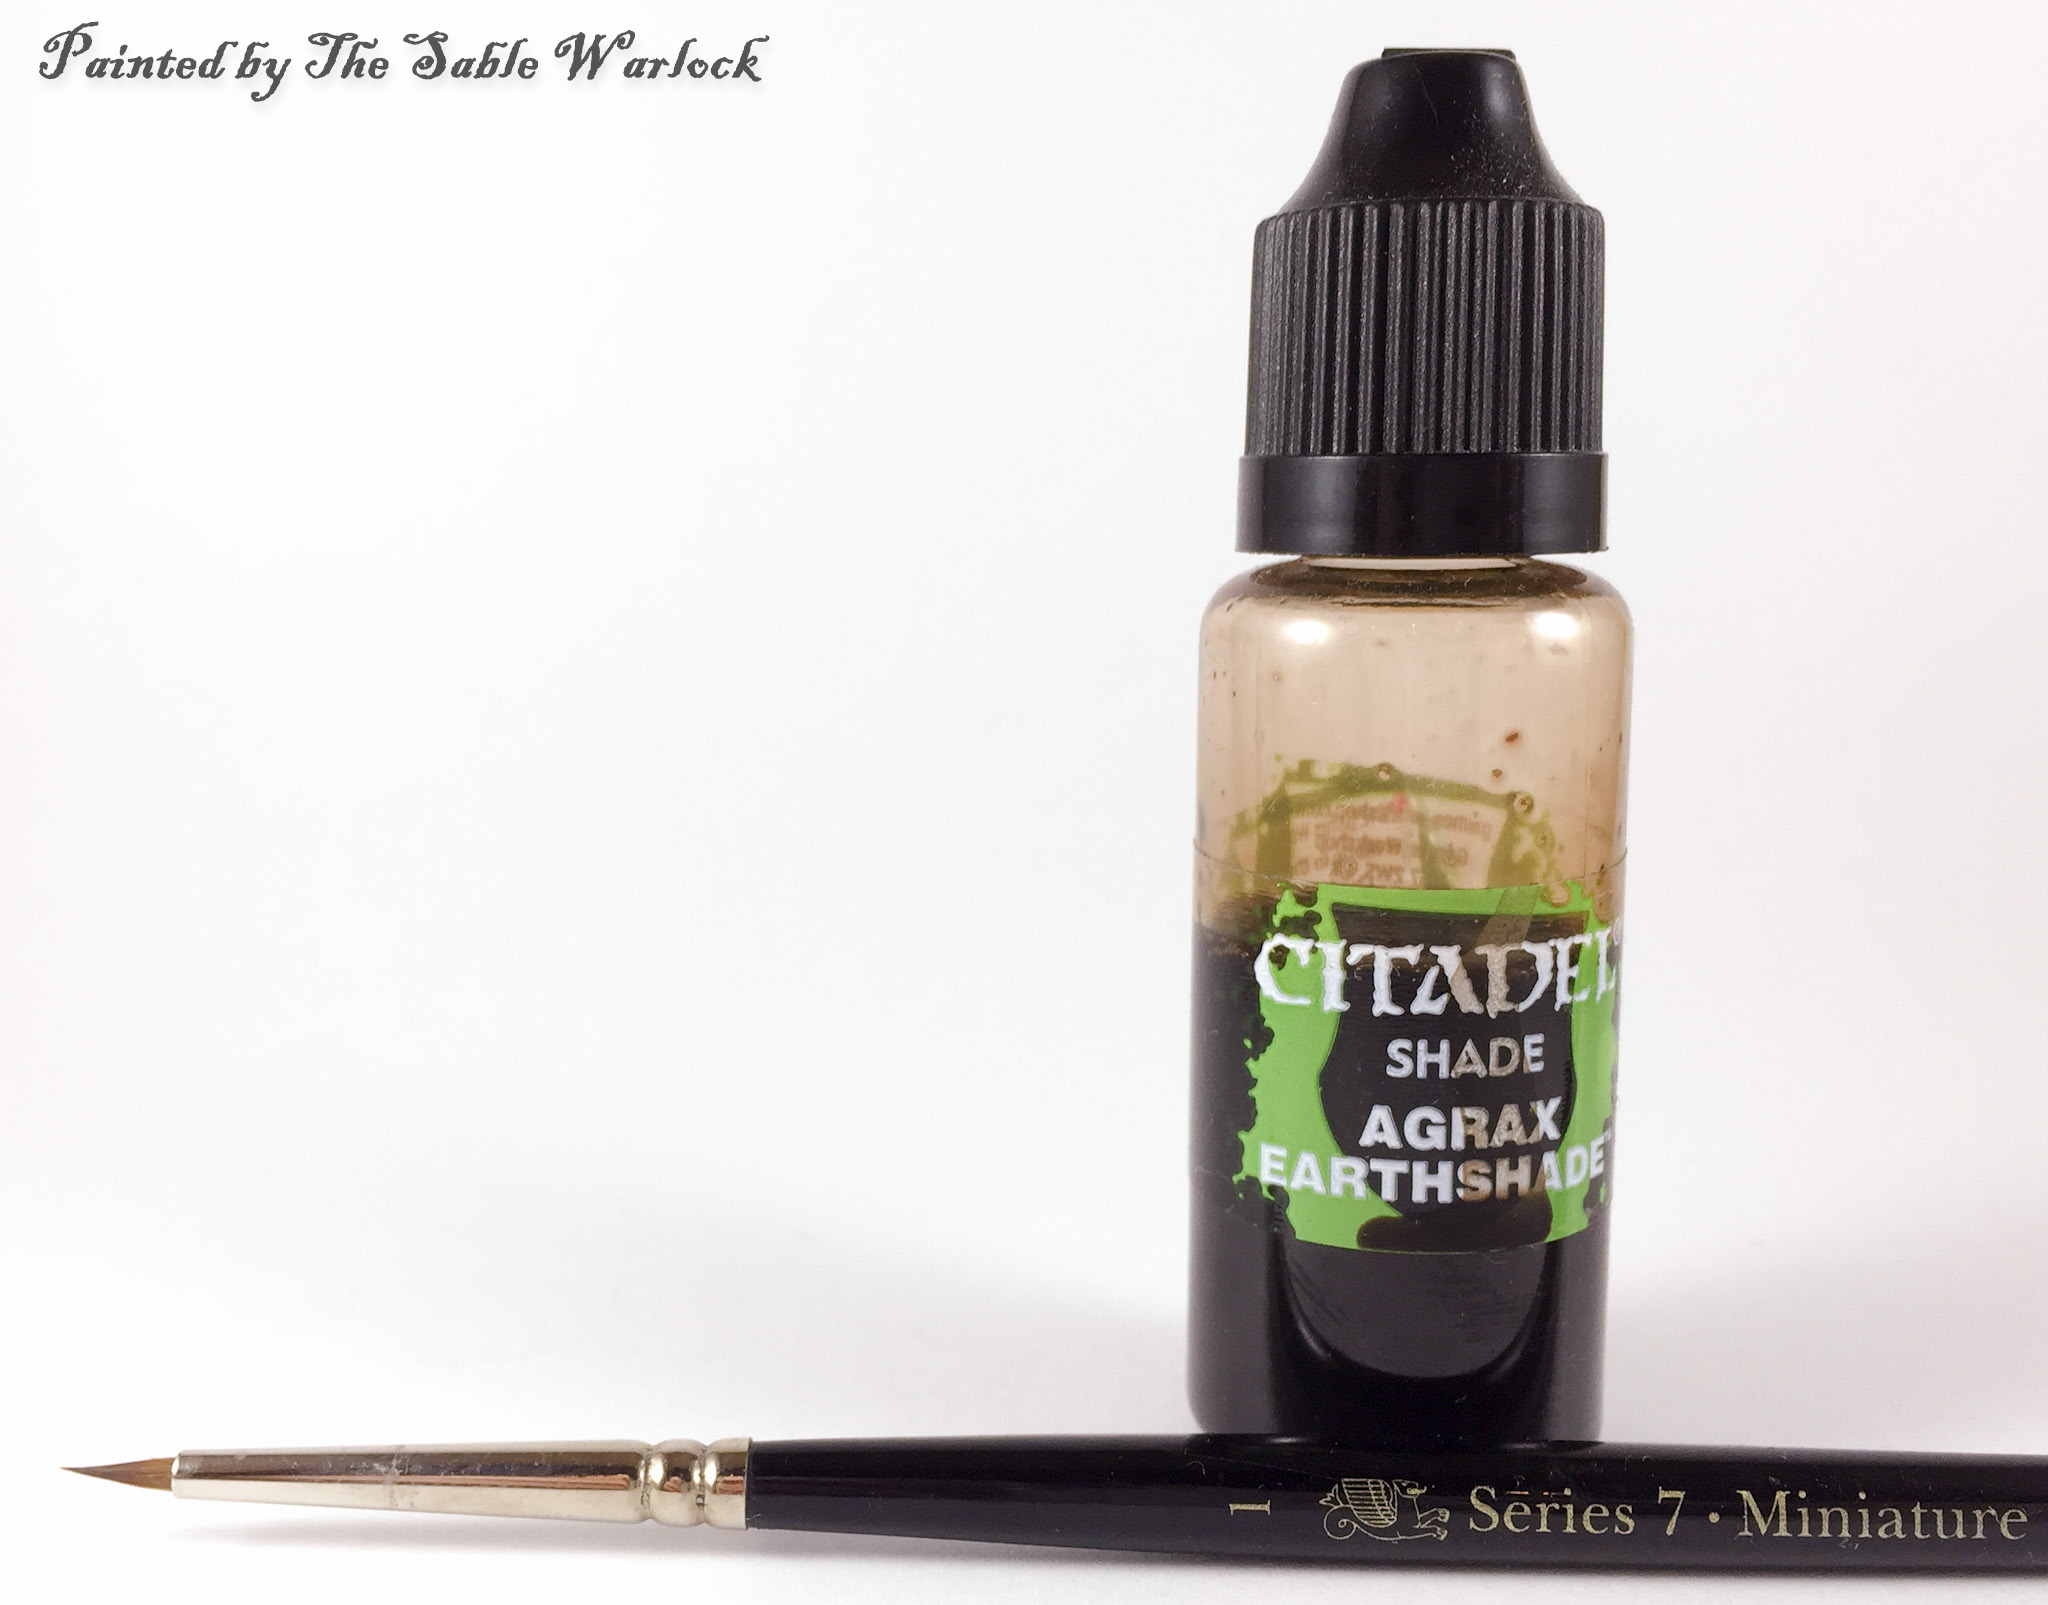
Add a Wash
A liberal wash of Agrax Earthshade is applied all over the gold to add a first layer of shadows and add some depth to the gold.

More Washing for Deeper Tones
Now the next step to add a an even deeper tone to the shadows is Druchii violet. Purple being the complimentary colour to yellow (Gold) will give a rich deep shadow to the gold and is placed in only the deepest areas of where you want a shadow.

Building Up the Gold
After allowing the Druchii violet to dry, Gehenna’s gold is relayed over the areas which are not in shadow. Ideally this should be many relatively thin layers, and complete coverage is not needed.
Adding Highlights
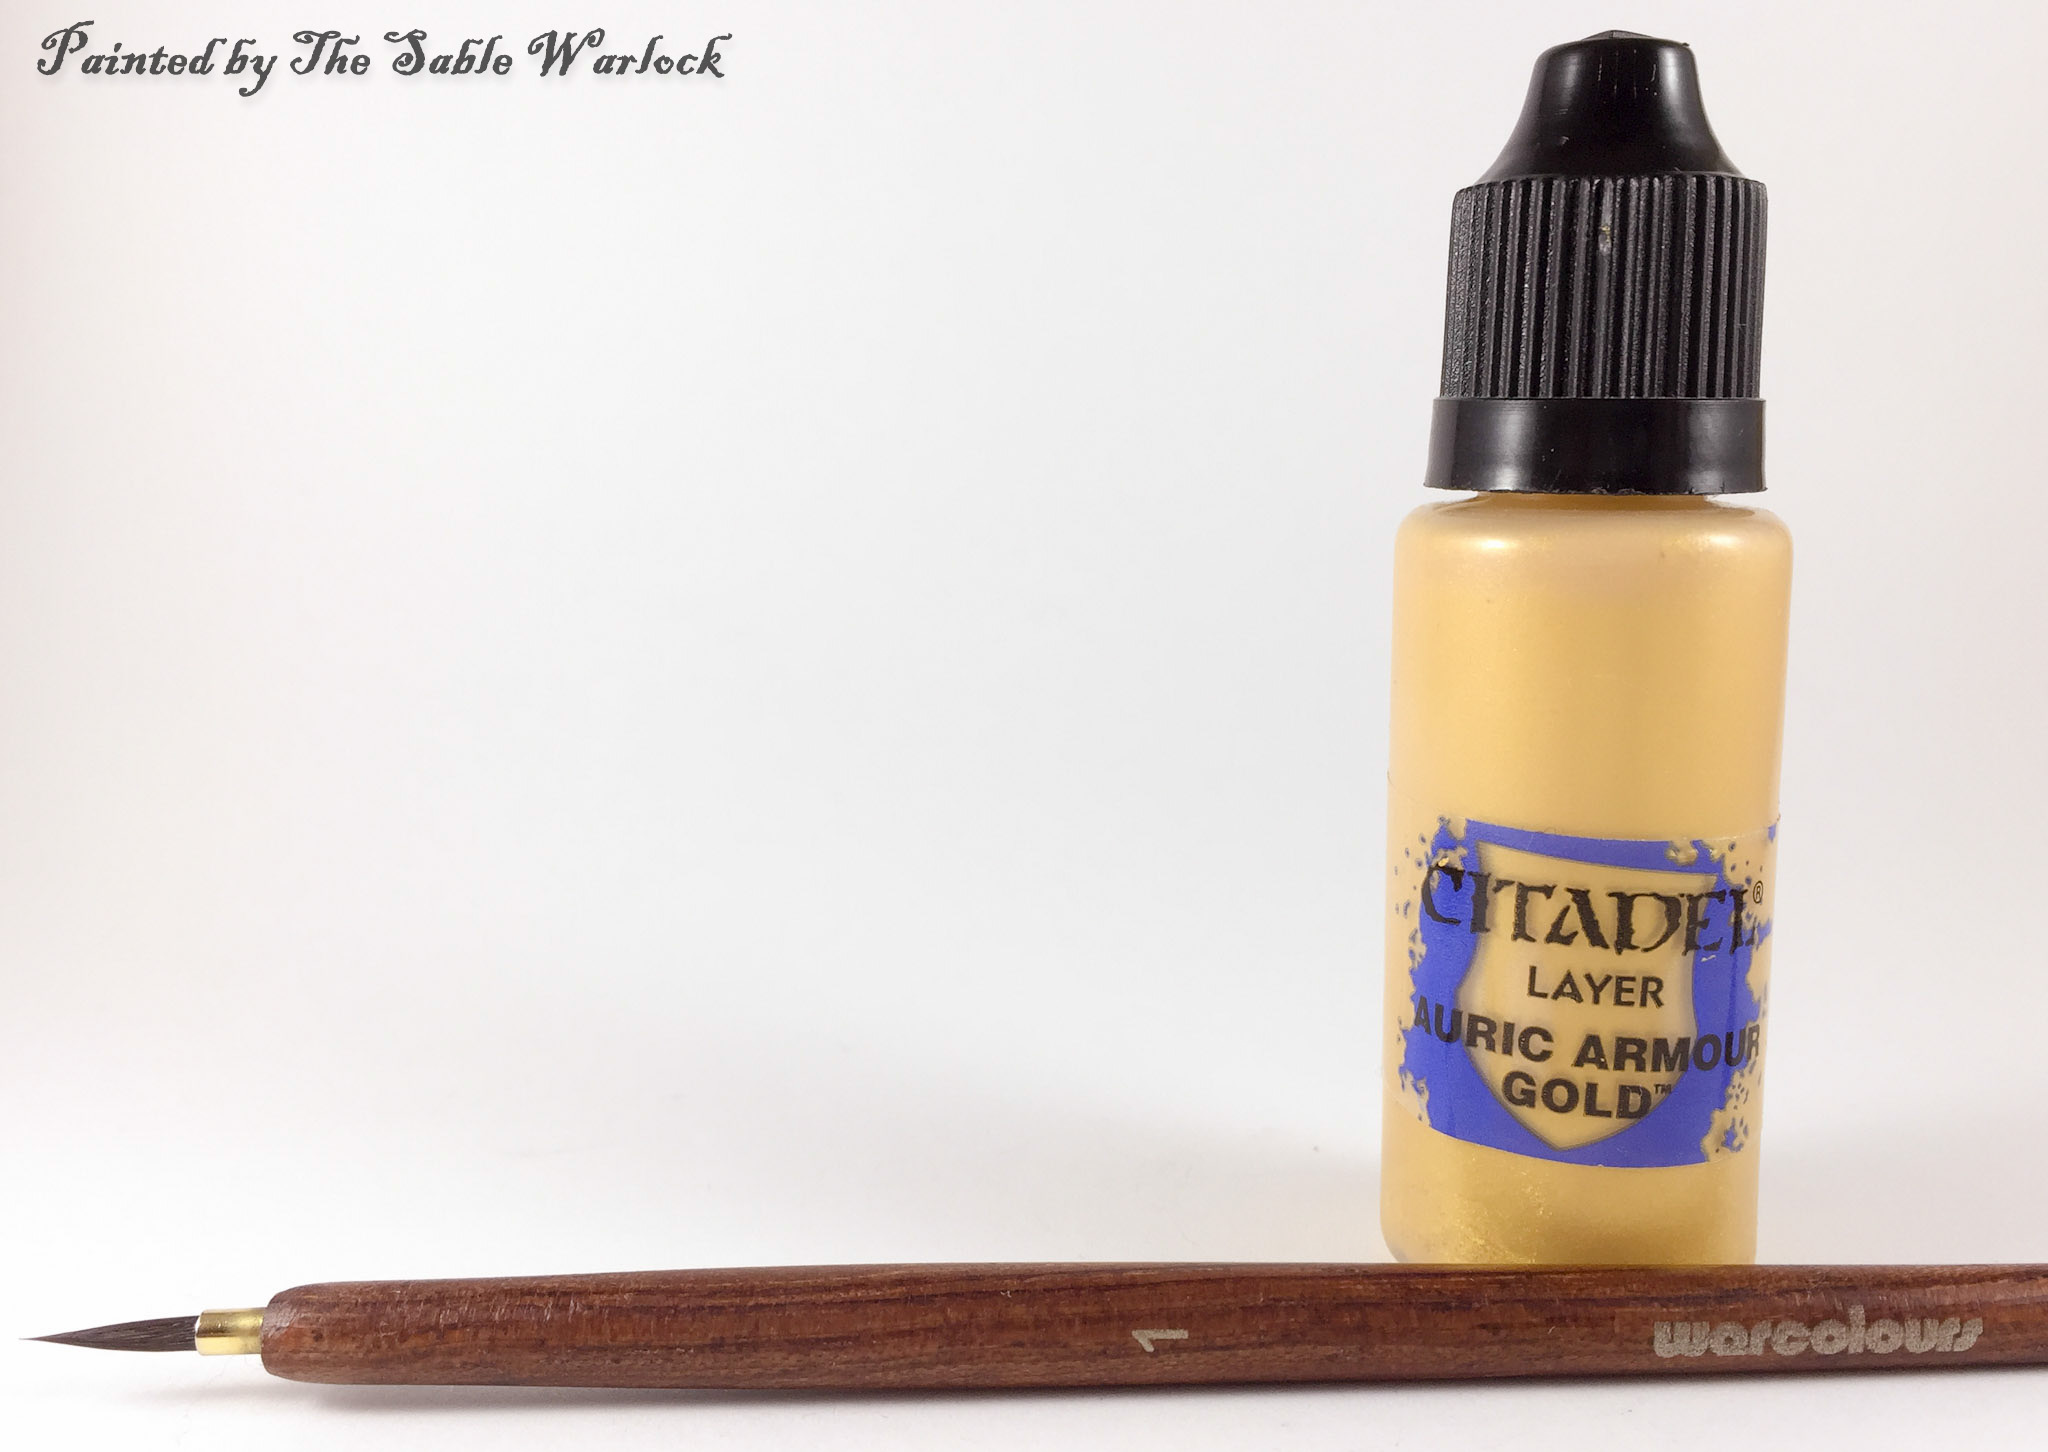
Now to add a layer of bright gold in the form of Auric Armour Gold to give some life to this metal. This paint is quite thin so its easy to create a smooth transition from the previous layer.

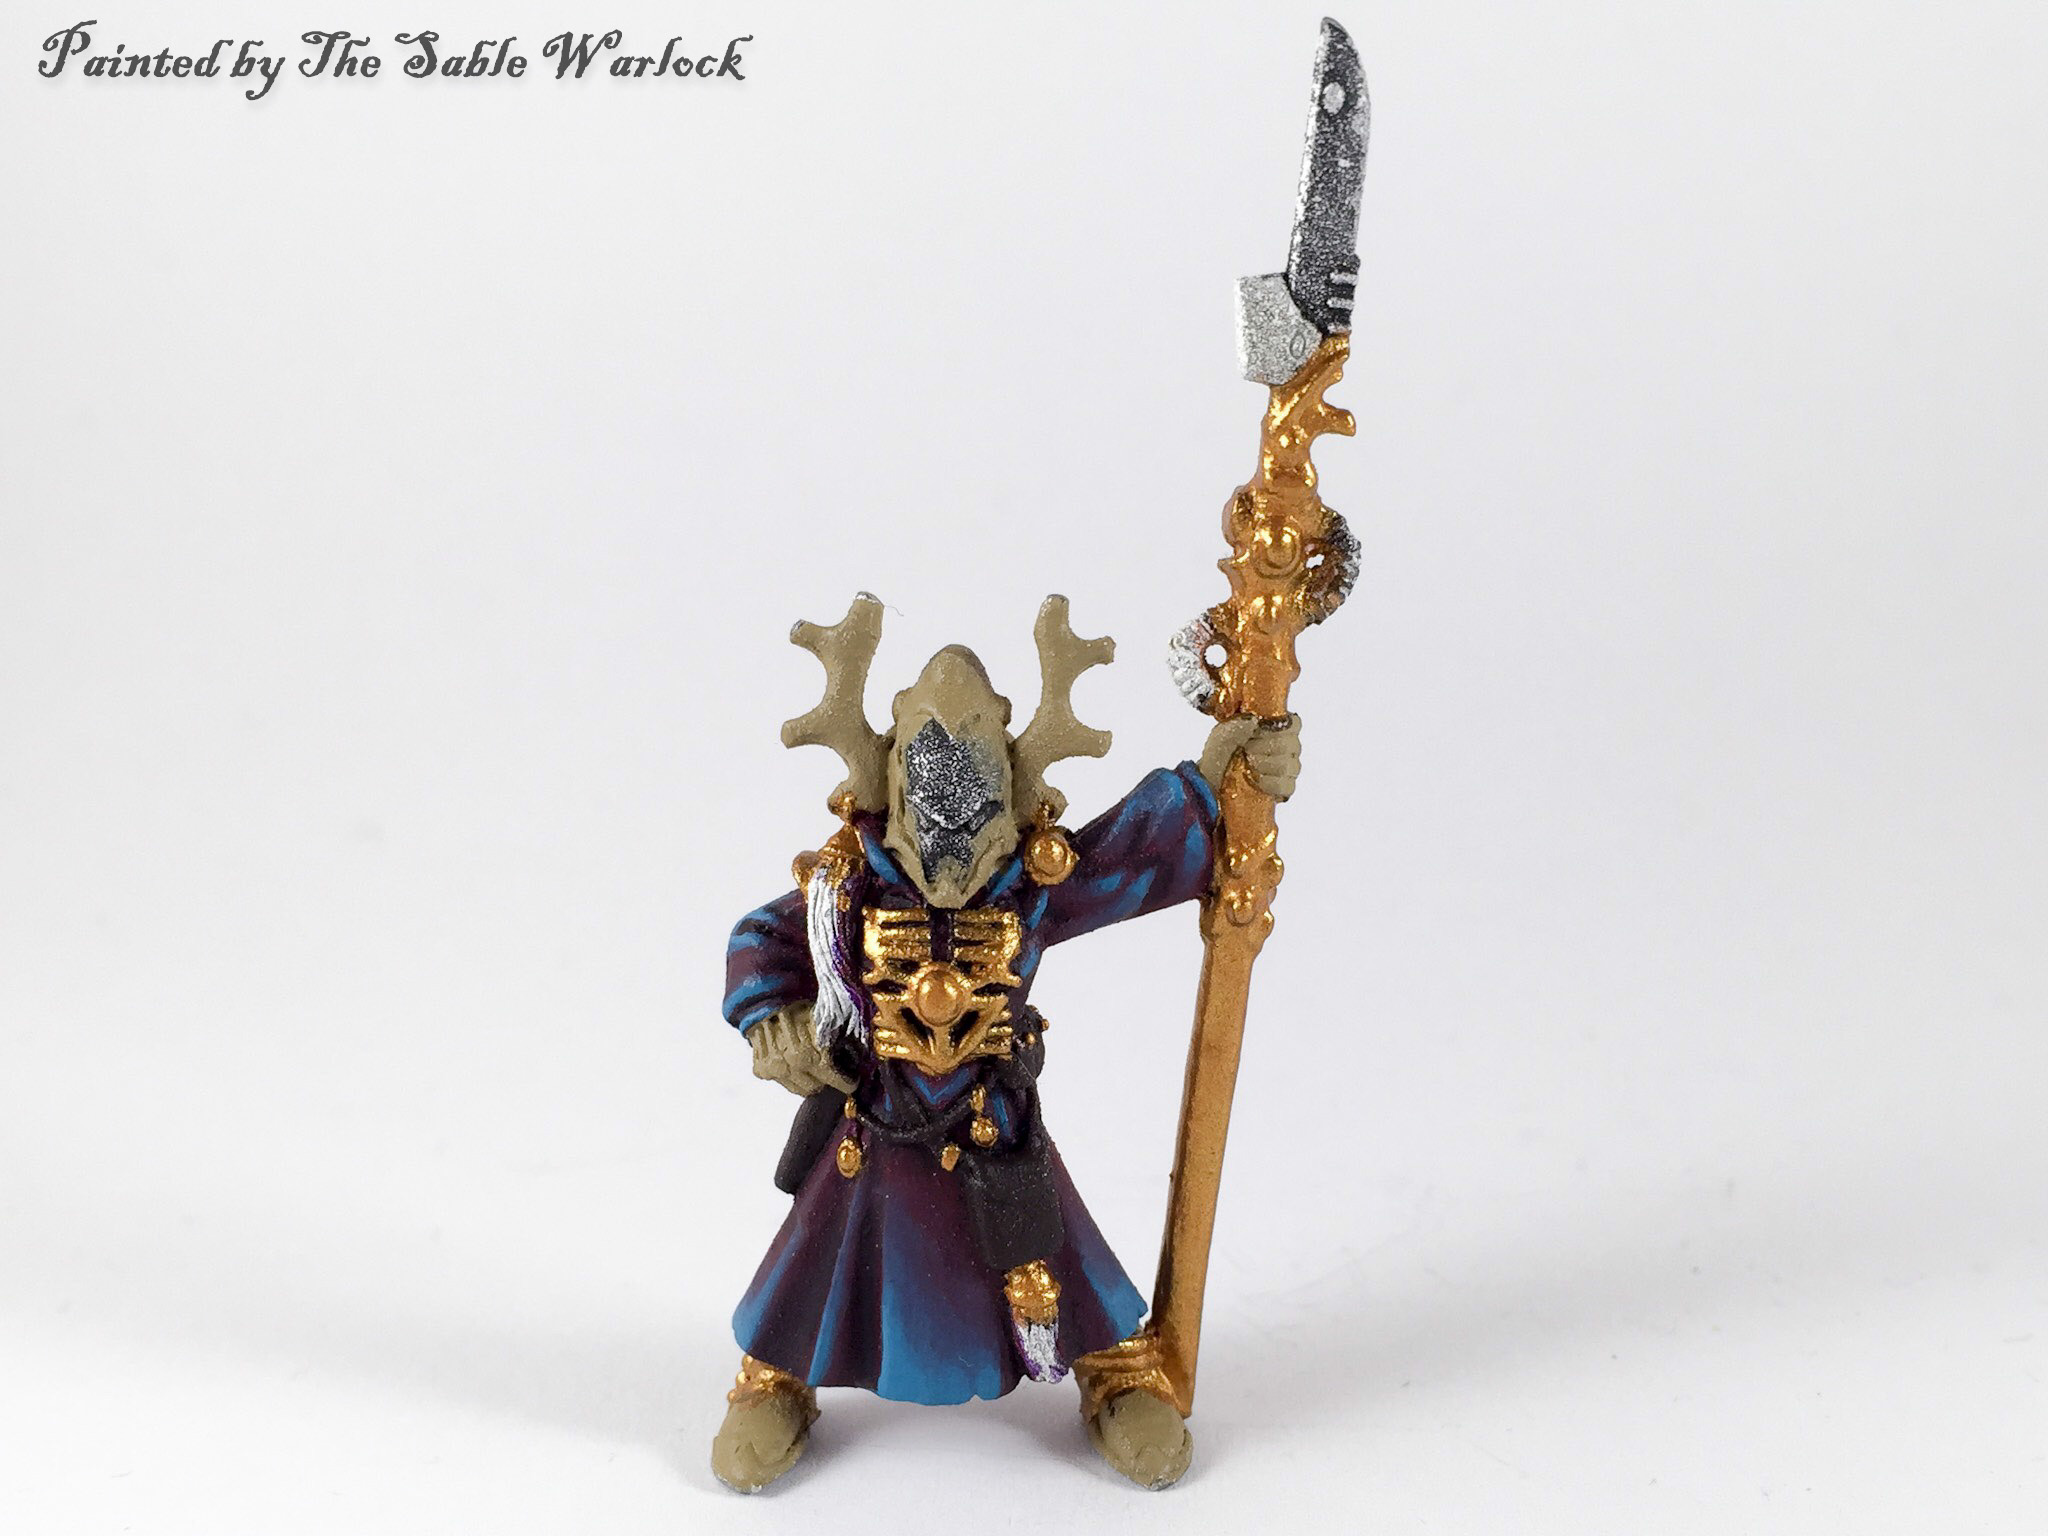
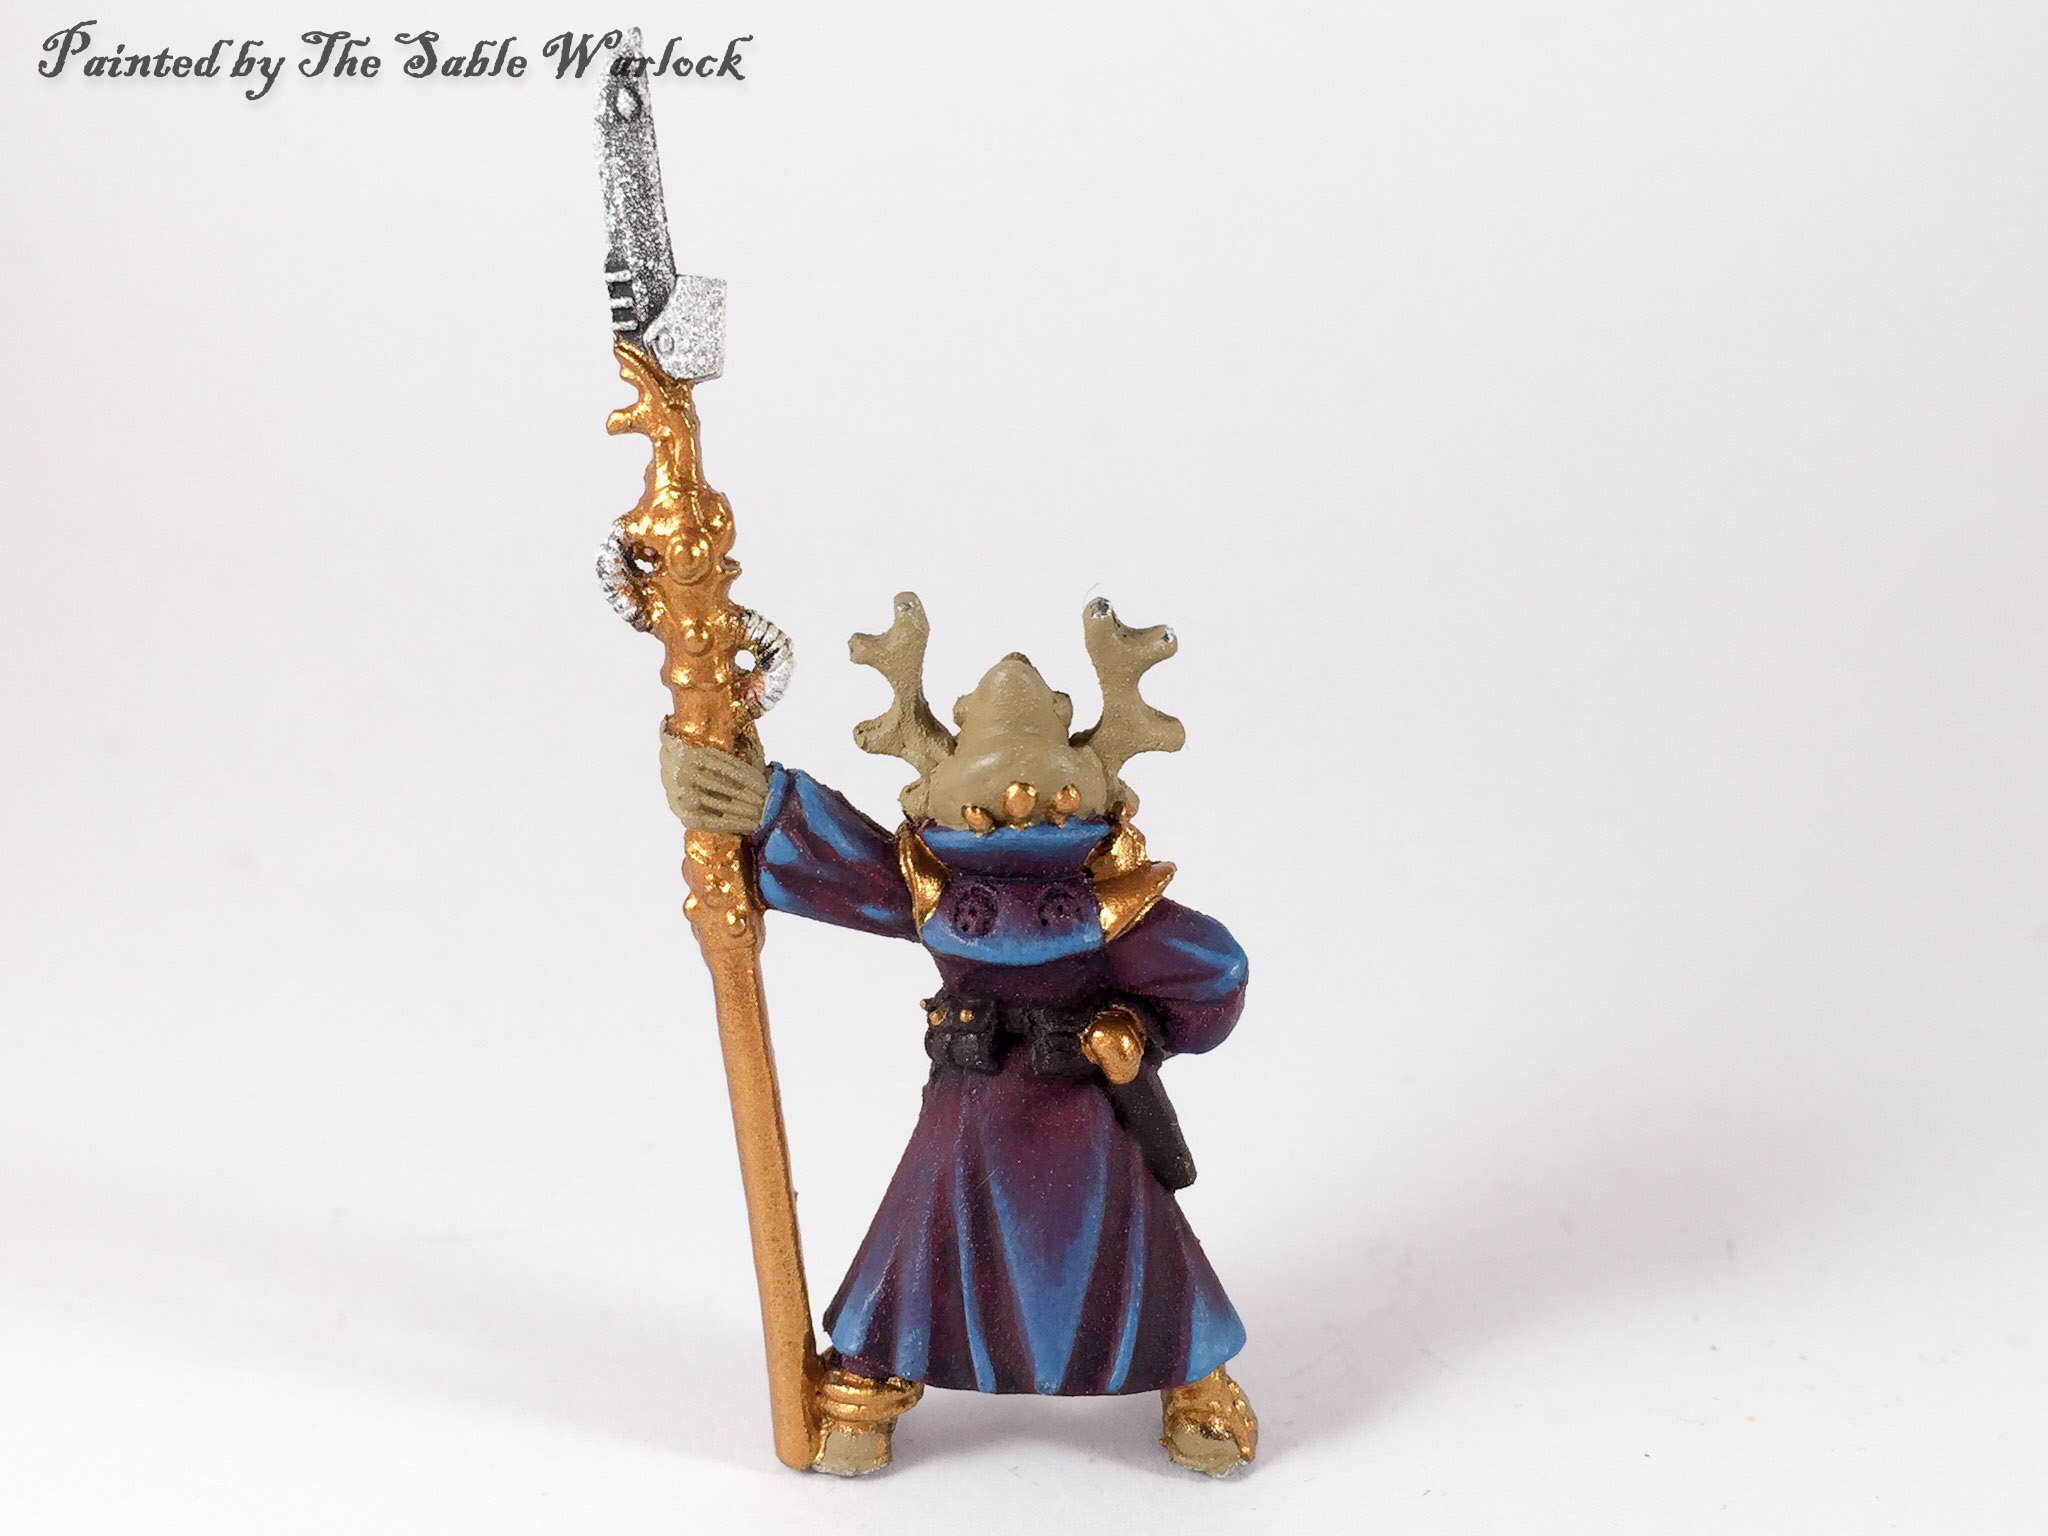
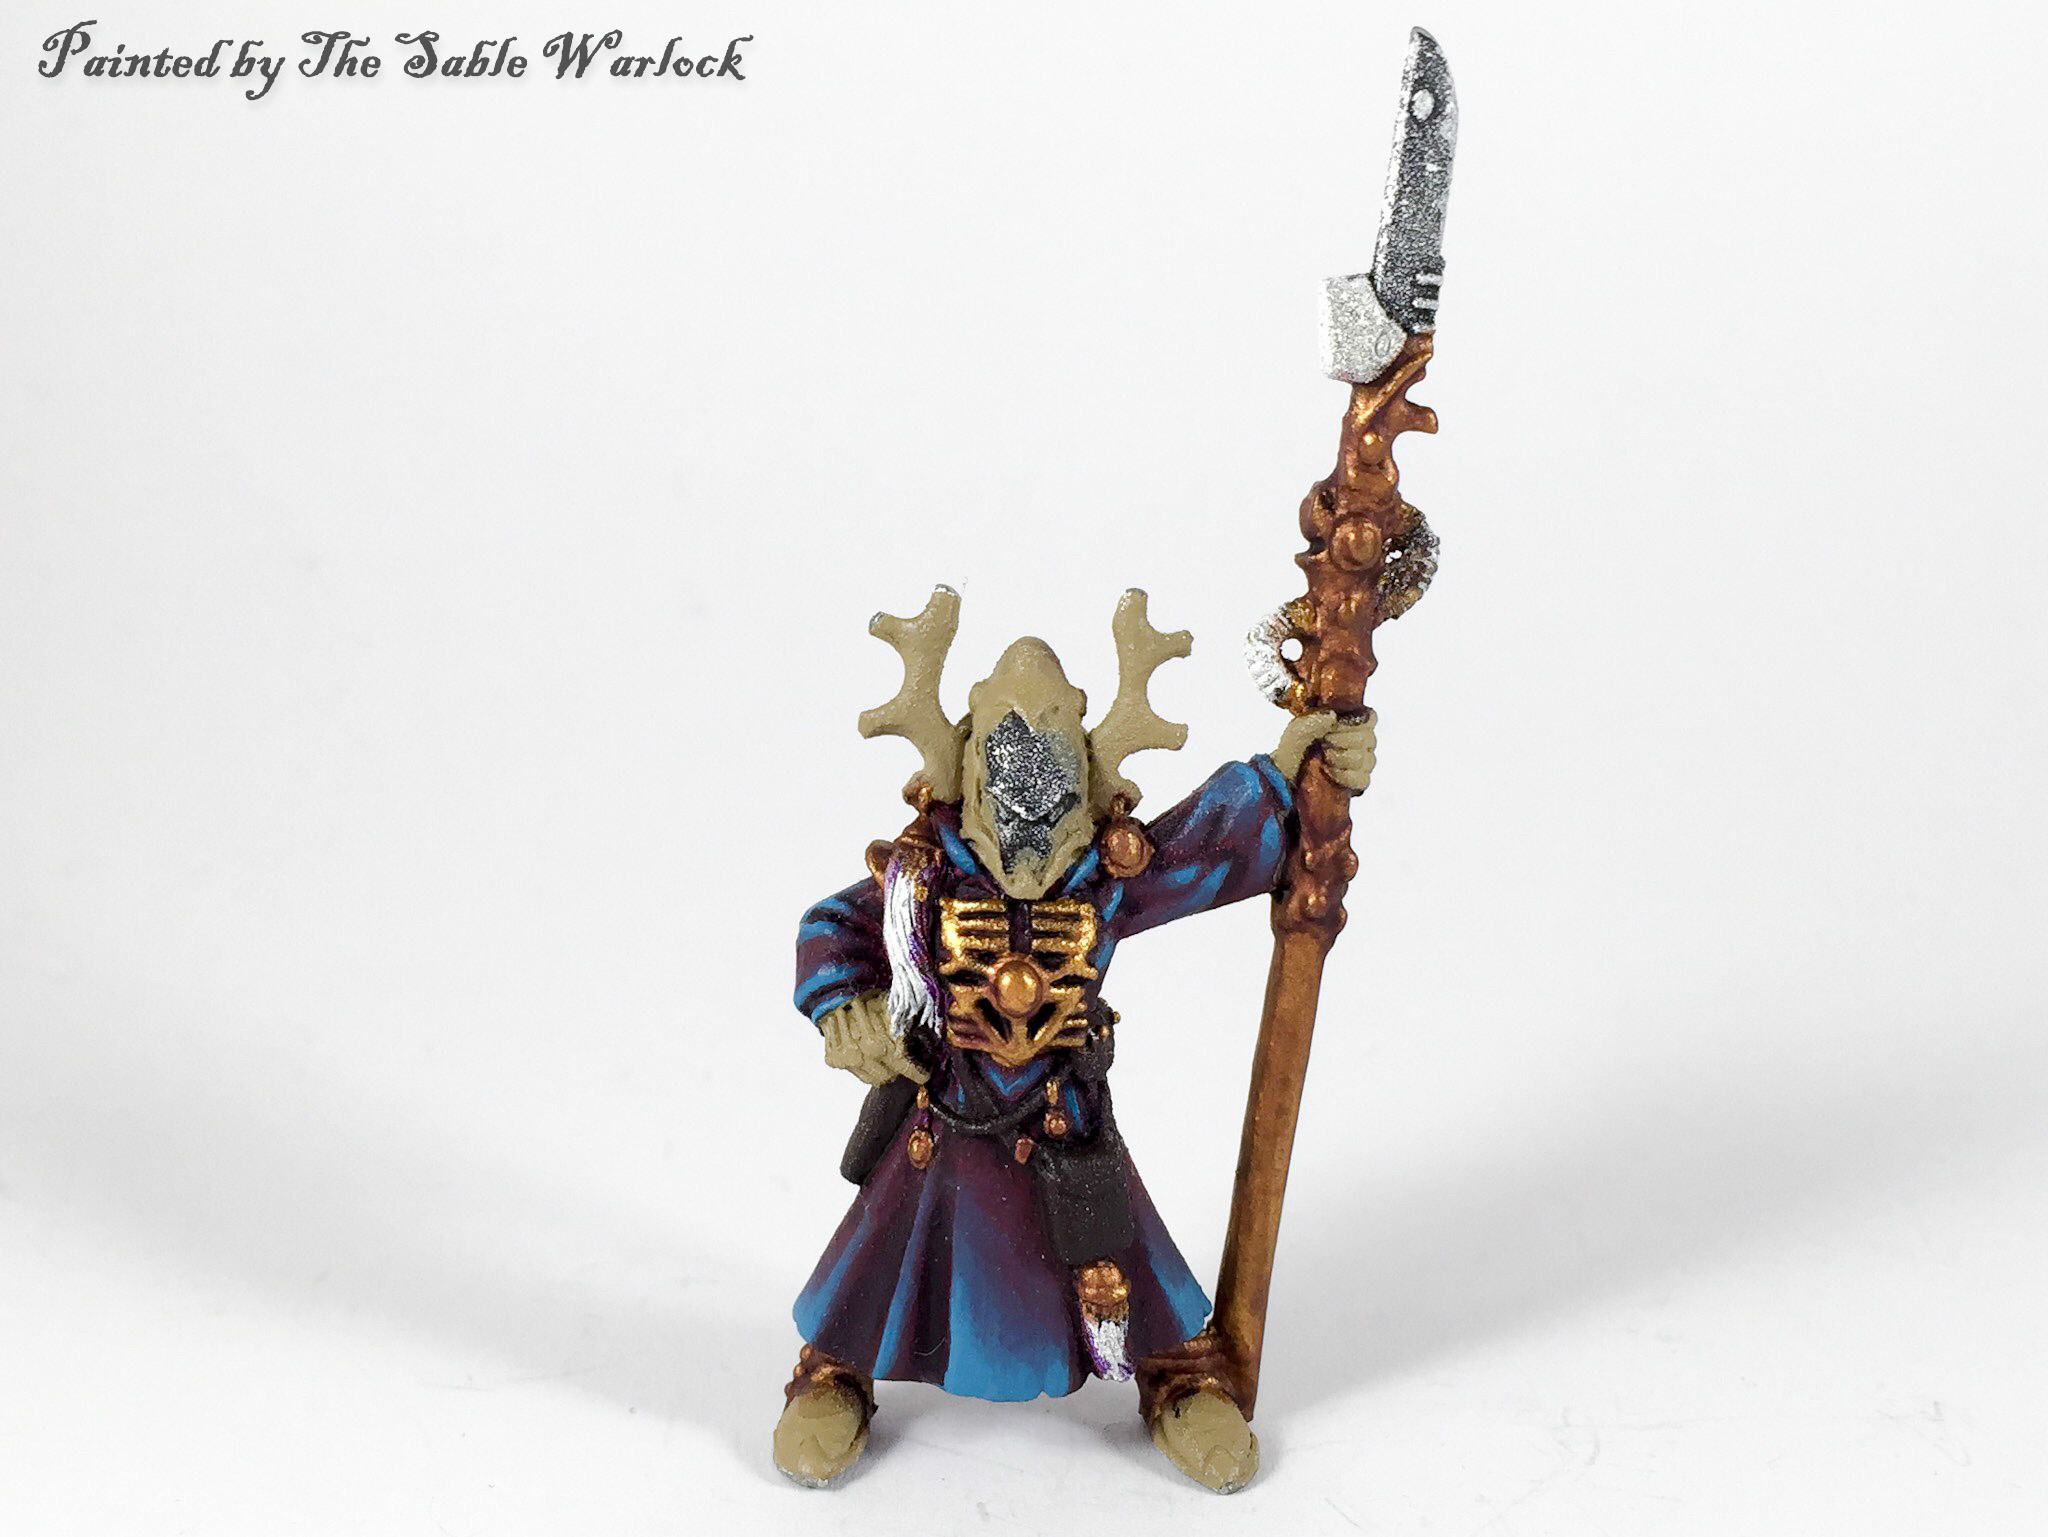
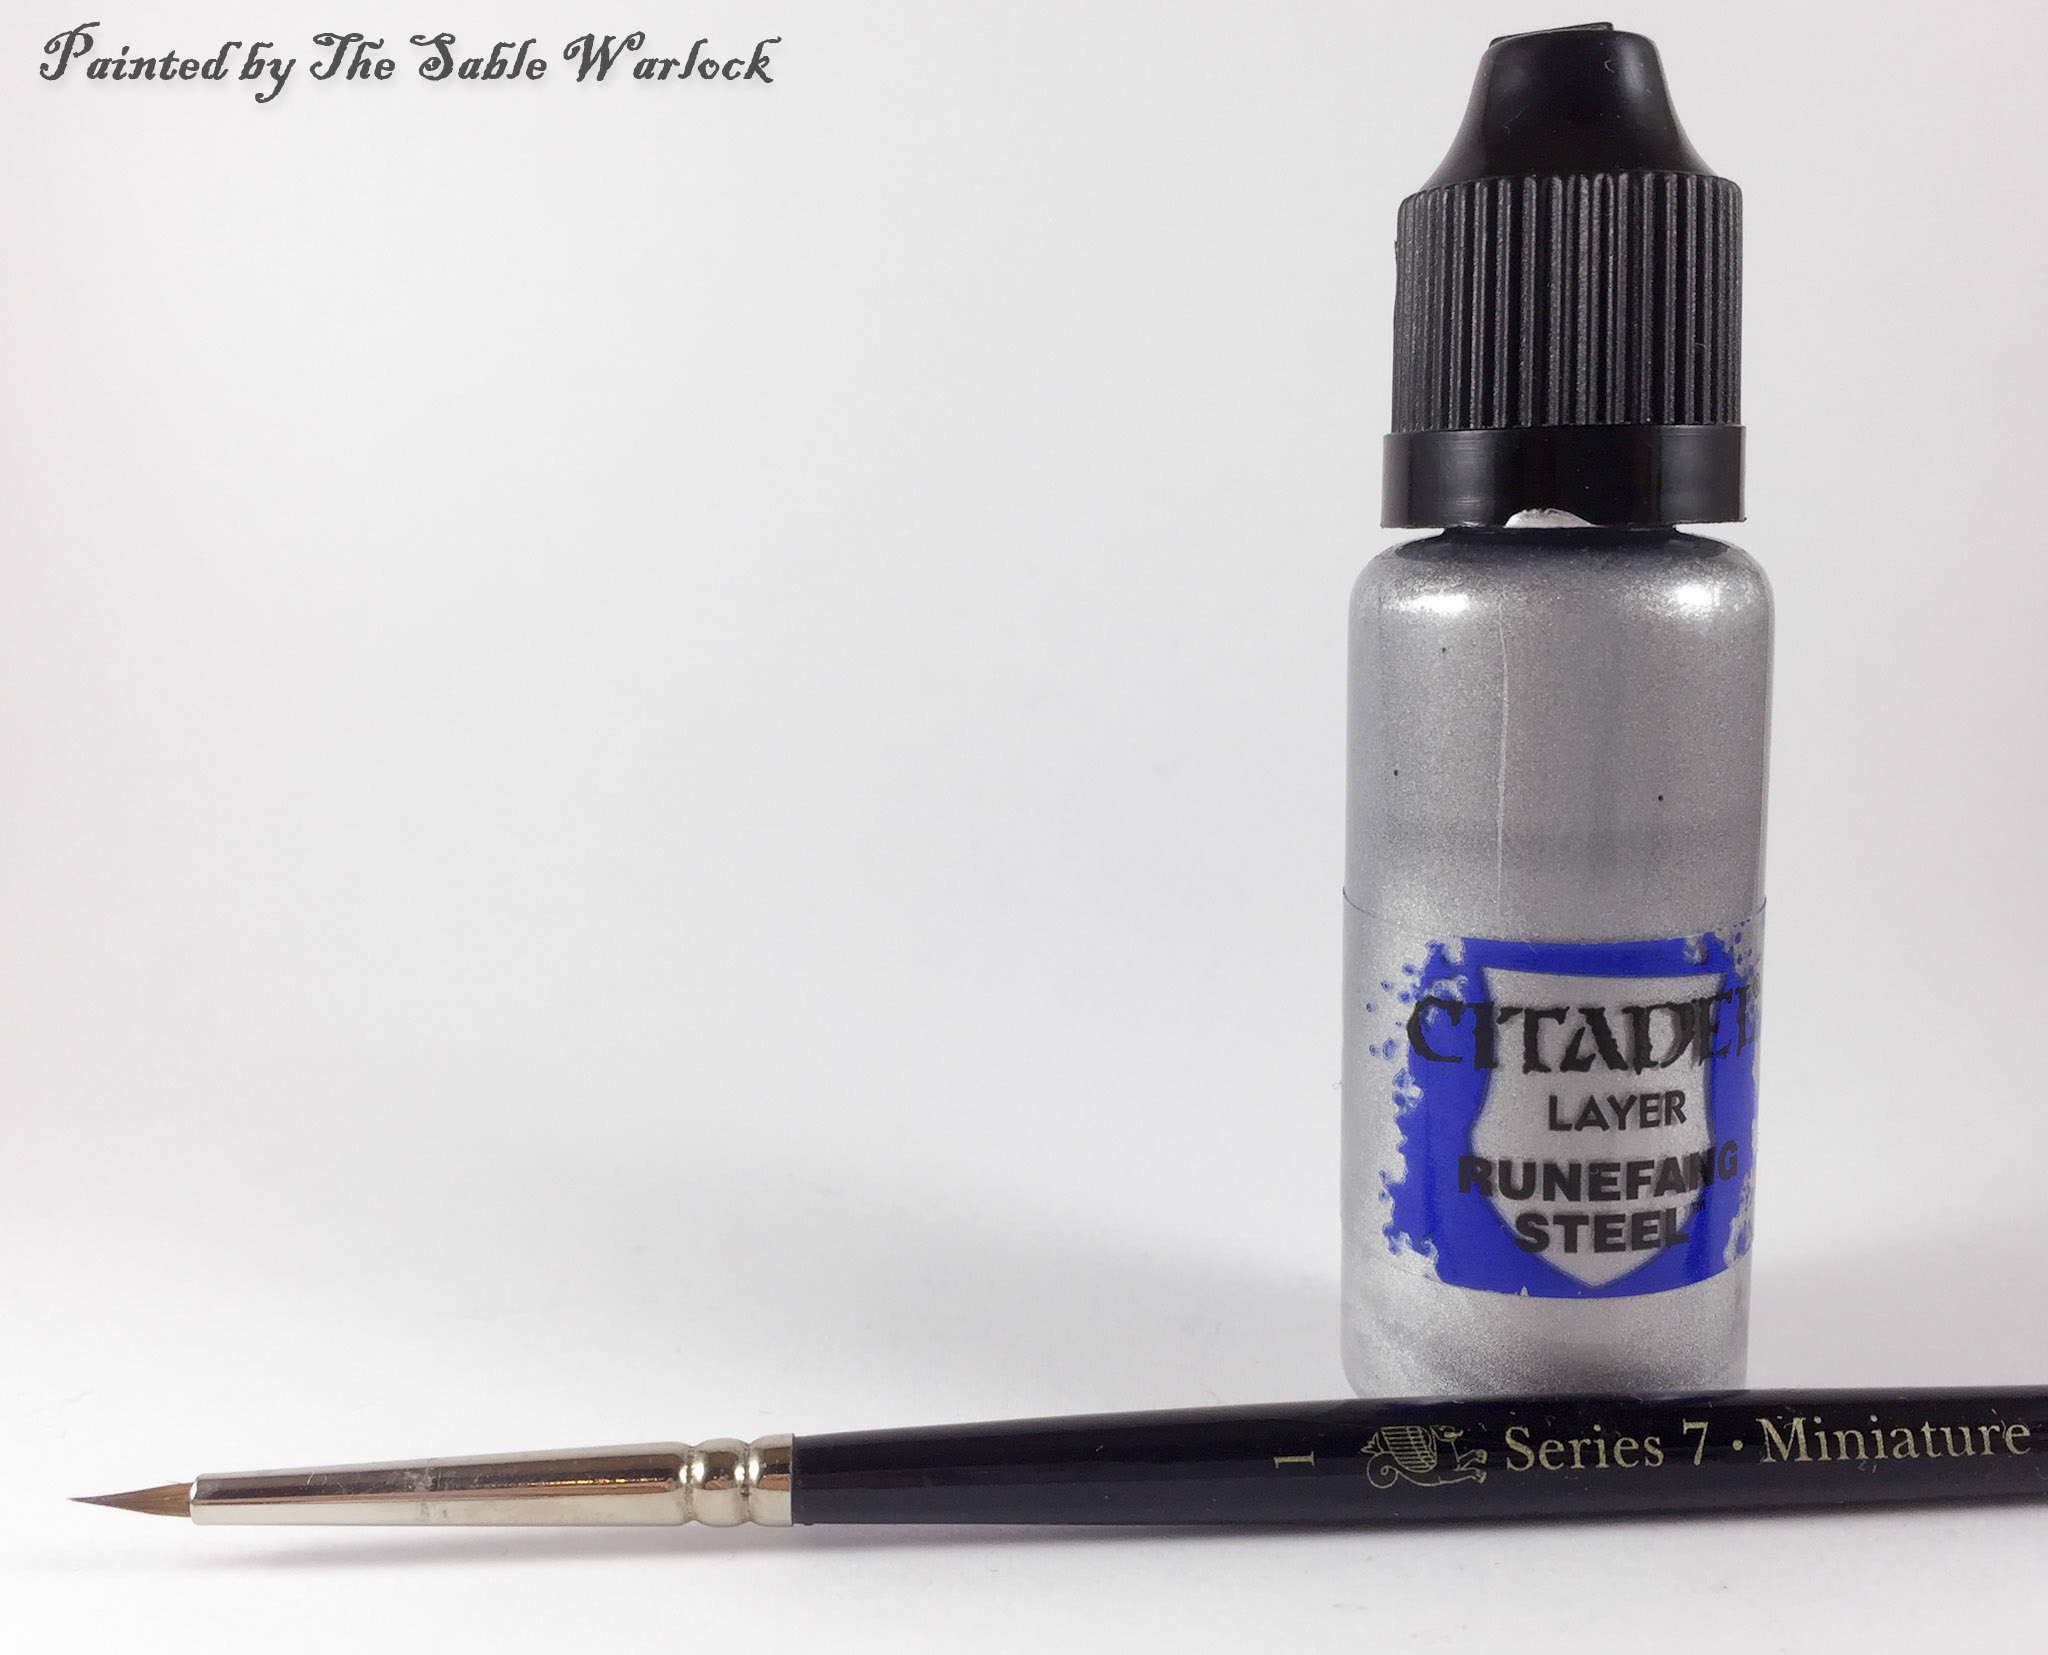
Edge Highlighting
Final highlights include an edge highlight of Runefang steel and sharp points and corners to give the appearance of a really shiny metal.
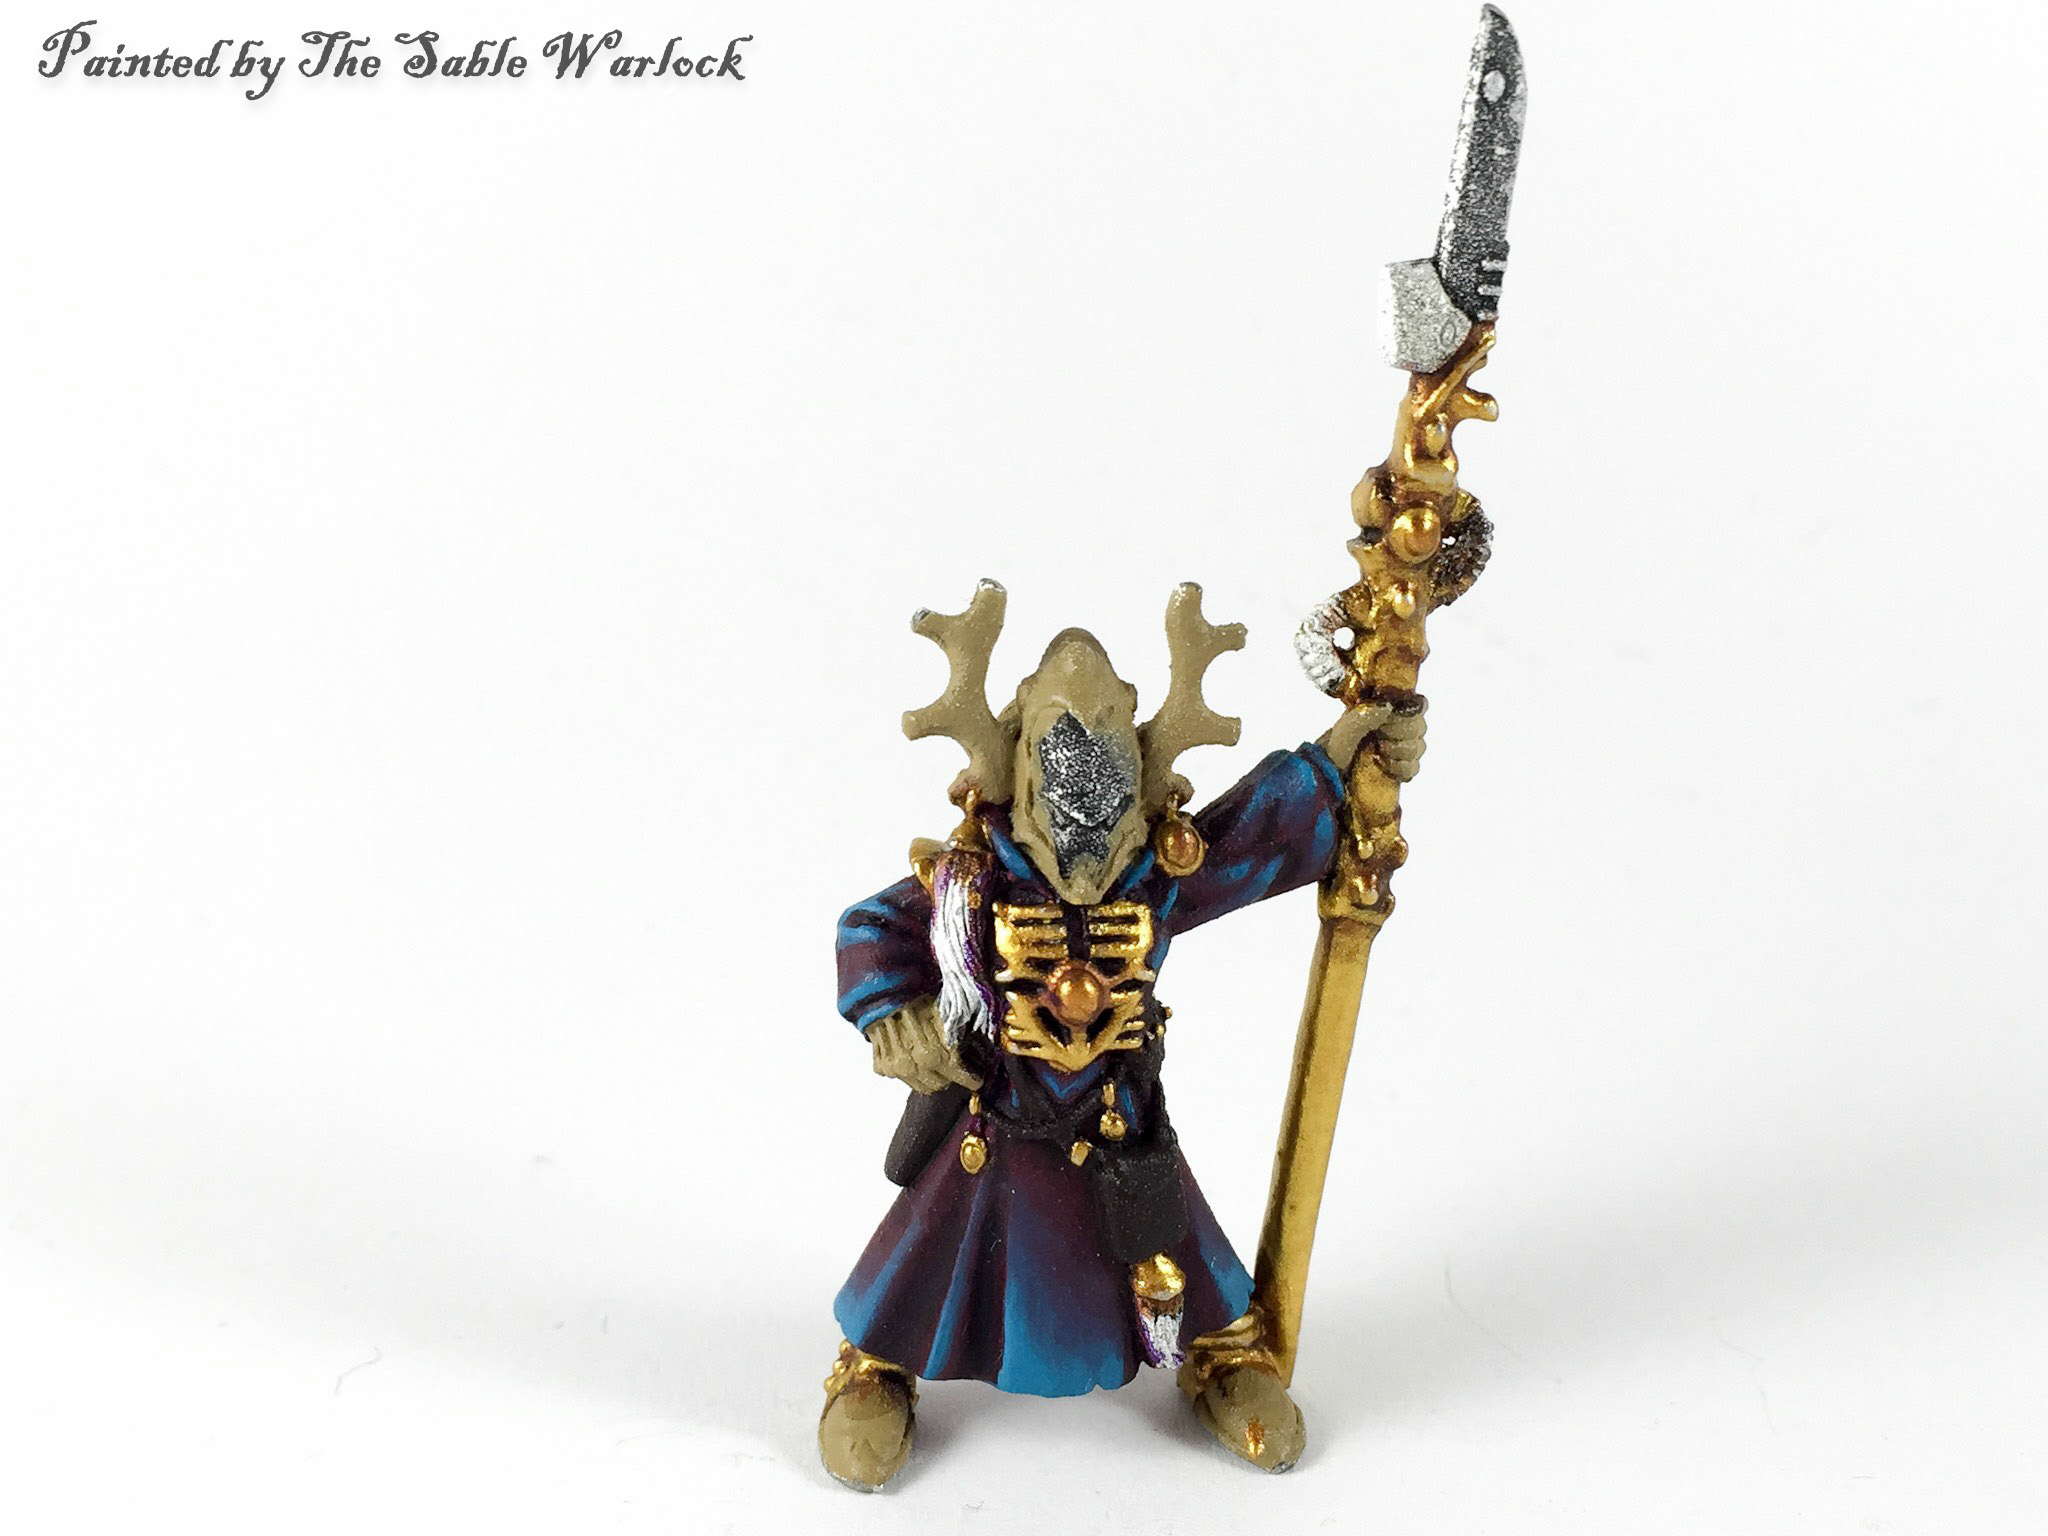

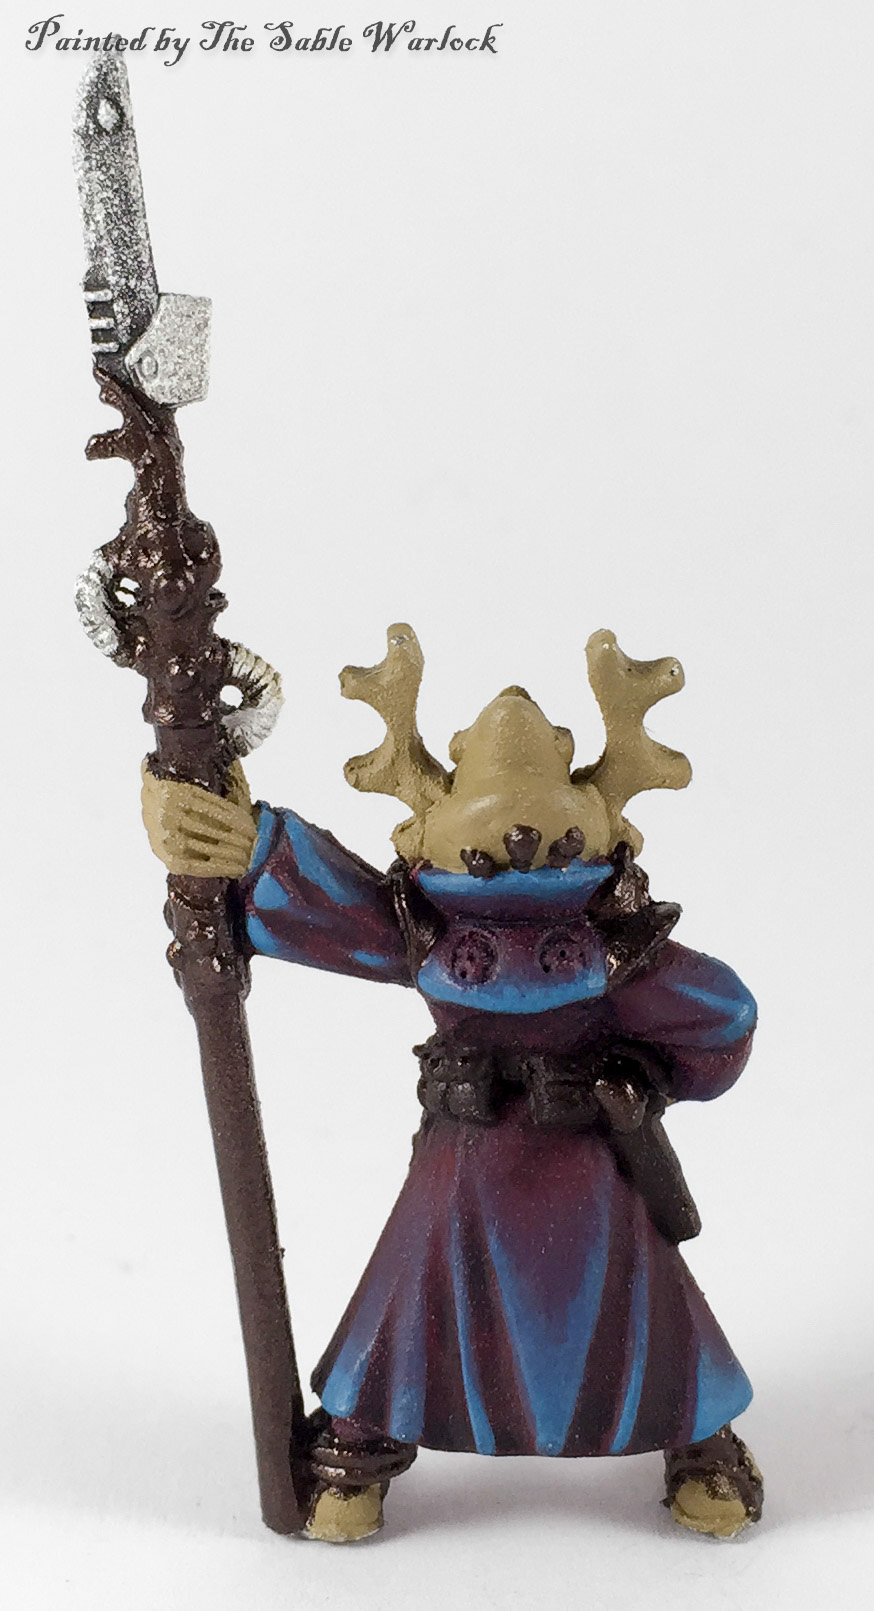
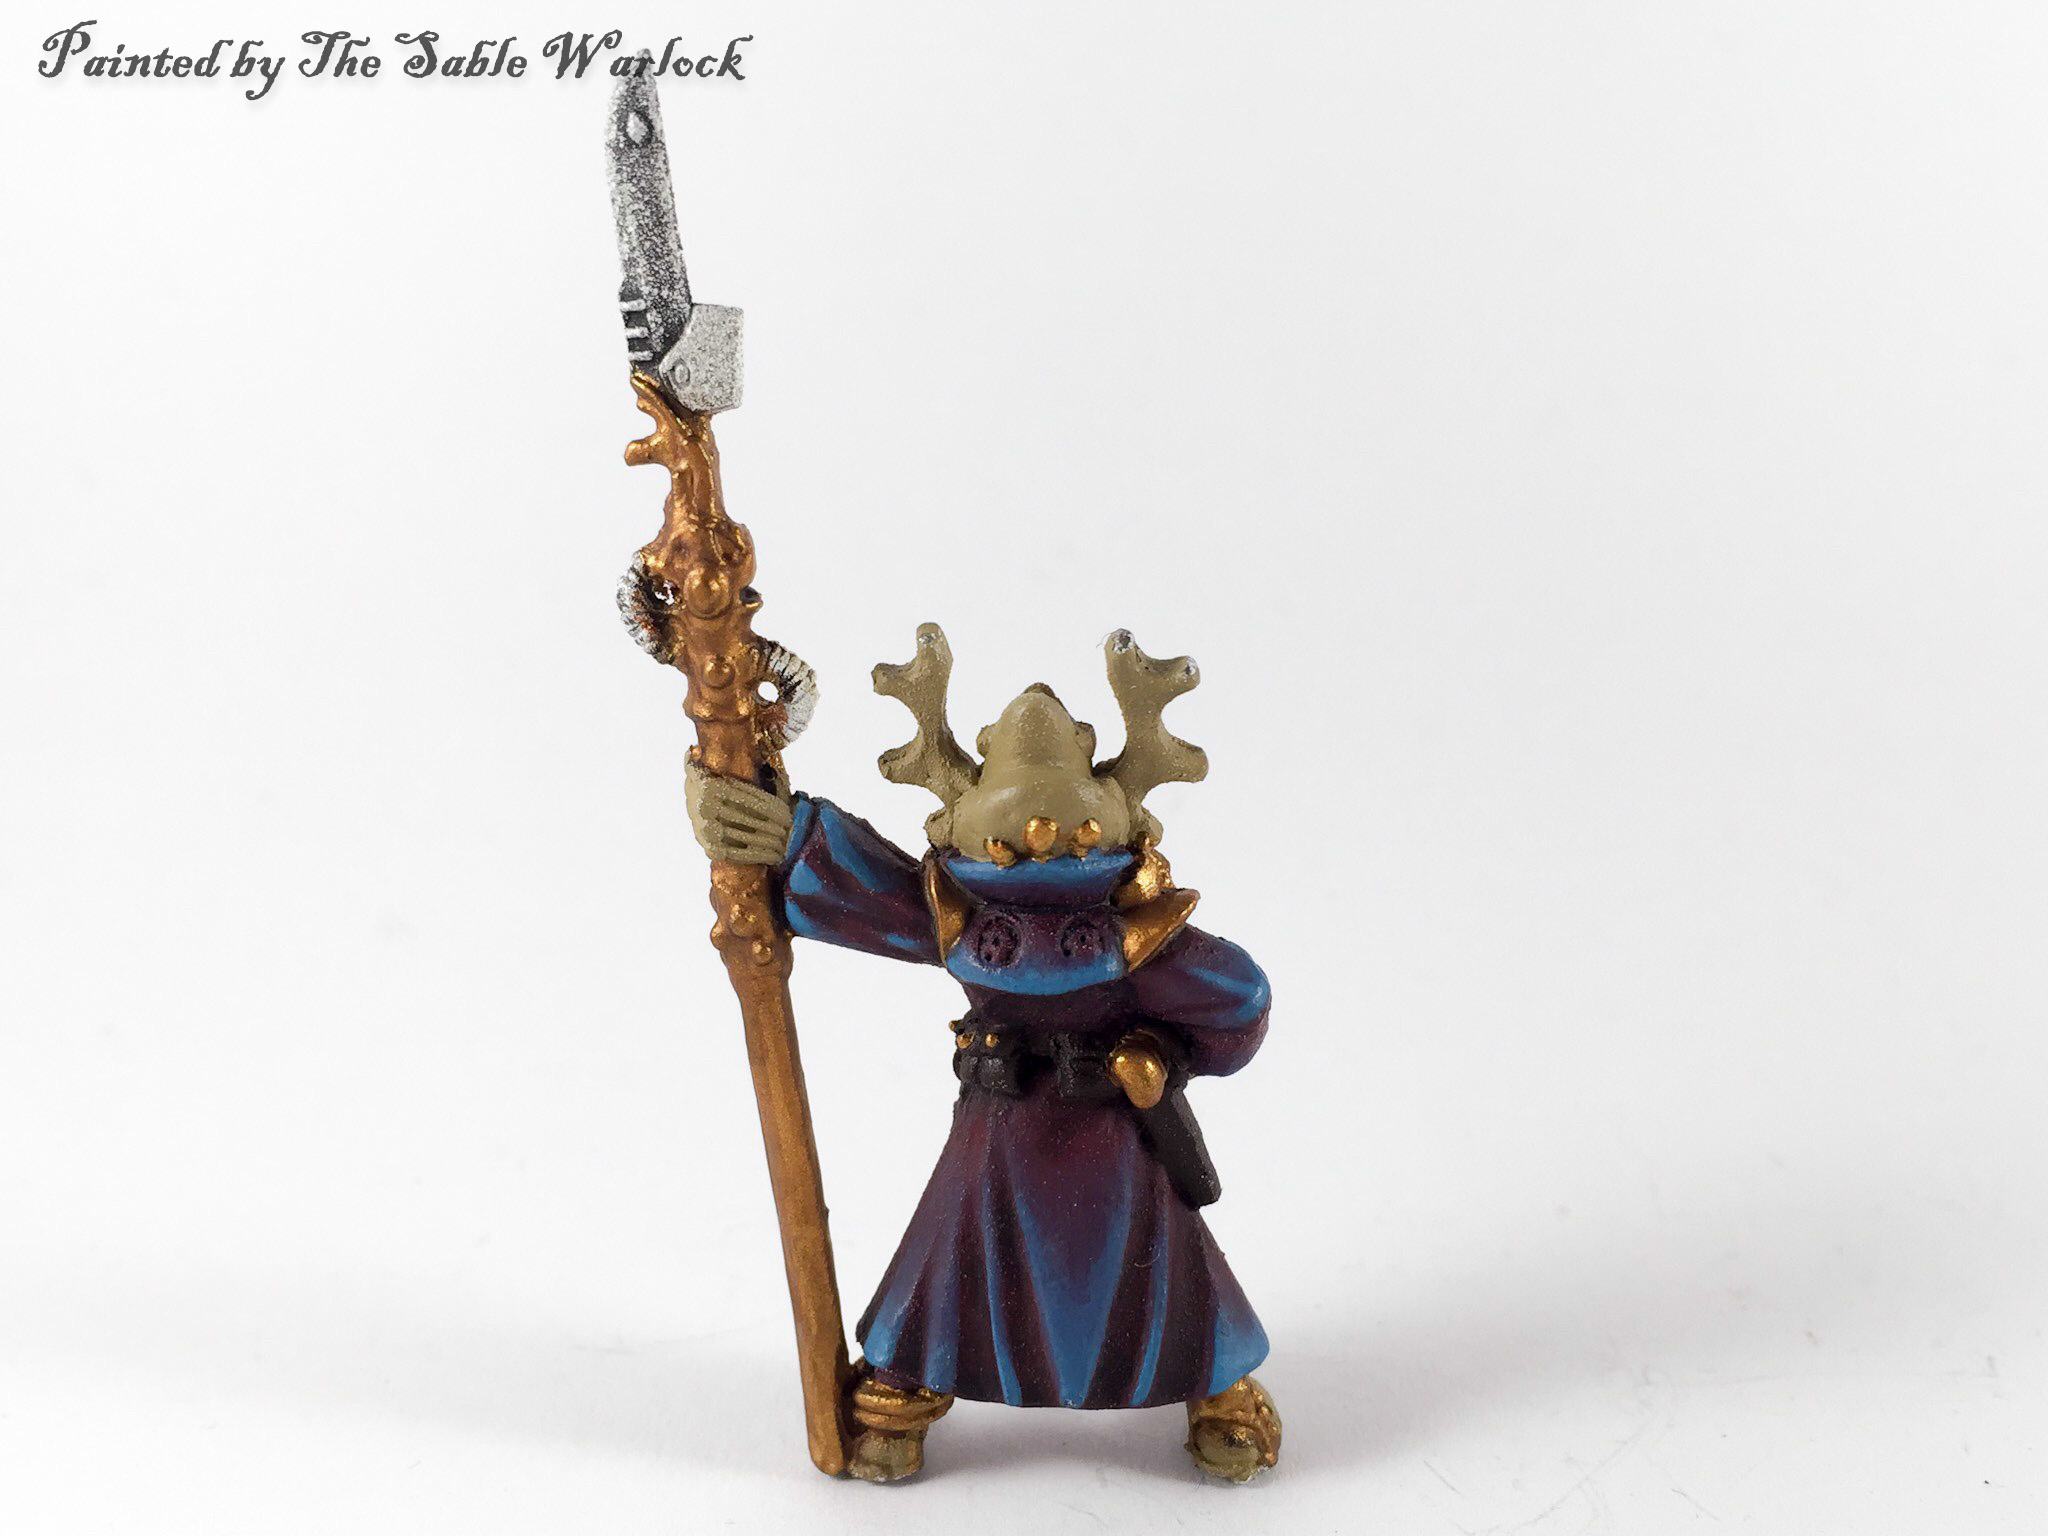
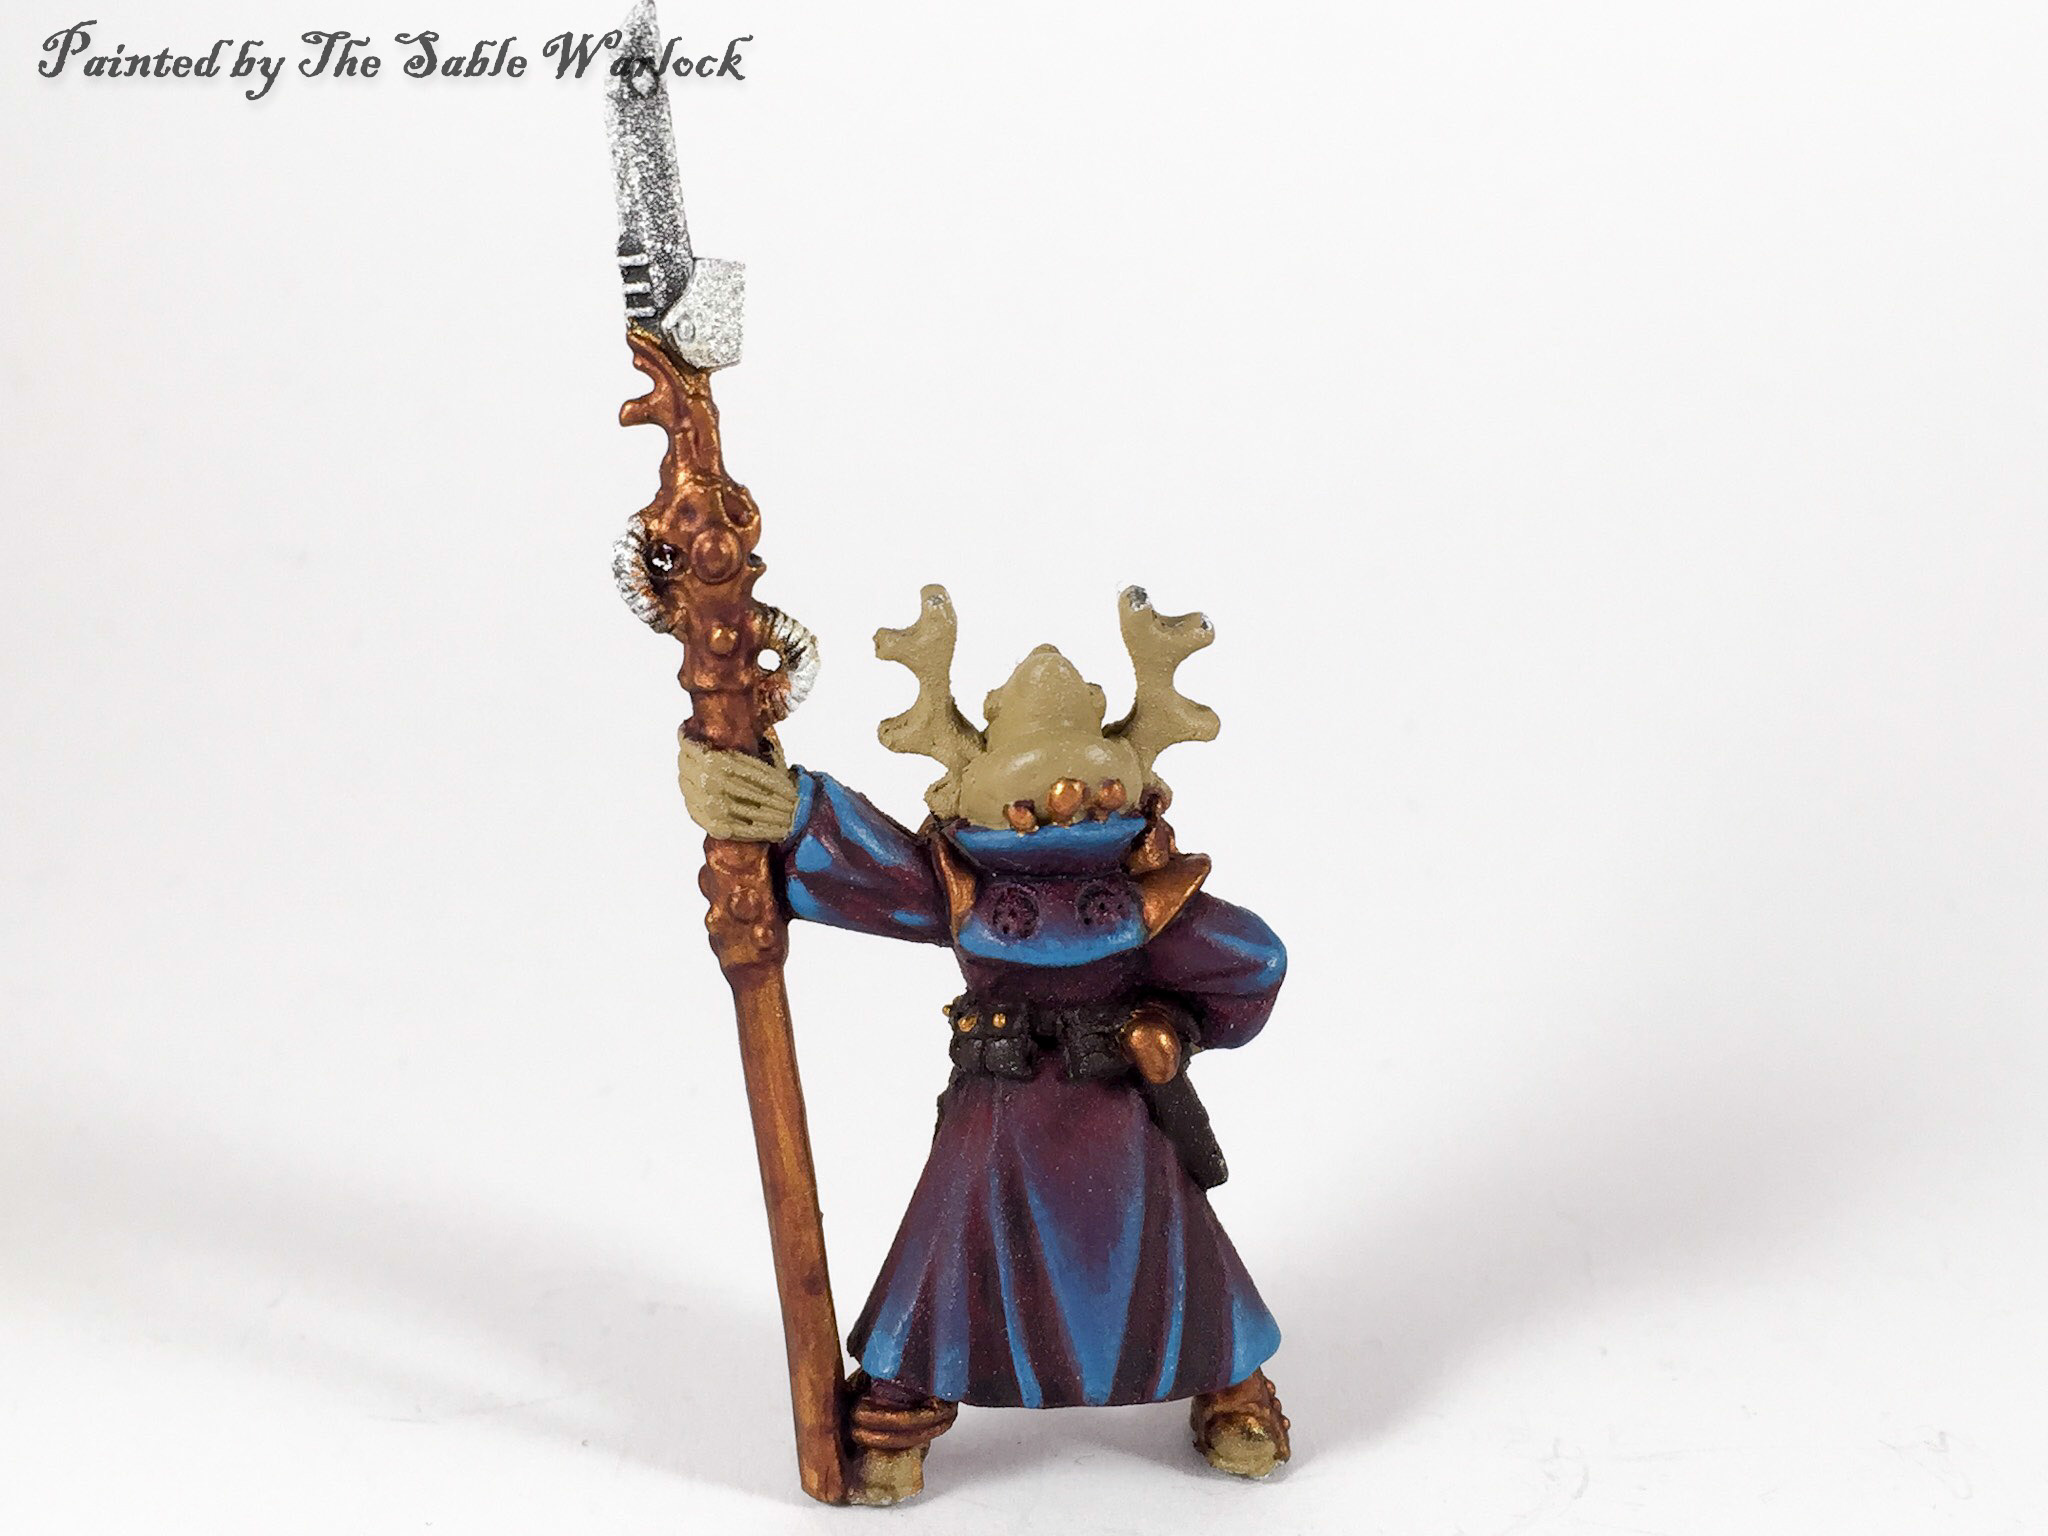
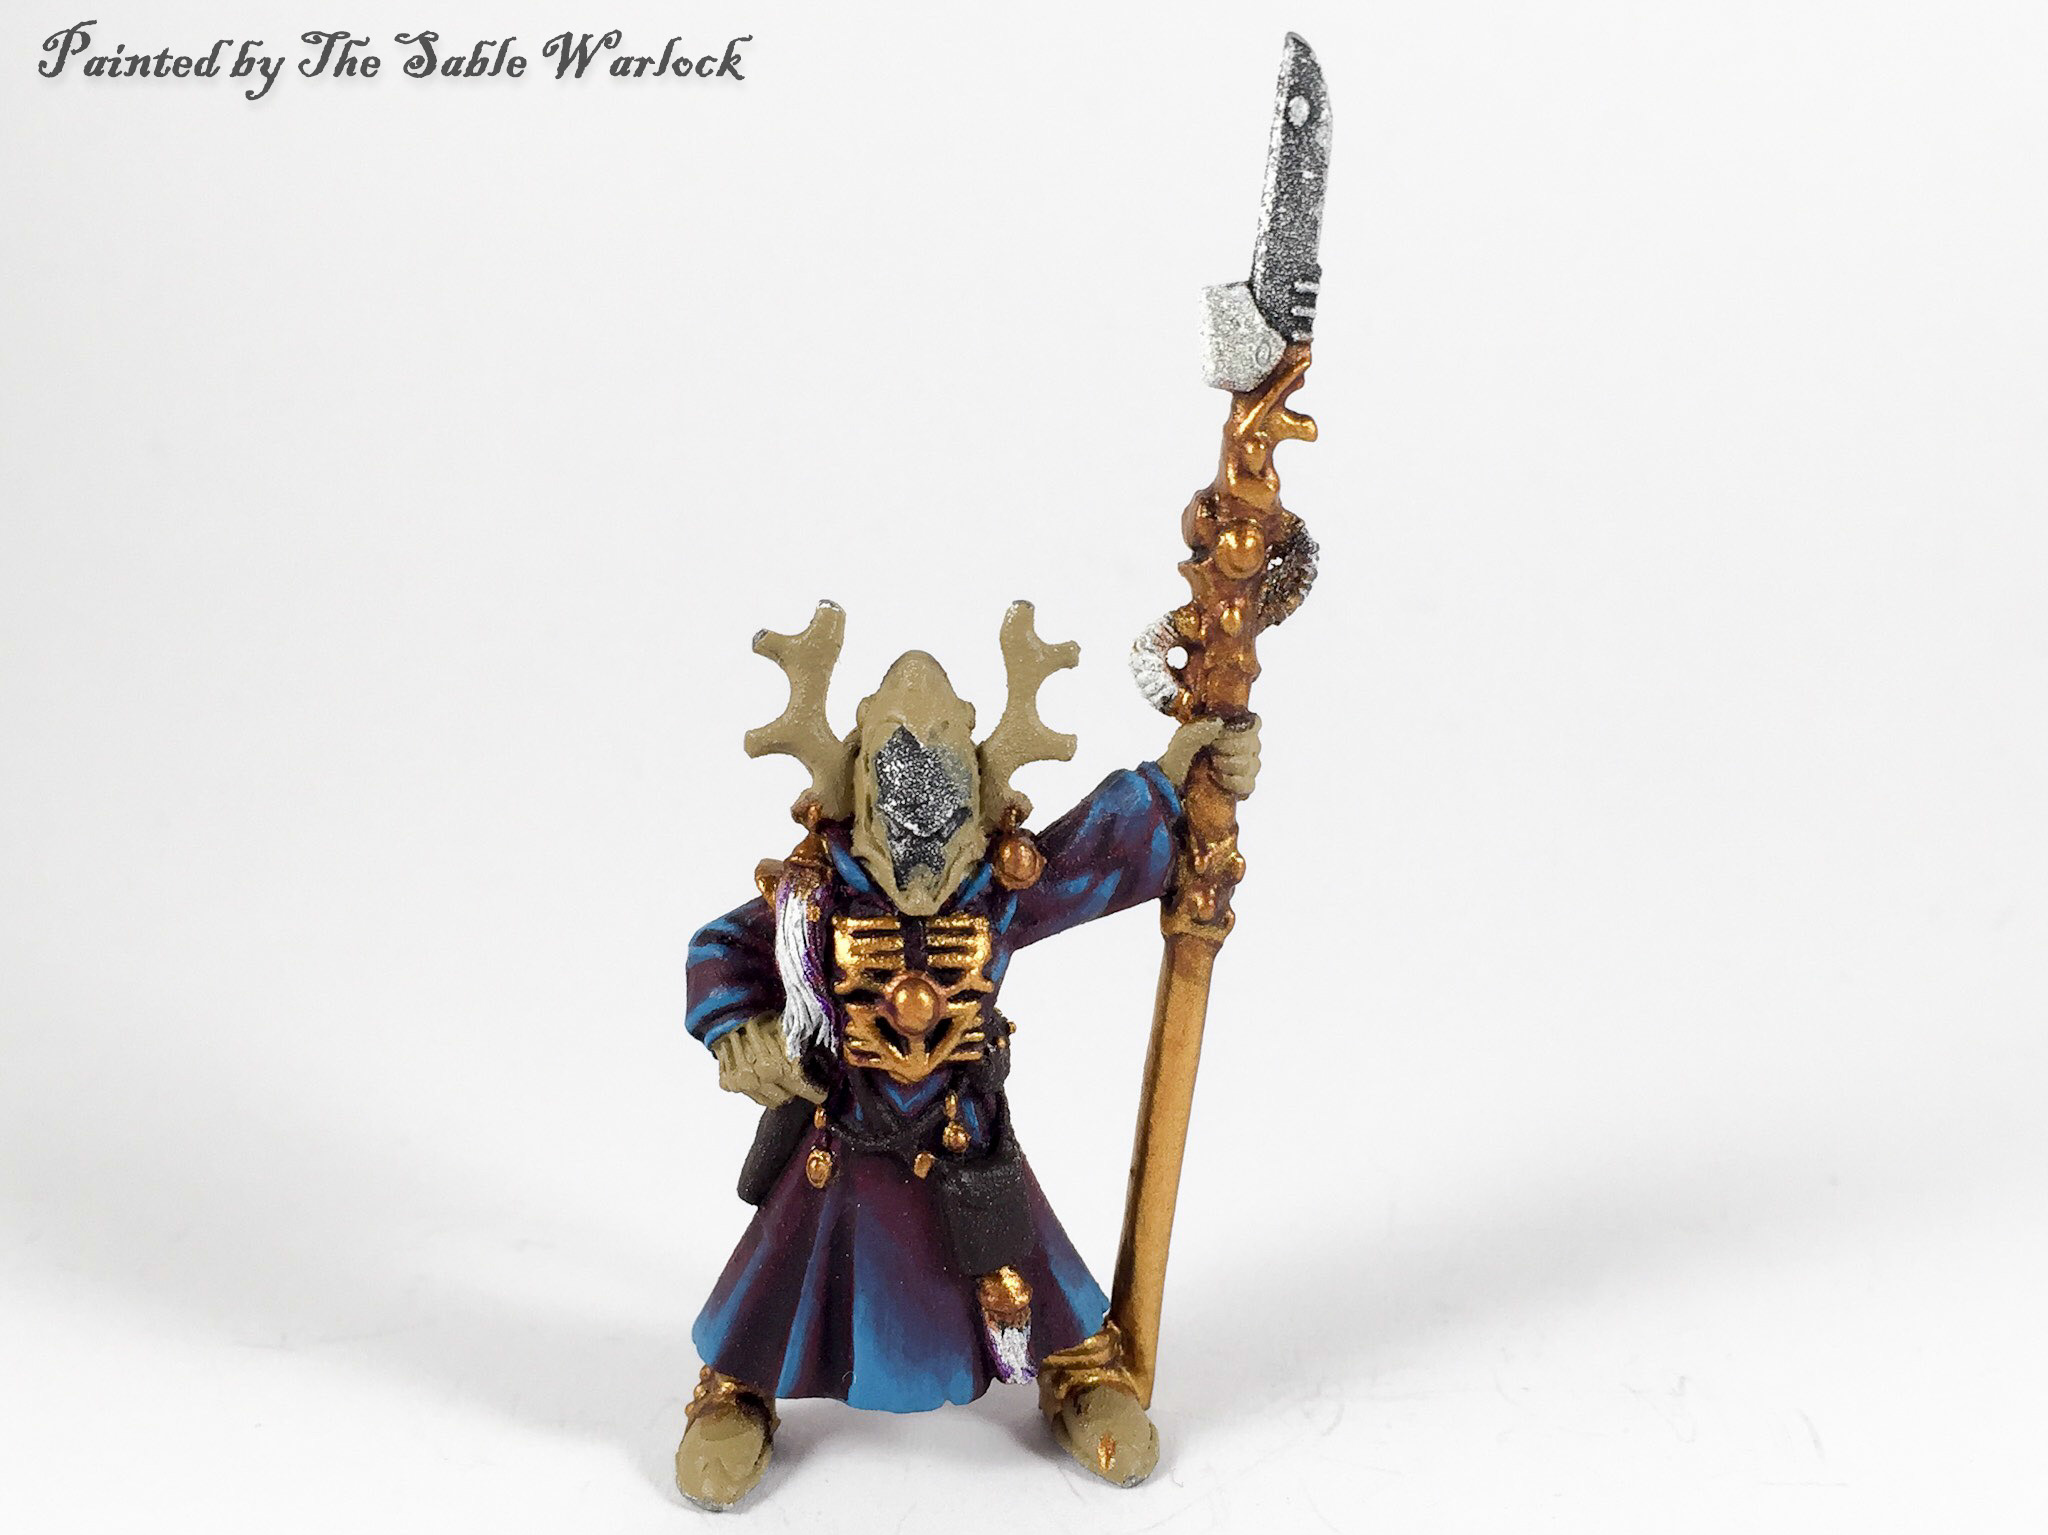
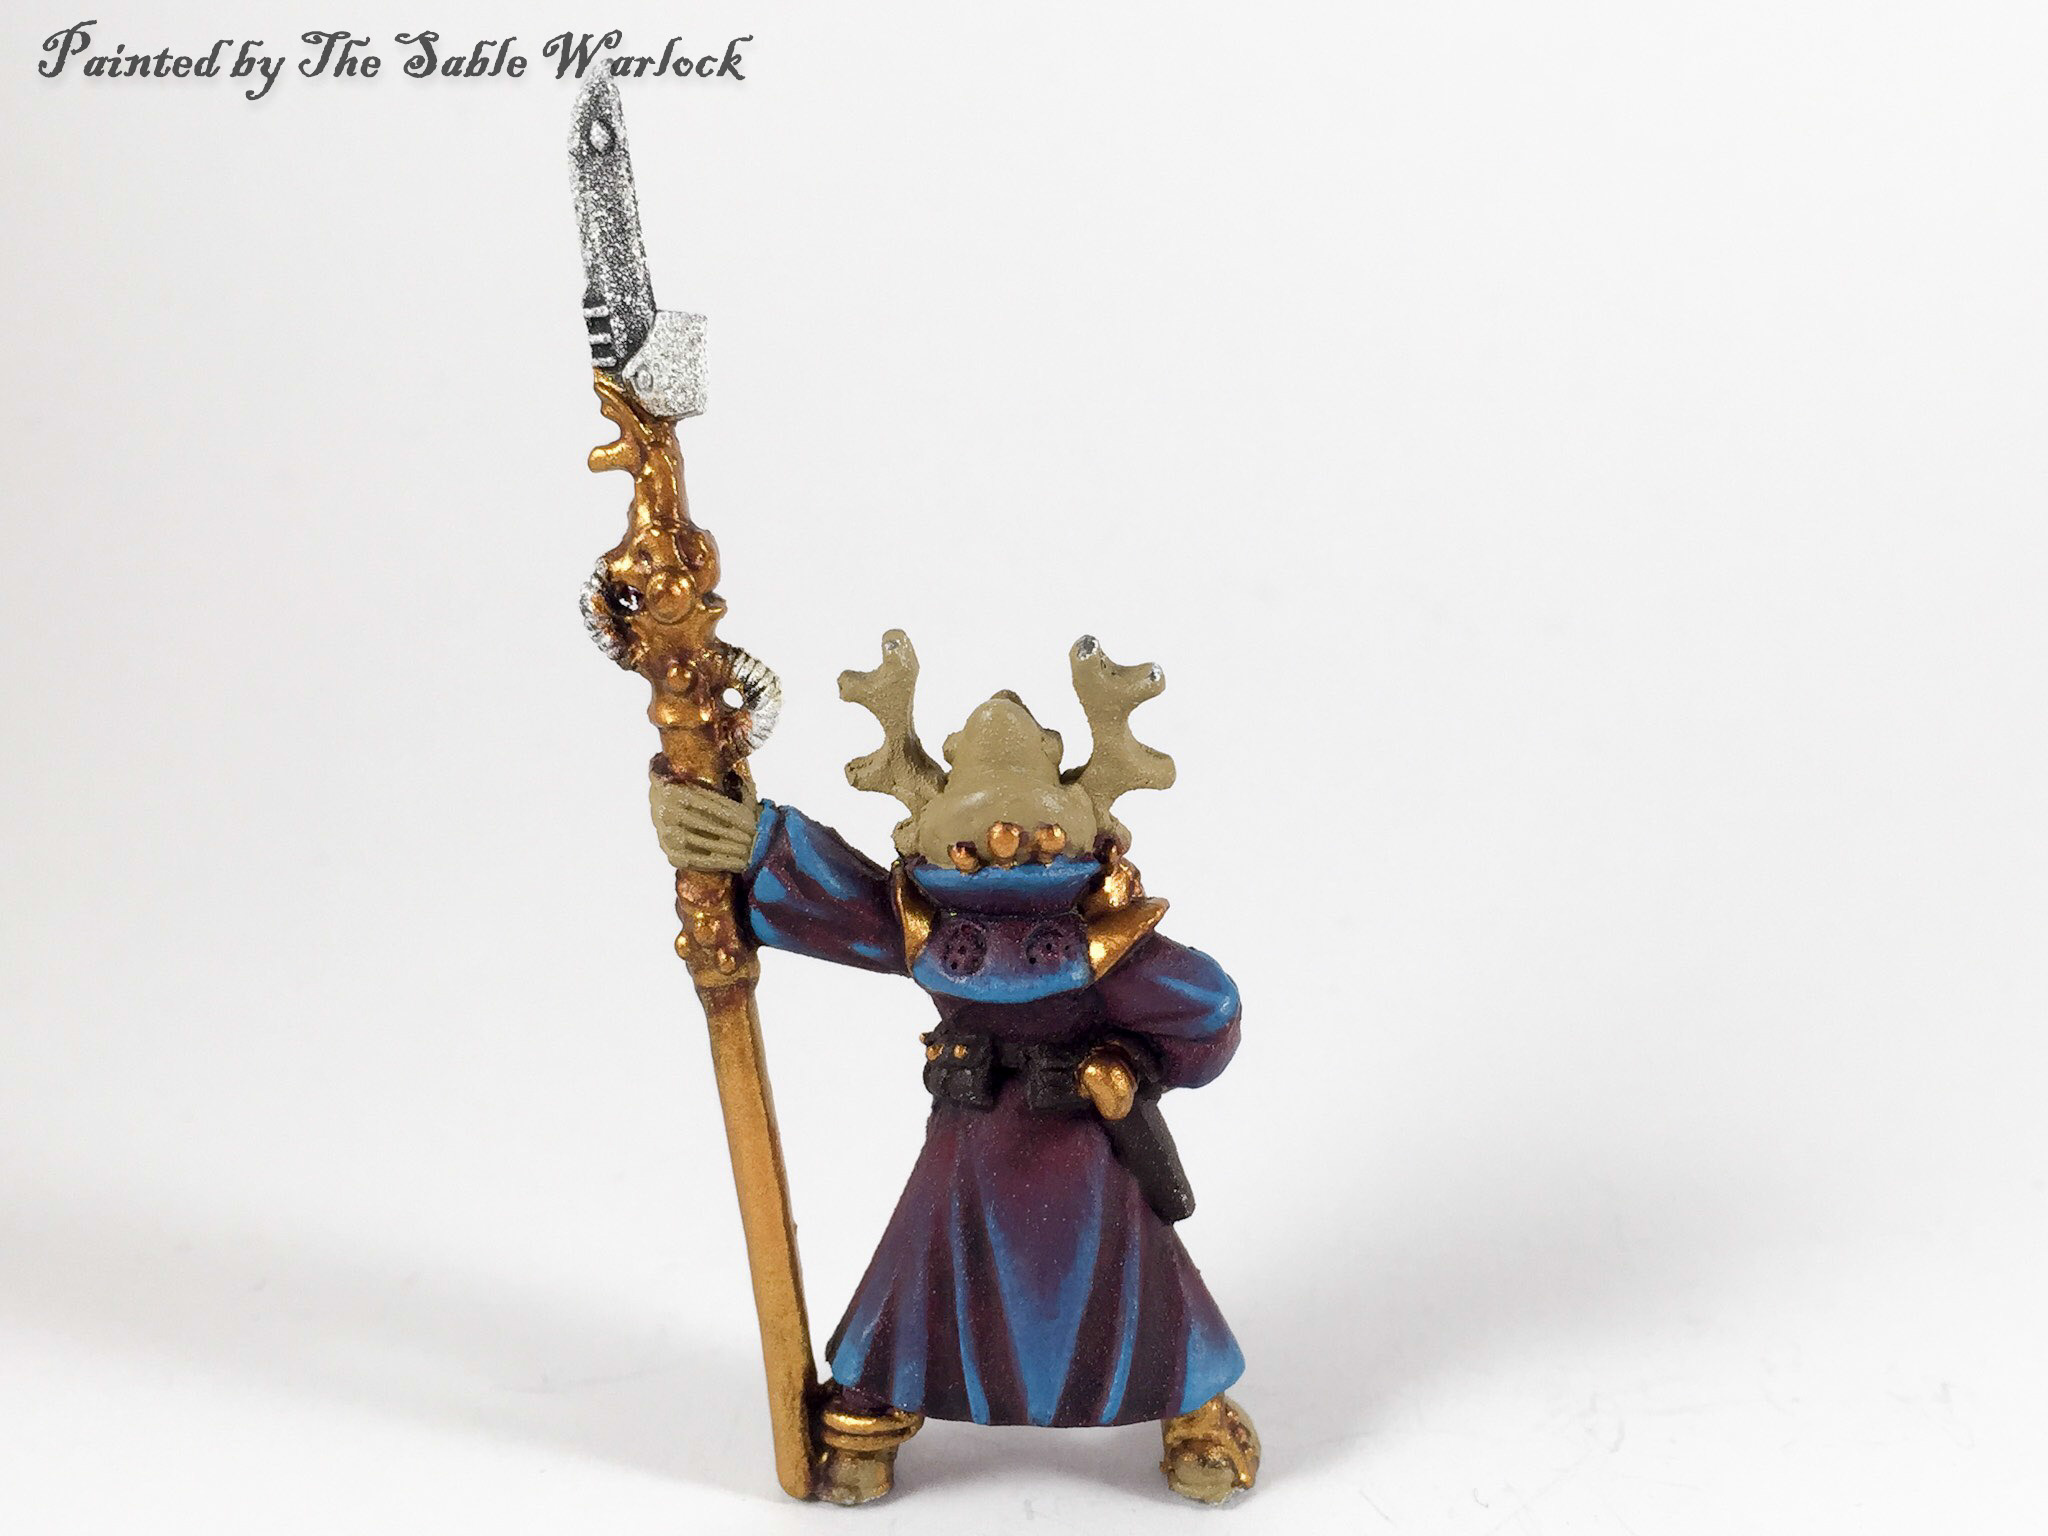
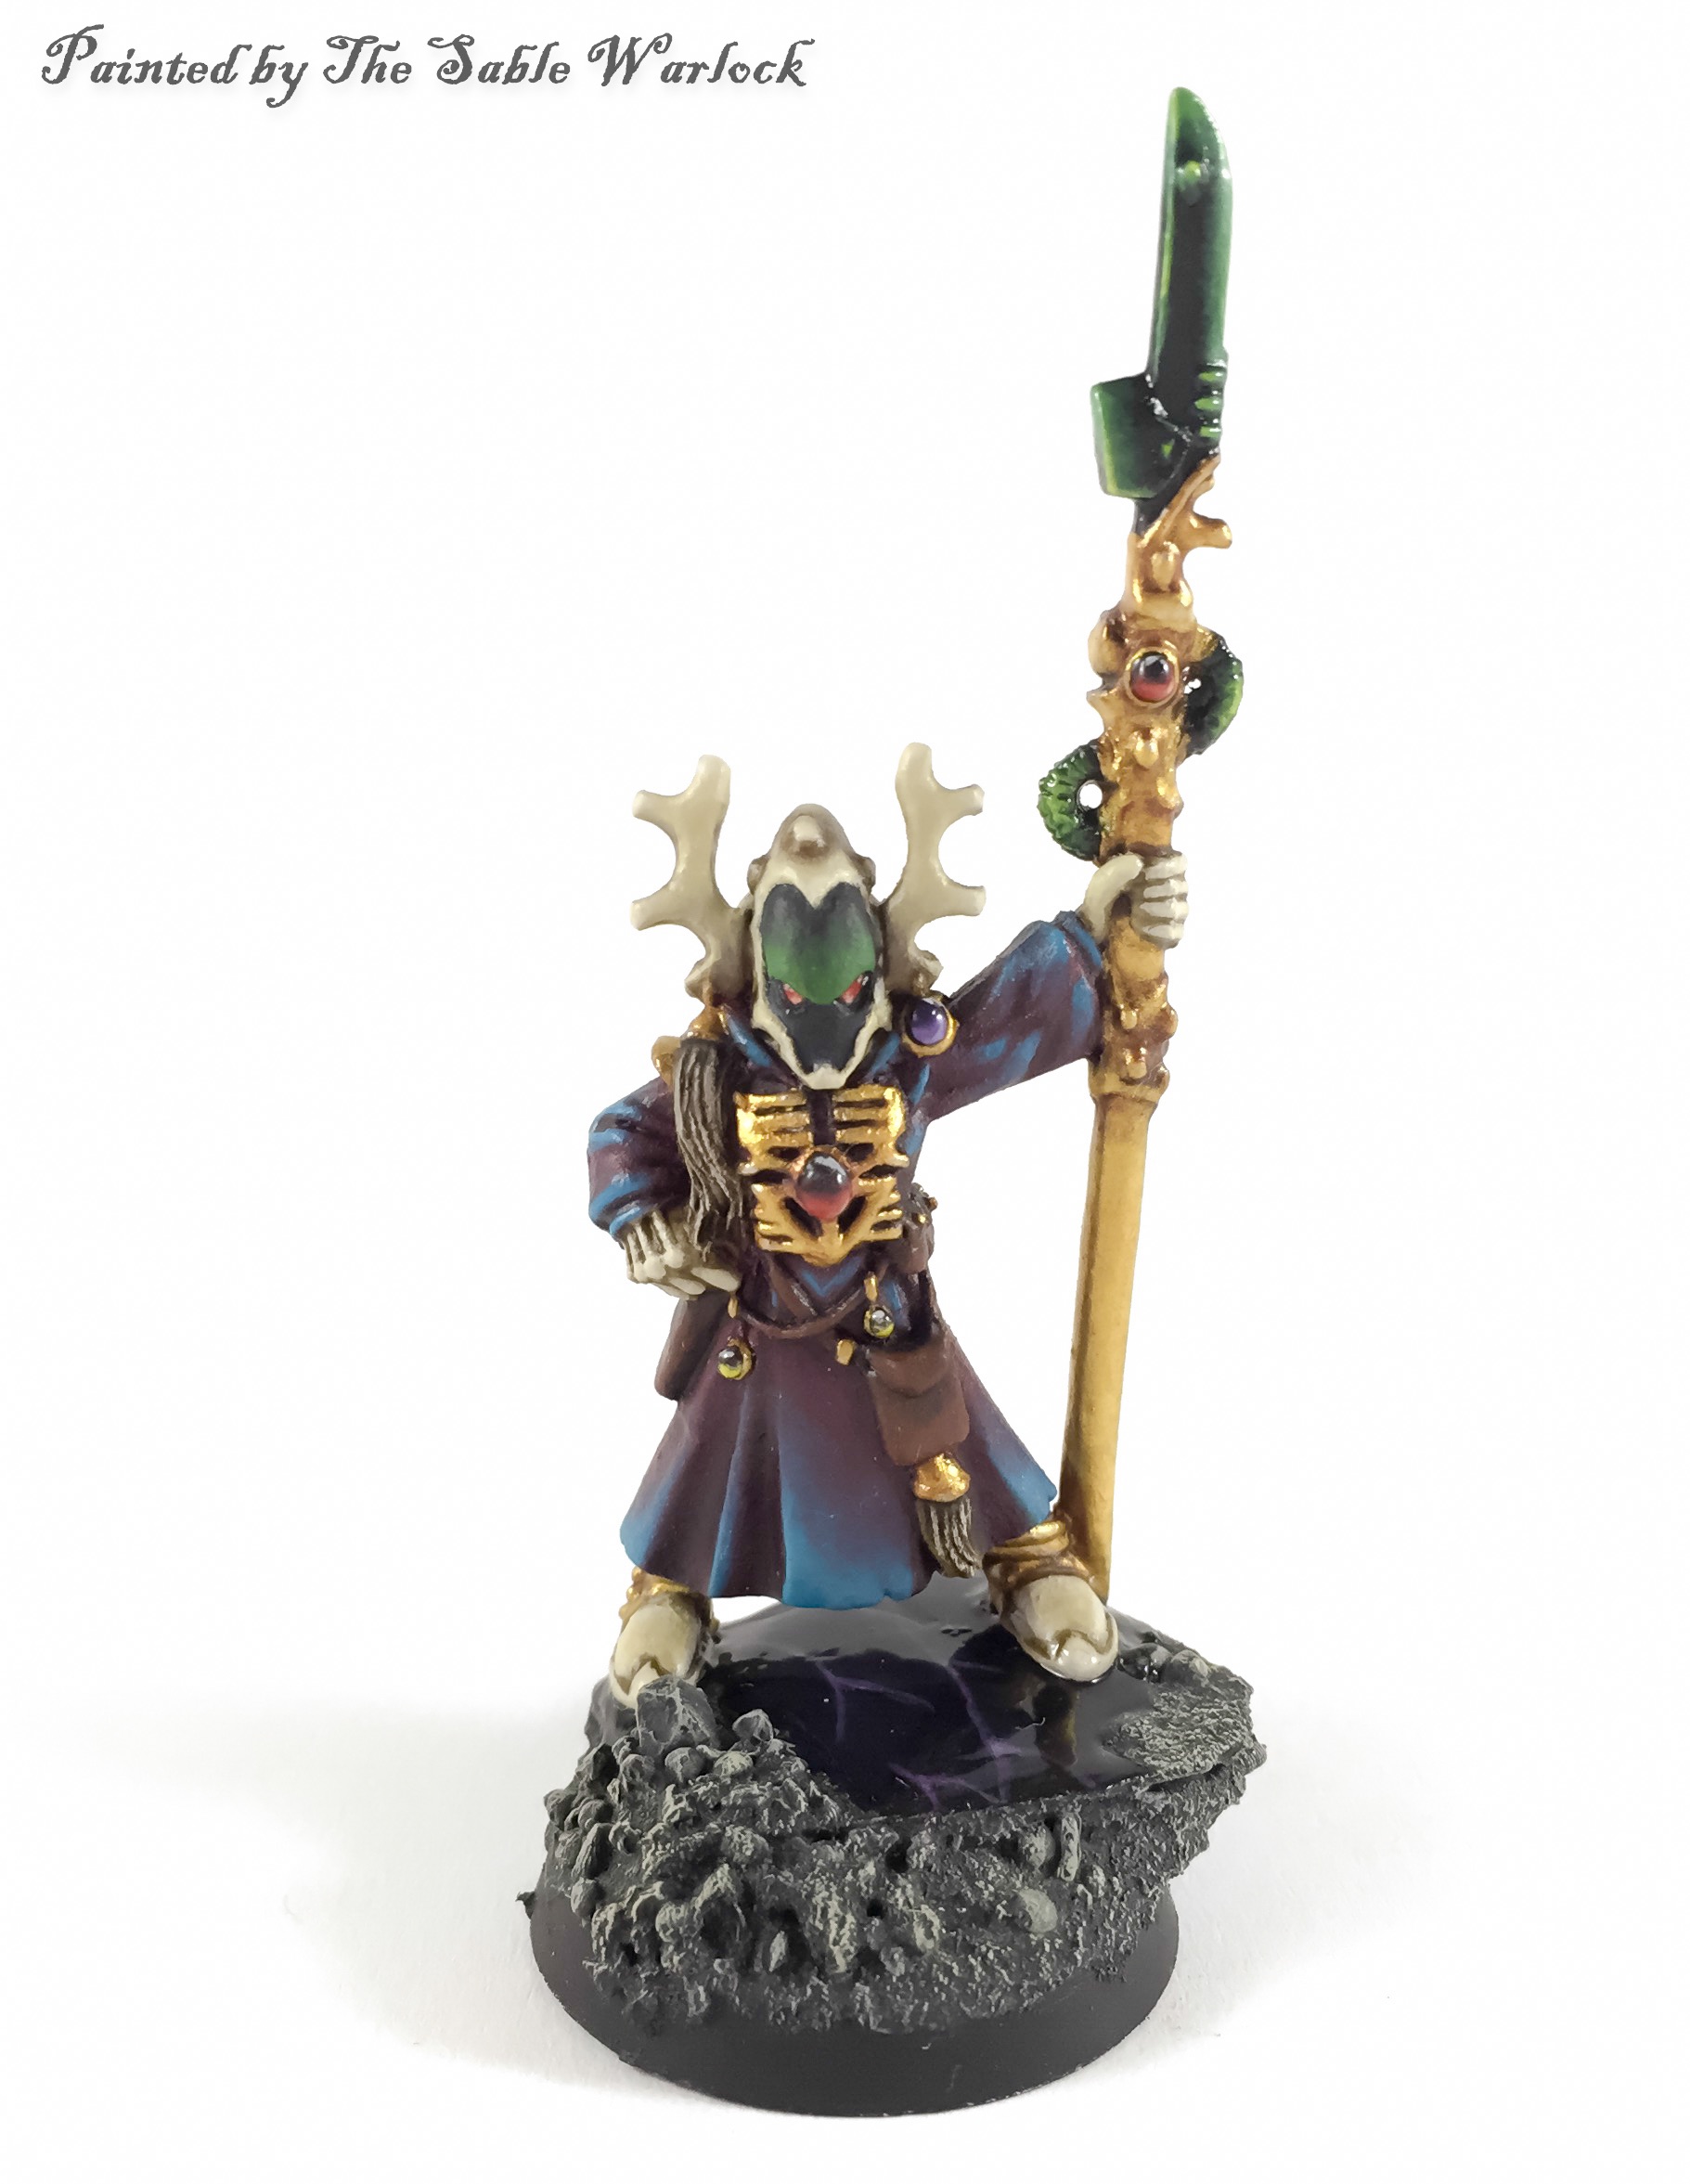
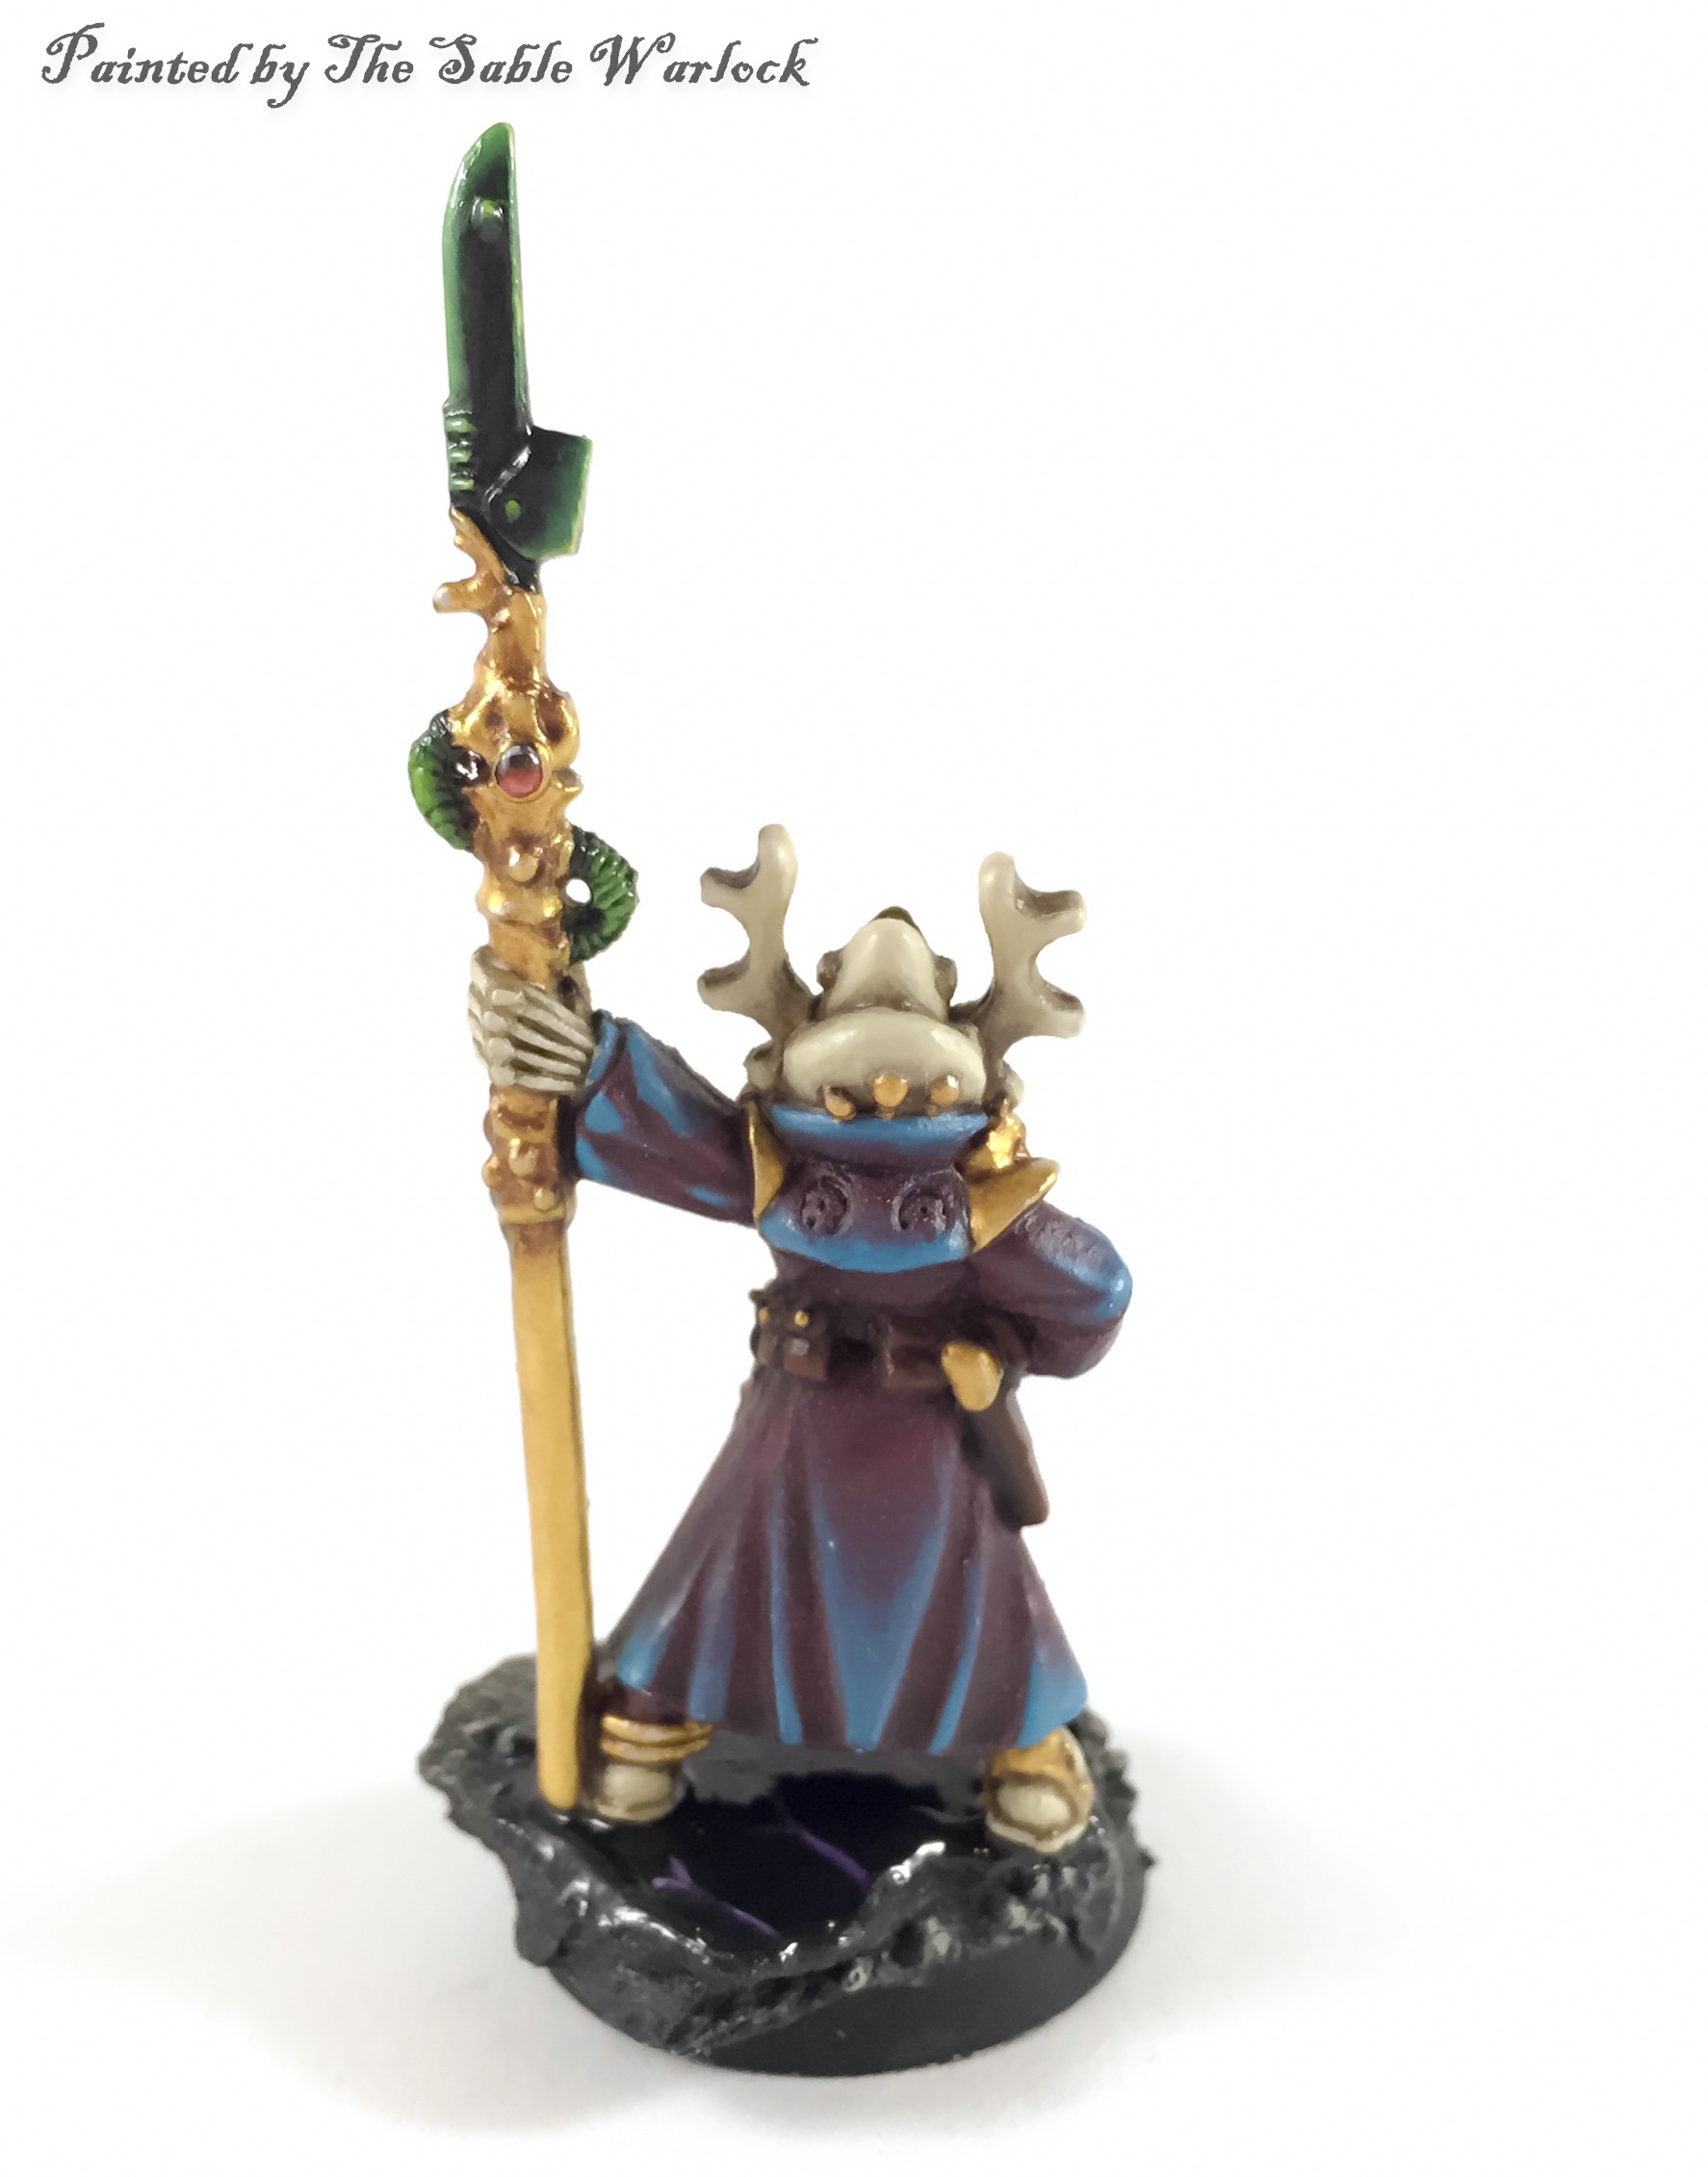
Finished Product
So now, this is how the gold appears with the backing of other colours and its look on a finished model.
Conclusion
I really enjoyed painting these warlocks as it gives me a chance to vary a bit of colours throughout my army whilst still keeping in the theme of the overall army.
Some of you may have realized that his is on a marble base, and I hope to be doing a tutorial for this in the near future. Meanwhile, Thor did do a tutorial on his marble technique.
I do hope you liked my tutorial on how to paint gold!
If you’re looking for stuff you should have for painting, the must-have items as a newer painter, then check out this article.
If you have any questions on how to paint gold, comments, or suggestions, please let me know.
Hope this helps!
The Sable Warlock
Specific Painting Techniques & Tutorials
Check out these other tutorials covering specific techniques.
- How to Paint Tyranid Carapace for Hive Fleet Kraken in 4 Steps - September 23, 2016
- How to Paint Gold Easily in 7 Simple Steps (Tutorial) - June 27, 2016

Great job on the tutorial. It’s a very thorough walk-through, which is perfect.
I would never have thought to use purple as a shade on gold, but it makes sense once you mentioned it. What happens if you don’t do the brown shade first? Does it become too purple?
The finished result looks great, and I’ll definitely use this method the next time I’m doing gold.
Hey!
If you don’t use the brown first you can get too much of a purple hue, its a slightly different effect. Usually the brown dulls down the hue of the purple and helps create a transition between the shiny metal and the shade colour. Most important thing to do is to keep the purple shade as thin as possible to prevent purple being built up and getting a solid colour which would look strange.
Thanks for commenting!
That’s what I figured. Basically, you’re glazing the gold with the purple.
yup whever i use any paint most of the its glazing but especially so with shades!
I would never think to use a purple wash looks great. I know people who paint brown first, with gold i just put it over black…..maybe that’s why I get my stuff painted so quickly I’m lazy lol
To be honest, for me this is table top quality, and i spend wayyyyy too long on each model. But in all honesty i need to make the process quicker overall!
Thanks for commenting!
Good call on the purple shading. I even knew that theoretically, but I never thought of using it on metallics.
Also, very nicely done with the final Runefang Steel highlights. GW’s painters always make those way too heavy, and it ends up looking like something that was very cheaply gold-plated and it’s all wearing off.
Yeah with complimentary shading, the first example i heard was using dark green to shade red which gave the the red a really nice “true red” colour. I think complimentary shading works actually best on shiny metals due to the natural shine of the metals under the shade.
Thanks for the comments, I don’t like it when gold ends up looking like like its gold-plated.
Thanks for commenting!
I ran into it in relation to 2d painting, and never really made the conceptual jump to try it on minis.
Also, this was perfectly timed, as I’m just getting into painting up my Silver Tower boxed set, which features a ton of gold, and if I get the shading a bit too heavy or something, well, a bit of purple will work just fine on Tzeentch stuff.
I want that box set just for the cool Chaos stuff. I haven’t checked eBay yet to see what insane prices they are charging for the single models yet.
Yeah, the Models are absolutely sweet. And I’m sure ludicrously expensive when split up for eBay. I should go check for Gryph Hounds, see if they’re more reasonably priced.
Horrors look amazing in that box set! I actually have a burning chariot with some horrors so i might do a tutorial on how to paint daemons ;)
Fantastic. This is about 5 steps more than I typical paint my gold :-) The base of bronze and purple wash really helps create the depth. And the Warlock looks brilliant when finished
I’m with you, though this process is only 3 steps more than my previous process.
The extra purple step in my opinion makes all the difference!
The purple shade…awesome idea! Looting that!
Seems we all unanimously agree that the purple shade is the trick we’ve all been missing :)
Haha thanks! glad you guys liked it! hopefully i’ll be able to get some other different techniques into these tutorials :)
So Link has Dark Link, I have…Sable Me? Good tutorial, by the way. I do like using the new GW golds over others as they seem a bit more pure in their values.
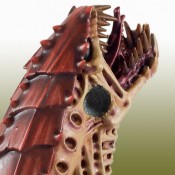
I’d love to know how you did that gem in the middle, it looks great and I want to do that with some Dreadhost Custodes.
I’m not sure the author is still around. However, his technique would be pretty close to the tutorial I did here: https://creativetwilight.com/glass-effect/
Thanks Thor! I have looked at your glass effect tutorial, and it was very helpful.
What I was wondering is the color scheme – that Black transitioning into a reddish? yellowish? gold on the bottom is absolutely gorgeous and I’d love to recreate it on a model. I tried to get a lens effect with some yellows on a test model and it did not turn out well…
I got better results with some Auric Armor gold as the offset point to a White Scar dot…
Basically a very deep red->bright red->orange->bright orange->yellow is the layering order. You got to start very dark and go very bright to sell the look.
If you wanted a yellow lens, then I’d start with a dark orange or a ochre color for the dark color, work up to yellow, but go so far as use white at the very bottom.
This looks incredible! I’m a new painter. Do you do each layer in one sitting or does it need a lot of time to dry in between layers?