One of the coolest effects you can paint on a miniature is a glassy, reflective surface like that of a gemstone, eye lenses, goggles, etc. The thing is, it’s also really easy to do on a miniature and it has a big impact.
I’m going to show you how you can do a miniature painting glass effect easily! There’s just a few basic principles you need to follow to create the effect and it can be done by beginner painters. I also have an advanced technique I show as well.
Miniature Painting Glass Effect
I’ll break this down into beginner and advanced. The great part is once you’re comfortable with the beginner technique for the miniature painting glass effect you can easily convert that into the advanced version. You’ll see.
I’m going to be using Cubie for this tutorial and painting it larger than you would have on a typical miniature. I want you to be able to see the concept larger to understand it easier.
Despite painting larger, the process remains unchanged on a miniature. Well, let’s be honest, it’s a bit harder on a miniature do to the size.
However, it’s that small size that makes it easier. The reason I say that is because you don’t have to work so hard to blend things together. Just basic layering for a gem or lense will still look great at a distance; no fancy blending required.
Disclosure: Some of the links below are affiliate links, meaning, at no additional cost to you, I will earn a commission if you click through and make a purchase. The commission earned helps maintain this site.
Light Source Help
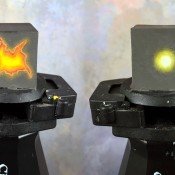
I put together a quick image to show you how things differ based on the angle of the light.
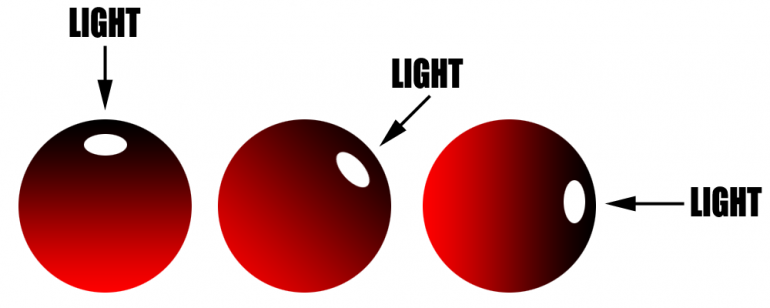
You can see how the reflection point (covered later) is where the light source is. Also notice that the darkest area of the gem is where the light source is and it gets brighter as it moves away from the light.
Beginner Miniature Glass Effect
Even if you’re after the advanced miniature painting glass effect, do read through this section as I explain the theory behind the choices being made and it will help you understand the approach.
Time needed: 3 minutes
Beginner’s guide to a glass effect. Further below is the advanced version.
- Laying Down the Base Coat
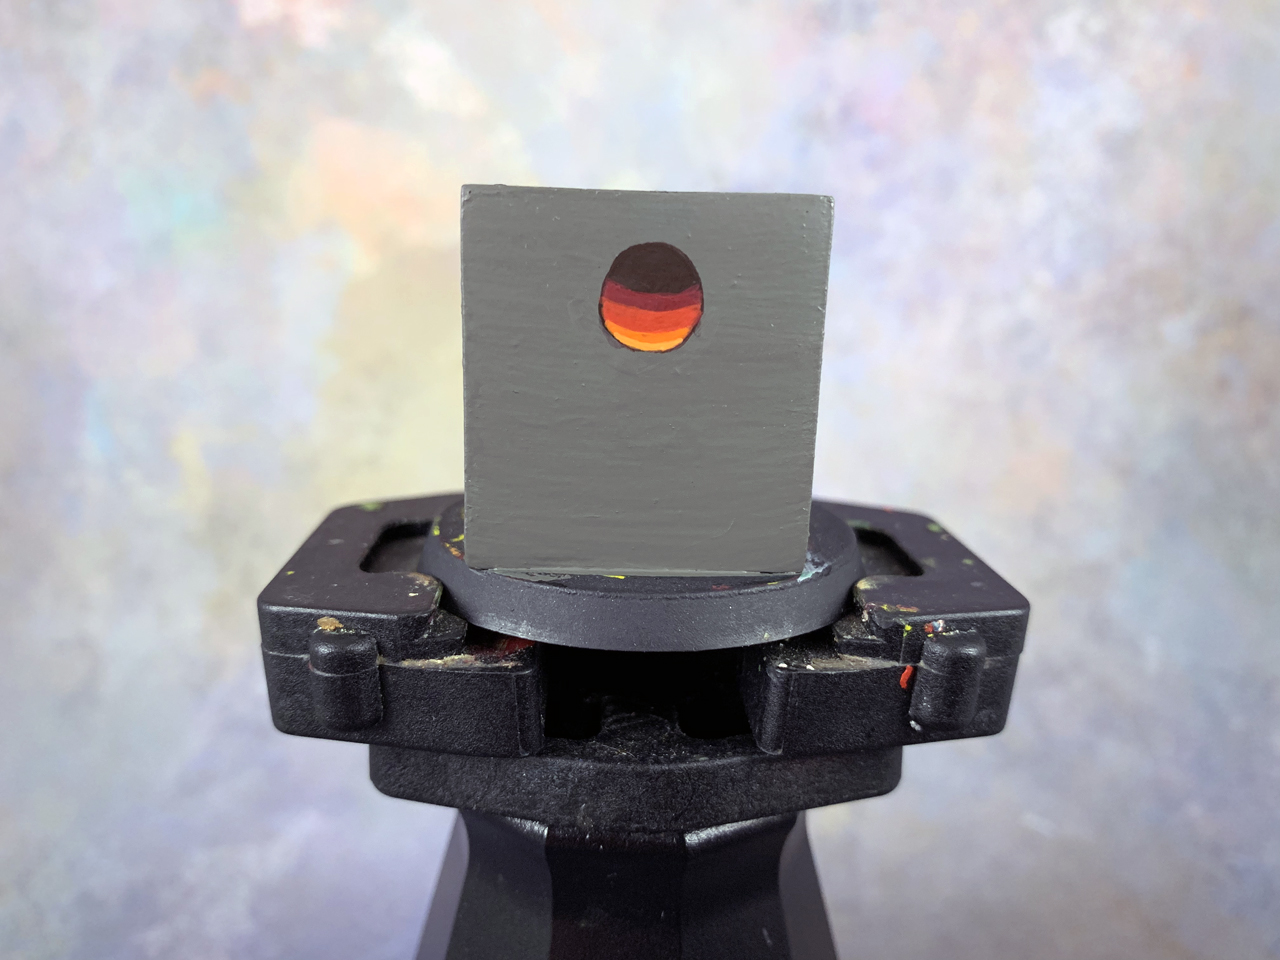
I like to start by putting down the darkest color I’ll be using as my base coat.
Now, when you’re doing something highly reflective like this, you have to go darker than you might think. To sell the glass effect you have to really push the contrast as reflective items have a lot of contrast in real life. It’s that high contrast that makes it seem reflective.
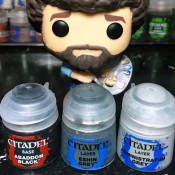
I’m going to paint this red, so for my darkest color I’m going to use a dark brown, in this case Rhinox Hide.
I kinda forgot to get a picture before I jumped to the second layer. So, jump down a bit. It’s not like it was anything major. - The Second Layer
To start selling the glass effect I make a jump in my next color. Again, I want to push contrast. So, I’m going to go straight to a red. For this I’ll be using Khorne Red, which is one of my favorite colors.
What you need to understand with a glass effect is that the darkest color is closest to the light source and you’re brighter colors are furthest from it. I know it seems counter-intuitive but that’s how it works.
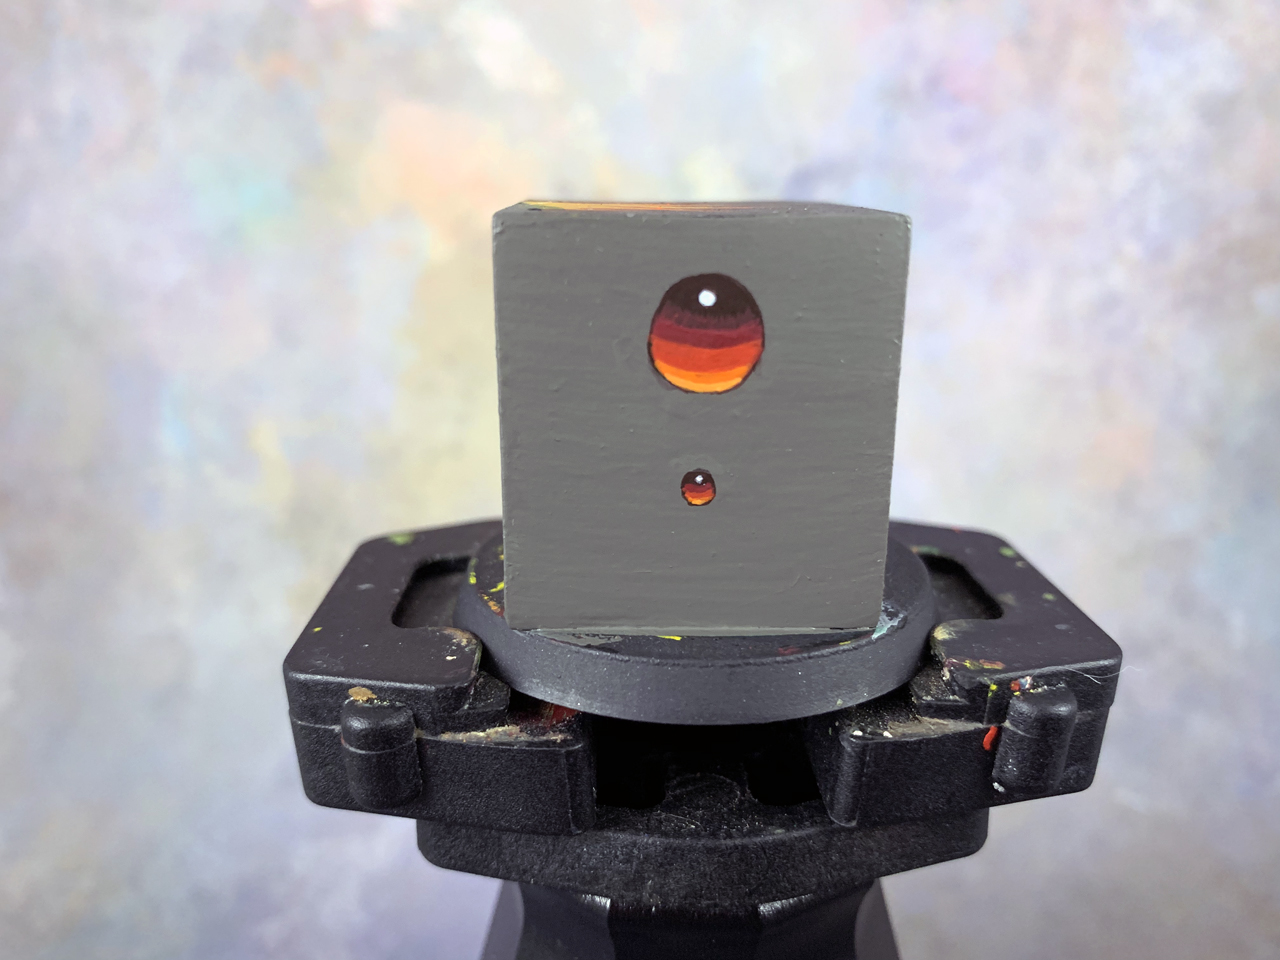
I put down a layer of the red on the lower half of the gem I’m painting. I start about halfway up and bring it down.
You can already see the striking contrast. Also, notice how it has a slight curve? I’m layering with the shape of the gem, which is round. - Keep Layering Brighter Colors
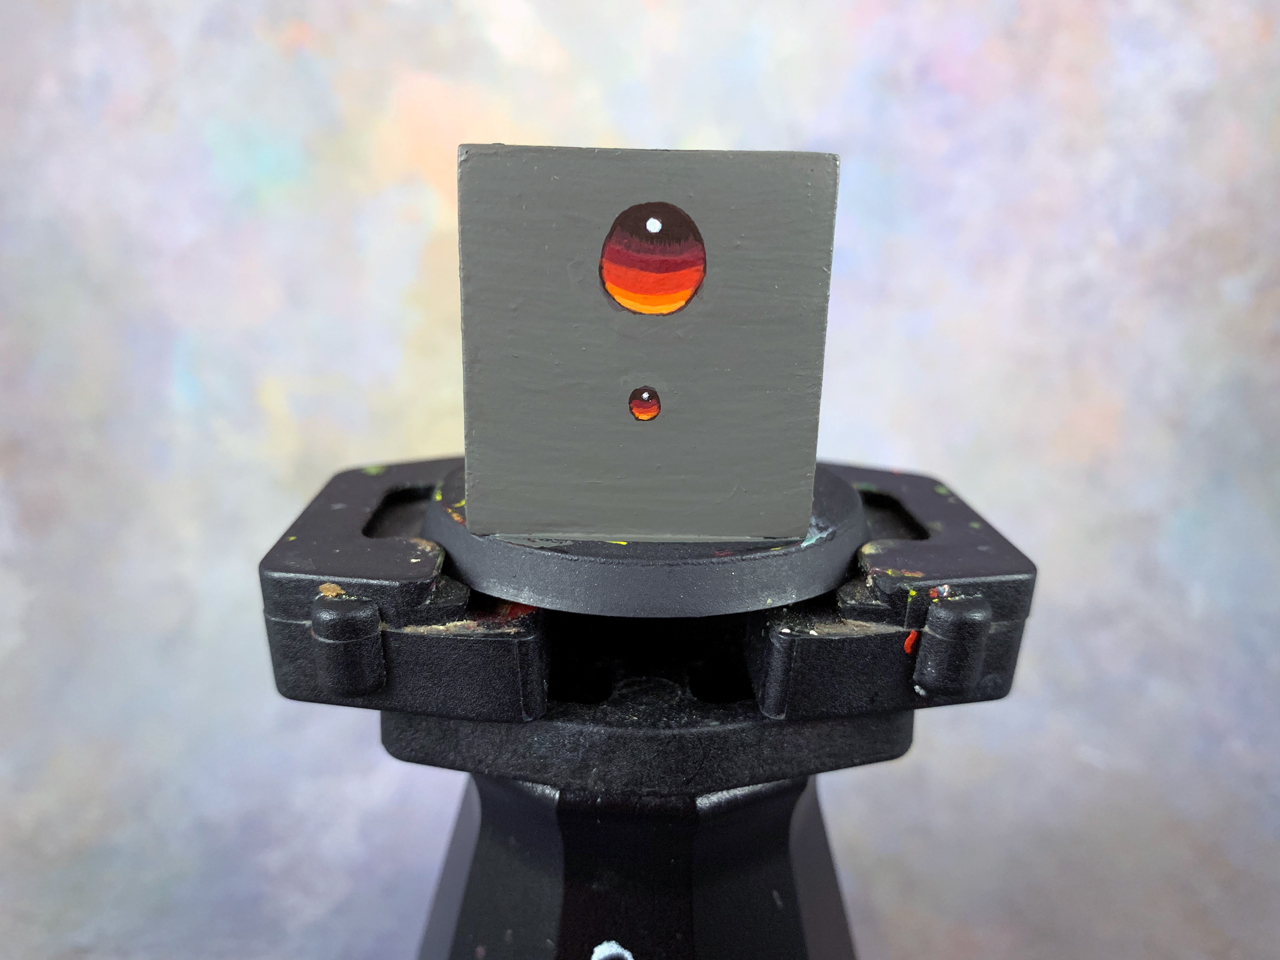
To keep pushing the contrast up I have to go brighter still. So, I use an a brighter red and layer that over the lower part of the previous layer. This red is Evil Sunz Scarlet.
- Pushing it Even More!
Now to really push the colors.
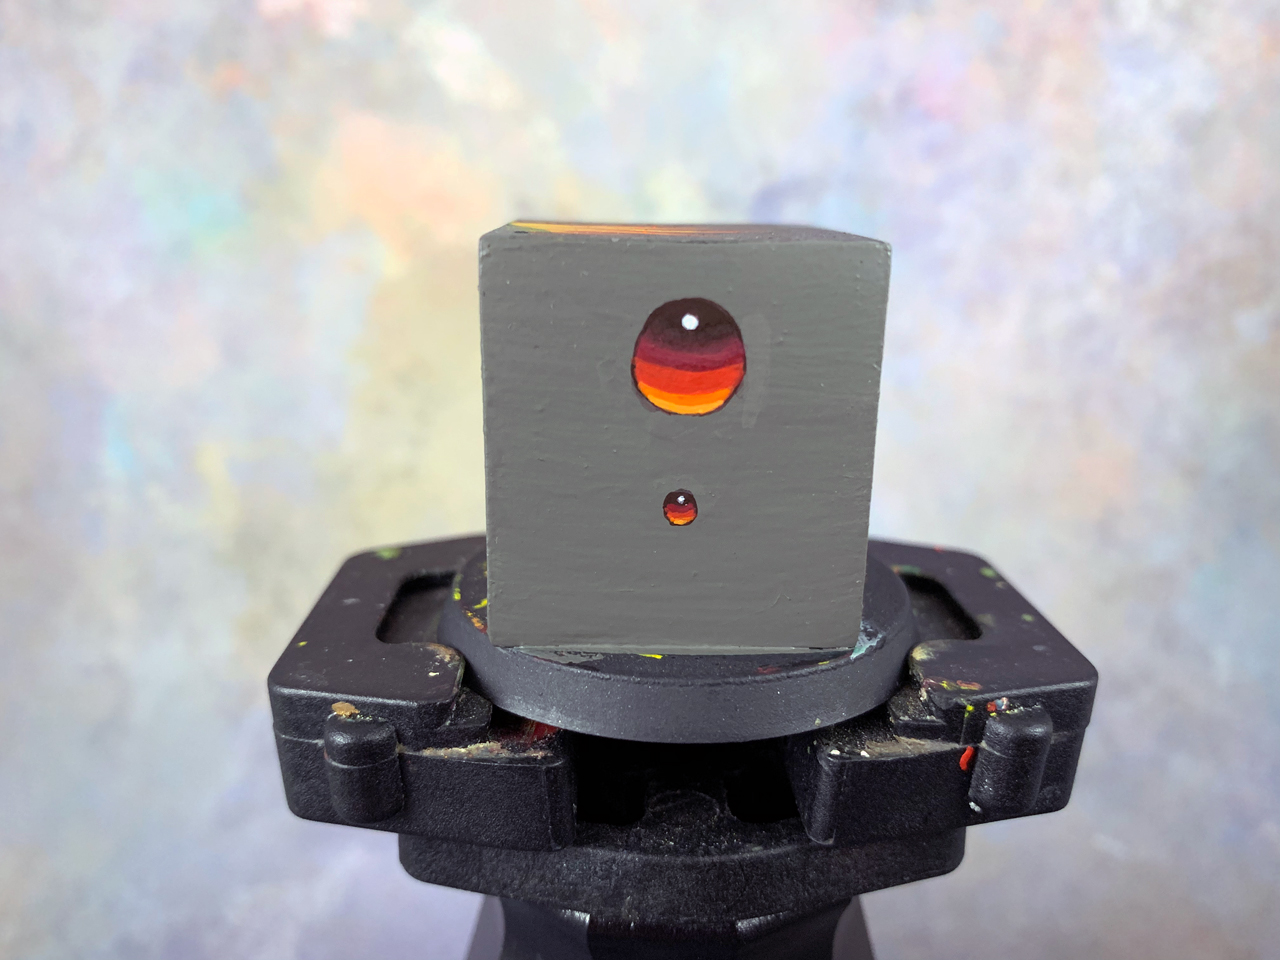
Next I painted an orange, Troll Slayer Orange.
Now, depending on the size of the item you’re painting, this could be as far as you need to go. You might find adding more layers is too hard. If so, that’s fine and just skip down to the reflective highlight section. - Orange Highlight
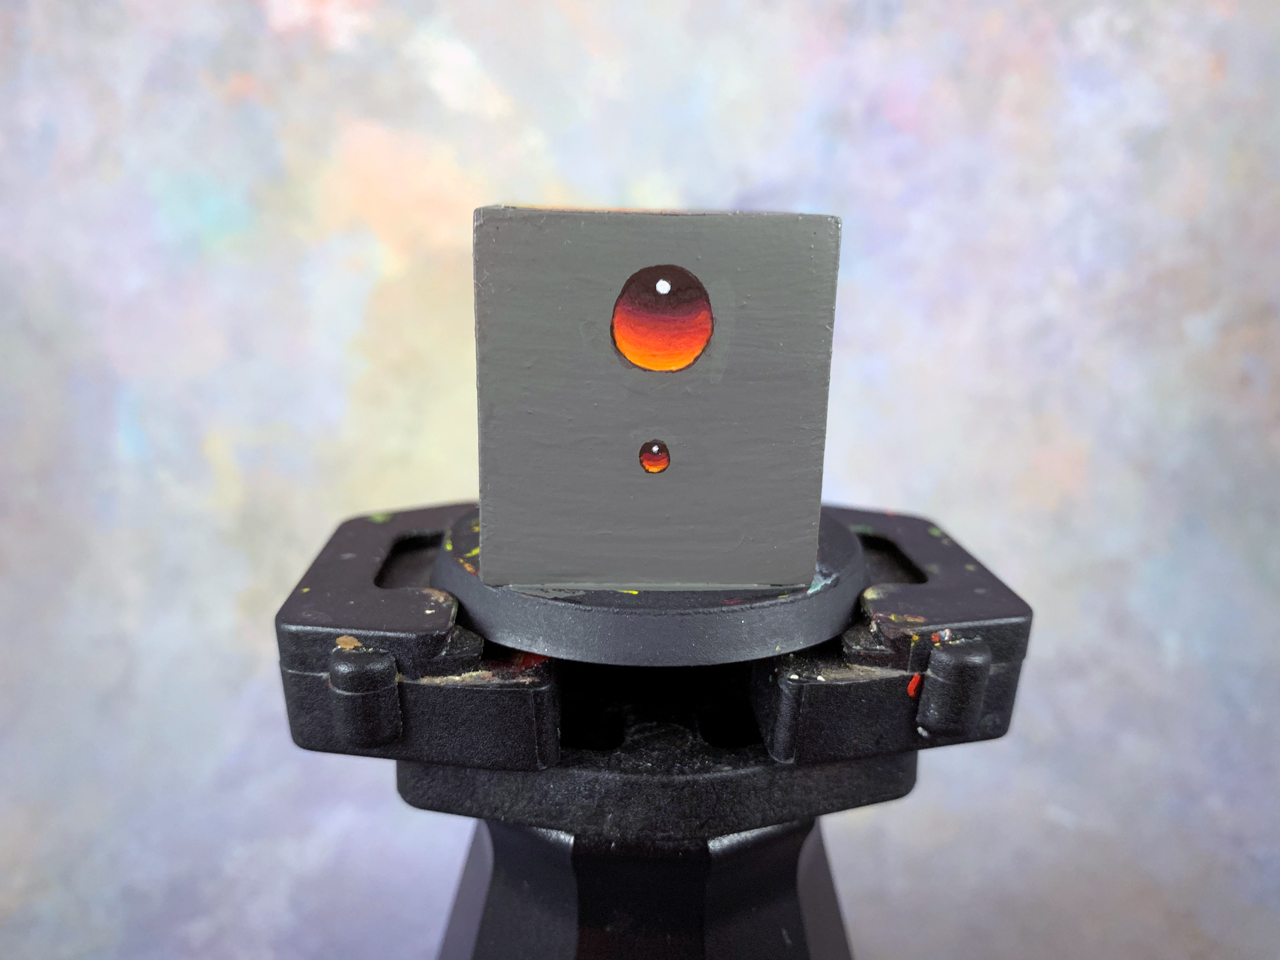
I like to add a thin line at the very bottom to highlight the orange. For this I used Fire Dragon Bright.
- Final Reflective Highlight
The final step in this whole process is the easiest and gives the biggest impact; it brings it all home.
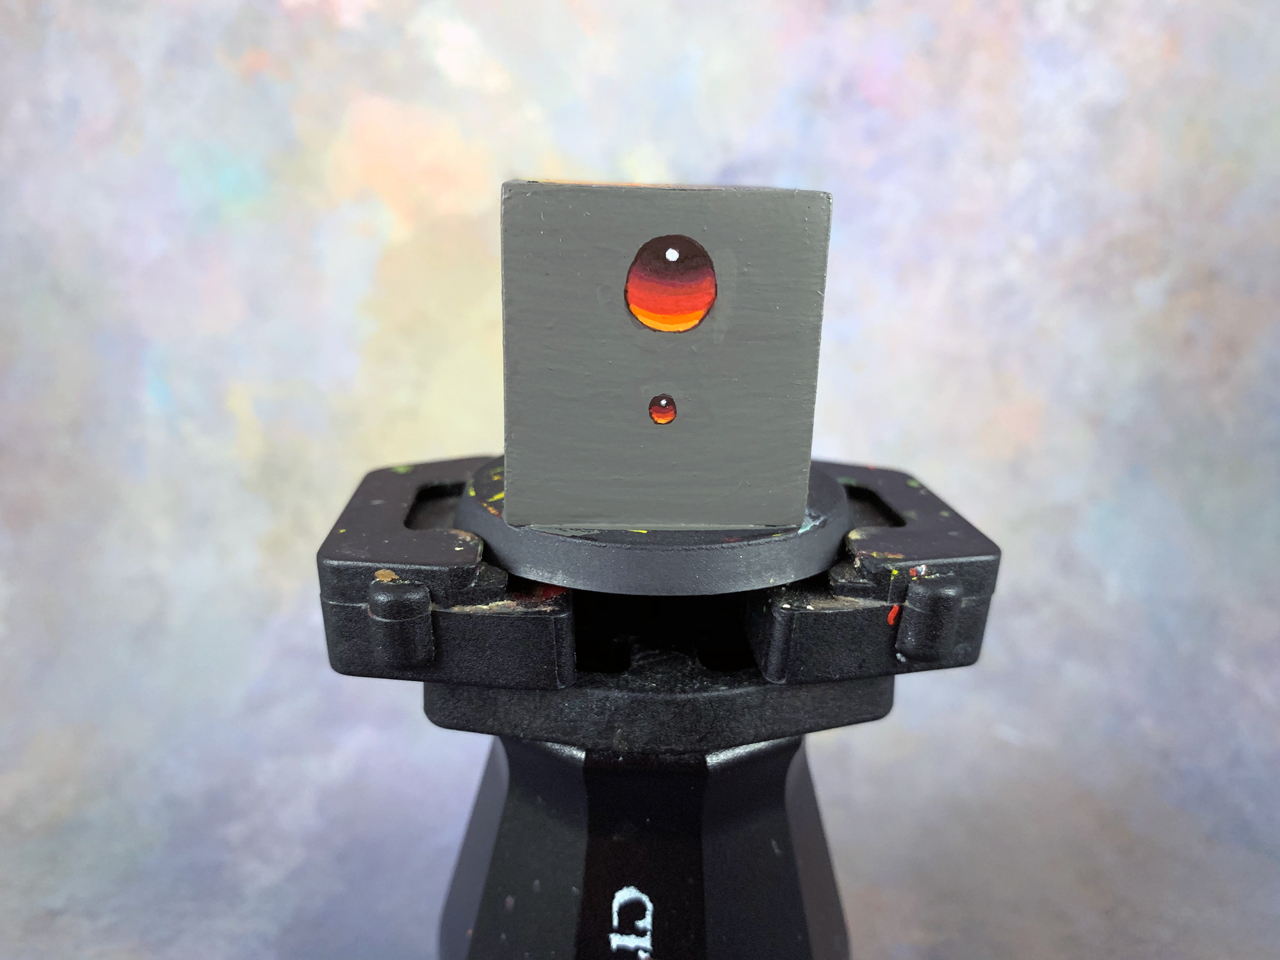
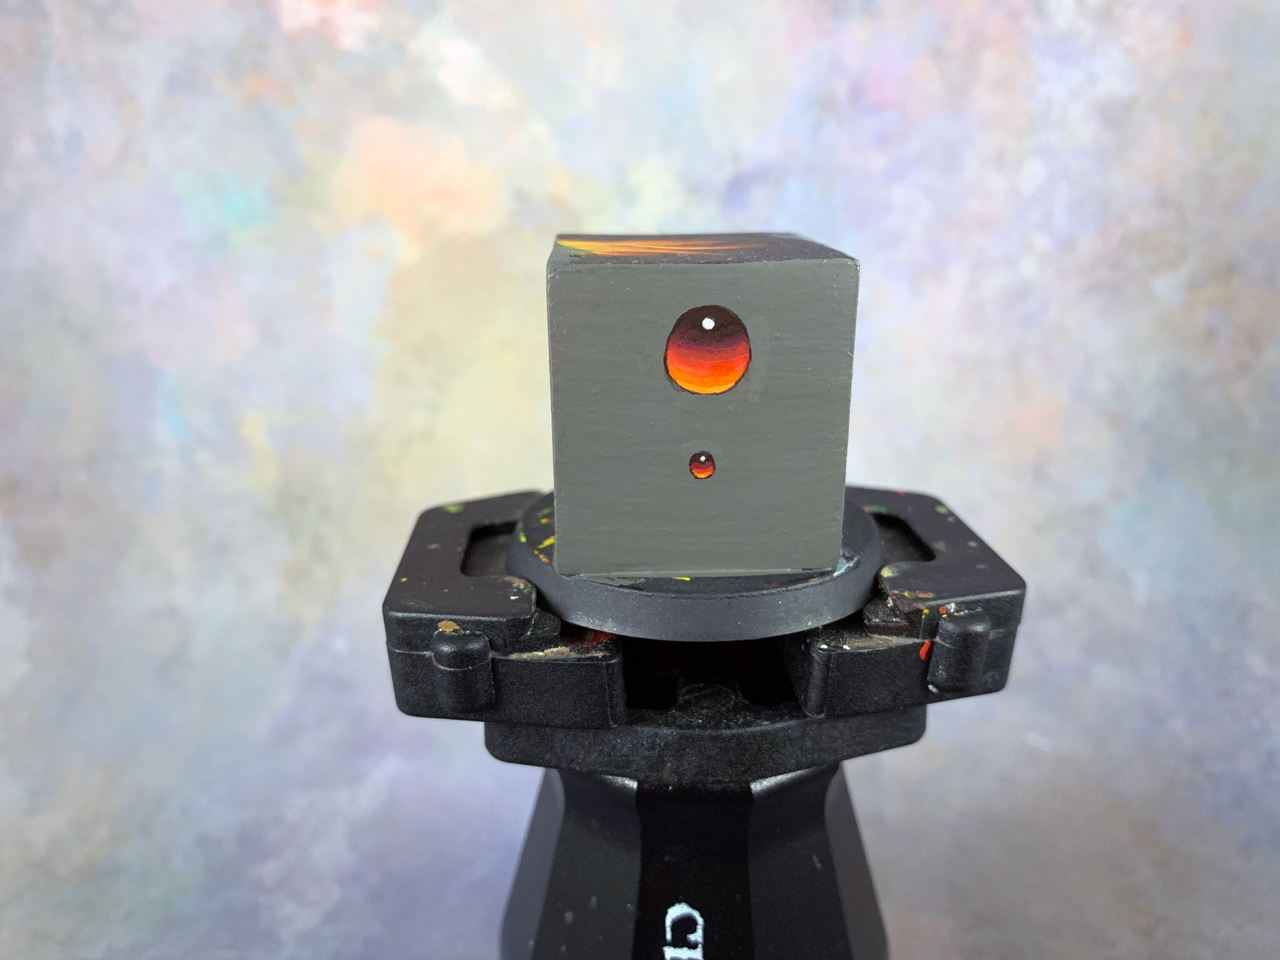
Take a bright color like a very light grey or white (I prefer white), and put a dot at the top of the gem inside that dark base coat. This should be placed where the light source is coming from.
That’s it!
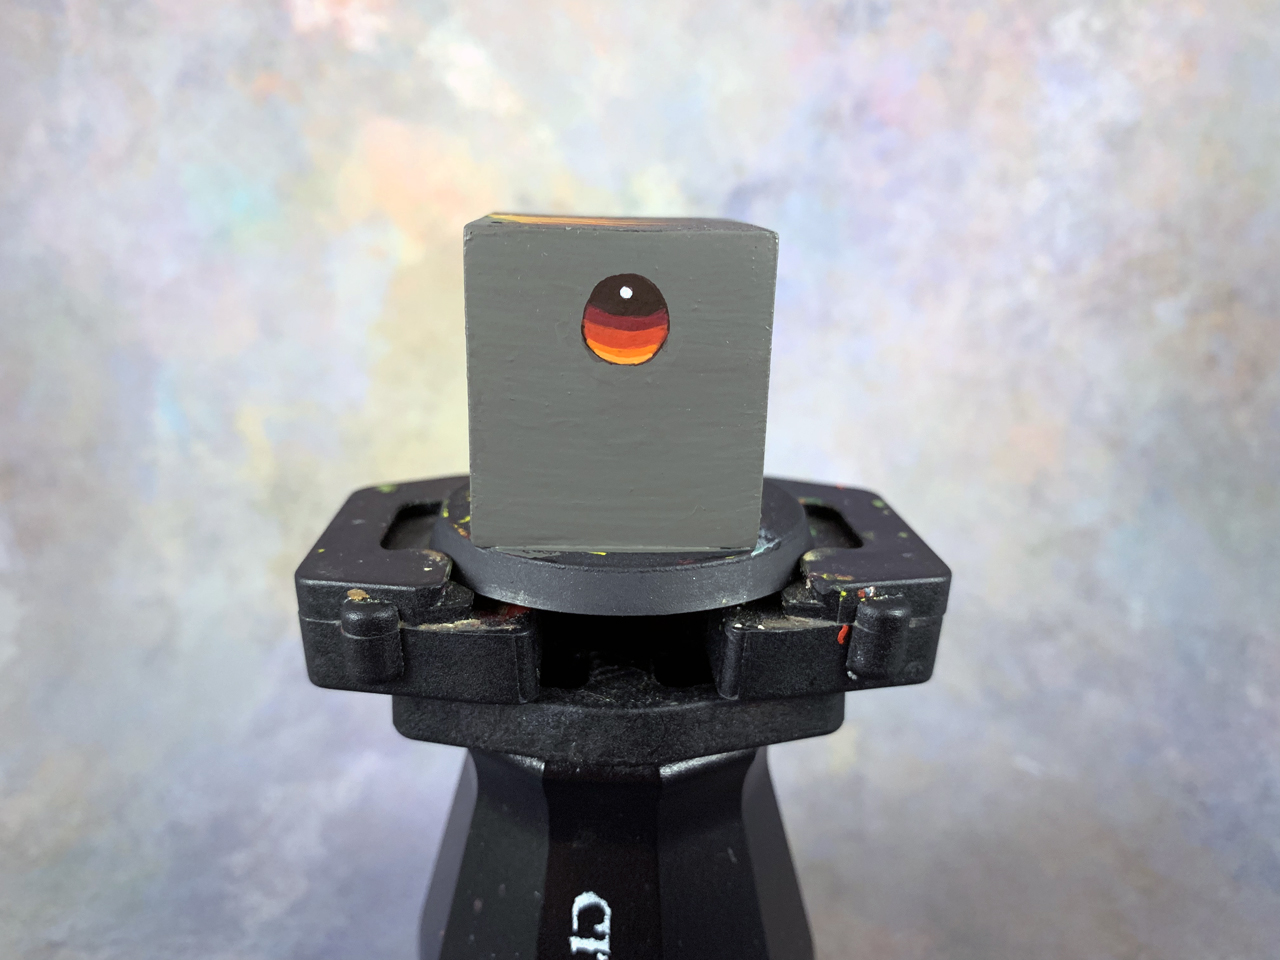
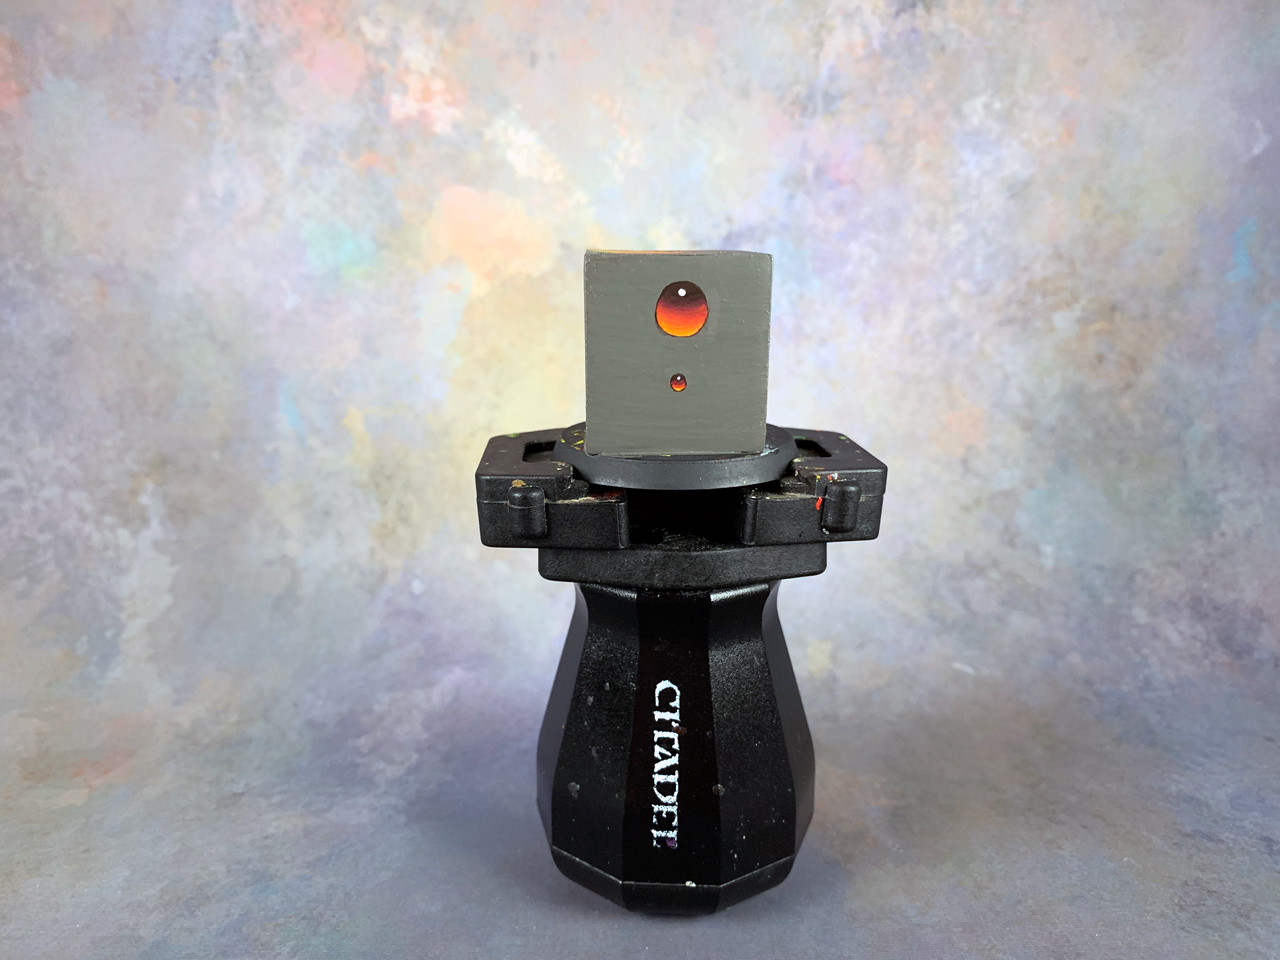
Now, if I zoom out you can better see the effect.

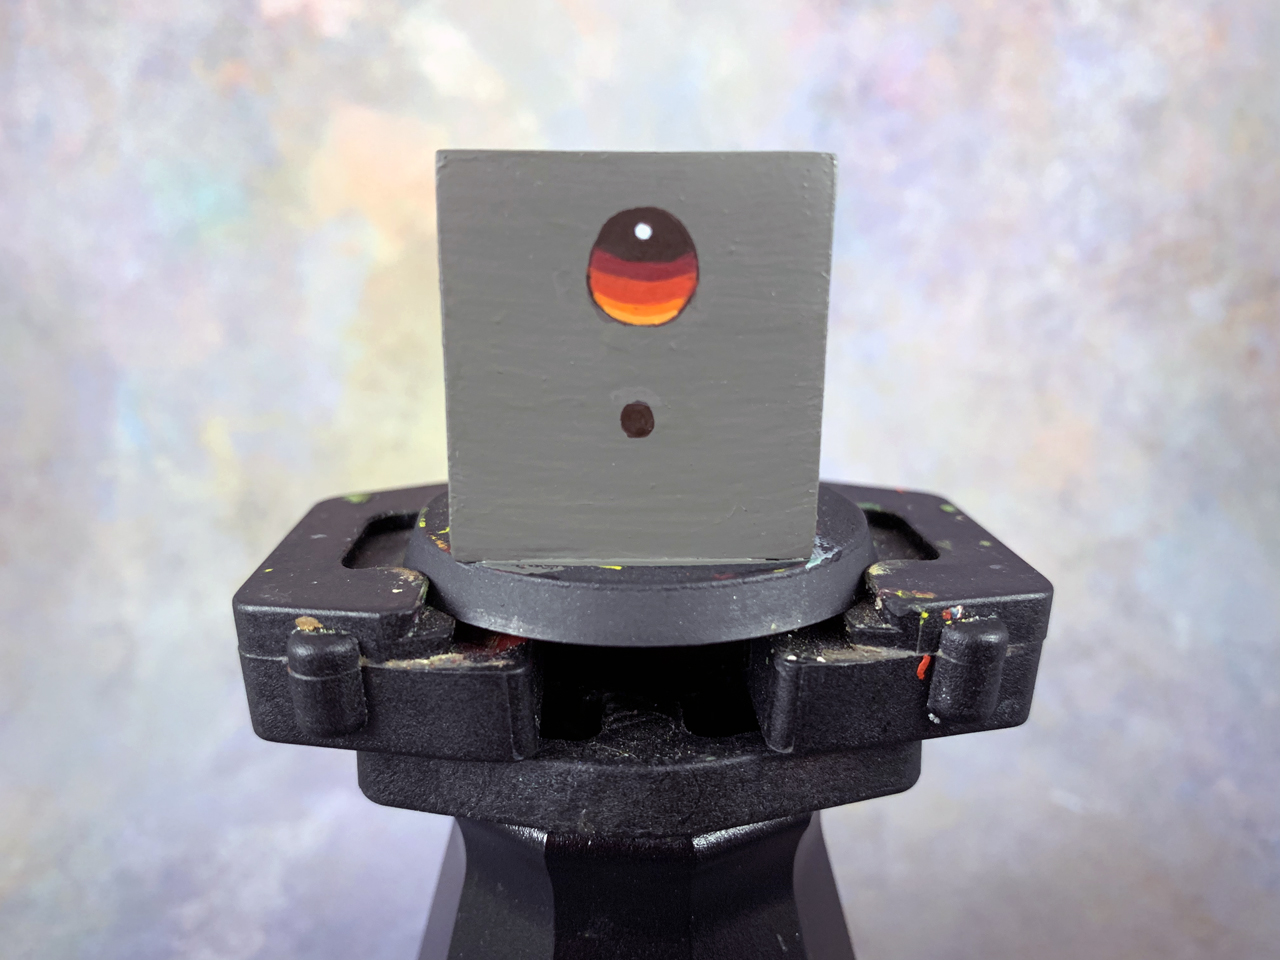
On a Smaller Scale
Being that I did that gem very large, you can clearly see the layering, which is what I wanted for the sake of showing you. However, now I’ll show you the same steps on something more typically sized for a 28mm miniature.
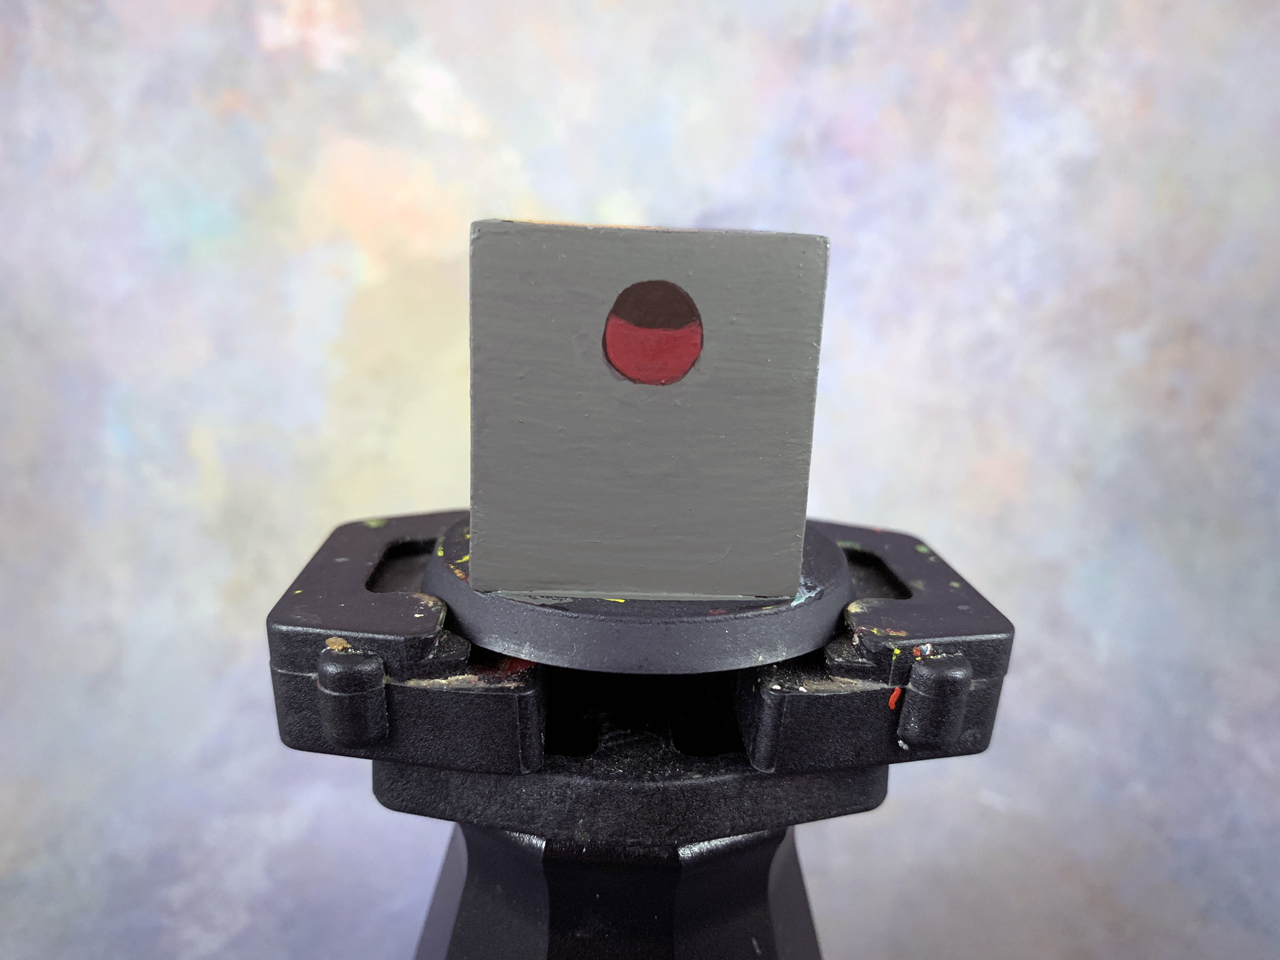
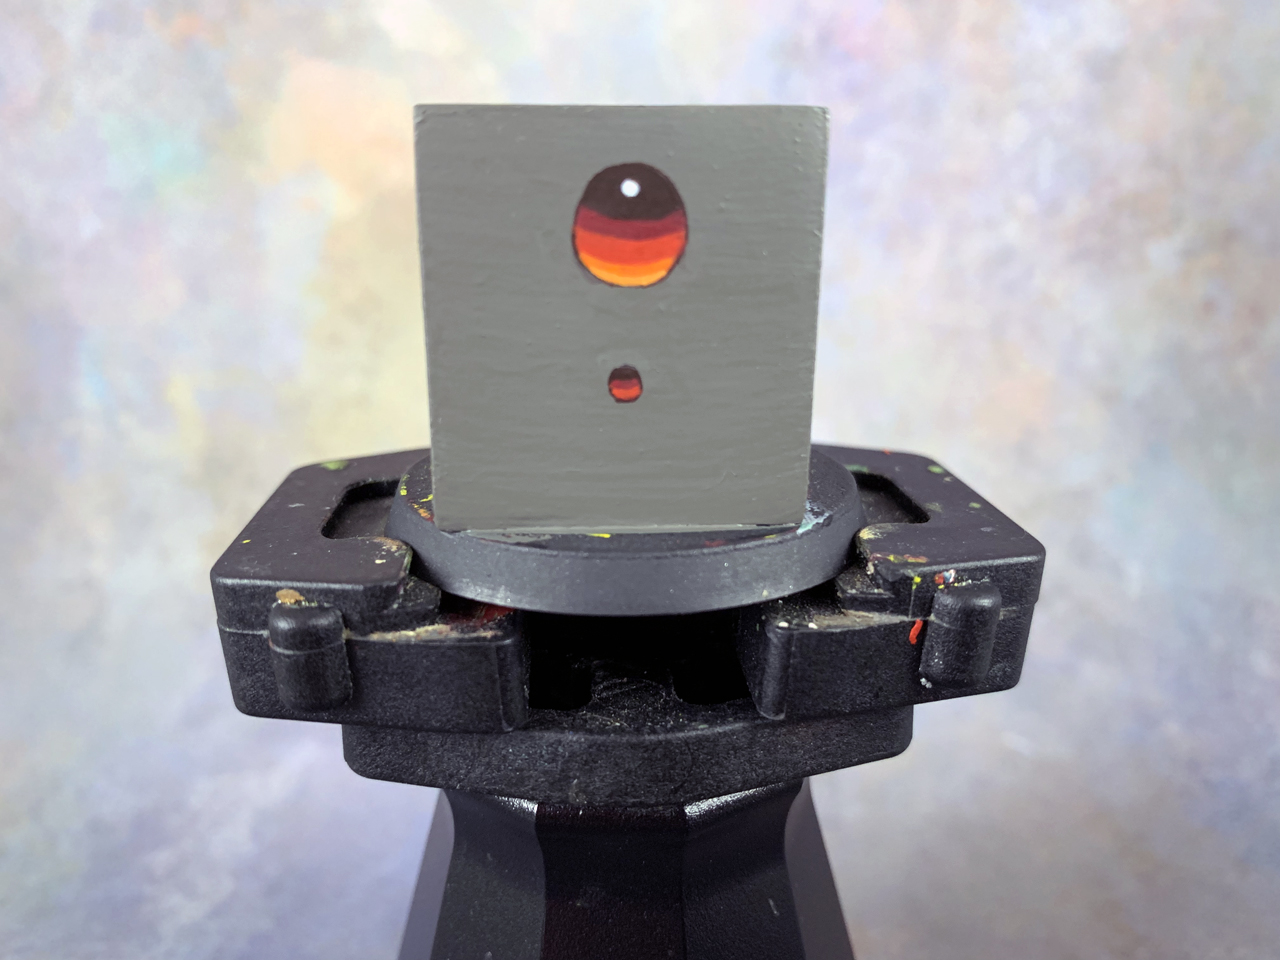
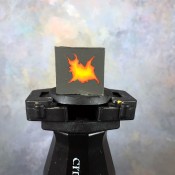
Here’s the base coat, the dark brown of Rhinox Hide.
Now for the dark red, Khorne Red.
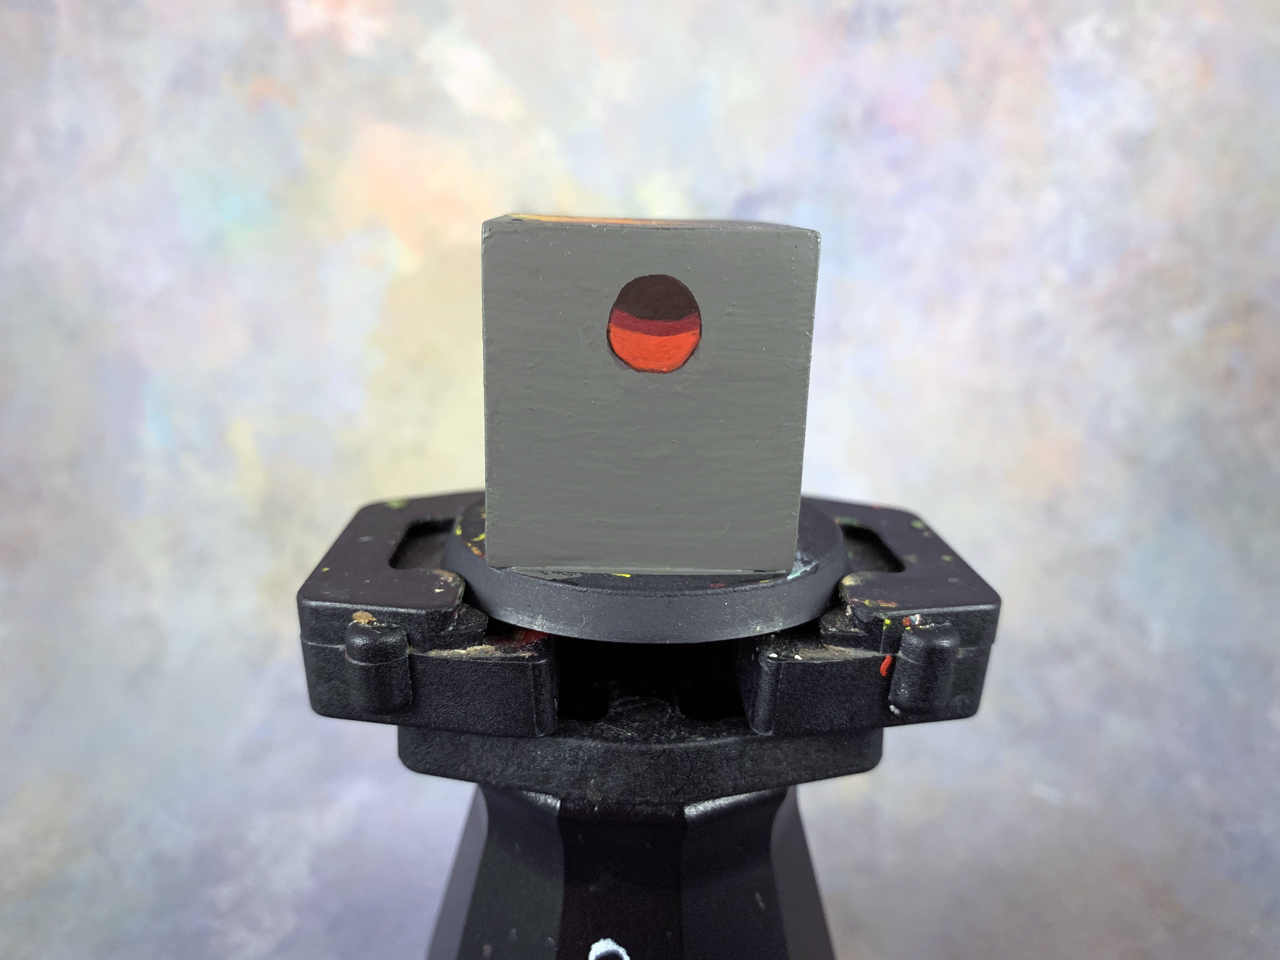
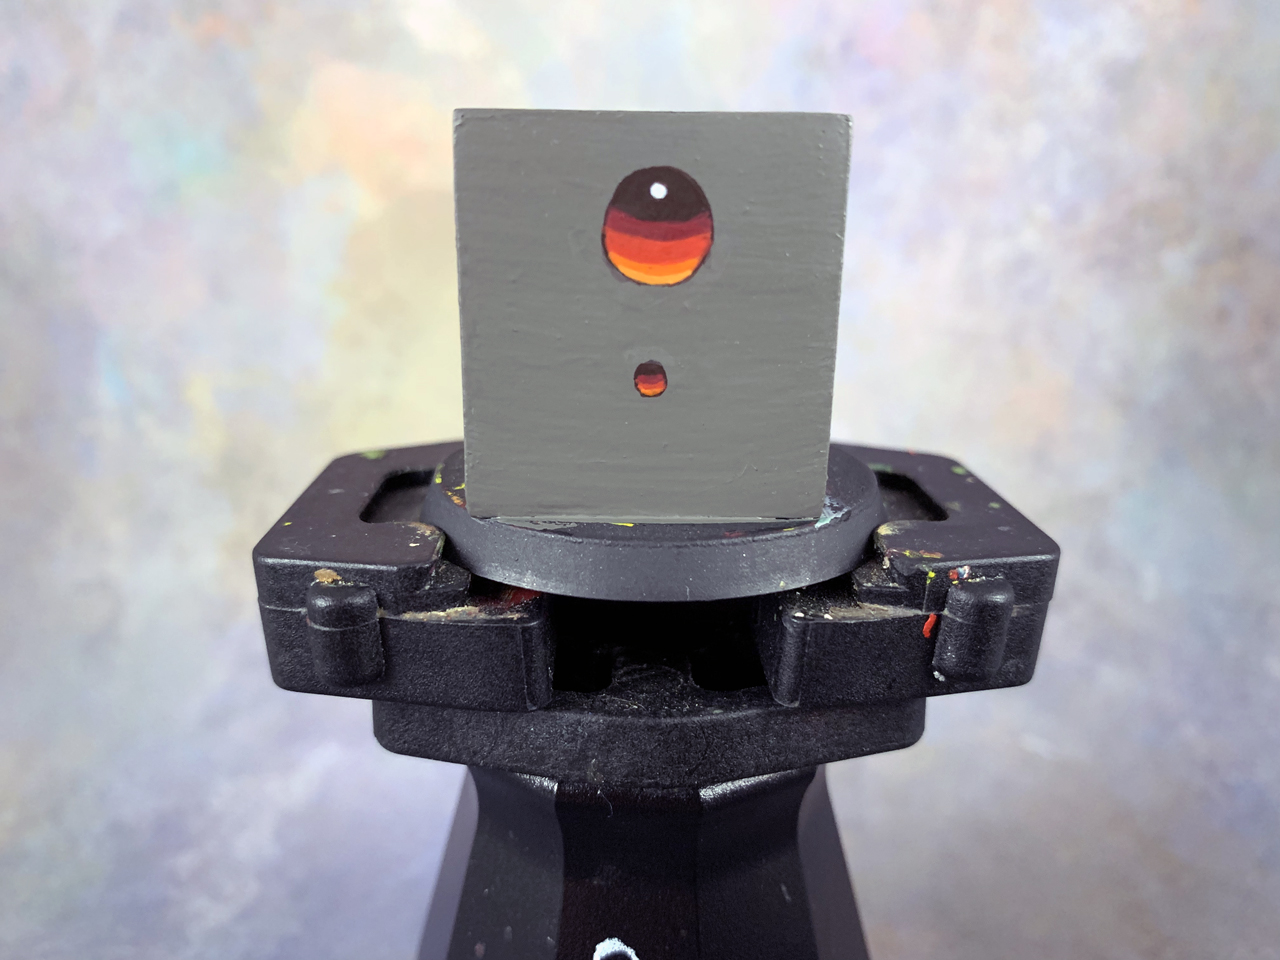
Then the brighter red, Evil Sunz Scarlet.
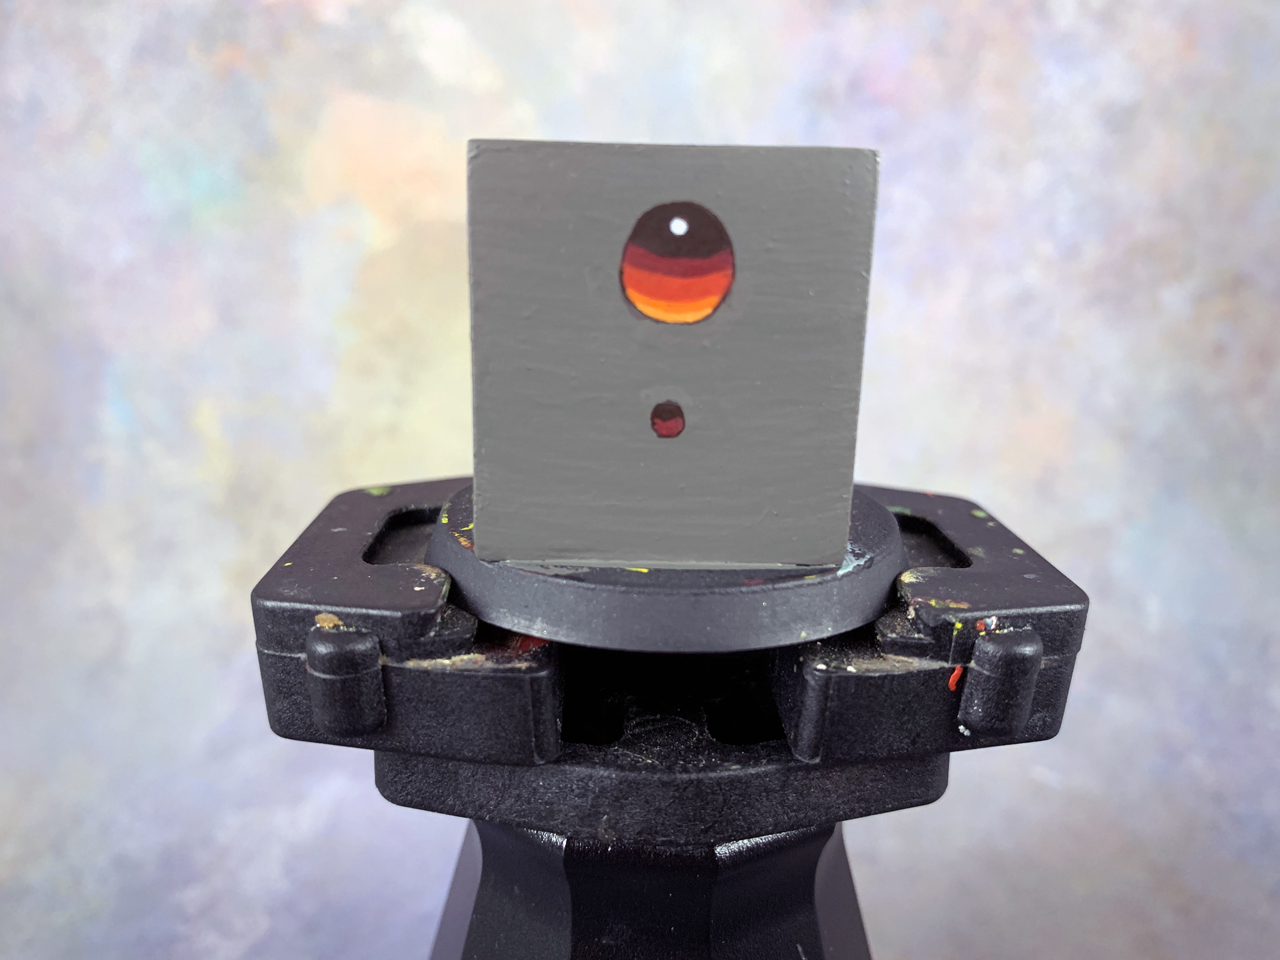
Now I add the orange. The area is so small that I’m really just adding in a very thin line.
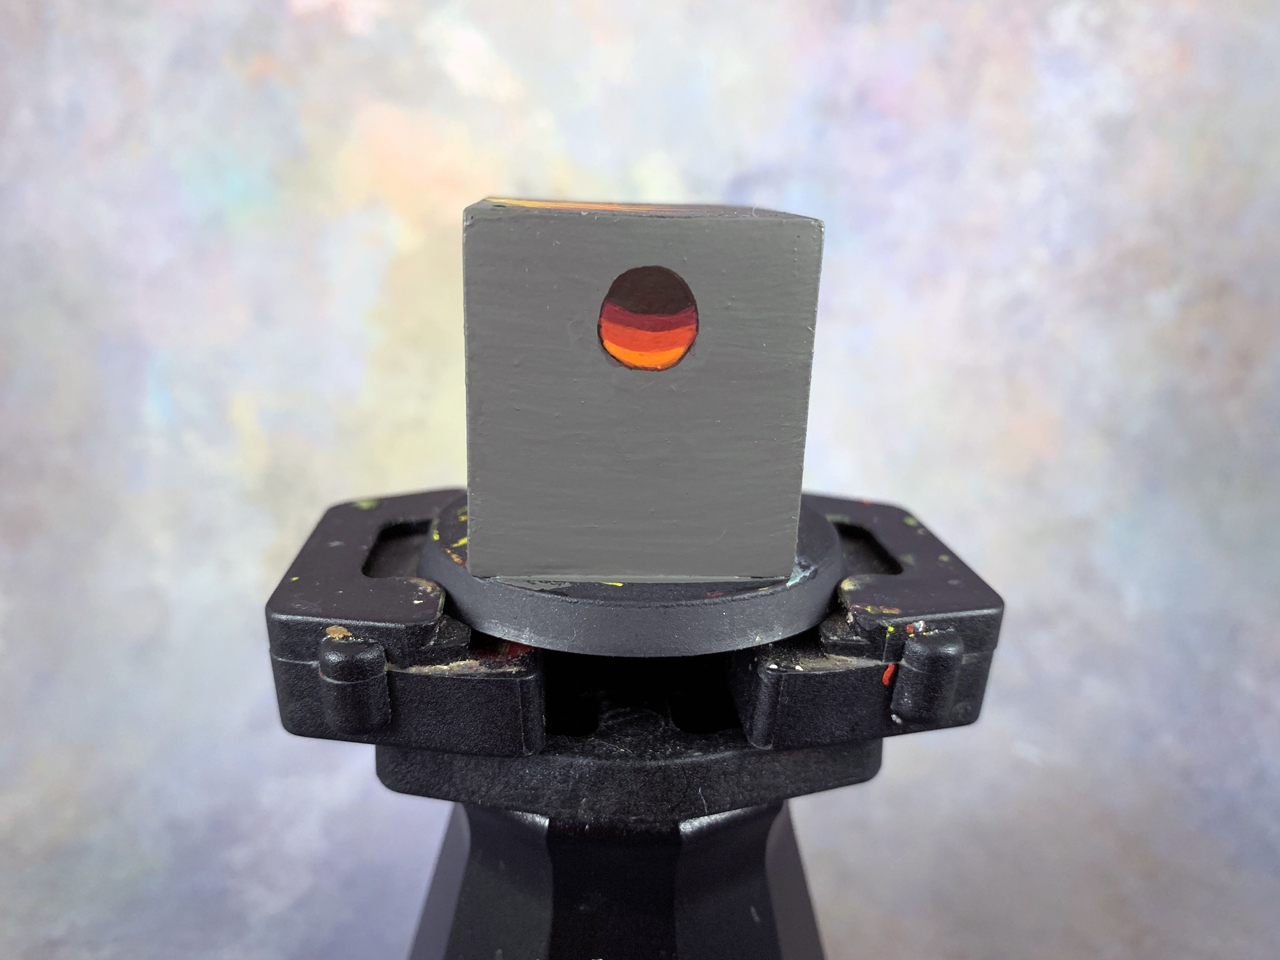
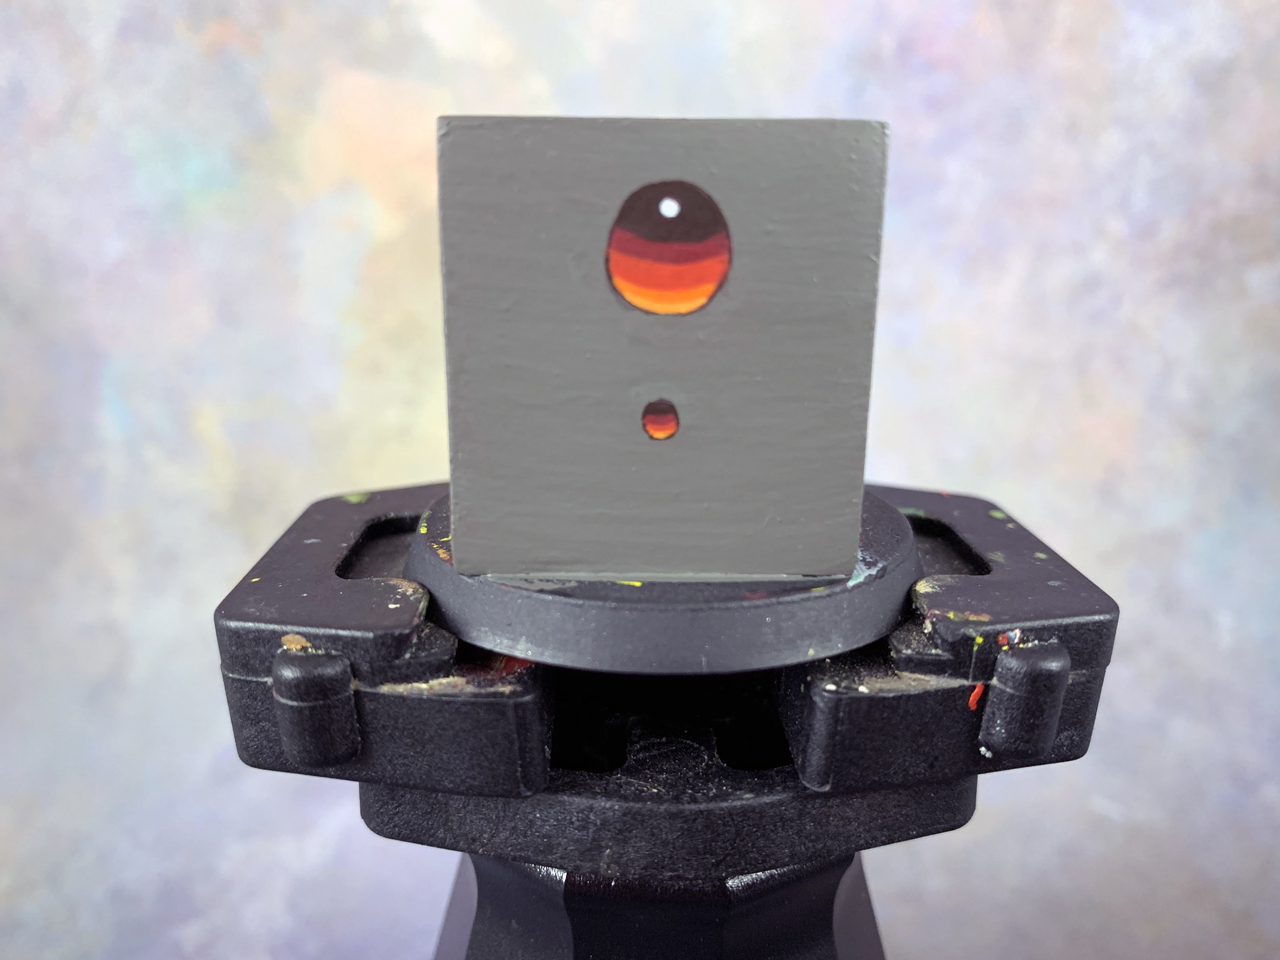
The brighter orange (Fire Dragon Bright) is almost a dot at the bottom at this scale.
Now the reflective dot and done.
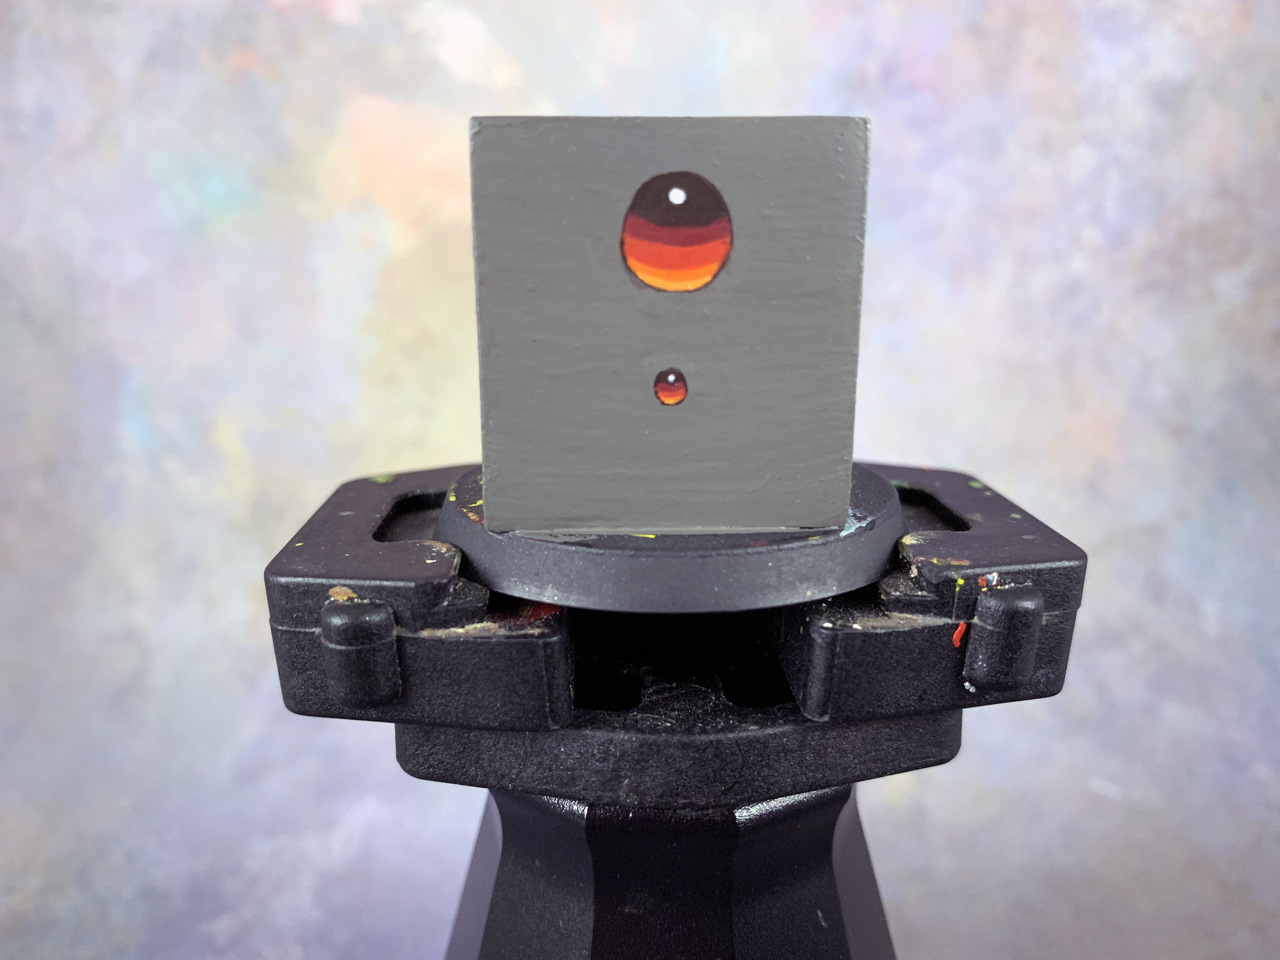
And zoomed out to better see.

As you can see, there’s no blending on that smaller gem and it looks pretty good!
Advanced Glass Effect for Miniatures
The only thing you need to do to make this an advanced version of the miniature glass effect is to blend those layers that were put down.
Those layers could have been blended as they were going on but sometimes it’s just easier to blend them after you’ve layered it out. I prefer blending as I go, but it worked out this way for the tutorial!
Also, to reiterate what I said above, if the scale of what you’re painting is very small, then you may find this is entirely unnecessary. The only time I blend a glass effect is when it’s something larger and more prominent.
To give an example, something like the lense on a Space Marine’s helmet is not something I blend. It’s such a small area that a few basic layers with a reflective dot does the trick. Same if it were something small like a tiny gem on an amulet.
However, if you’re painting larger gems, like an Aeldari soul stone on a vehicle, or maybe a crystal orb on a staff, then blending out the layers is useful.
Start with the Darkest Area
To start the blending I grabbed my dark red, Khorne Red, and thinned it out to a glaze. I then started the brush in the dark brown area (Rhinox Hide), and pulled down into the Khorne red.
As you can see, it’s not very clean. So, I keep doing this to smooth that transition out.
I do this a few times to smooth out the transition until I’m happy.

Now, if you want the blending process explained in more detail, then definitely check out my tutorial on blending. That tutorial covers this in more depth and explains the process of blending more.
Keep Blending All Layers
I kept doing the same thing. So, I took the bright red and blended that down from the dark red.
The Final Result
Since this tutorial isn’t on how to blend, I’m going to fast forward to the final result, which I achieved by slowly blending each layer and smoothing out those transitions.
My blending is quick and dirty. I absolutely could have spent way more time working the transitions, however, I’m not one to spend 30 minutes blending out each layer; I’m lazy. I call it tabletop blending.
And that’s all there is to it!
Some Examples of My Work
Just to show you some examples of this effect in practice on miniatures I’ve previously painted, here’s some stuff to check out.
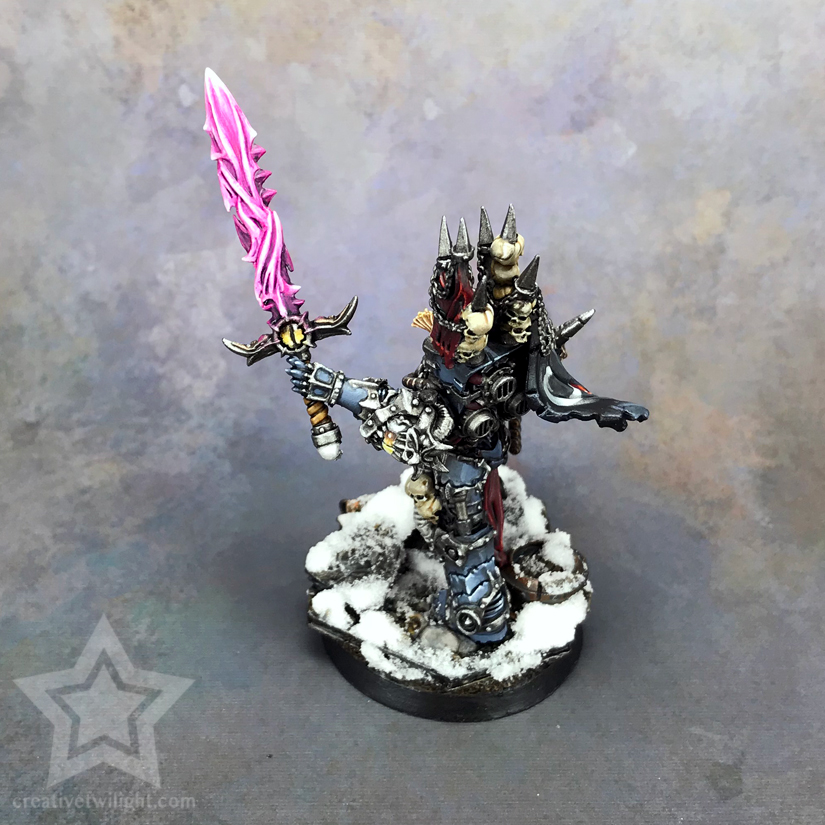
If you look at the yellow eye in the hilt of the sword you’ll notice the glass effect there. Notice how the reflective spot is towards the top right? That’s because the sword is tilted and that’s where the light would strike, not dead center.
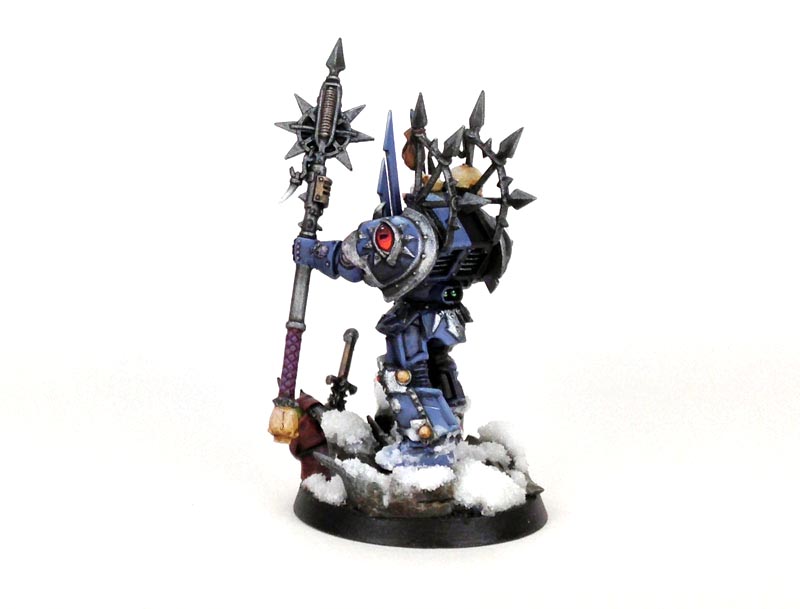
The red eye gem on the shoulder I painted with a glass effect. I didn’t go quite as bright in the contrast on this because of how the eye is shaped around the shoulder. Still, I feel the effect came out pretty well here.
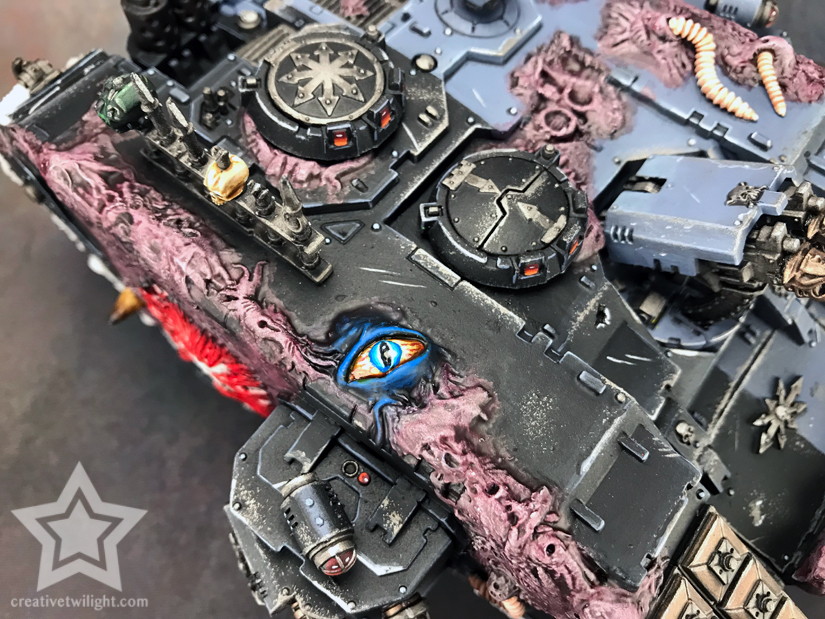
I know this model is distracting, but if you look at the lenses on the top hatches you’ll see the effect being used.
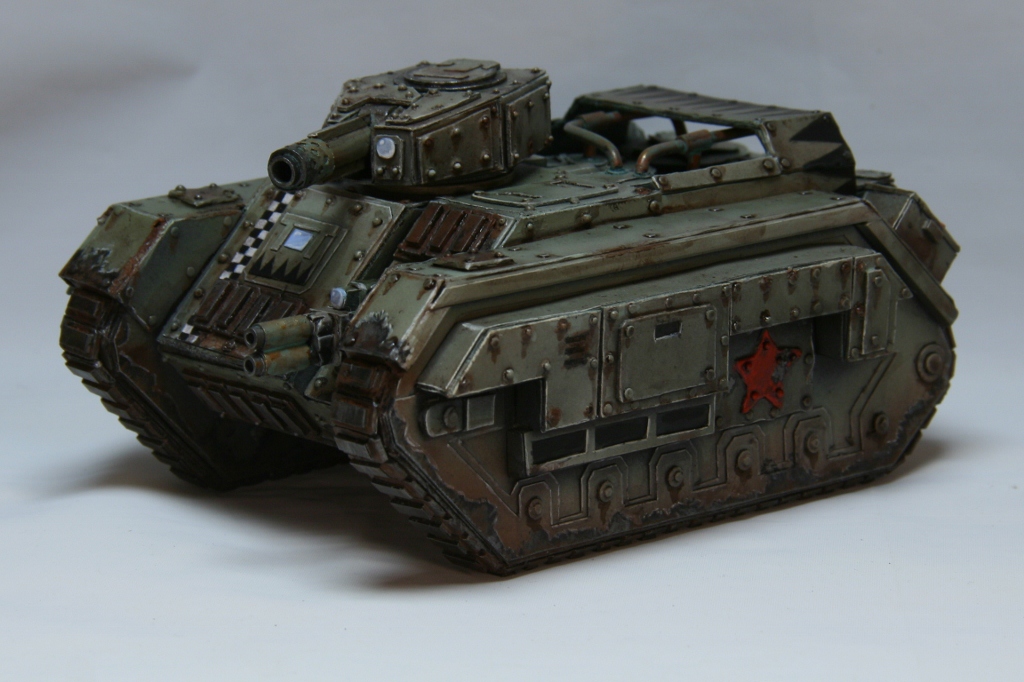
This Devil Dog was painted by Kamui. I realized I use red a lot for my effect (I love red!), so I wanted to show it done with another color. You can see the lenses on the Devil Dog are a blue-grey.
Kamui didn’t push the contrast as much as I do but it still looks great and he didn’t do any blending on this either.
Video
If you prefer video format, then check out this great one from Vince where he does the effect. Vince makes a ton of great videos like this so be sure to subscribe to him.
Conclusion of the Miniature Painting Glass Effect
As you can see, it’s not terribly complicated to pull off this effect. The trick is strong contrast and a nice, bright reflective spot to sell the whole effect.
It will take some practice, I won’t lie, especially working on smaller areas, but it’s very achievable and you’ll be surprised what you manage in a few minutes of painting.
There’s a lot more you can do with this effect as well. My tutorial is more or less a tabletop quality example – quick and easy. However, you can play with the reflective highlighting a lot more if you want to push this up a notch.
Realistically, the reflective highlight would just be a simple white dot at the top. Instead there should be a slightly lighter area in the shape of the gem with a brighter spot in the center of that.
You could play more with color transitions as well as the shape of the layers. The layers could bow up instead of down. Maybe the layers are completely horizontal instead. There’s really no wrong way to approach this if you follow the basic principles.
Miniature Painting Techniques & Guides
Learn the basics, as well as the advanced techniques, of miniature painting.
I love painting miniatures and teaching people how to paint. I also really love blogging, so I've combined those two passions here.
- Creative Twilight’s Future and My Thoughts (Feedback Welcomed!) - December 4, 2021
- My Top Gift Ideas for Miniature Painters & Hobbyists + Gifts to Avoid - December 2, 2021
- The Year That Was 2020 and Where I’ve Been - January 17, 2021
I was really surprised when I first ran across this technique how easy it is to get it to look good. As you say, the smaller scale actually helps it work better, which feels kind of counter-intuitive, but really is the case.
Your example looks a little odd to me because I almost always assume a light source somewhere off to one side*, rather than directly above, so I’m used to having a bit of tilt to the whole thing. Which is actually one more important point: If whatever you’re working on has multiple gems, be sure to paint them all as tho they’re lit from the same direction. One of the few things that can really screw this up is having gems near each other that look like they’re being lit from different directions for no apparent reason.
*In my case, I always do it like it’s coming from my left. My strongest light at my painting desk is there, so I tend to use that as my reference when I’m doing highlights, which means it makes sense to do the gems the same. Standardizing it like that also means that they all look like they’re in the same lighting when I have the whole army set up on a display board or something.
You’re absolutely right about lighting. I paint my miniatures with the light overhead, hence the top reflection point. So yeah, always paint the light source on your gems to match the light source on the model, otherwise things get weird and look off, which you know – just stating for others :)
There, just added a reference image talking about light source directions with examples :)