OSL (object source lighting) is the process of painting a light effect on your miniature to create a glow effect. The source of that light could be an object your miniature is holding, like a lamp, torch, or even magical flames. It could also be that the source of the light is not on the miniature but you’re painting the effect of this off screen light source onto the model.
What I’ll go over is principle of OSL, show you some examples, and walk you through painting OSL on your miniatures. It can be a bit tricky to get this right, and it takes some practice, but the results are worth the effort.
The Core Rules of OSL (Glow Effect)
To create a realistic look of light being cast onto an object, there’s a few rules that you should follow.
- The source of the light will always be brighter than the lit areas it creates.
- The areas lit by the source light needs to be brighter than they are unlit.
- Light travels in a straight line and diminishes in strength the further from the source it goes.
I could add in some other rules, but I feel that sums up the most important. The other rules are a bit subject to artistic interpretation anyway.
Rule #1 – Source Light
Pretty simple and it makes perfect sense that the object creating the glow effect is going to be brighter than the lit areas it creates.
Light loses intensity the longer it travels, and that’s applicble to even very short distances. So, as light moves away from the source it gets a little weaker and weaker until it fades to nothing.

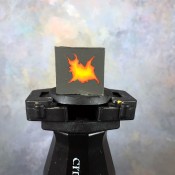
You’ll see an example of this below where I show you how I painted OSL for lava.
I used 3 colors for the lava: orange, bright orange, and yellow. The yellow is the brightest part of the lava, so that means when I light up the areas around the lava I won’t use the yellow. Instead I use the bright orange for the lit areas.
My rule of thumb is to use whatever your mid-tone color is for the glow effect (OSL). If I painted something glowing using dark green, bright green, and neon green, then I would use the bright green to paint the OSL, leaving the neon green as the brightest element on the source object.
Rule #2 – Lit Areas
The areas that the glow effect reaches from the light source should appear brighter than they are normally.
Here’s an example of good and bad OSL color choices.
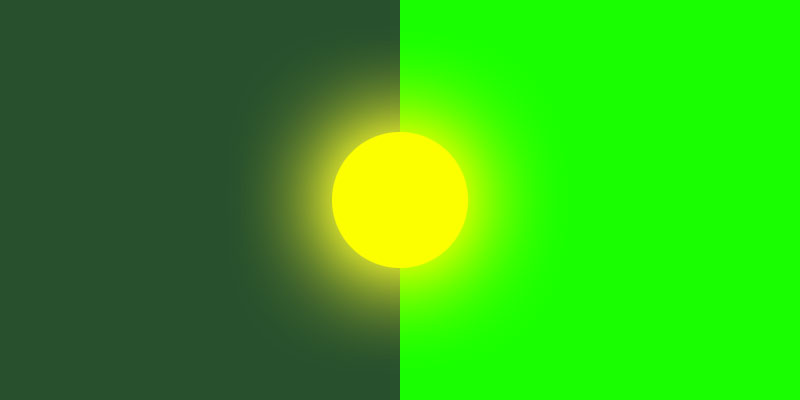
On the left the green is dark, so the yellow shows up as a glow. The areas the yellow light source touches are brighter than they are without it. So, it appears lit.
On the right side, that neon green is about the same brightness as the yellow, so the glow from the yellow gets lost; it has no impact.
That neon green doesn’t appear brighter than it was without the yellow glow, so the rule is not being followed.
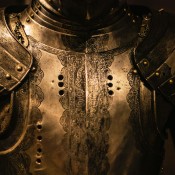
Metal is different. Metal is often bright, but it’s also reflective. Casting light onto a metal surface can generally ignore the being lighter than it was previous rule. That being said, you still want to use bright colors for the OSL.
Rule #3 – Light Travel
Light moves out from its source in a straight line. It doesn’t bend around objects, so it will create some deep shadows as a result.
Light can, however, be reflected and in turn cast onto areas normally not reached by the light source, but that’s not something that comes up a lot in miniature painting. Well, unless you’re doing something that’s a showpiece.
So, just picture your light moving straight from the source object. Visually draw the lines so you can determine what needs to be lit.
Here’s an example.
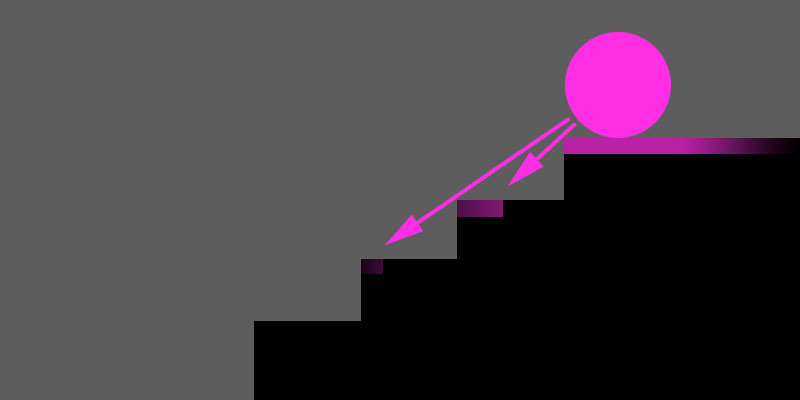
You can see how the light travels straight and so there are areas on the stairs that get no light and remain dark. You will also notice that the light is getting duller the further from the source it gets.
How to Paint OSL (Glow Effect) Without an Airbrush
Painting OSL isn’t very complicated and you don’t need an airbrush to do it. The process is simple and just requires some time and patience.
Disclosure: Some of the links below are affiliate links, meaning, at no additional cost to you, I will earn a commission if you click through and make a purchase. The commission earned helps maintain this site.
Painting OSL for Lava
Time needed: 5 minutes
Previously, I painted this up to show how to paint lava. Next, I’m going to add in some OSL (glow effect) to have the lava glowing onto the area around it.
Now, I’m imagining that the lava is recessed down, so the light it casts will mostly only touch the edges of crevice it’s in since light travels in a straight line.
- Edge Highlight
The first thing I did was to create an edge highlight to the Stormvermin Fur color, the base color around the lava. Again, the idea is the lava is recessed down, so that Stormvermin Fur color would have an edge highlight. For that I used Karak Stone.

- Thin Layers of Paint
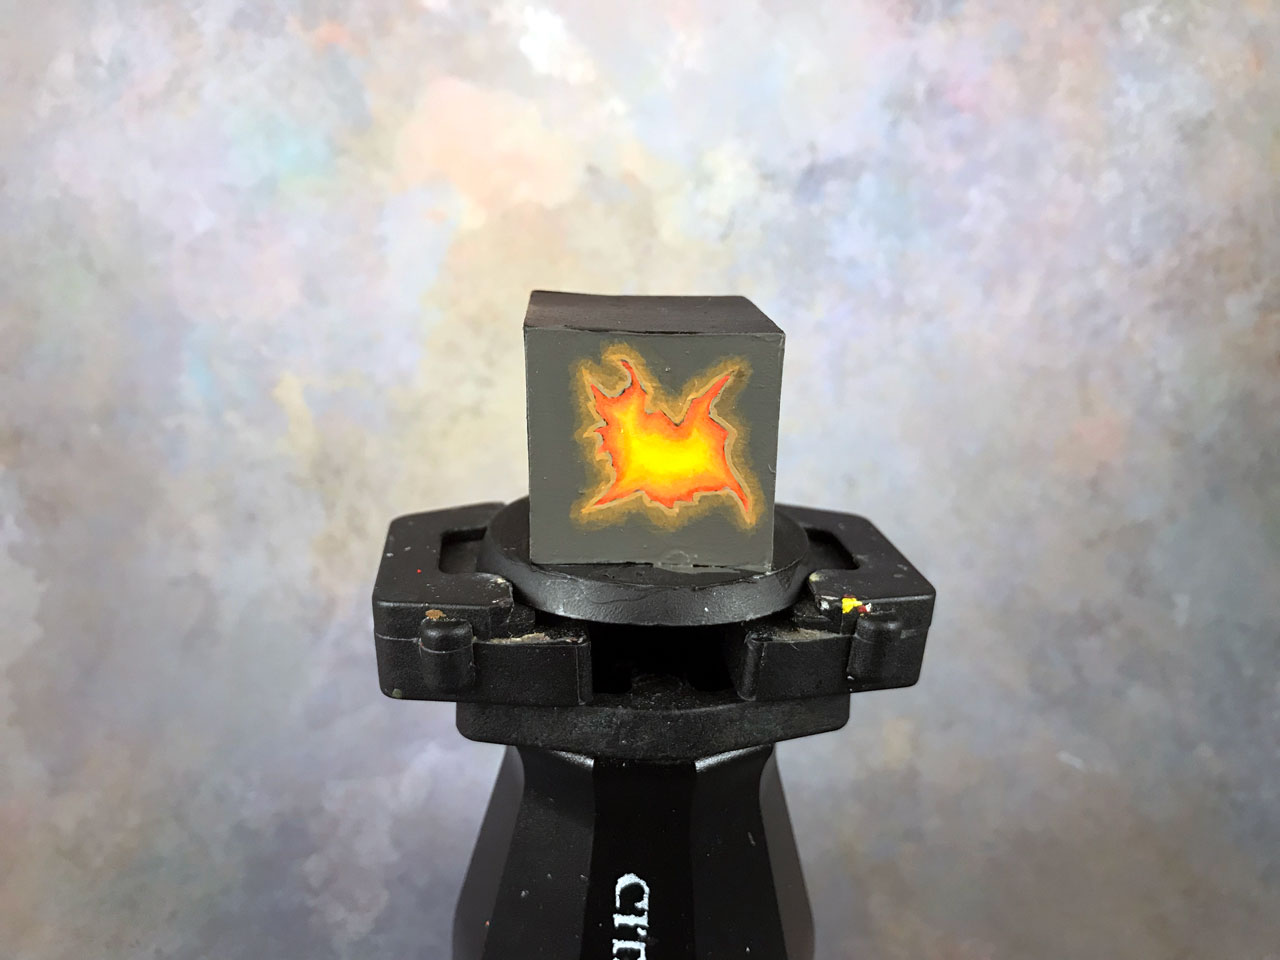
Now, a very thinned out Fire Dragon Bright is applied. It’s basically a glaze at this point.
I start it outside that edge highlight and pull towards the lava/light source.
That first layer is so thin that it’s hard to see. - More and More Layers
All I do is continue adding thin layers of Fire Dragon Bright, more glazes. Each successive layer comes back a bit closer to the light source, in turn creating a blend with the area closest to the light source being the brightest.
I do this around 3 times, so 3 layers, to build up to what you see here. - The Final Blend
I base coated this in Stormvermin Fur, so that’s the color I use to blend out the light.
Just as with the light, I thin out the paint to create a very translucent paint. I started the brush on the edges of the light and pull outwards, away from the light source, to blend it out.
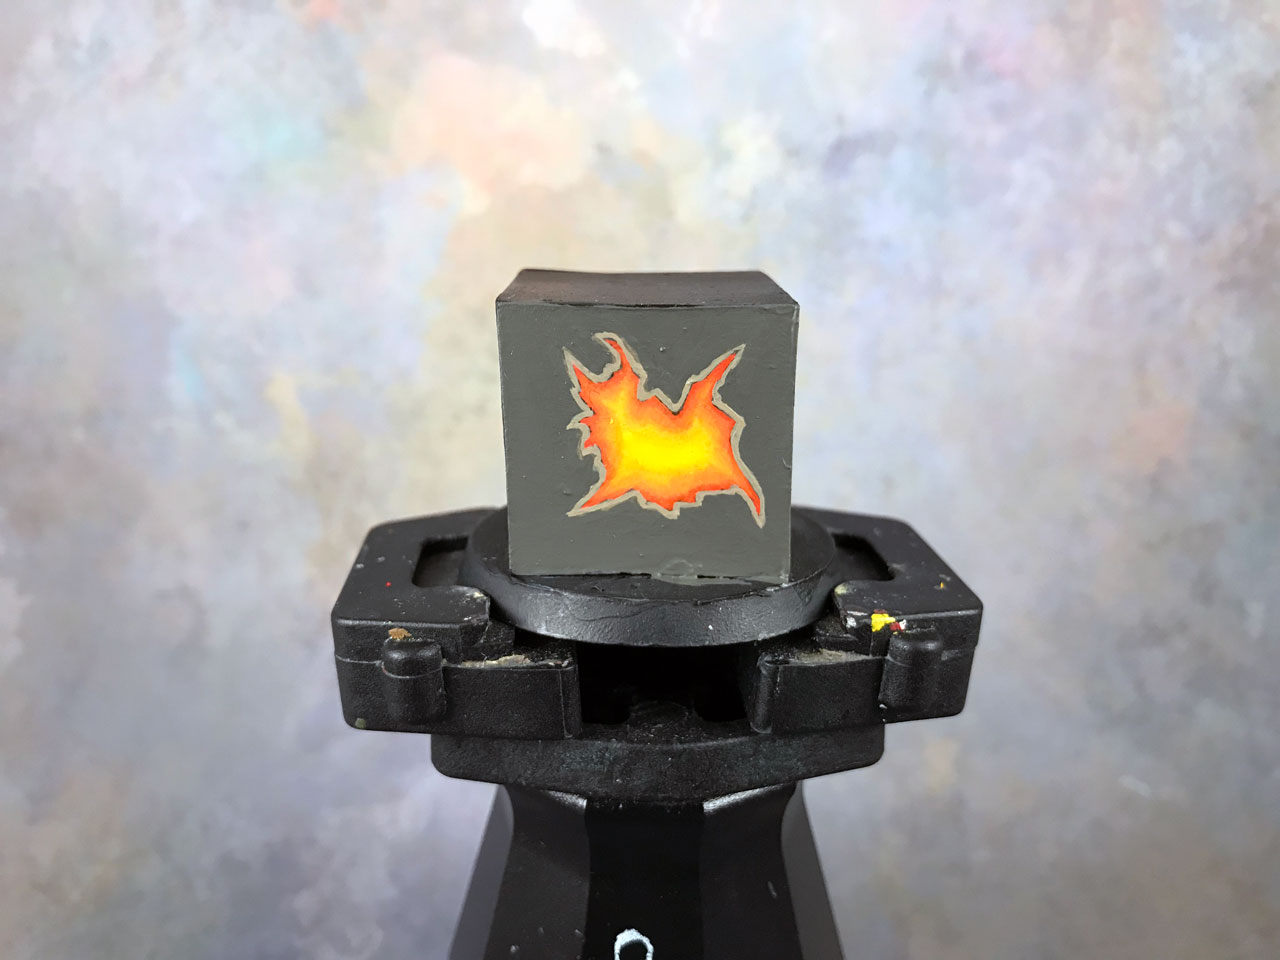
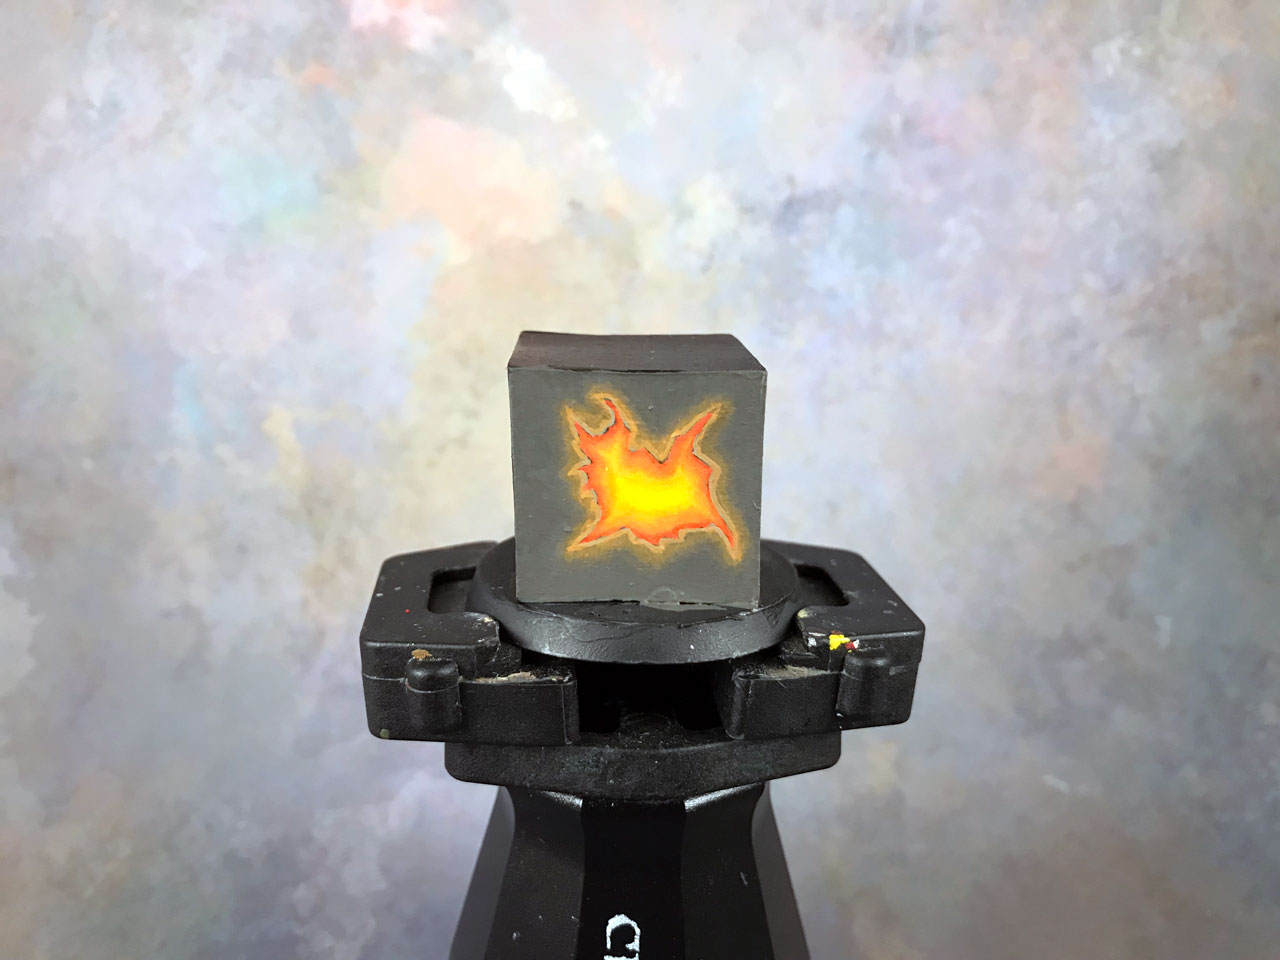
Here is the finished product. I could spend more time blending out the light source but I’m going to call that good for this tutorial. I just want to show you how it’s done and not create a masterpiece ;)
Now, I followed all the rules of OSL with this. The light source (lava) is the brighest element. The lit areas I created were done with Fire Dragon Bright, the mid-tone I used on the lava, where the brightest part of the lava was the yellow (Flash Gitz Yellow).
The area I lit up with the glow is brighter than it was prior. This is very important otherwise it just doesn’t give the appearance of light.
Light travels in straight lines so I didn’t cast the glow out too far. I wanted to glow out a bit from the edge, but I kept it pretty close to the source as light wouldn’t move out far at all if it were recessed in as I envisioned it.

How to Use Glazes for OSL (Glow Effect)
I wanted to also show you another way to approach OSL. Instead of painting your color into the surrounding surfaces, you can use white instead. Then, once you’ve got the white all blended out, you can use glazes to add in the color.
The nice part about glazing over white is that it creates a very vibrant look. It just looks like it’s glowing with no extra effort needed.
So, I put together a quick example to show you how you can use white in this way. The blending on this isn’t amazing, and I will admit that blending with white can be a chore. Still, if you put the effort in you can get some amazing results.
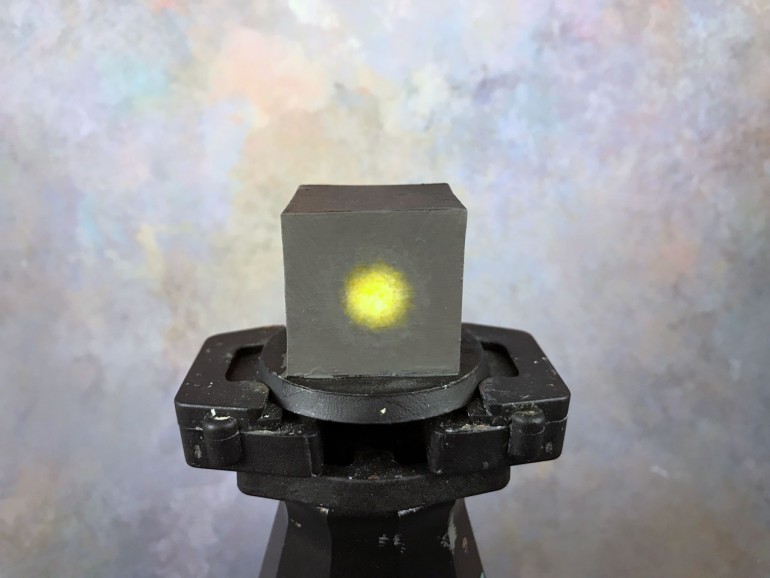
Step #1: Initial Blends
Since I’m working on a flat surface, first I had to create what will be the light source.
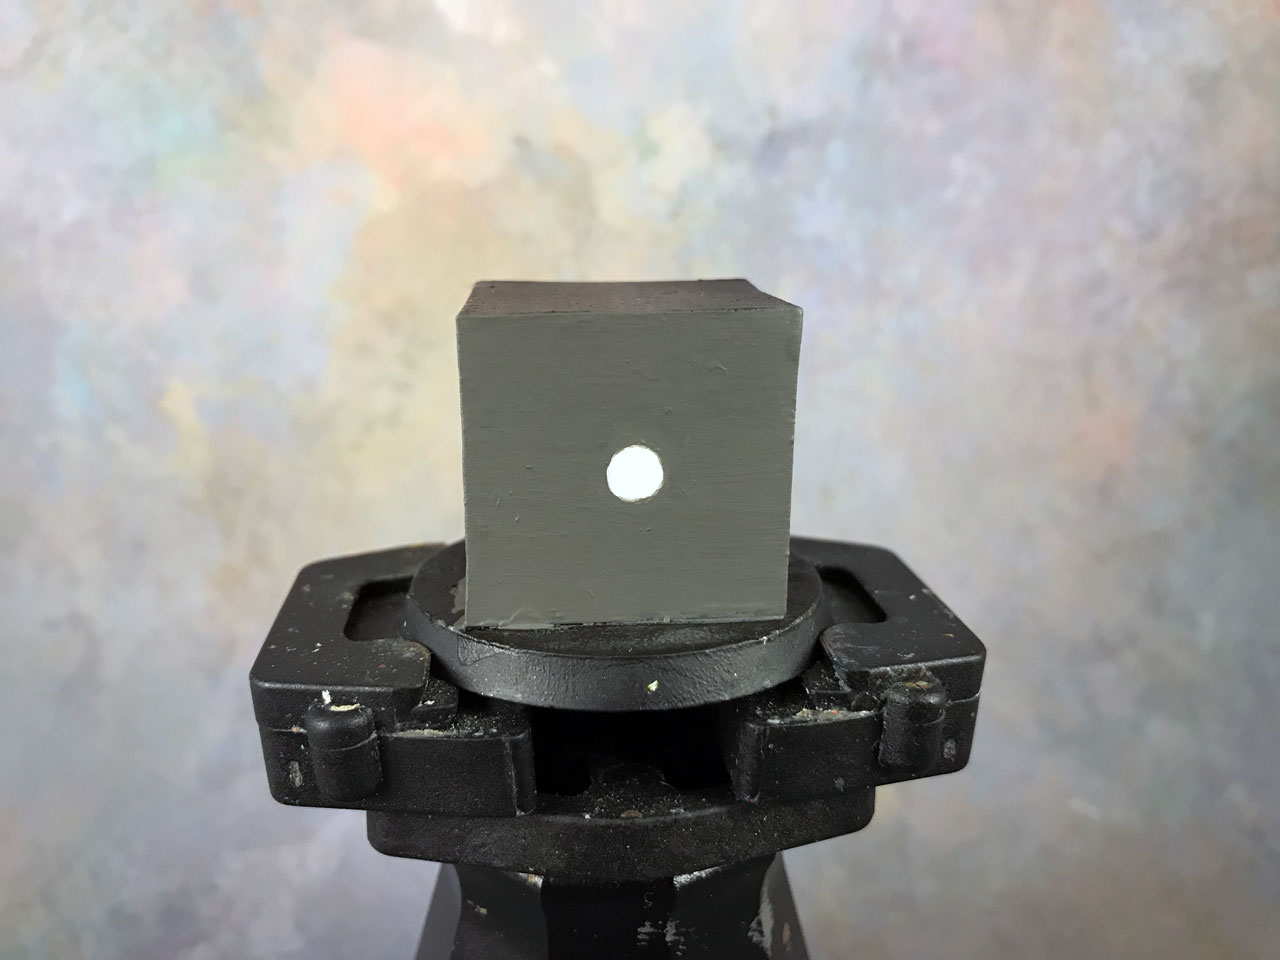
Then I started laying out some layers for the OSL.
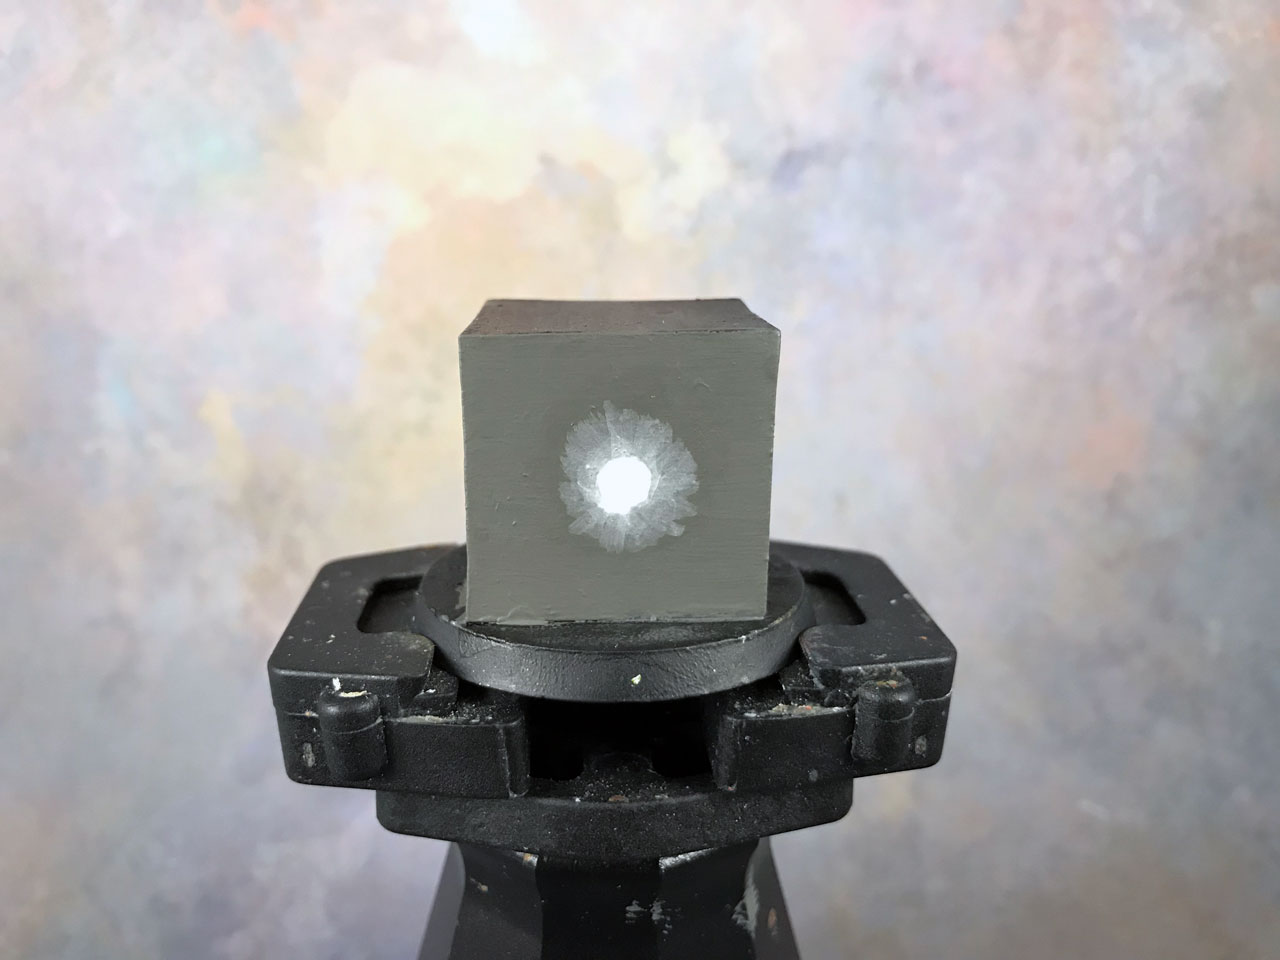
The white was way stronger than I thought it would be. I had thinned it out with Lahmian Medium but not enough for my liking.
Still, I kept at it, pushing the intensity up with each layer knowing I could fix it later.
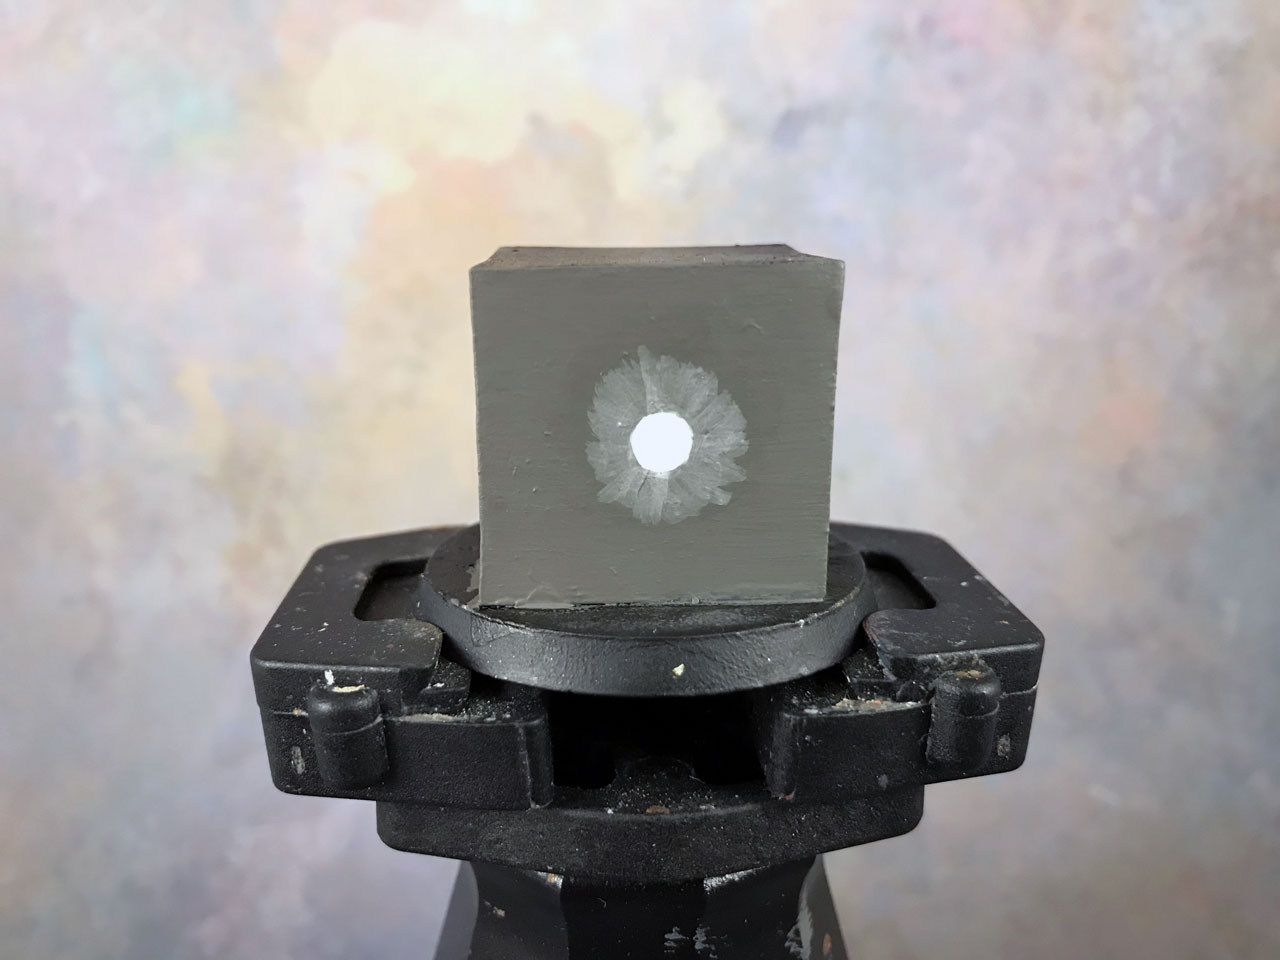
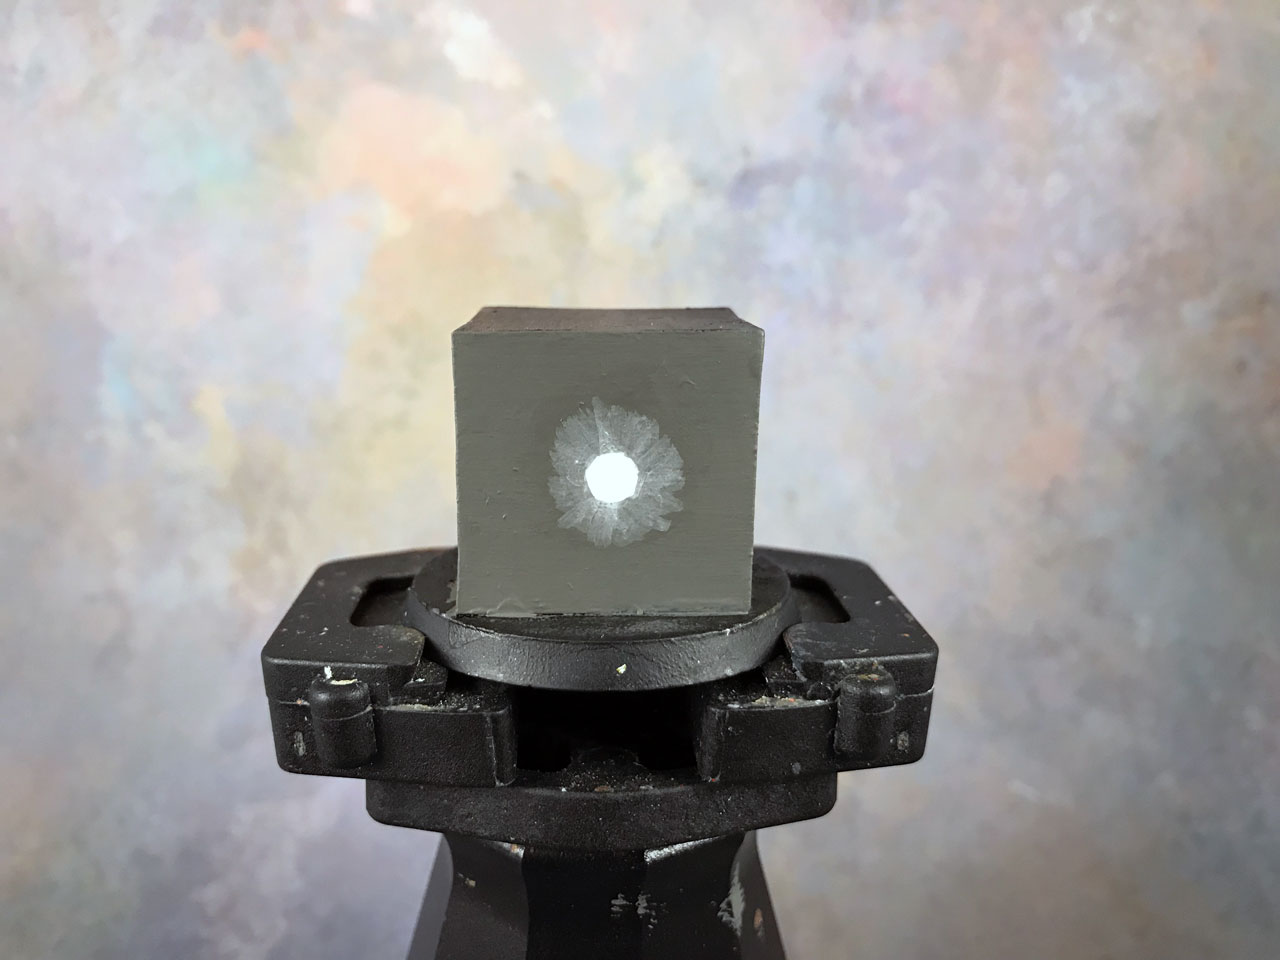
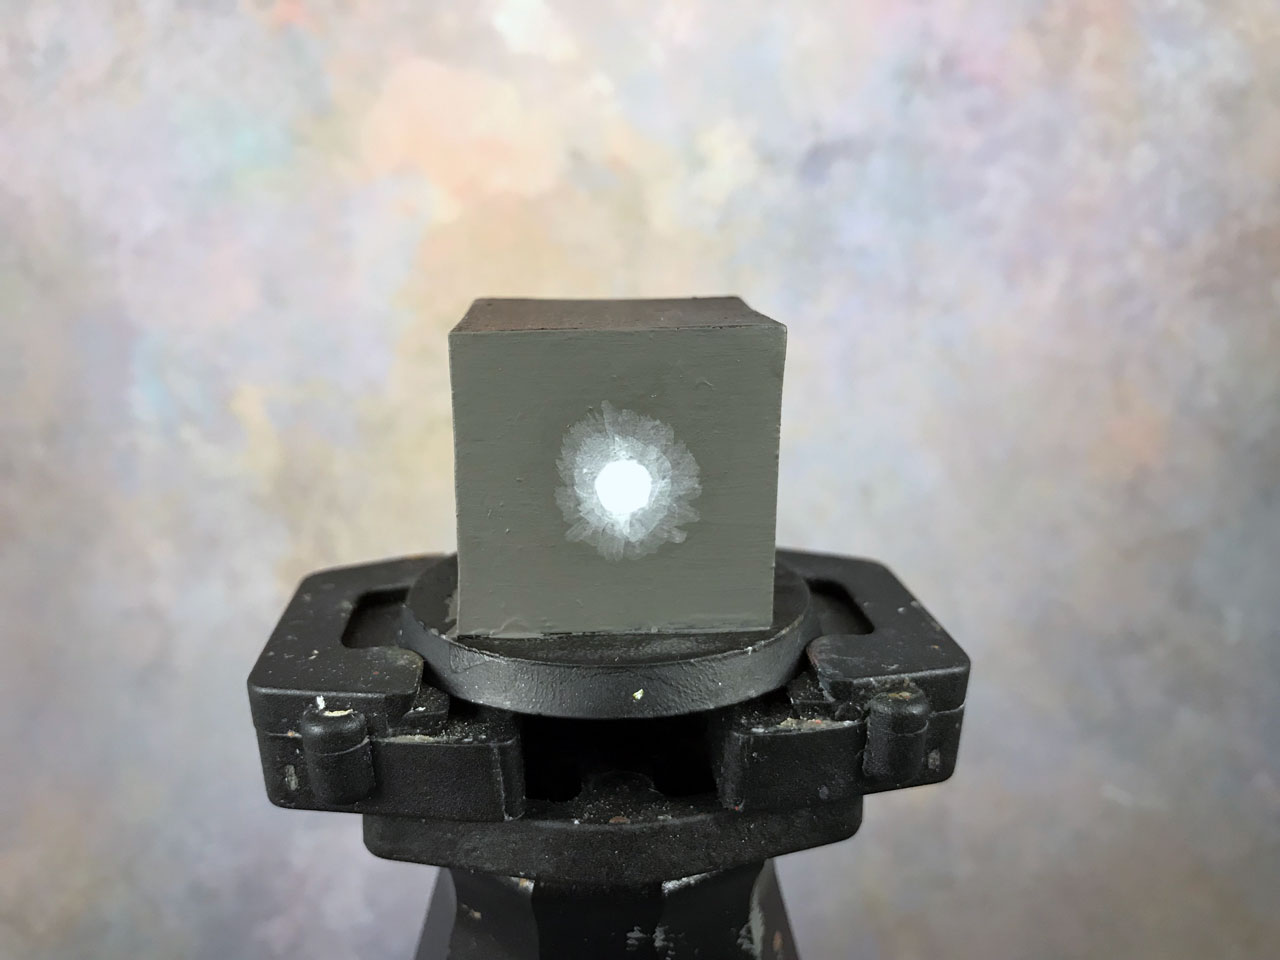
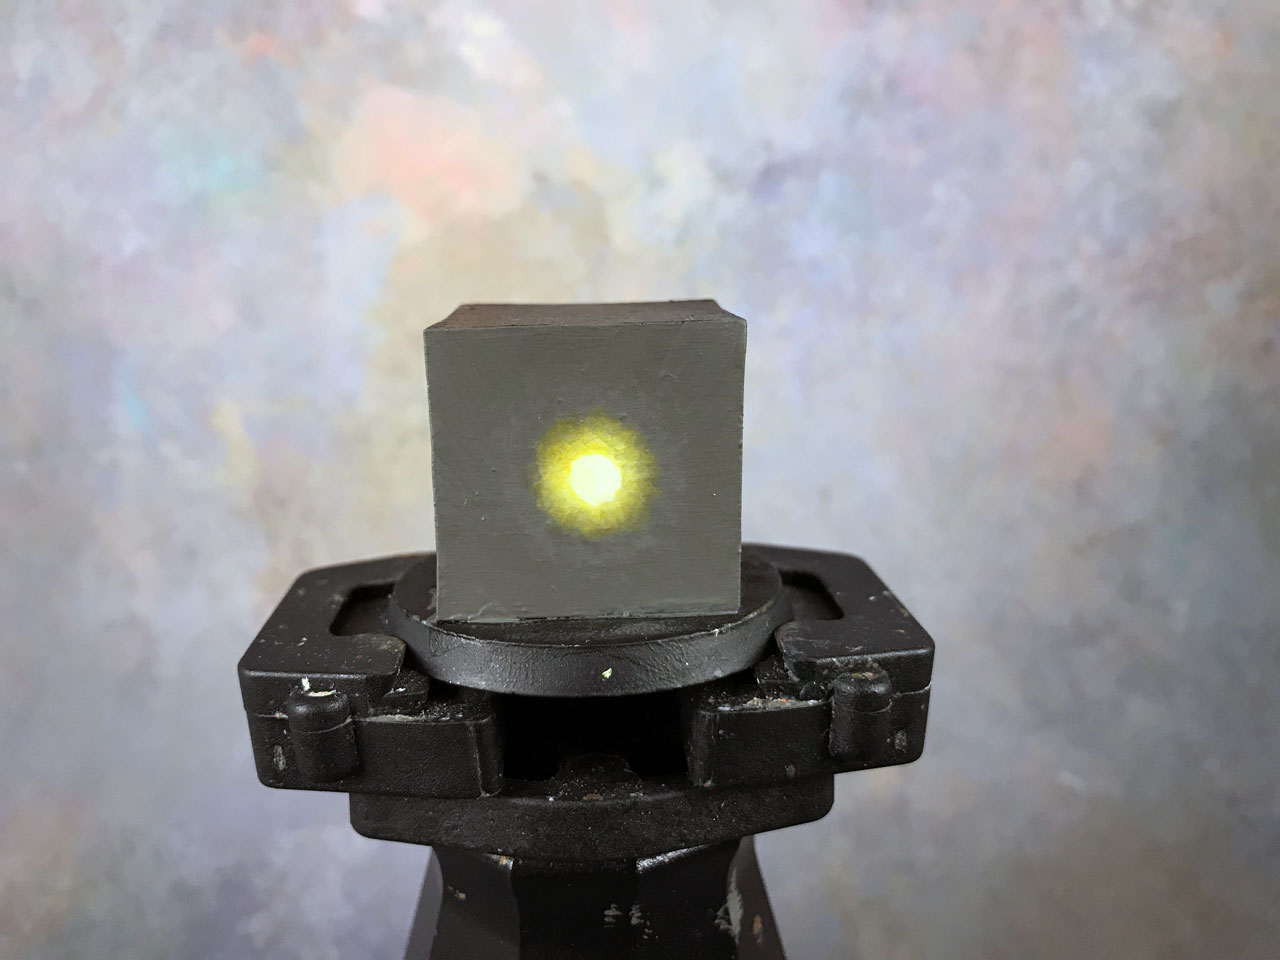
I thinned things out a bit more and tried to blend out the transitions a bit with a few more layers of white.

Step #2: Blending Out the Edges
That looked better so I decided it was time to blend out the edges of the glow effect and smooth that transition out.


I think you can see by now how much fun blending white can be ;)
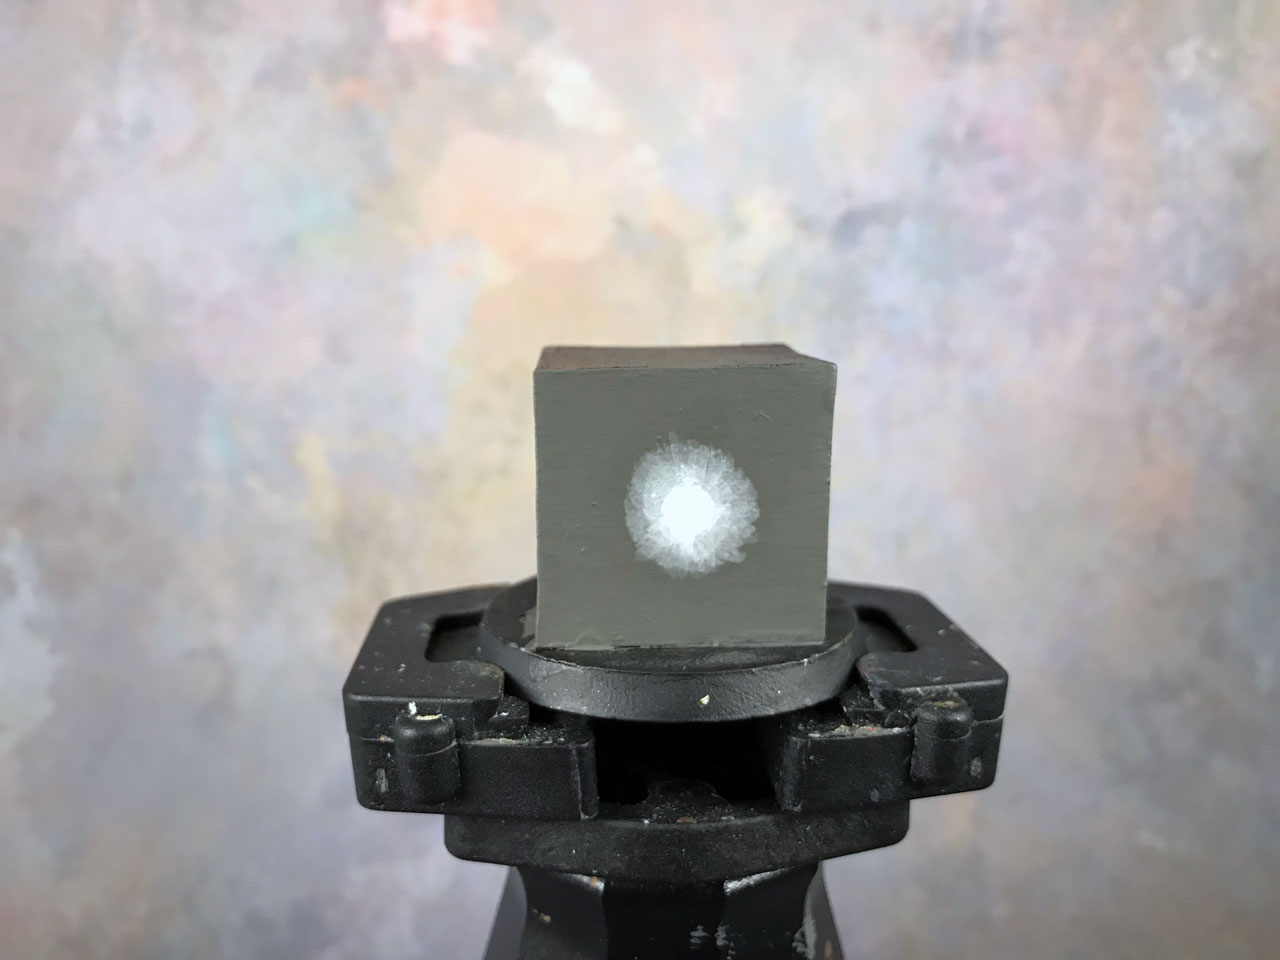
Step #3: Glazing
Now the final and magical step, adding the glaze.
I added the first layer on thin. Oh, I’m using Lamenters Yellow for this.
I want a more yellow look so I did a second layer.
Much better.
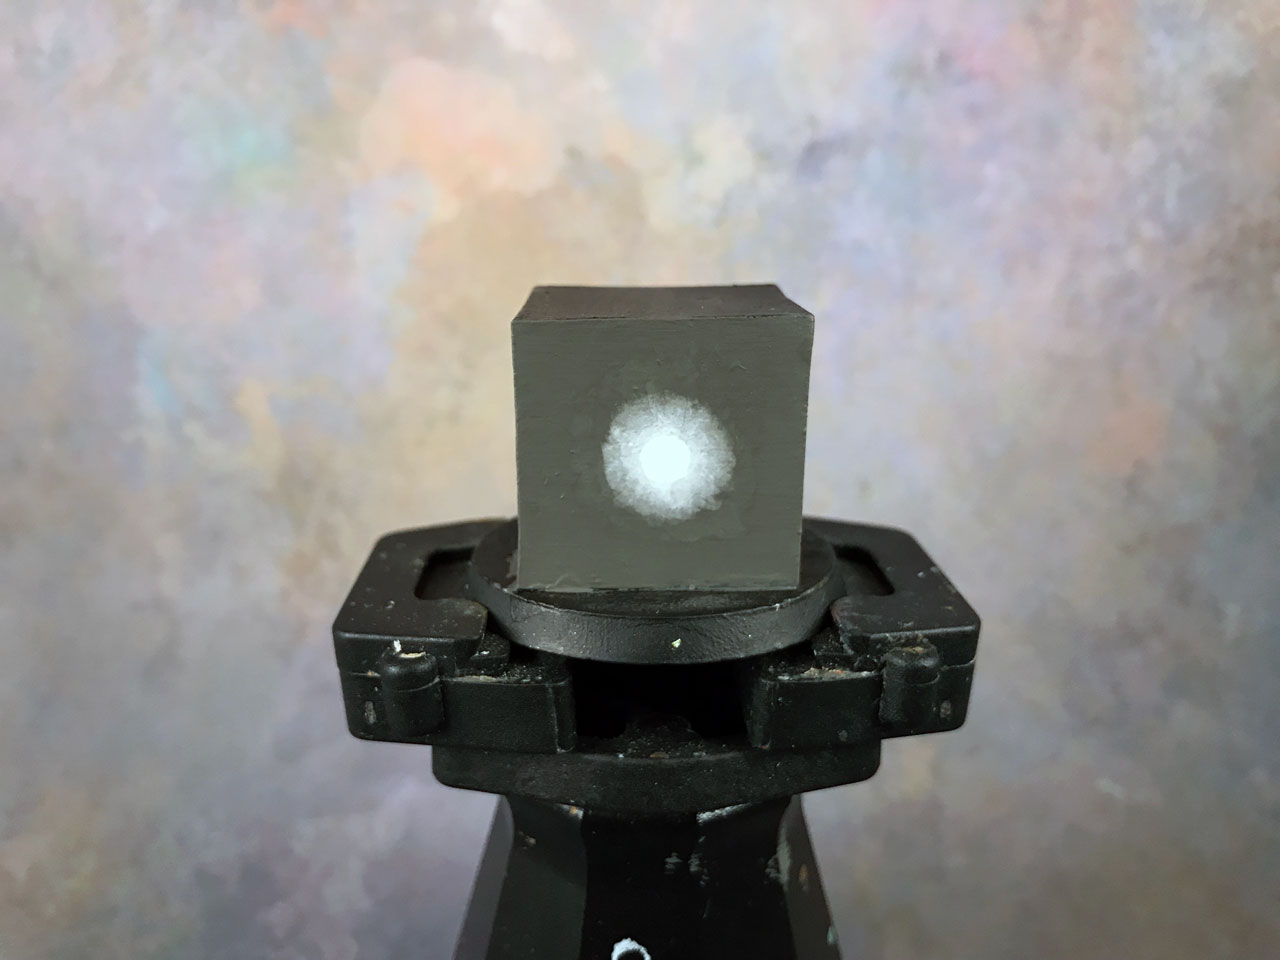
At this point I need to reinforce the light source as it’s lost in the yellow now. So, I use a thin layer of white to pull it out again.
The final shot, I decided to blend out the edges a bit more – nothing major.
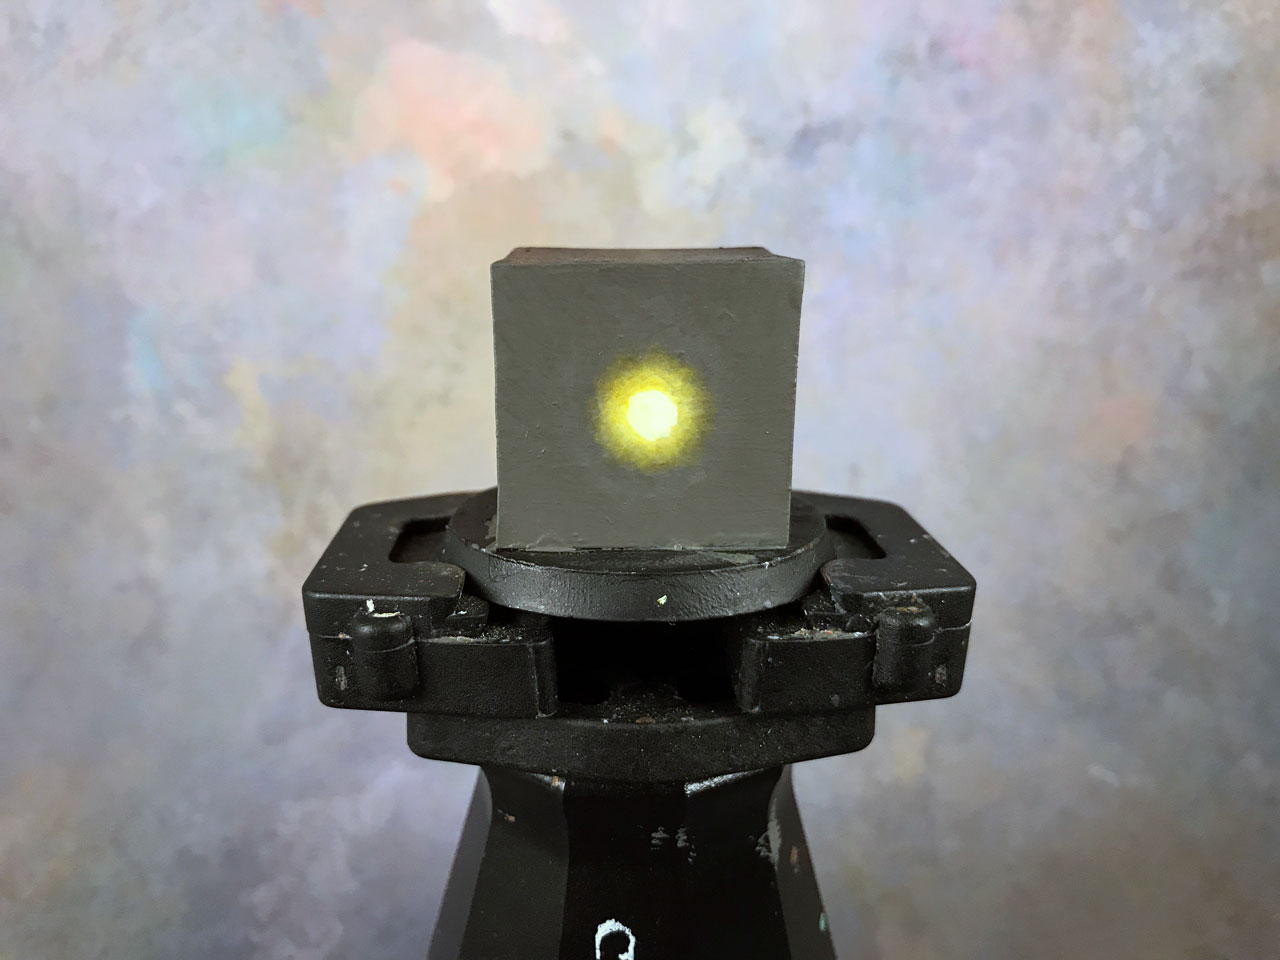
That’s it, all done.
In hindsight, I probably should have mixed in my base coat color with white and built it up that way for cleaner blends. Doing pure white over anything is tough.
There is a great tutorial on OSL where you can find a great example of using white and glazing on Light Miniatures.
Other Ways of Creating OSL (Glow Effect)
A very popular method is to use an airbrush to create an OSL/glow effect. Airbrushes are great at doing smooth blends with.
Other than an airbrush, and the layering/glaze method I showed, you could use various other blending techniques like feathering or loaded brush blending.
Both of those blending techniques are ones I’m trying to master myself, so I don’t have any tutorials here for them. However, you can find great tutorials for feathering and loaded brush on Pirate Monkey. Actually, you’ll find other blending techniques as well; check it out.
Also, you can do OSL with dry brushing as well. It’s not a bad way to start to get the basics down since dry brushing, by nature, adheres to most of the principles. There’s a great tutorial on WeeMen about just that.
Examples of OSL
Here are some other examples where I’ve painted OSL.
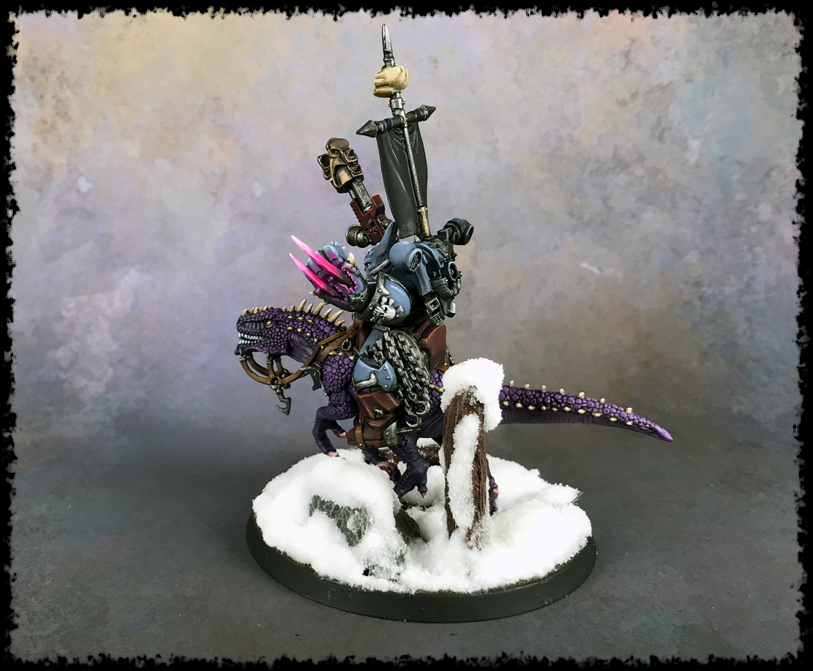
Fane Bloodstar (AKA: Abaddon)
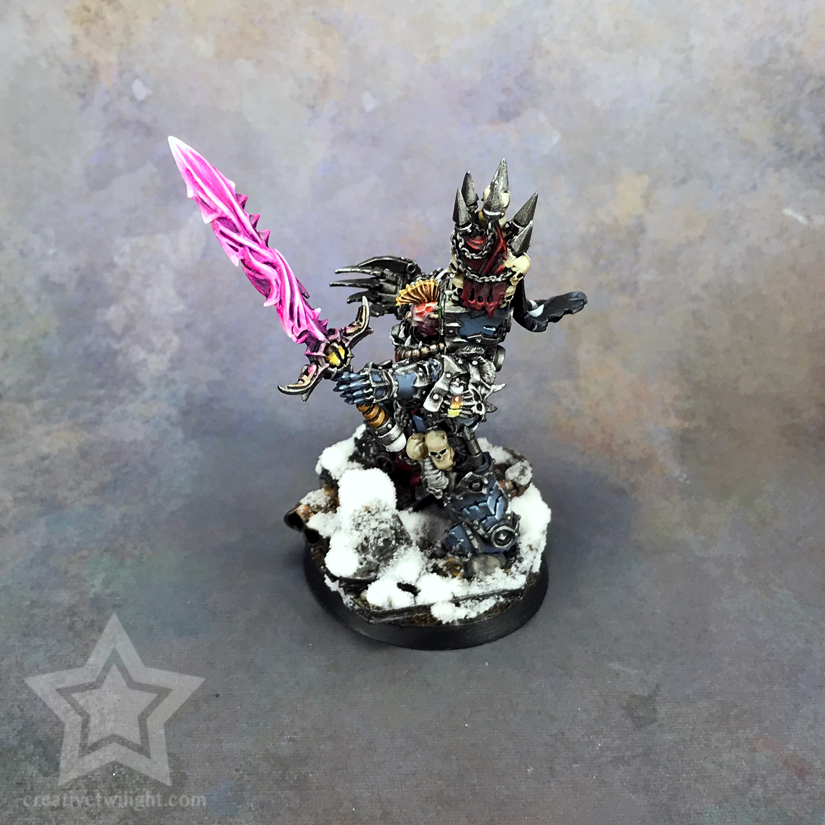
In this example I kept the glow pretty subtle and contained. You can see the pink on the sword hilt nearest the blade.
This also shows what I was saying about metal and that the glow cast into it doesn’t have to be brighter than the metal as we all know metal is reflective.
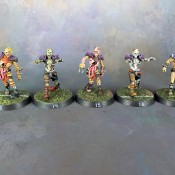
Obliterators
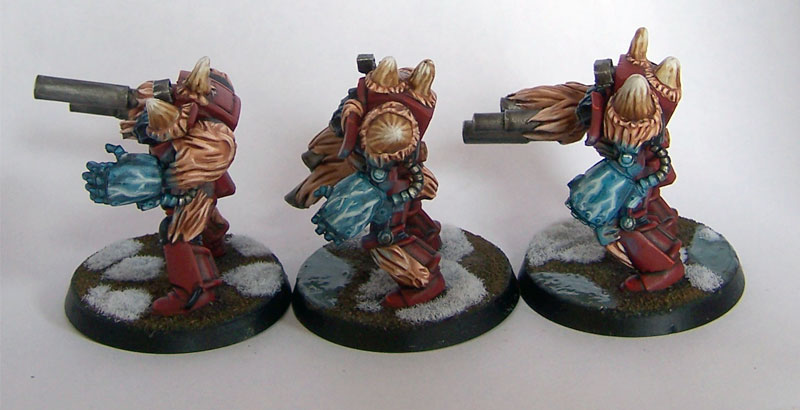
This was my first ever attempt at OSL back in 2012. You can see the glow effect cast out a lot towards the shoulder, cables, and elbow. Sorry for the bad pictures. My setup was terrible back then.
The big thing I learned with these models was that you can’t always just do thin layers of your lighting color over the lit areas. In this instance, just painting thin layers of blue over the red armor was really problematic for me.
With some advice, I learned to mix that blue paint in with the red armor color and use that to create the OSL effect. Some colors are just hard to blend over certain colors, so just mix the paints together and blend it out that way. Also, mixing together paints like that will give you better blends in general.
Ghostwrath (Daemon Prince)
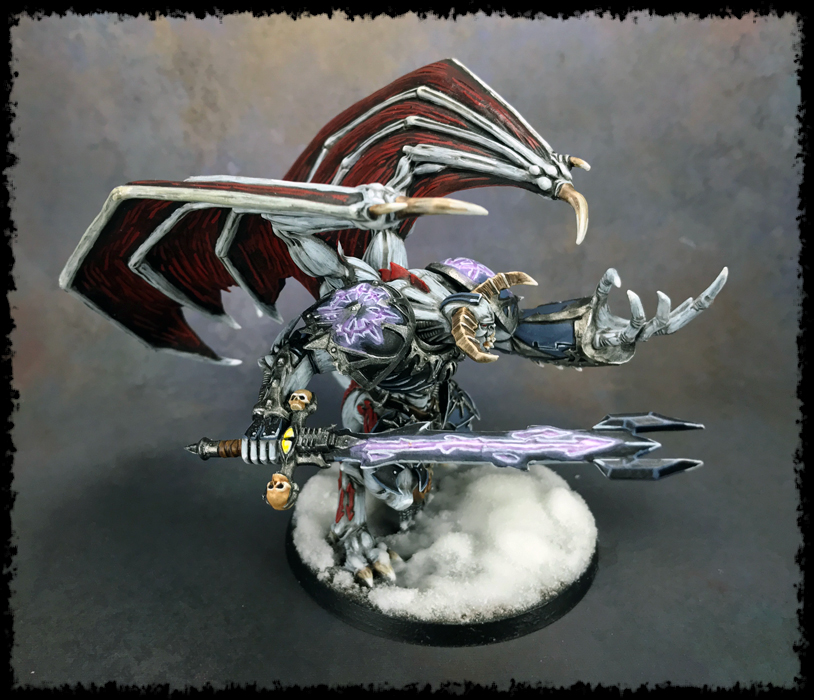
Here’s another example that’s very much like the lava walkthrough I did. I painted the recessed areas a glowing purple and cast it outwards. This was also some early work of mine but where I started to figure it out a lot more.
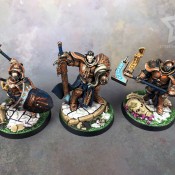
Chaos Lord
On this Chaos Lord I did OSL from the lightning claw into the hand and fingers. I did the light pretty concentrated and intense here.
Chaos Terminator
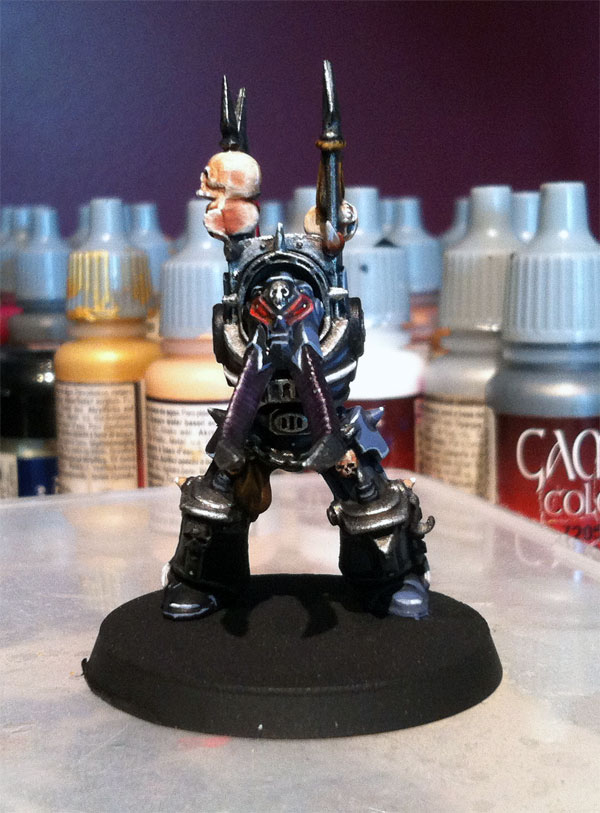
Here’s another old OSL attempt from back in 2013. You can see I did a simple eye lense glow.
See how it catches the edges and that’s it? I was obeying the rules of OSL with straight lines. Also, I didn’t want it too strong and casting out too far in front.
Tips with OSL
Some advice I’ve learned over the years and will no doubt continue to add to.
Material Matters
Different materials handle light differently. Cloth is a dull material and absorbs light. However, if you’re reflecting light on to a metal surface then the OSL effect is going to be stronger as metal will reflect the light.
Keep it Thin
I’m a big fan of using Lahmian Medium when I’m working with OSL. Lahmian Medium is great at thinning out paints and giving you good control with them.

See, the area I see a lot of painters fail is in the blending of the light, and it’s also where I fail the most too honestly.
Light can be very intense and just completely alter a color. It can also be very subtle and just slightly shift the color of the object it’s lighting up. Thinning paints with a medium will give you more control and consistency with your layers and let you build it up to the perfect level of light.
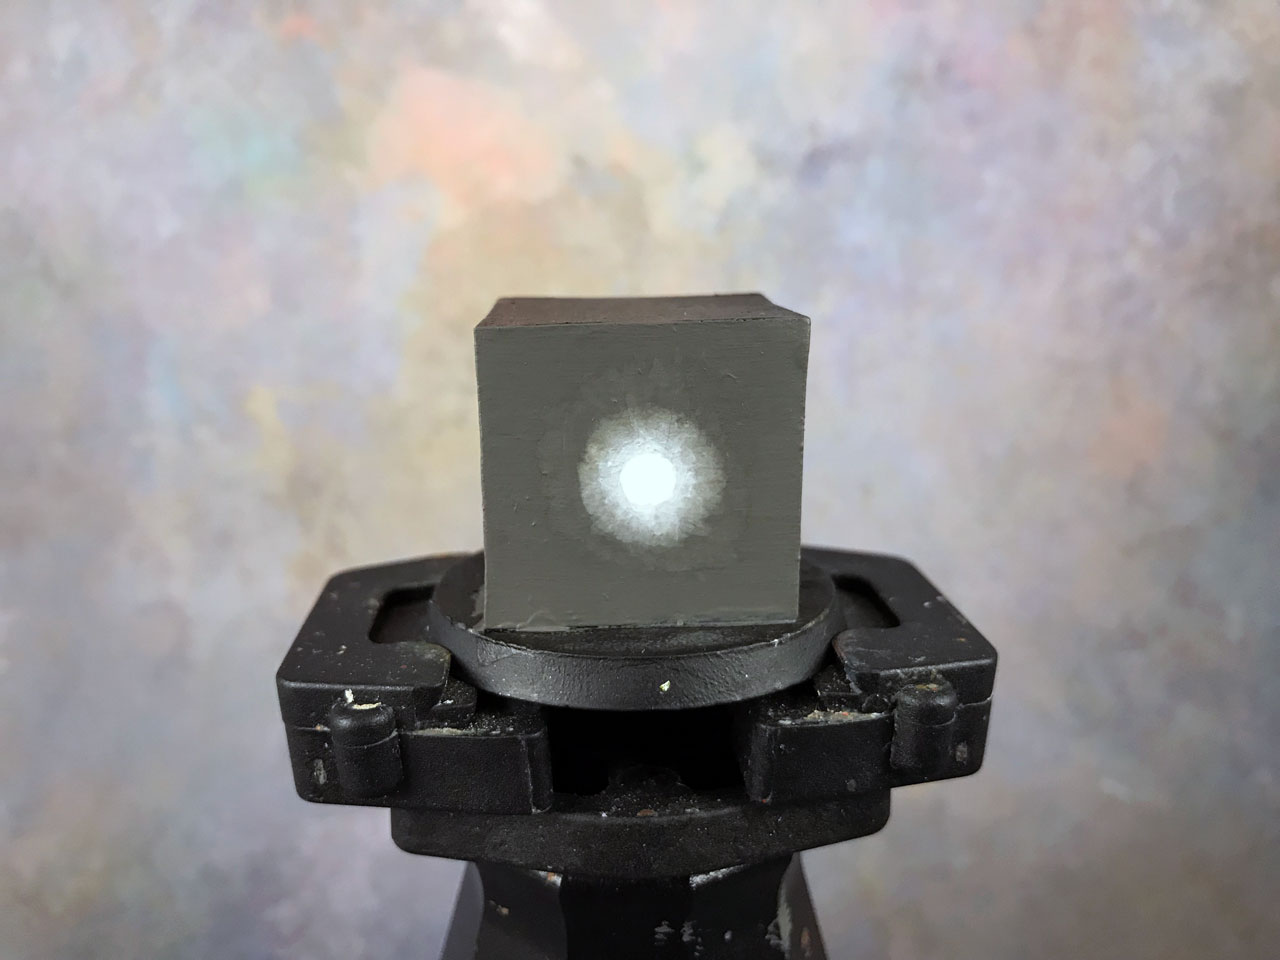
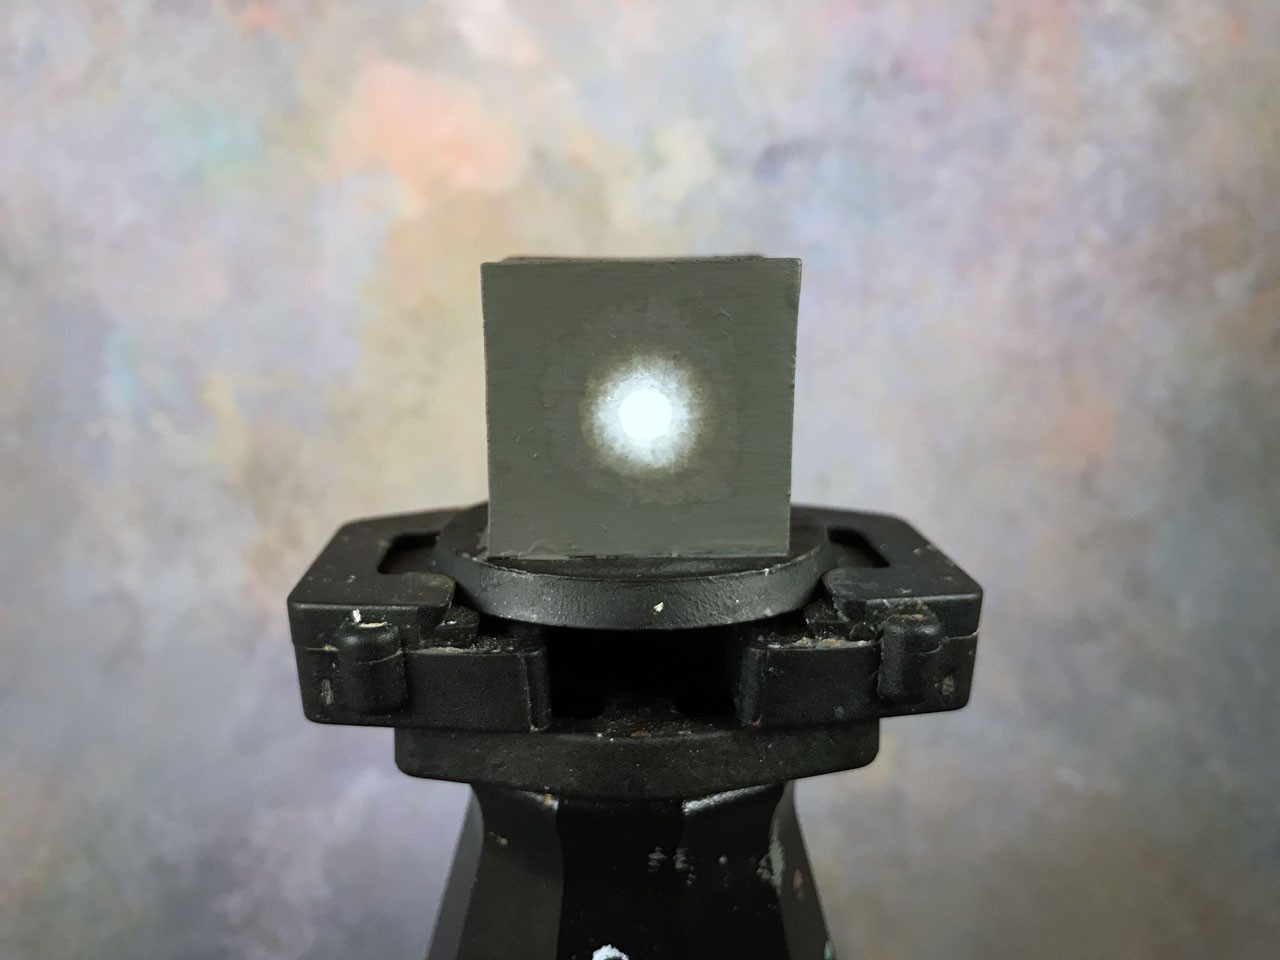
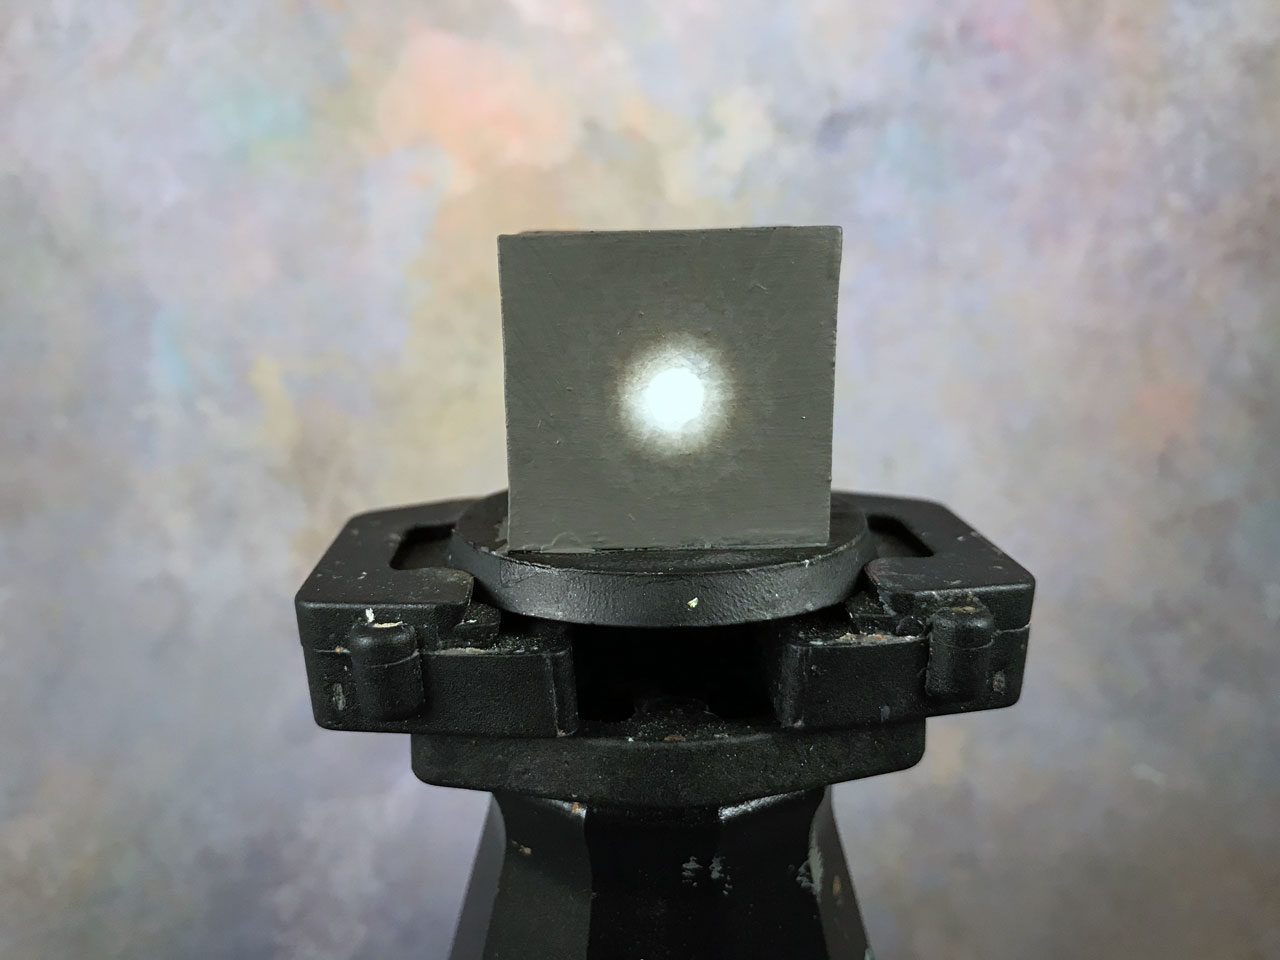
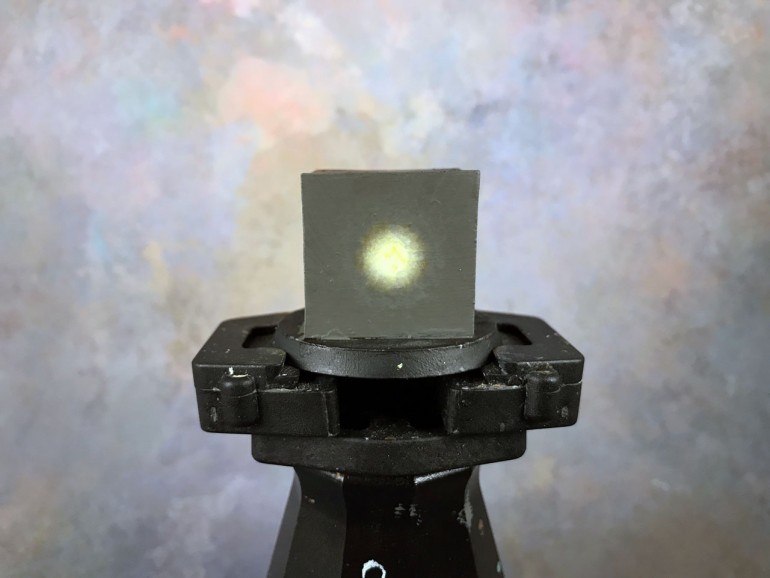
Use a Light
Use a light to replicate the glow effect on your miniature if you’re unsure. Tilt your miniature under a good light to get the angle your light source is using and look at the areas that get lit, the areas that create shadows, and take a picture if you need to for reference.
Test Your Colors
Not every color is great for doing OSL with. Some colors are traditionally hard to use, like red and purple. You want to go with a color that’s very saturated (bright), and one that’s going to work well with the other colors on the miniature.
It might sound like a great idea to cast a red light onto a green surface since they’re complimentary colors, but you may find it doesn’t work out as you thought. Grab an empty miniature base and test your color theories before you commit them to your miniature.
Some colors are just easier to work with as well and really sell the effect to the eye. Yellow is always a great choice, as are bright oranges, and even greens.
Again, try it out first. You don’t want to start glazing or blending layers of light on your miniature you’ve spent hours already working on and realizing the color choice was a bad one.
Conclusion
There really is a lot that can be said of OSL (glow effect), but I feel that covers the basics. It should give a good understanding of the concept.
I will admit that I’m not a pro with OSL either. I may have been trying it for years, but I’ve had varying levels of success with it. I’m not art expert either. Finding the perfect colors to use is an experiment for me, hence my advice to test before committing.
I do suggest starting off small for your first OSL piece. Maybe do glowing eyes, a magical flame on a hand, etc. Build up your confidence and then try something more ambitious like a torch that illuminates a model in pitch darkness.
You’ll find some more painting tutorials below. I also have an article that covers everything you need to know about miniature painting. It’s a comprehensive guide that’s a great resource for painters.
As always, practice, learn, and have fun!
What’s your favorite way to paint OSL? Let me know in the comments.
Miniature Painting Techniques & Guides
Learn the basics, as well as the advanced techniques, of miniature painting.
I love painting miniatures and teaching people how to paint. I also really love blogging, so I've combined those two passions here.
- Creative Twilight’s Future and My Thoughts (Feedback Welcomed!) - December 4, 2021
- My Top Gift Ideas for Miniature Painters & Hobbyists + Gifts to Avoid - December 2, 2021
- The Year That Was 2020 and Where I’ve Been - January 17, 2021