One of the most basic and fundamental things to learn with miniature painting is layering. It really is the foundation of pretty much everything. With a good understanding of layering you can do most any technique out there with some practice.
So, today I’m going to walk through the concept of layering and show you how to do it.
Disclosure: Some of the links below are affiliate links, meaning, at no additional cost to you, I will earn a commission if you click through and make a purchase. The commission earned helps maintain this site.
Miniature Layering Painting Technique
The concept of layering is simple. It is to add a layer of paint over an existing layer, typically leaving some of the previous layer visible.
The reason for leaving some of the previous layer showing is to create a transition of colors. This transition can be used to create depth and shading on a miniature, highlights to show a light source, or just to create a cool effect.
Shading & Highlighting with Layers
Shading and highlighting are the most common places people use layering.
For example, you might start painting something a dark blue, the shade color.
Next, you add a layer of paint over that with a lighter blue, all the while leaving the darker blue in the recesses and areas that wouldn’t get light.
Finally, you add an even brighter layer of blue closest to the source of light.
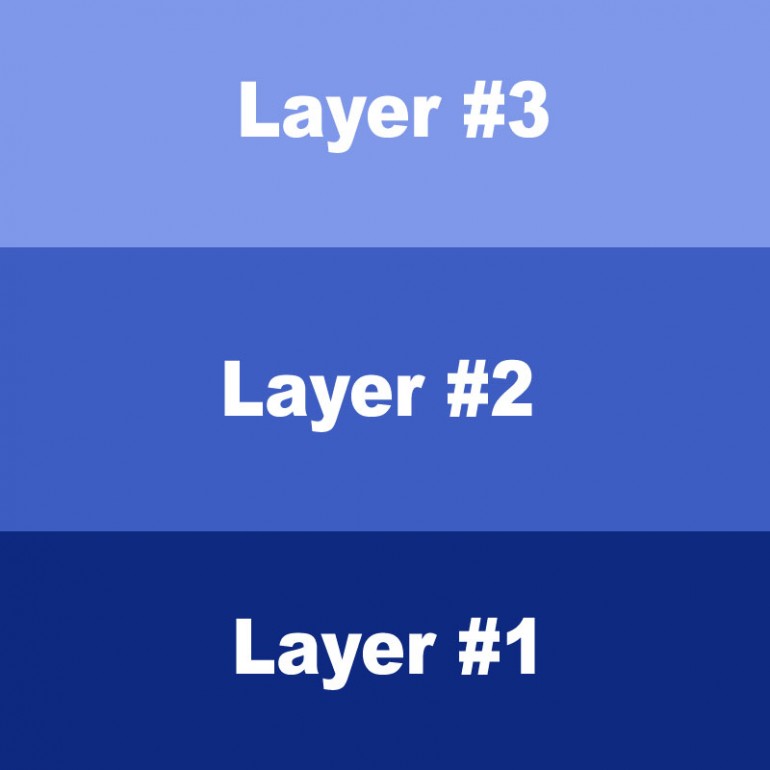
That image is pretty basic, but it illustrates what I’m talking about – just one layer of paint on top of another.
It’s worth mentioning as well that the order in which you layer your paint will make a difference. Painting over a darker layer will tone down the layer going on top of it. Painting over a lighter layer will lighten the layer on top.
So, if you want more muted tones, something less saturated, then you’ll want to build your layers up over a dark base coat. By contrast, if you want brighter, more saturated colors, then start with a lighter layer and paint progressively darker layers.
The Brushes
I’ve used a lot of brushes over the years, so here’s my advice.
You can get away doing basic layering with a cheap brush you buy at Walmart or some craft store. This was what I did for about the first 11 years I painted and it worked.
If you’re looking to upgrade a bit, then there’s the brushes from Citadel, which are surprisingly affordable and decent quality. I’d consider these a mid-tier brush.
From the Citadel line I have used their Medium Layer Brush and the Small Layer Brush with. Both have worked well for me and with proper cleaning have held up for quite a while.
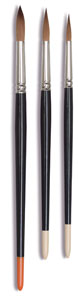
I have since upgraded to the Raphael 8404 Series brushes and love them. In particular, I use the Round 2 brush for almost everything I do. It holds a lot of paint, great for layering, and has a fine point for details.
The Paints
You can use any acrylic paints you like for this. A good choice of paints would be anything from Citadel (Games Workshop), Vallejo, Privateer Press (P3), and Army Painter. Those are all top-notch paint manufacturers.
Now, what I wouldn’t recommend is using cheap craft paint. You know, the stuff you can buy at Walmart and craft stores for 99 cents and less. Trust me, save yourself the headache; that paint is not for miniatures.

If you’re new and getting started then there’s a few good bulk buys. Citadel has a Layer Paint Set that comes with 20 paints. That will covers your basics and give you some choices. It’s a great buy since it’s discounted compared to buying all those paints on their own.
Vallejo also has a good starter set that offers paints at a discount. I prefer Vallejo when I can get it because of their dropper bottles. Also, the paint quality is great.
Practical Example of Layering
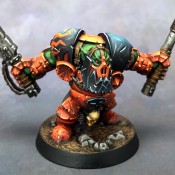
This is a miniature I painted in 2009. This is some of my earliest work that I started photographing, which is perfect to show you basic layering.
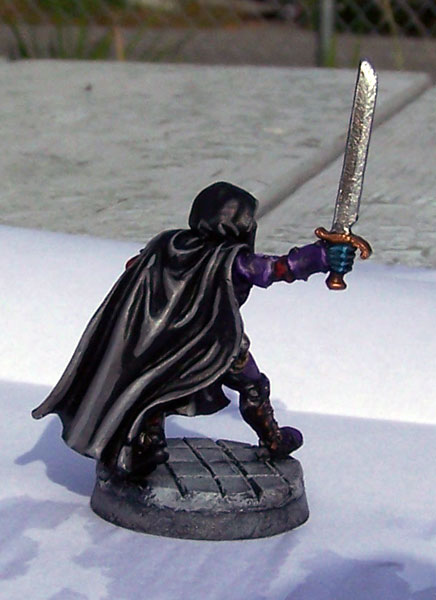
This was before I knew anything about blending and creating smooth transitions in color, so the layers are really obvious.
You can see I painted that cloak black, added a mid-tone grey layer on top of that, and a brighter layer of grey on top of that.
You can also see that’s there’s nothing complicated in what I did, no video tutorial needed, and it’s something anybody can learn to do.
The process of layering has created shading (black), and highlighting (lightest grey), and the mid-tone grey pulls it all together.
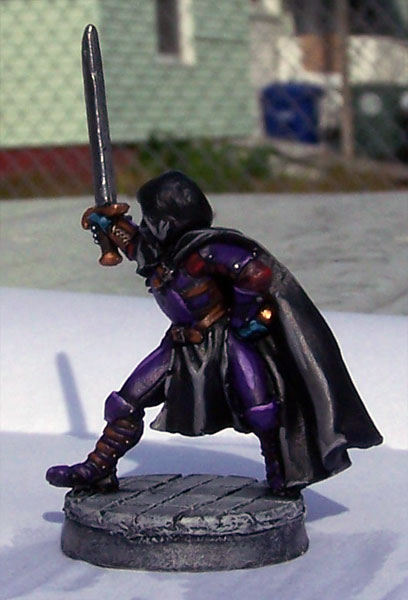
From another angle now, you can see a single layer of a brighter purple on leather armor parts to indicate lighting. You might even be able to pick up the lighter red layer in there on the undershirt too.
Again, nothing fancy, just painting one layer of paint on top of another to create lighting and shading.
Now, while this may not seem like much, it’s the first step in a process of learning painting techniques. You have to learn to crawl before you can walk.
If you want to see the process in video form then check out this great video from Games Workshop on the process of layering.
Cheating with Washes
Are you familiar with washes? Washes are watery thin paints that are very pigment heavy. You apply a wash over a miniature to create natural looking shading. In turn it creates highlights as well.
The other great thing with washes is they’ll create smooth transitions in color naturally as well.
Also, they’re a great way to help make your paint layers less obvious and help blend them out. So, layer like normal and then apply a wash over it. It will help your shading and smooth things out.
Here’s a really old video I did (pardon the quality) showing how I use washes on miniatures.
Now, I do have a tutorial on washes if you want to cover this topic in more depth.
Washes + Layering Example
Here’s some examples of using washes and layering. What I did on these models was to base coat them, apply a heavy wash, and then layer back up to the original color.
Doing it this way gives a cleaner look than if I just washed them and left it that way.
Now, I could have done a lighter wash after I layered it back up to smooth things out. However, I was aiming for something quick that looked decent. So, I left them like this, which I like anyway.
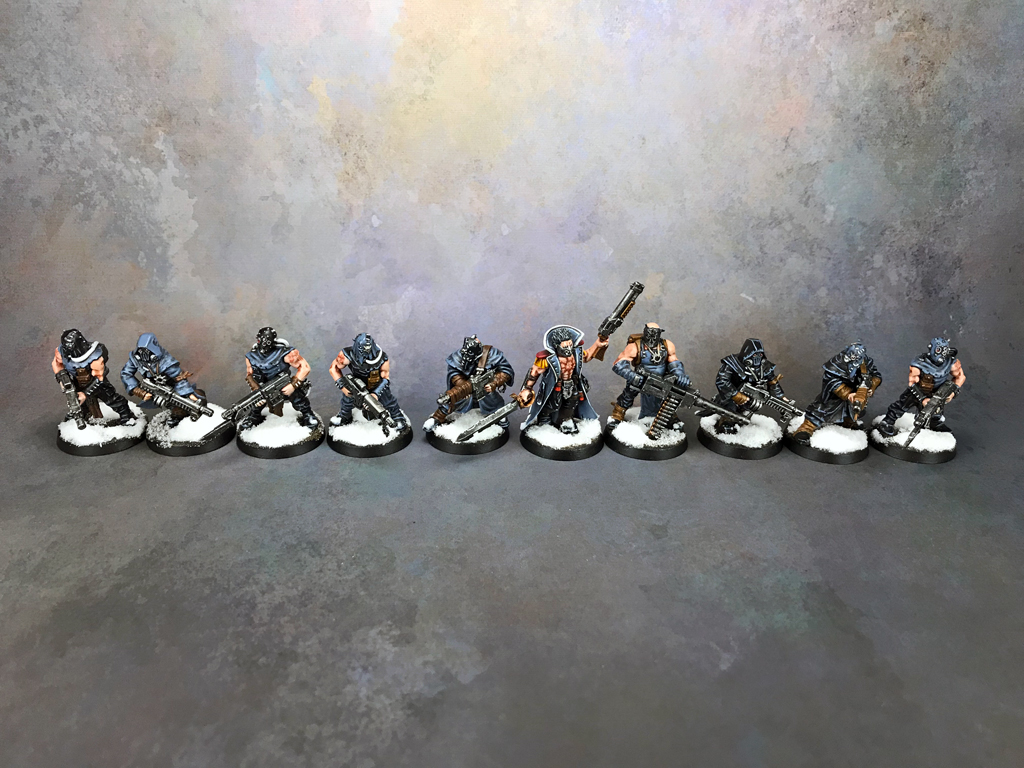
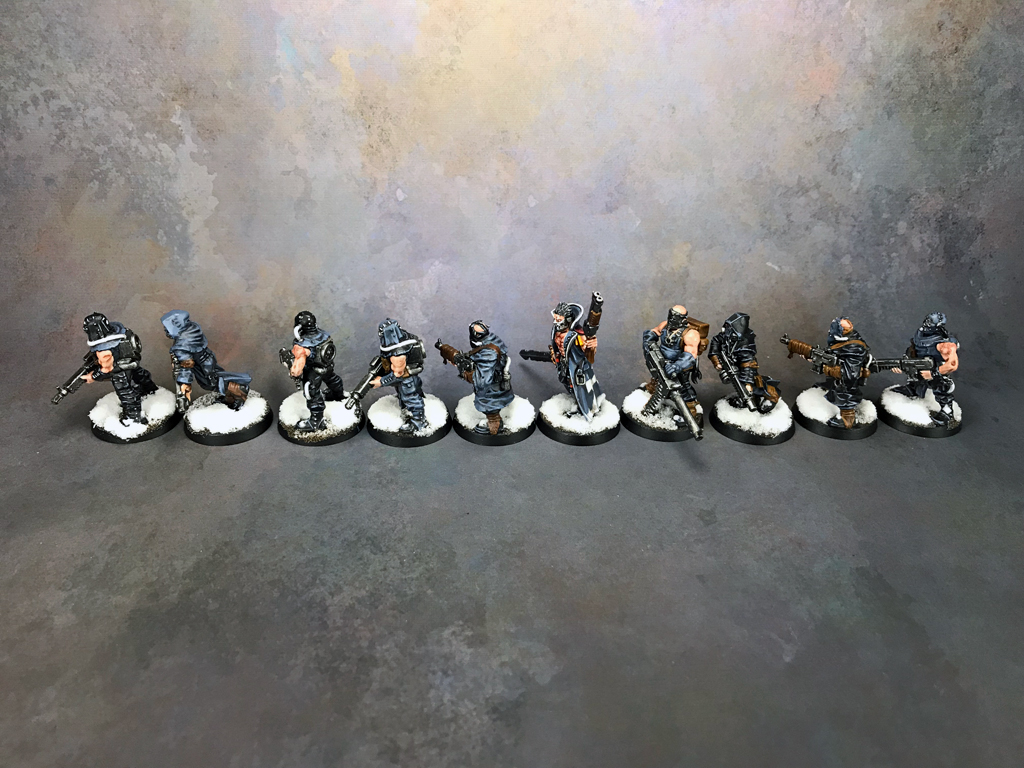

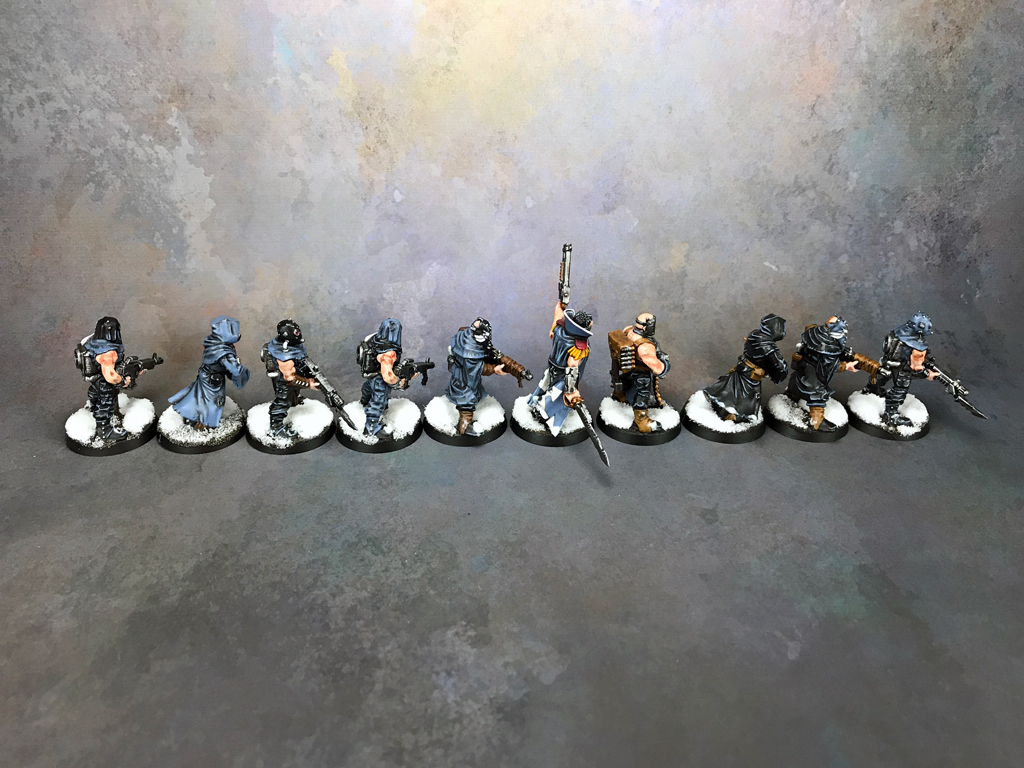
I realize there’s no closeups on those but that’s not really a bad thing. It goes to show you more of what they look like on the table and how doing something so simple can look good.
Getting Advanced
I’ll be honest. The above pretty much covers the topic of layering paint. It’s a simple technique and I’m not going to make you read 4,000 words on it.
Now, from that basic technique, however, you can begin on a road to creating so much cool stuff.
With that Drow Assassin above, I mentioned it was before I knew anything about blending. Blending is a way of creating smooth color transitions between layers of paint, making the layer less obvious.
This miniature is painted using a blending technique that I call advanced layering. There’s probably a proper term but that’s what I’ve dubbed it.
The darker and lighter colors are layers of paint, but I blended the transitions to make it look nice and smooth.
It looks nice, right? That’s an advanced technique born of a simple one.
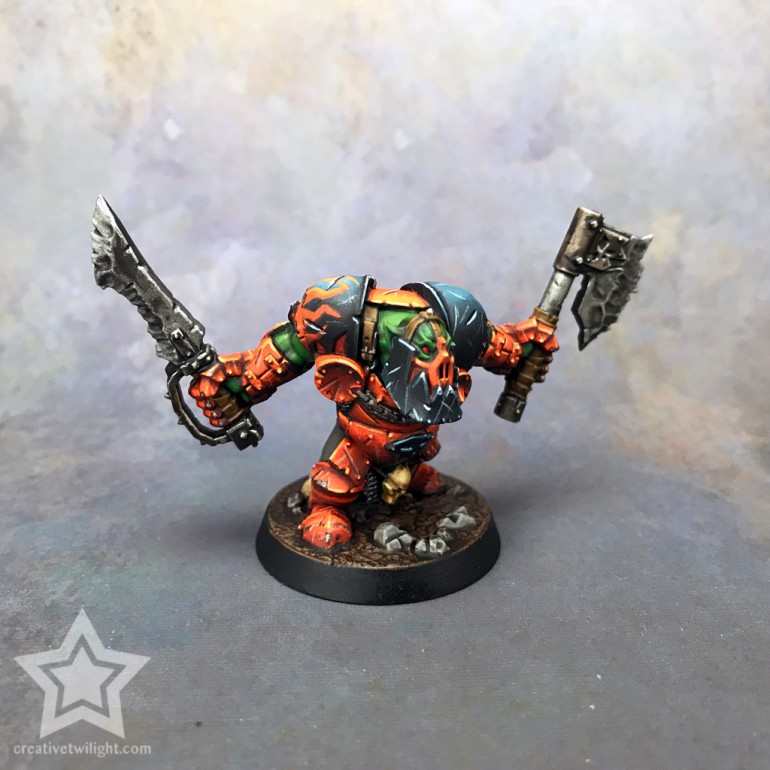
Take a look at this, specifically the power weapon/halberd.
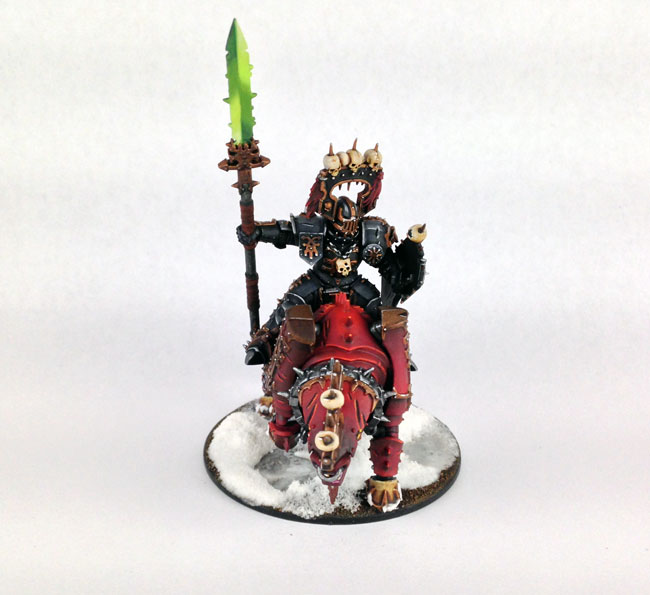
This miniature was the first one where I painted the entire thing with blending. The best part of this model is that halberd and the green glowing effect.
Well, that green effect is just layered paint. I blended those layers together, but ultimately it’s just layering.
Conclusion
This is probably my shortest painting tutorial ever. But, why write more than is needed, right?
Anyway, hopefully I’ve helped you on this subject some and given you some ideas.
As I mentioned above, definitely check out that article on washes for your next step. Also, there’s an article on edge highlighting that goes great with this as well.
In general, if you’re after some more resources for painting, then check out my complete guide to miniature painting. Think of it as a one-stop shop for everything painting.
Also, I have a nice collection of painting supplies everyone needs that you might find interesting. I cover everything from brushes to good lighting to paint by.
As an aside, yes, that’s a Bob Ross Funko Pop! in the cover image. He’s an inspiration of mine so he’s always around to help me paint :)
Miniature Painting Techniques & Guides
Learn the basics, as well as the advanced techniques, of miniature painting.
I love painting miniatures and teaching people how to paint. I also really love blogging, so I've combined those two passions here.
- Creative Twilight’s Future and My Thoughts (Feedback Welcomed!) - December 4, 2021
- My Top Gift Ideas for Miniature Painters & Hobbyists + Gifts to Avoid - December 2, 2021
- The Year That Was 2020 and Where I’ve Been - January 17, 2021