One of the first painting techniques new painters want to learn is how to dry brush miniatures. There’s a good reason too. It’s a very simple technique for highlighting a model and it’s very easy to learn.
So, if you’re a new painter and looking to learn how to dry brush miniatures, then you stumbled into the right article.
Disclosure: Some of the links below are affiliate links, meaning, at no additional cost to you, I will earn a commission if you click through and make a purchase. The commission earned helps maintain this site.
About Dry Brushing
Dry brushing is a form of highlighting. It’s the easiest to learn and also fun to do. It doesn’t take long to quickly master this basic painting technique.
Highlighting a miniature shows light and in turn shadows. It’s something we do in miniature painting to really push the concepts of light and shadow because the models are so small. Letting light naturally highlight and shade a miniature isn’t as captivating, or really natural looking either do to the scale of the model.
The most effective uses for dry brushing miniatures is when you’re dealing with vary textured surfaces. Let’s say you want to highlight sand, rocks, fur, or hair. Those are perfect for the technique.
What this technique is not well suited for is large flat surfaces, like those of a tank or plane. The dry brushing technique will leave a textured like look to the area it’s used on.
When you’re talking about very textured things, like sand, then you’ll never see it. But, if you’re working on a large flat area, that textured look will be very apparent.
It could be that a textured look is what you’re after. Maybe you want to give an organic look to your tank. I’m not saying you can’t do it, just know what the end result will be ahead of time.
How to Dry Brush a Miniature
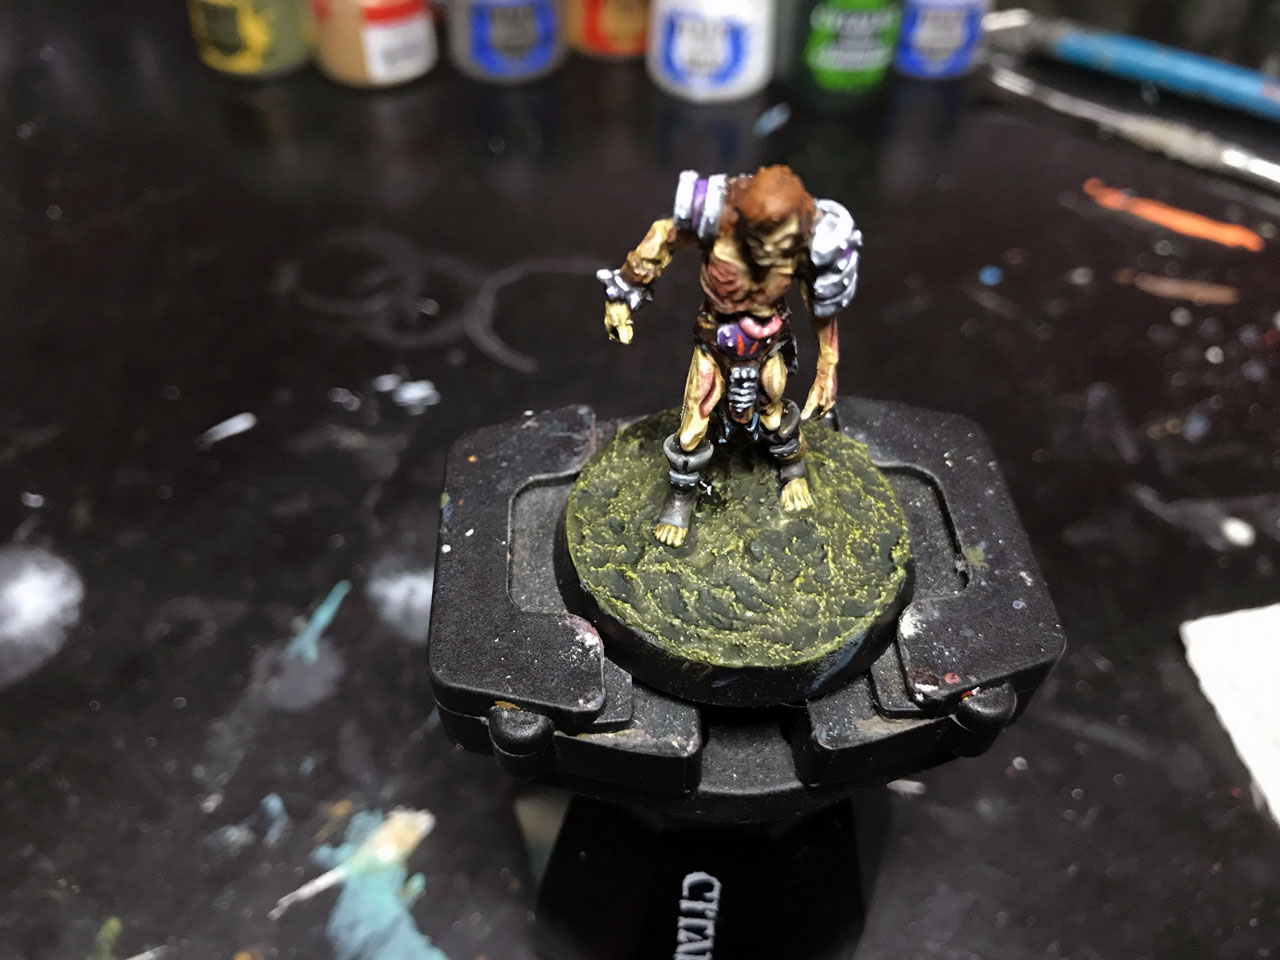
Here’s a Zombie I’m working on for my Undead Blood Bowl team. As you can see, I’ve already washed the grass to give it shading. Now it’s time to get some highlights on there to really make it stand out.
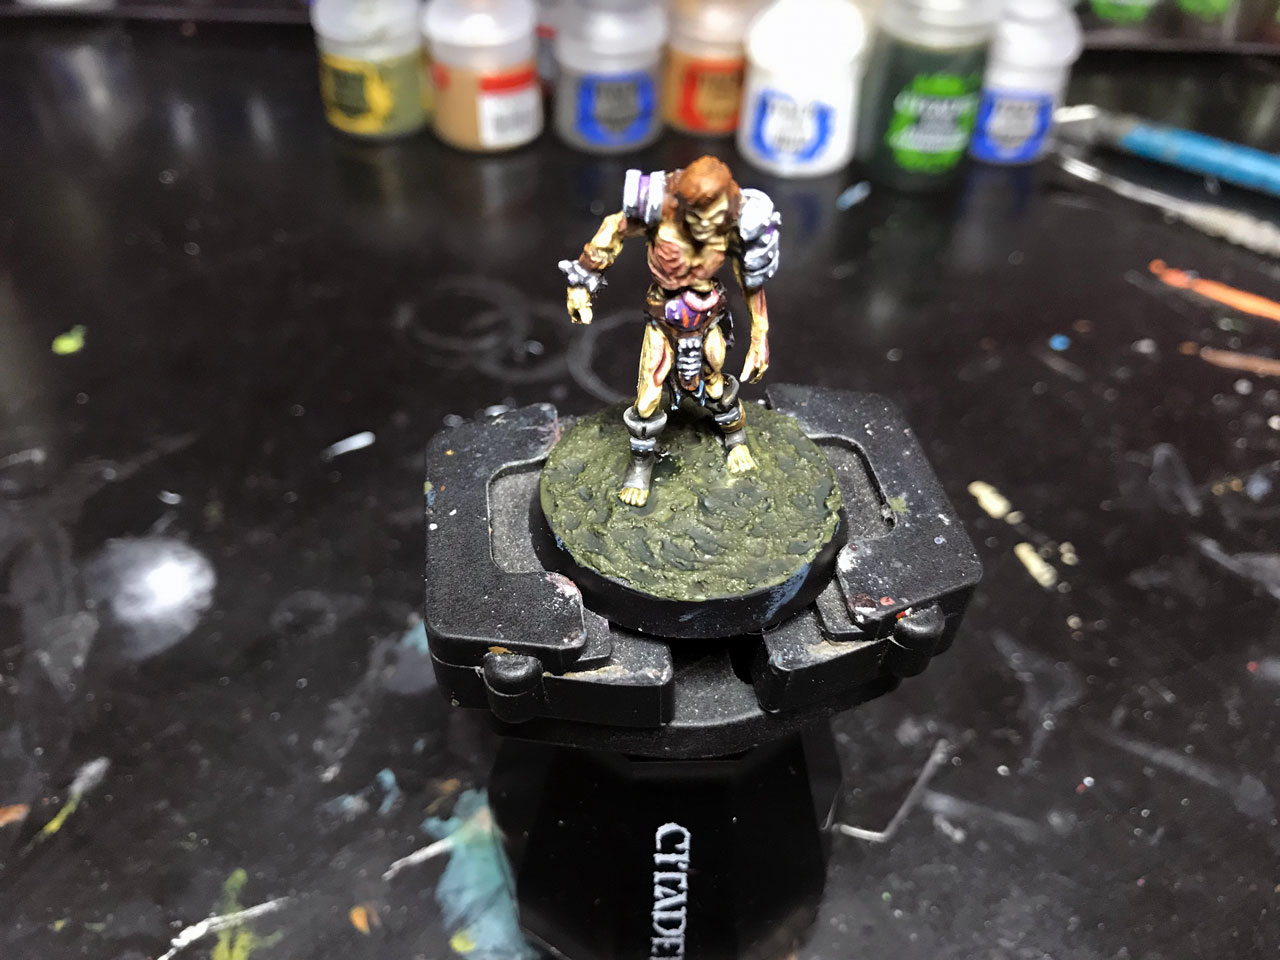
If you need a hand with using washes then I’ve got a tutorial for that also.
Time needed: 2 minutes
Alright, so let’s learn how to dry brush.
As I said, this is very simple to do, so this tutorial will be pretty short.
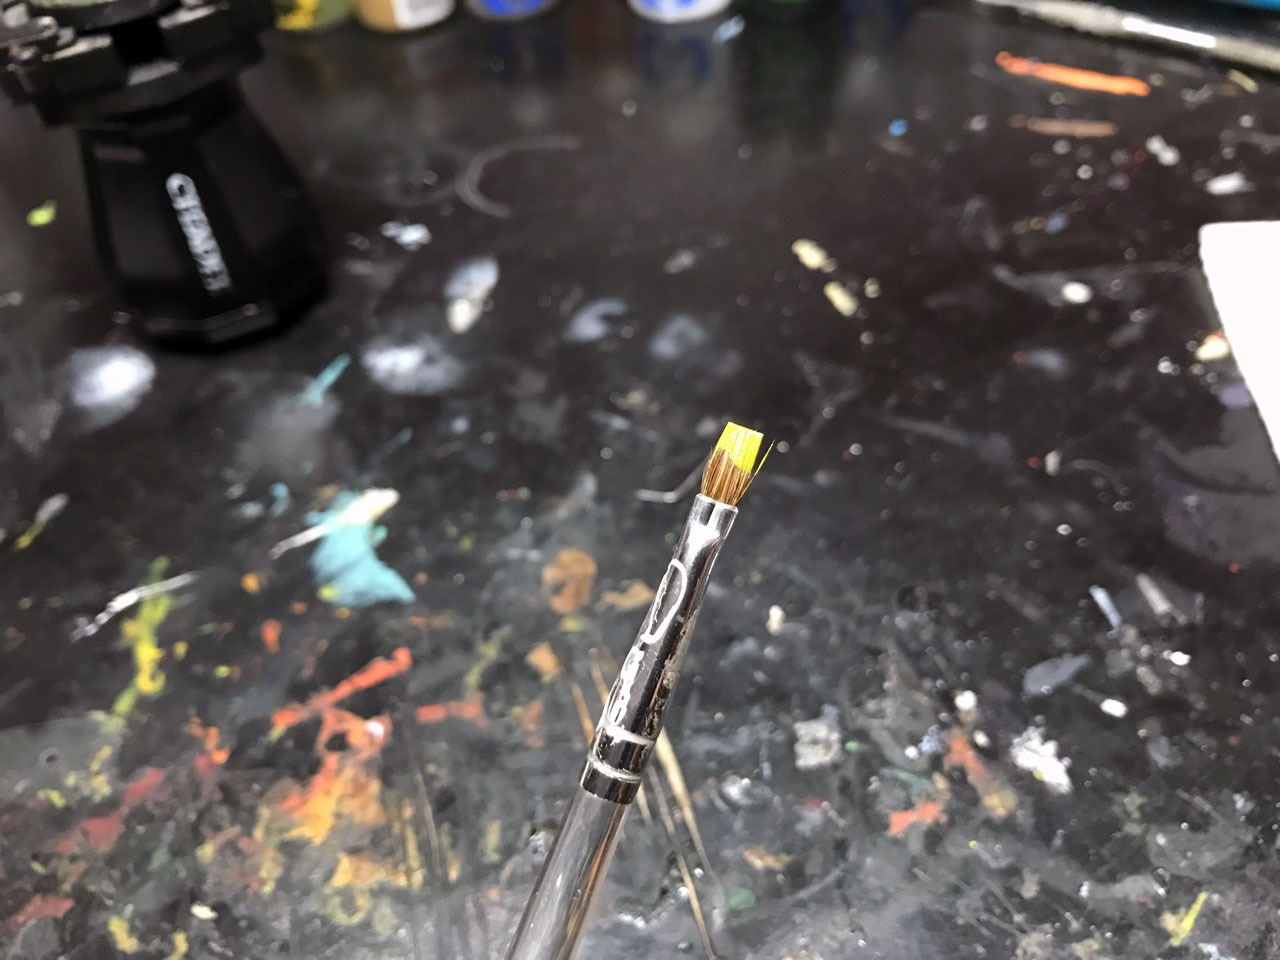
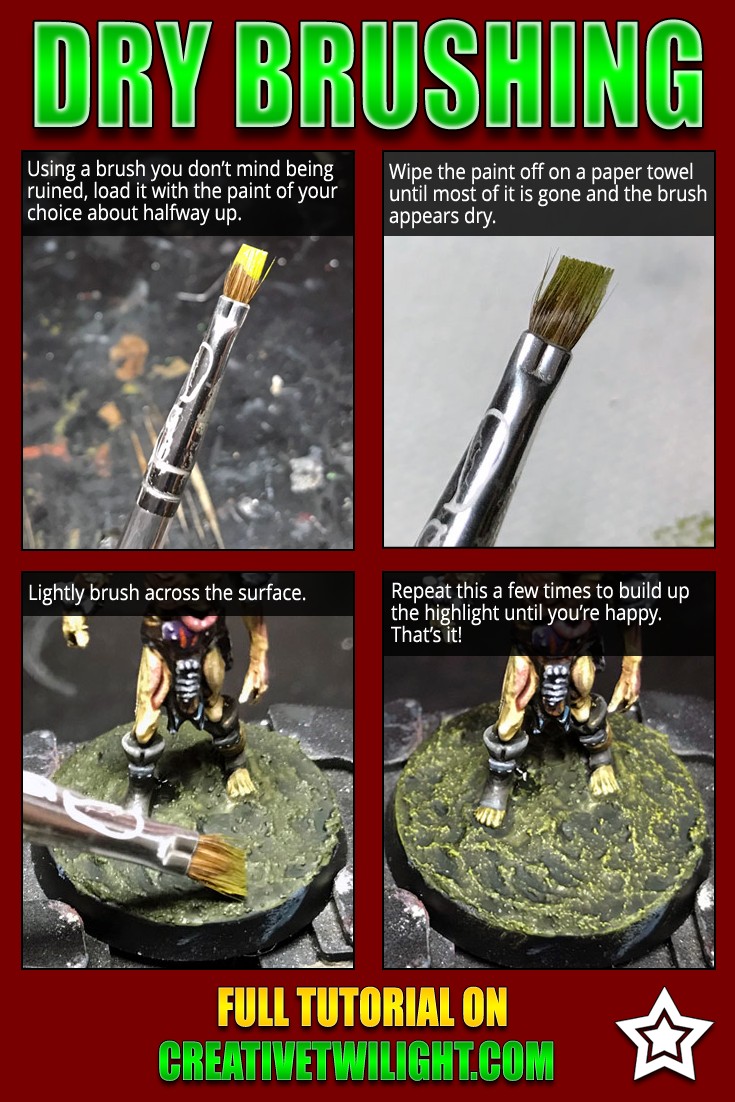
- Load Your Brush
Using a flat shaped brush ideally, though a round one works, load the paint about halfway up the bristles.

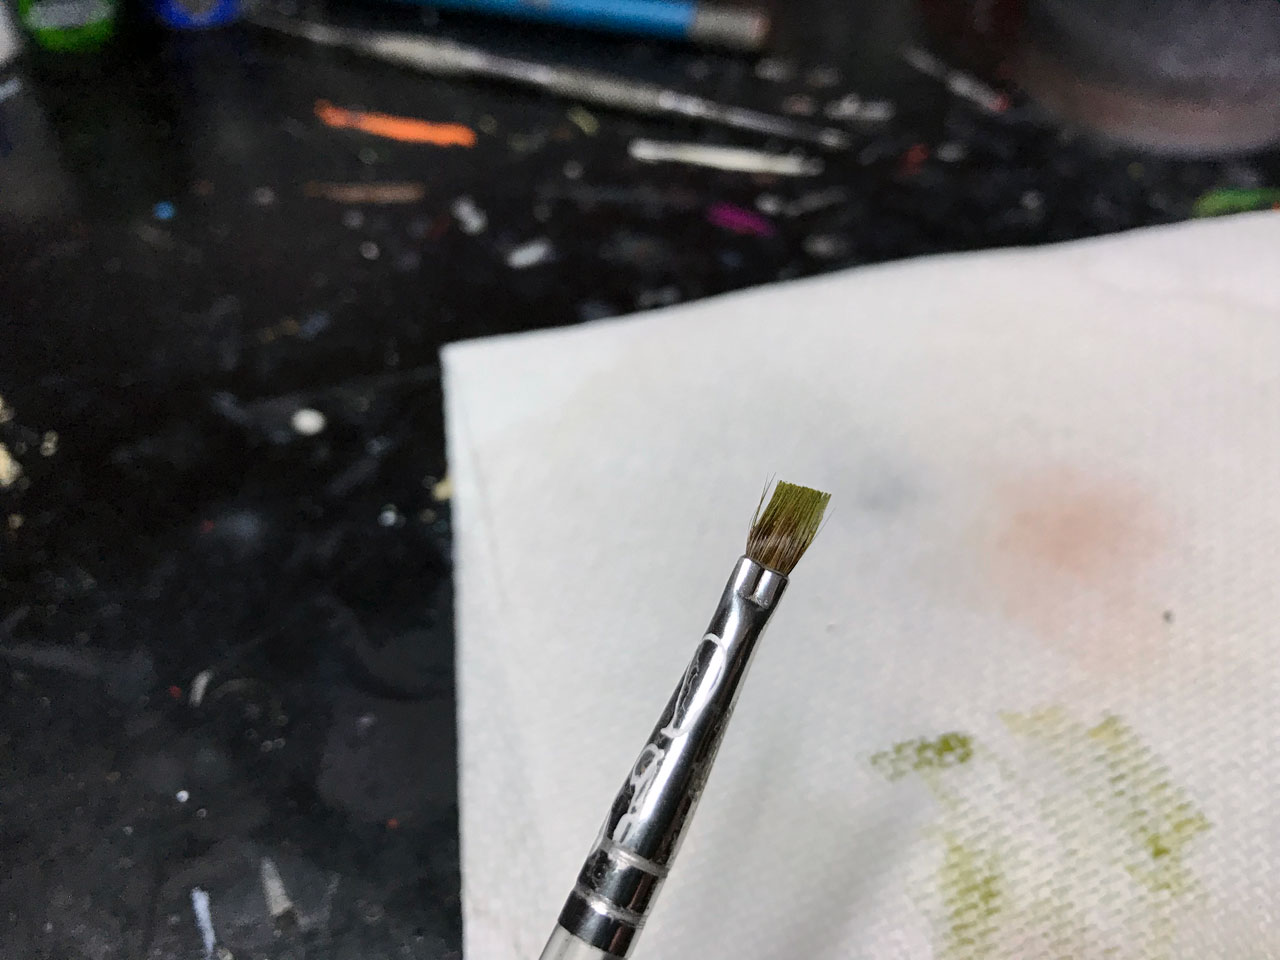
- Wip off the Excess Paint
Now we have to wipe off almost all the paint.
So, using a dry paper towel, brush your brush against it to wipe off the paint. Keep going until virtually no paint comes off any longer.
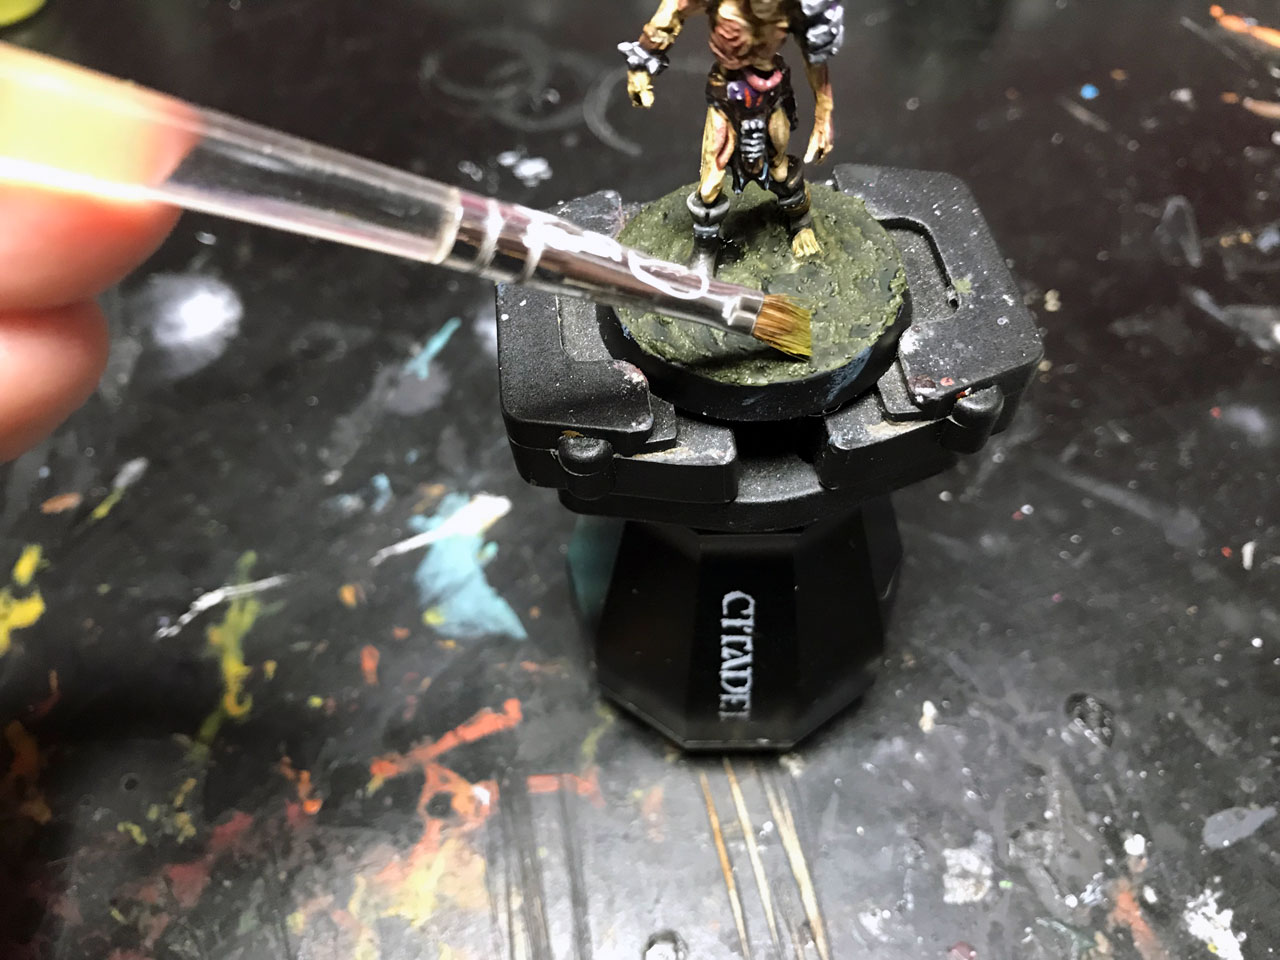
The brush should look like there’s almost no paint on it. - Start Dry Brushing the Miniature
Taking your brush, you want to lightly brush it over the surface that’s getting the highlights.
It’s hard to get a picture of this by myself while doing it, so that shot does look a bit odd, I apologize.
Anyway, you’re going to brush across the surface very lightly, repeatedly, and back and forth. You’ll quickly see the area getting highlighted. - Build up the Highlight
I usually do two layers with dry brushing. The first layer goes on a bit dark and then the second layer adds more emphasis.
When I do the second pass I focus on the areas that get the most light. In this instance that would be really everywhere around the Zombie. Meaning, I don’t do a second pass underneath him, between his legs.
In doing this I help further emphasis the concept of light and shadow and give it a realistic look.
That’s it. Just repeat this a few times until it reaches a point you’re happy with.
Quick & Easy
Here’s a handy image for a quick and easy reference. It’s great for saving on Pinterest too ;)
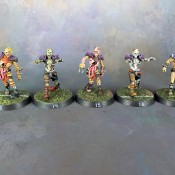
Examples of Dry Brushing
Just to show you a range of things you can do with this technique, here’s some other stuff I’ve done.
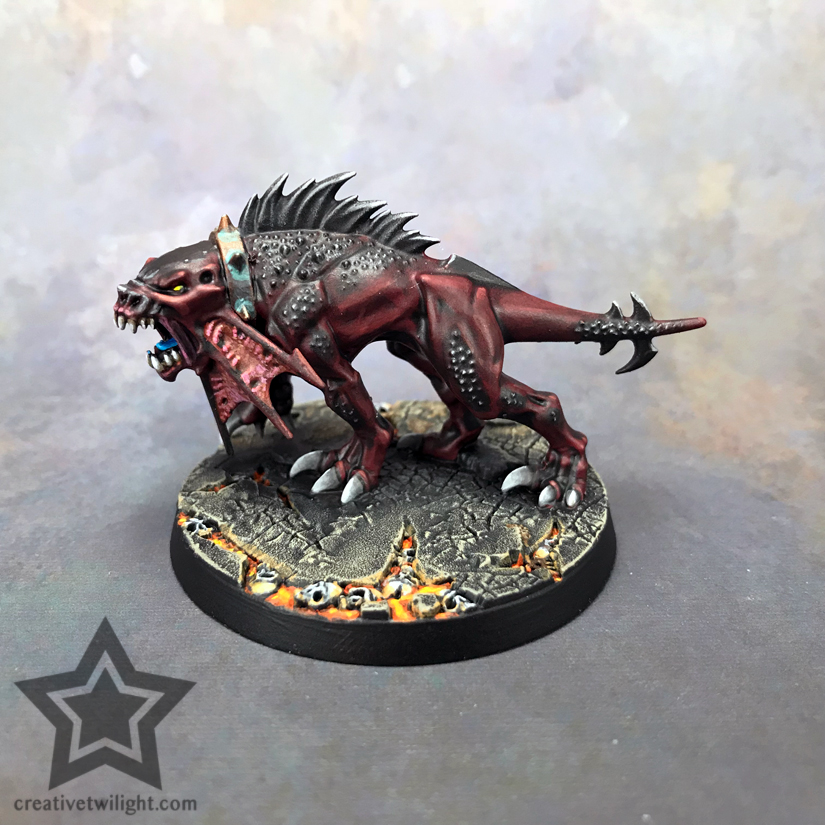
The stone area on the bases of my Magore’s Fiends warband were all dry brushed. The textured surface lended itself to the technique for easy highlighting. Plus, I like doing this on stone surfaces because it makes the stone look more realistic.
The fur was dry brushed to build up layers. I started with a darker color and kept lightening it a little bit as I moved up towards the top.
Fur is perfect for this technique.
The base was washed and dry brushed as well.
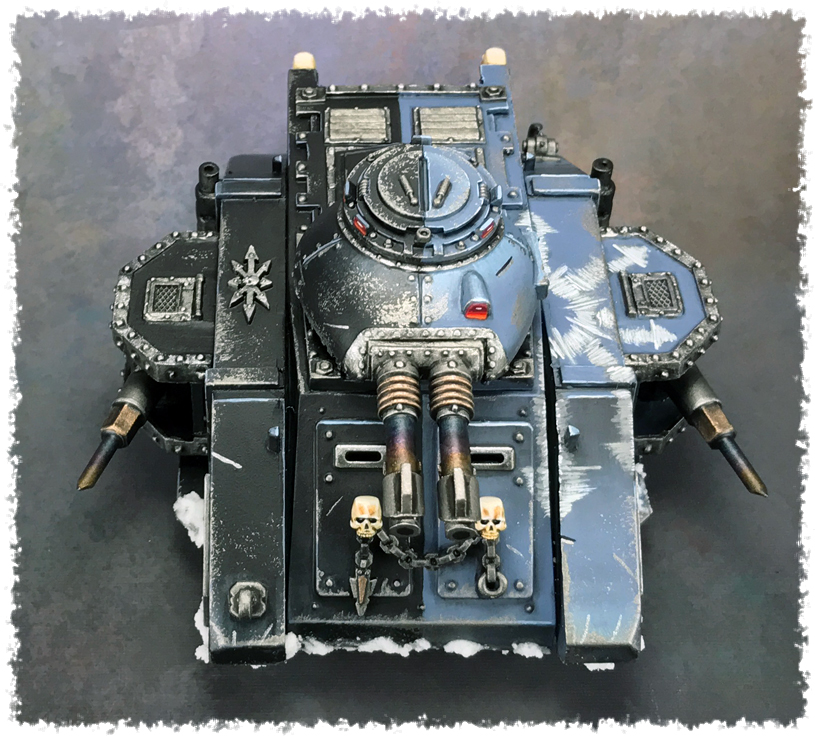
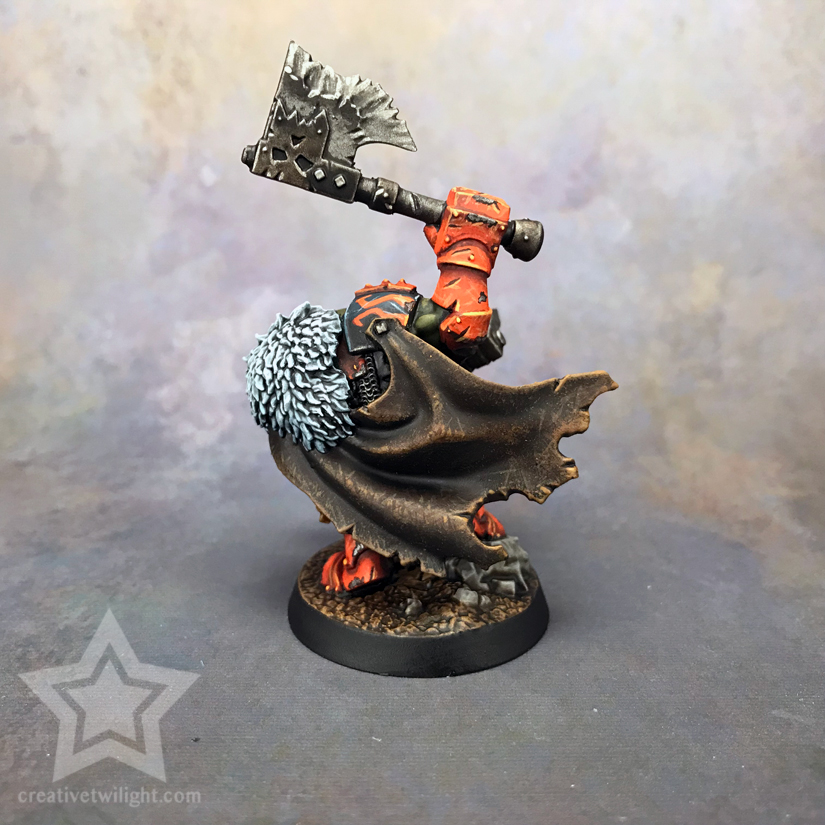
Here you can see some really simple weathering I did by using a metallic paint and dry brushing it over the painted metal areas.
Dry Brushing Tips
These are all things you’ll learn with experience but I’ll help you get there quicker :)
The Brush You Use
First things first – the brush itself. This painting technique will destroy your paint brushes. DO NOT use your good brushes for this. What you want to use are your old, ragged, and already ruined brushes for this.
Alternatively, which is what I’ve done, is buy a brush just for the task.
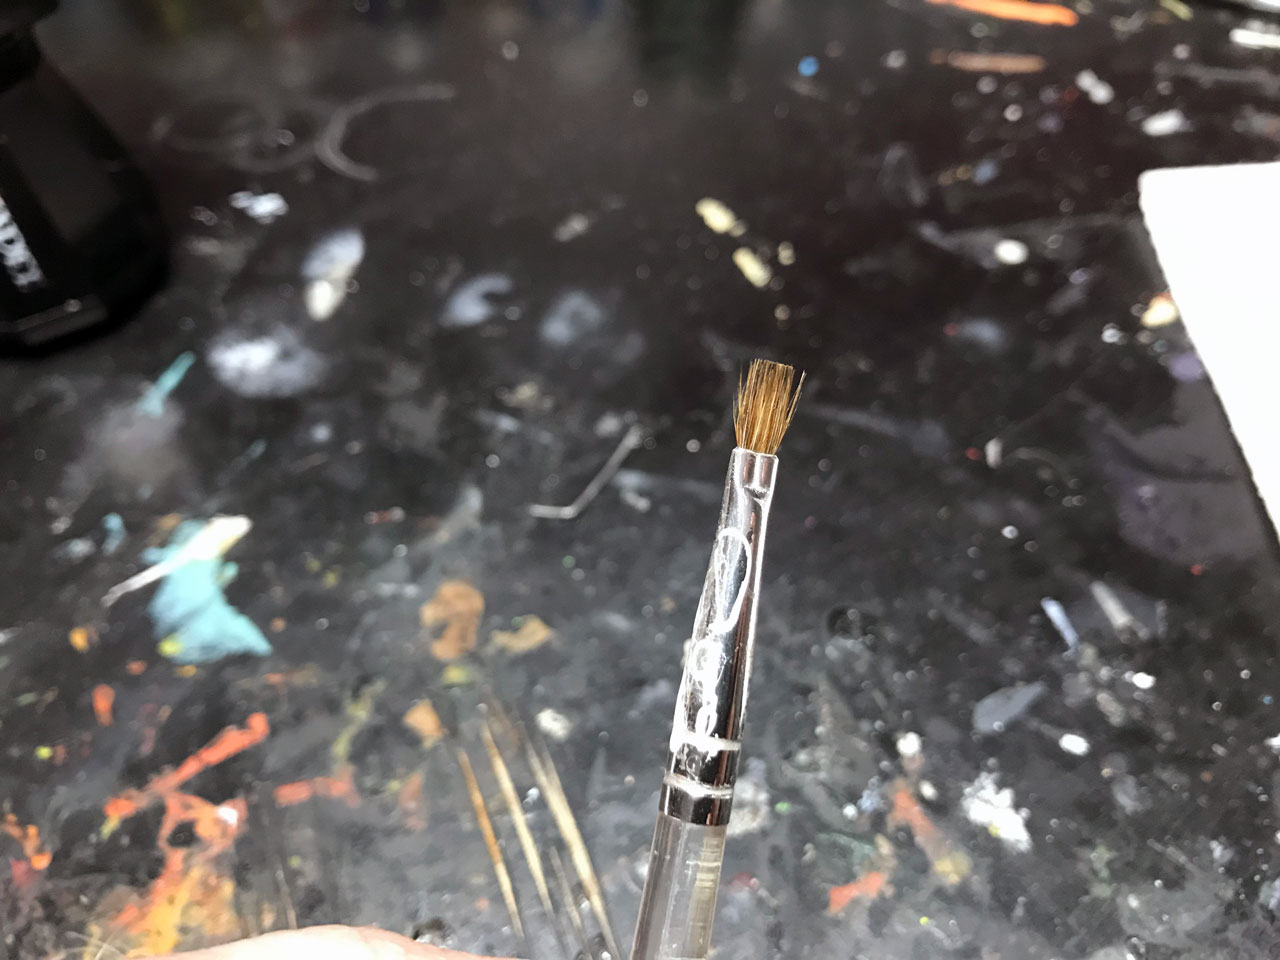
I like this brush because it’s got thick, wide bristles, so it holds a lot of paint and covers a lot of area.
I got that brush cheap at an art store for like $1. There’s no sense spending good money on a brush I’m going to slowly destroy.
I find these wide, flat brushes work best. However, you can use any brush you like. A typical round brush does well when you’re trying to be a bit more careful when working on a smaller area.
Here’s a 60 piece paint brush set for extremely cheap. The brushes are synthetic and perfect for this type of work.
You can buy brushes from Citadel that are intended for dry brushing. I haven’t used them personally, so I can’t say if they’re worth the money, but it’s an option.

Use a Dry Brush (No Pun Intended!)
Make sure the brush you’re using is completely dry. If you washed a brush, and dried it off on a paper towel, then it’s still too wet for dry brushing. Trust me; you’ll get wet streaky paint instead.
So, if you plan to do a lot of dry brushing then make sure you have a few brushes on hand so that you always have a completely dry brush ready.
Also, if I’m doing progressive layers to build up a highlight on something, then I will use the same brush.
Meaning, if I’m working on sand and add a highlight with Brown #1, then I won’t wash the brush when I load up Brown #2 for the next layer. It’s a simple way to get the two colors to blend a bit.
Use a Painting Handle
A painting handle is really helpful for doing this too. You don’t need one, but it does make dry brushing around the base a lot easier.
See, you’re going to be quickly moving the brush around and spinning the model as you go. I just find it’s a lot easier to hold on to the painting handle than it is the edge of the base.
I’m a really big fan of the Citadel Painting Handle. It’s extremely affordable and probably the best painting tool they’ve ever created. It’s what you see me using above.

I do have a review of the painting handle if you’d like to get more info.
Use a Lighter Color
When you’re choosing a color for a highlight you want to go lighter than you would normally if you were layering.
The process of dry brushing is depositing trace amounts of paint to a surface, so the intensity it leaves behind is subtle. So, you want to go a bit lighter than normal so that your highlighting is seen and not lost on the previous layer.
Using Different Colors
Though I didn’t do this on this model above, often when you dry brush you will use different paints for highlights and to build up the effect.
So, I could use another color that’s brighter than the green I used and do another layer, further pushing the highlights in the areas that get the most light. Instead of the green I could use used a bone color for the second highlight.
That type of progressive build up gives a nice look. I didn’t do it here only because I wanted to keep the tones where they were and not get too green.
Unlimited Uses Beyond Highlighting
You can use dry brushing for more than highlighting. You can use it for a range of things like weathering models, creating glow effects, or simply creating texture.
For example, say you have a jet miniature and you want to give a used look to the engines. Use a dark brown paint and dry brush all around the end of the engines and back a bit from the exhaust area.
Then use a black paint and do the same but focusing mostly near the exhaust area, leaving some of the brown further back.
By using two paints and a simple painting technique you now have a soot covered engine.
For really simple weathering on armor you can dry brush over colored metal areas with a silver paint to create a worn, scratched look to the armor. Like I showed above with the Predator tank.
Here’s a tutorial on someone using dry brushing for OSL (object source lighting). Typically OSL is done with an airbrush or by blending, but this painter decided to use a classic technique for an advanced result.
Cleaning Your Brushes
Other than the brushes getting damaged from repetitively brushing textured surfaces, your dry brush will have a lot of dried paint in the bristles. You’re loading the brush, drying it off on a towel, then dusting over a model, so the paint gets stuck in there really well.
I highly recommend you routinely clean your brushes with Masters Brush Cleaner. You can get this at a local art store, online with Amazon or with Blick.
Even though you’re using cheap brushes for this, you don’t want to have to buy new ones more often than needed.
Cleaning your brushes properly only takes a minute. I even have a brush cleaning tutorial to walk you through it.
Practice, Practice, Practice!
While the technique is really simple it takes a bit of practice. You’ll learn with experience when you’ve got the right amount of paint, how hard to brush the surface, etc.
Don’t let your first few attempts frustrate you. Do it a few times and you’ll quickly get the hang of it.
Conclusion
That’s all there is to it. It’s super easy to learn how to dry brush miniatures and it really will help push your painting ability.
The place I use this technique the most is on scenery and terrain for gaming tables. You’re often dealing with a lot of sand and gravel there. Also, it’s great on large buildings too if you want a weathered and worn look to them.
Of course, you want to use a large brush for stuff like that. I use a 2 inch paint brush for that stuff, otherwise I’d be there all day working on one piece!
A quick note on the technique itself. There are painting snobs who look down on anyone who dry brushes. They see it as a basic technique for beginners.
Ignore those fools. Painting is never about how you achieved something, only that you did. The end justifies the means. If what you painted looks great, then it doesn’t matter how you did it.
I’ve been painting miniatures since 2006 and I still use this technique where appropriate. It’s a tool in the arsenal of any smart painter.
Speaking of tools, if you’re a new painter, or even a veteran, then I’ve got a great article covering painting supplies every painter needs. It covers everything from brushes to primers to lighting.
I also have a guide that covers miniature painting in depth. It’s an awesome resource for new painters who are just discovering the hobby.
You will also find some more useful painting guides below.
Anyway, I hope you learned something here and have fun painting!
Do you have any tips for dry brushing? If so, I’d love to hear them in the comments.
Miniature Painting Techniques & Guides
Learn the basics, as well as the advanced techniques, of miniature painting.
I love painting miniatures and teaching people how to paint. I also really love blogging, so I've combined those two passions here.
- Creative Twilight’s Future and My Thoughts (Feedback Welcomed!) - December 4, 2021
- My Top Gift Ideas for Miniature Painters & Hobbyists + Gifts to Avoid - December 2, 2021
- The Year That Was 2020 and Where I’ve Been - January 17, 2021
Something I do a lot on Models that are primarily one colour is “directional” drybrushing. I use a really big brush (like, yeah, a 1-2″ brush from the hardware store), and do big strokes, always starting at the top of the Model and moving downward. It gives an effect sort of like a zenithal undercoat.
When using drybrushing on larger pieces (buildings and such), it’s often helpful to use a sort of circular motion rather than a back and forth or directional motion. It works particularly nicely with a really big brush to help keep the drybrushing from being quite so stark and obvious, and to give the effect of some light weathering.
I definitely second the recommendation for cheap brushes. I have actually made the mistake of buying GW Drybrushes, and they’re not worth it. Stick with something super cheap from a craft store or whatever.
And yeah, don’t let the haters and the snobs push you away from drybrushing. I’ve been painting minis even longer than Thor, since the mid-90s, and drybrushing is still one of my staple techniques.
Good call on the directional brushing. You really use a 1-2″ brush for dry brushing miniatures?
Yeah. I mostly use a brush that big when I’m going for the zenithal effect. The big bristles help keep the paint from hitting smaller details below overhanging parts, so it keeps it closer to how light would actually fall on the Model.
Gotcha!
Great work! Dry brushing is one of those techniques that can be very forgiving and still give great results even when you’re just starting.
Also #drybrushingisnotacrime
Thank you.
I agree. When I learned to dry brush it was a game changer. So, like everyone, I did it to everything. But, it was awesome to so easily bring something to life with some easy highlighting like that.
Nice tutorial :)
I still use dry brushing for bases without fail. Simple techniques still have their place in my repertoire ;)
Thanks.
Exactly. No matter how simple a technique is, it still has a time and place to be used. Smart painters don’t stop using a technique because it’s too simple; they learn where to use it best.