Having struggled for years with a good light box setup for miniature photography, I eventually figured out a good solution that was cheap to setup and works really well. This is the same setup I use today and I thought it was about time I shared it.
The Early Light Box Setup
When I first started painting miniatures I refused to take pictures of them. Not only was my painting quality lacking, I also had no real way to take pictures of them. At least any way that wasn’t a huge pain my butt.
Eventually though, I put together a light box I made out of cardboard and paper. It’s a pretty simple setup you can find easily enough, but in short you cut the sides from a cardboard box, cover with paper or cloth, and point lights at it.
That setup worked for a while but wasn’t perfect. It was good for single miniature photography, but for full squads, or even large models, it didn’t work.
Here’s a few shots from models I took in it. The lights themselves were just desk lamps with CFL bulbs – not great.
See how the background is dark, you can see shadows from the model, and it’s just not bright enough? Yeah, it wasn’t all that great.
At some point I ditched the cardboard box and shot just on white paper. Again, not great, but it worked.
The problem I had with the variation setups I tried was that they all required setup. Any time I wanted to take photographs of my miniatures I had to drag out the box, or the paper, move around desk lamps, etc. It took time to do and eventually I just opted to not take pictures than to spend time setting up for it.
Let’s face it, we can all be lazy.
Disclosure: Some of the links below are affiliate links, meaning, at no additional cost to you, I will earn a commission if you click through and make a purchase. The commission earned helps maintain this site.
My Current Miniature Photography Setup
I wanted to setup an area where I could do miniature photography without having to constantly prepare it. Time spent setting things up is time wasted.
Well, one day I bought a cheap plastic shelving unit for my hobby room. Like all hobbyists, my collection of random stuff grows every year and I needed more storage.
So, I bought a cheap plastic shelf from Lowe’s. You can find these online easy enough, or in virtually any store that sells homegoods.
After having had the shelf for a little while, I had an epiphany. Why not use one of the shelves as my “light box”? I could clear it off, setup lights, and take pictures there!
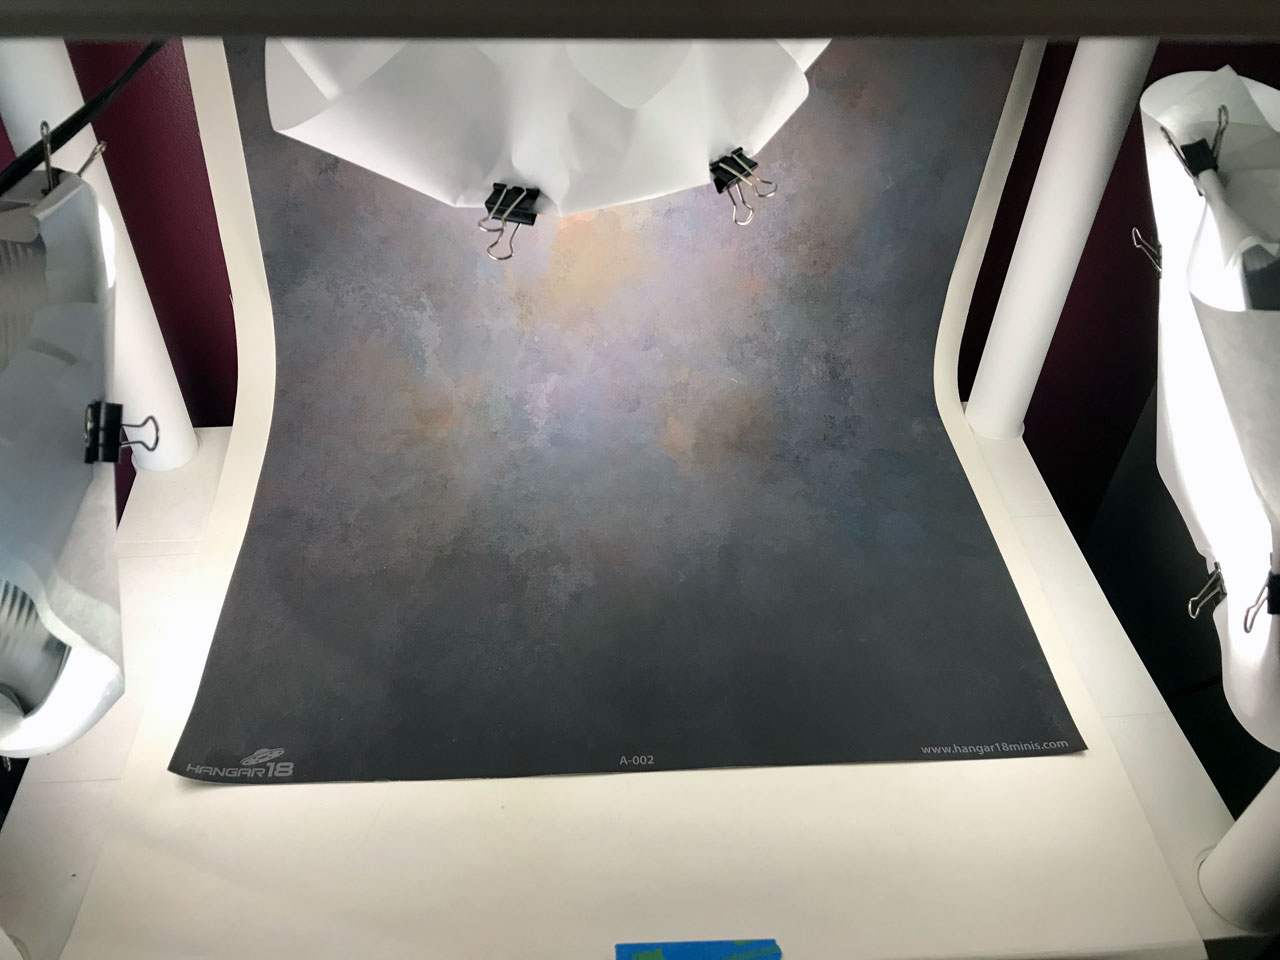
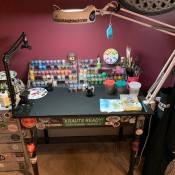
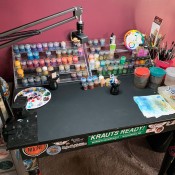
So, that’s what I did. I cleared off a middle shelf. I taped a white piece of posterboard as the backdrop. I later picked up a proper backdrop to replace that with.
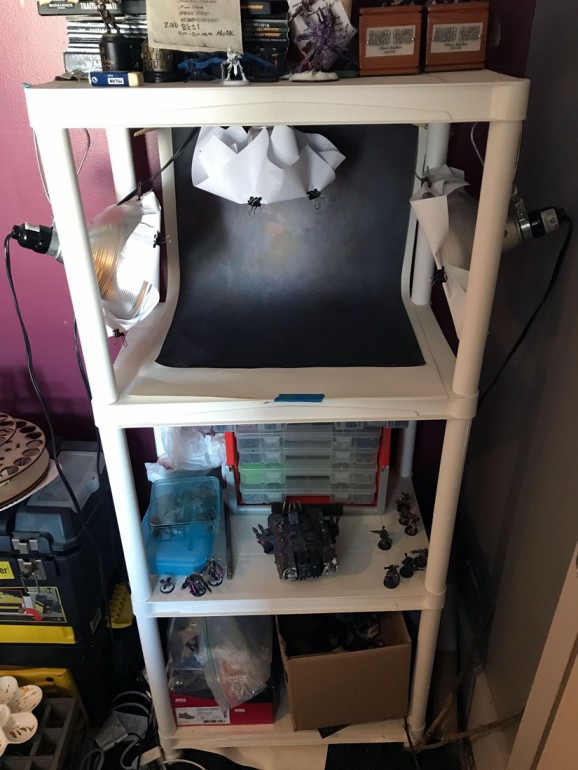
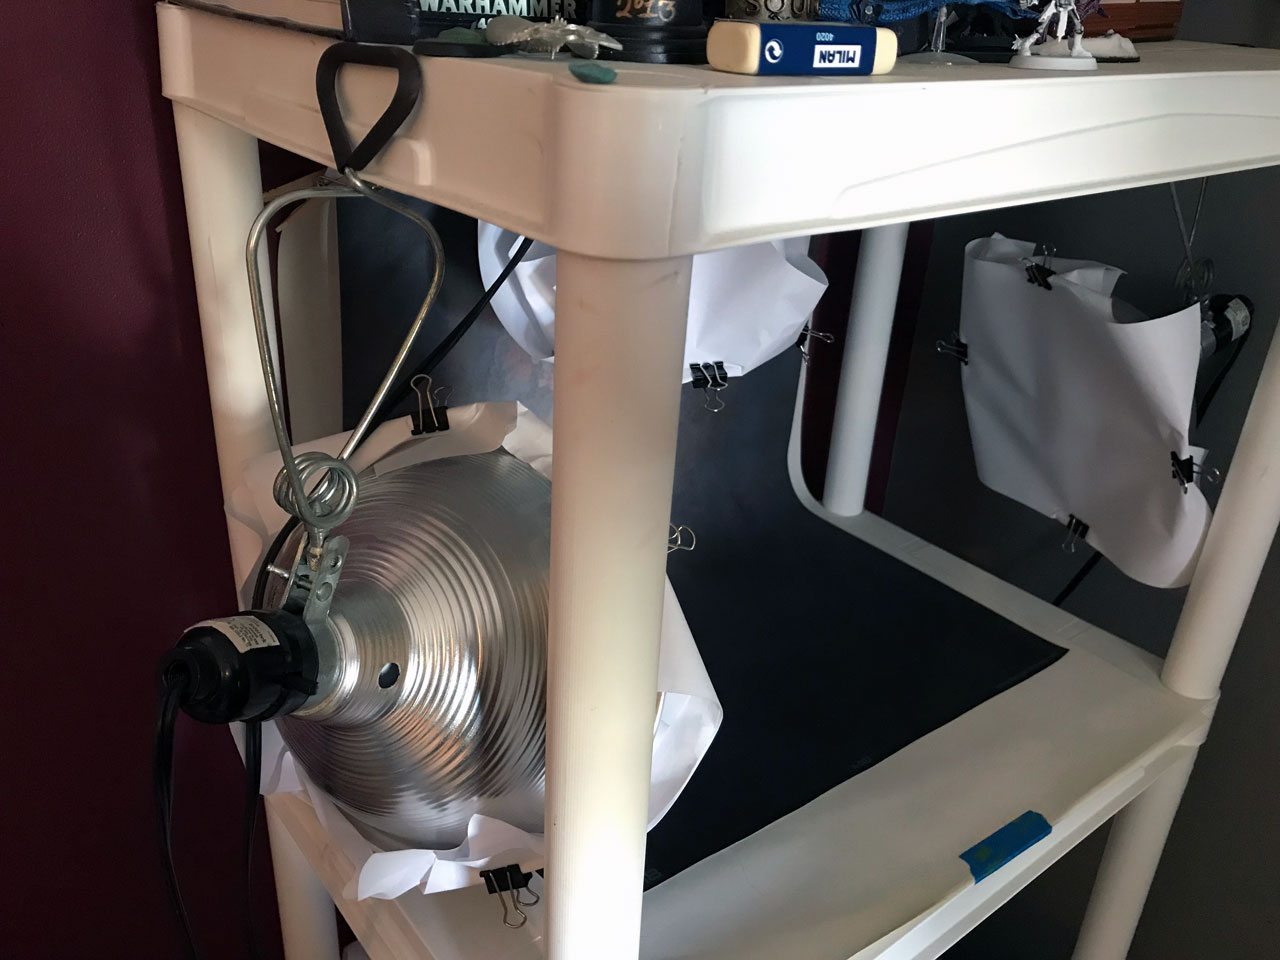
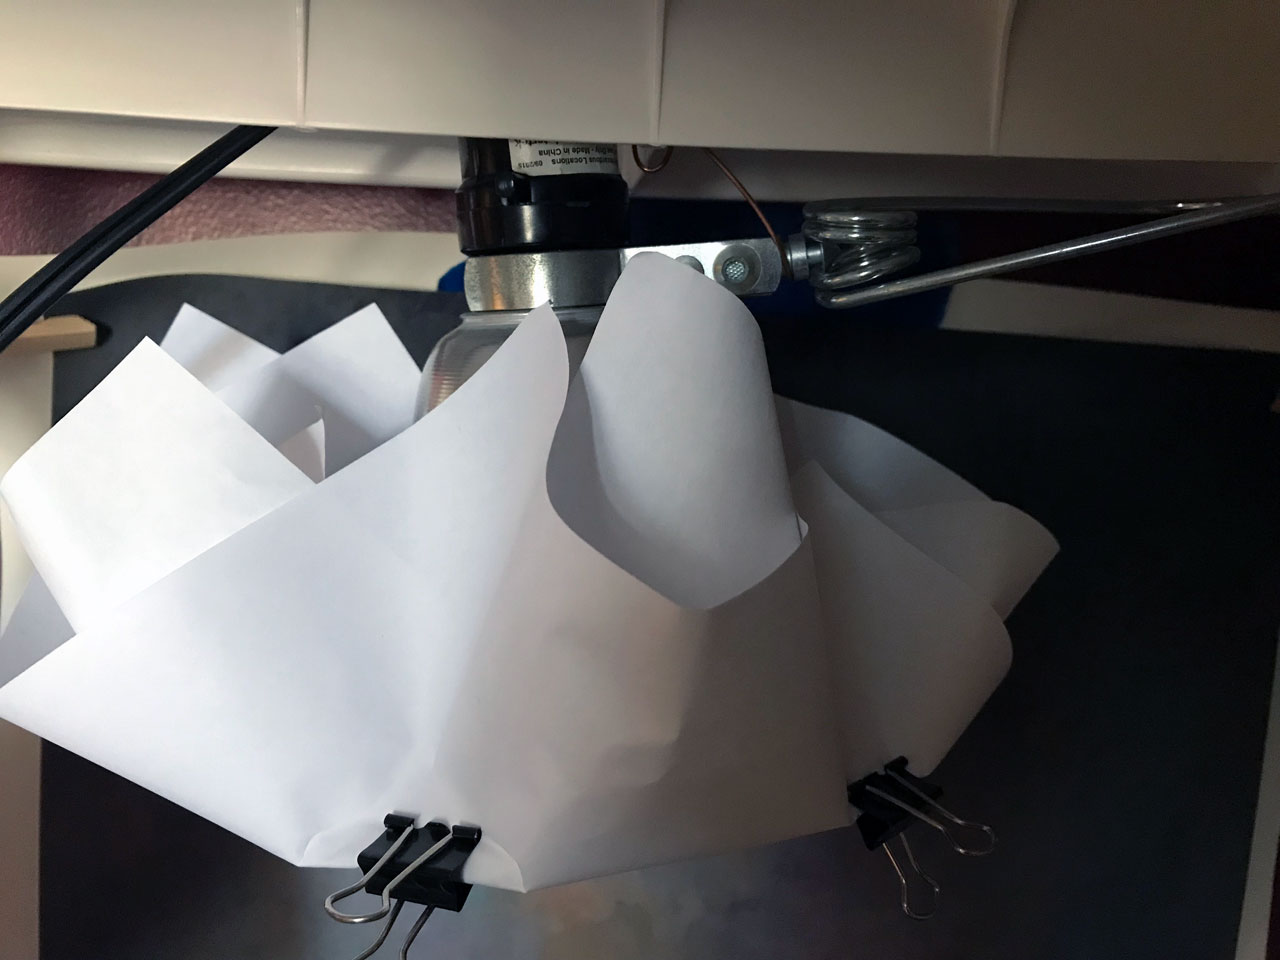
I then went and bought some clamp lamps from Home Depot and clamped them onto the side of the shelving unit.
For lights I picked up LED bulbs. I wanted something that wasn’t going to get hot, but also something that would be like daylight. So, I snagged some 5,000K LED bulbs.
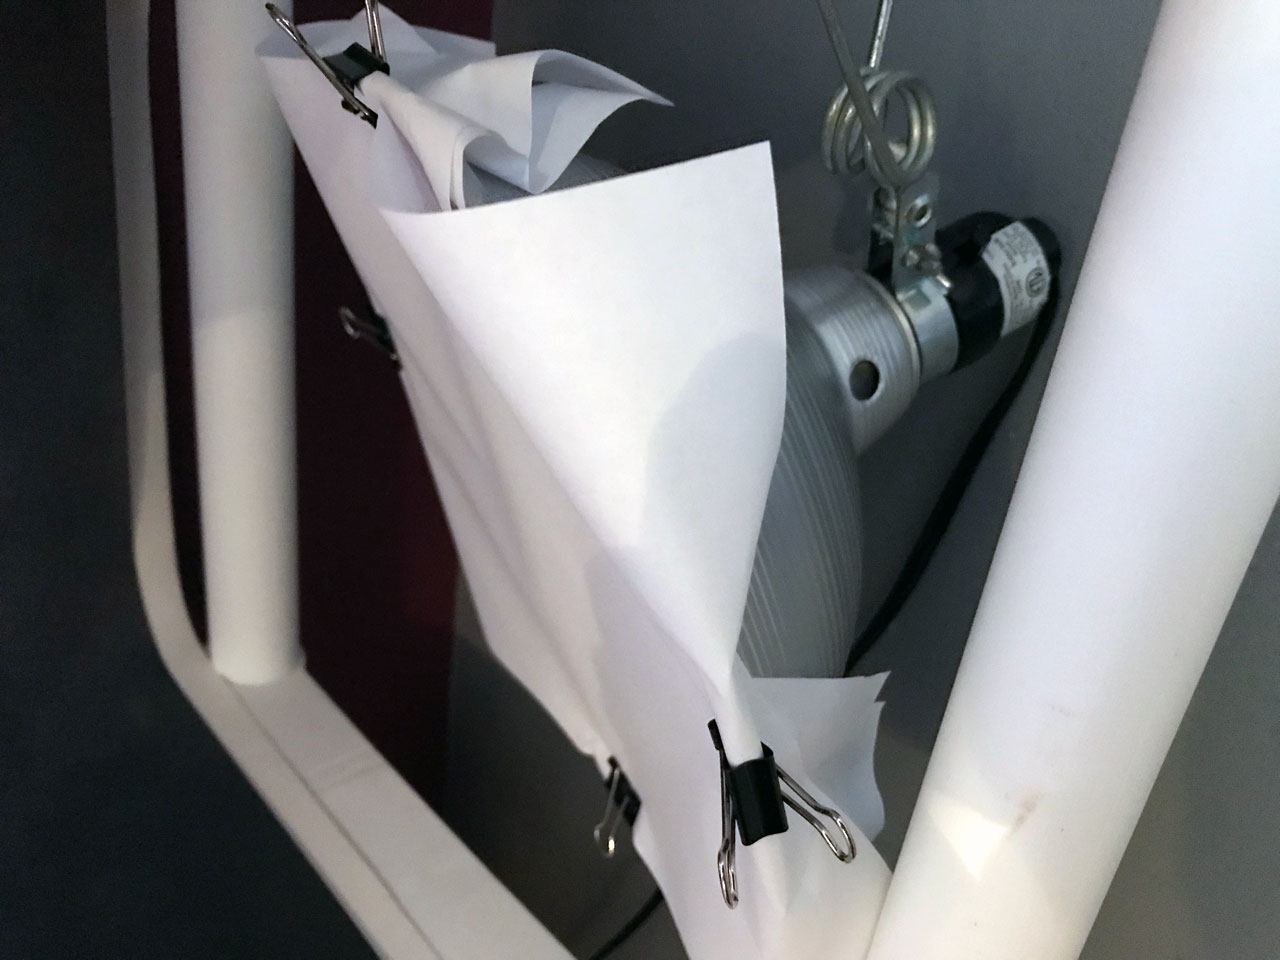
Considering how close the lights were to my miniatures, I decided to put a layer of normal white paper over the lights to diffuse it. After some experimenting over the years, I’ve found 3 sheets works out well for me.
I really should get something proper to use…
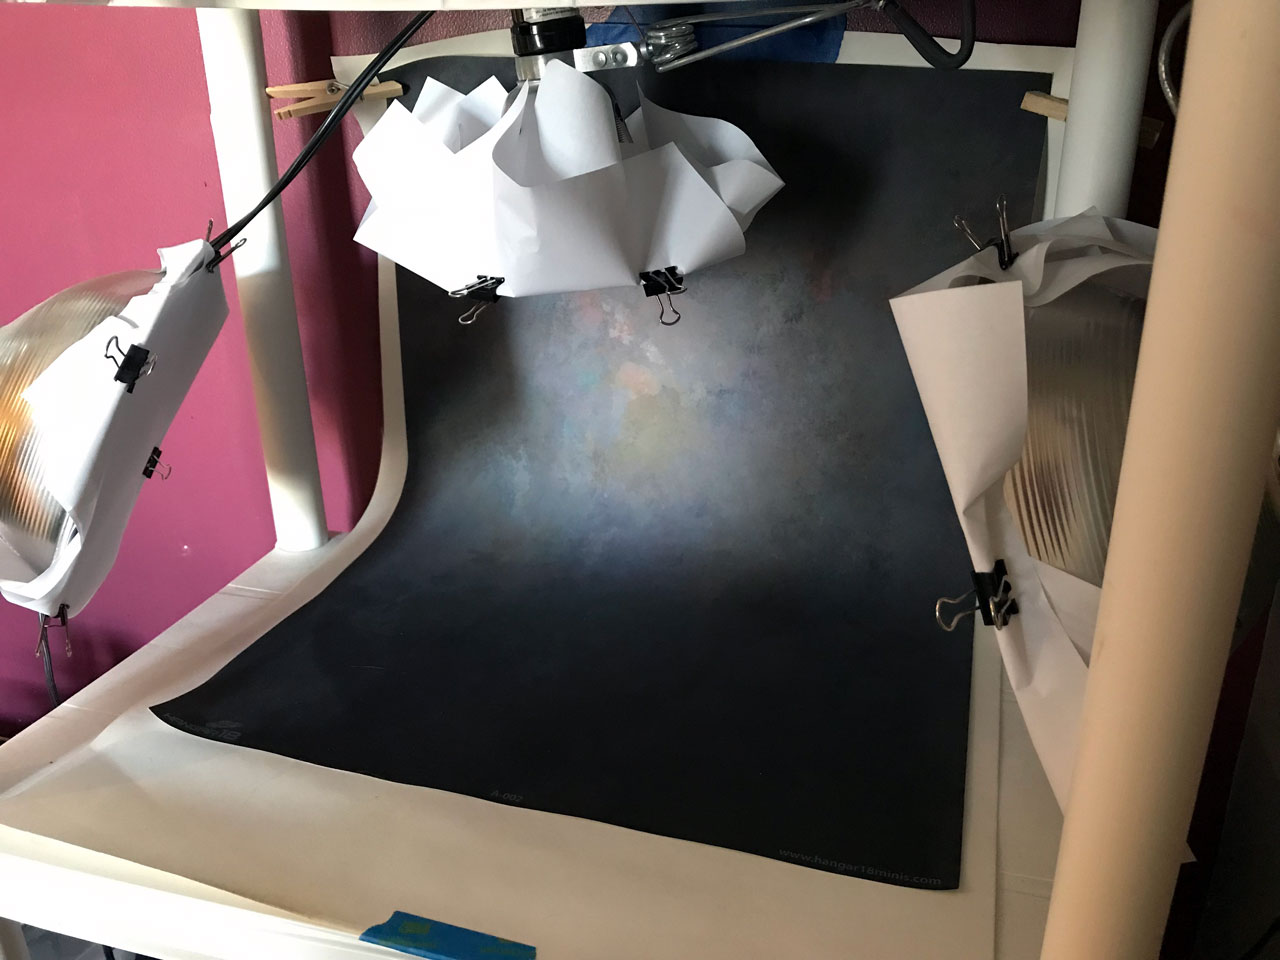
With the lights on, and everything ready to go, it looks like this.

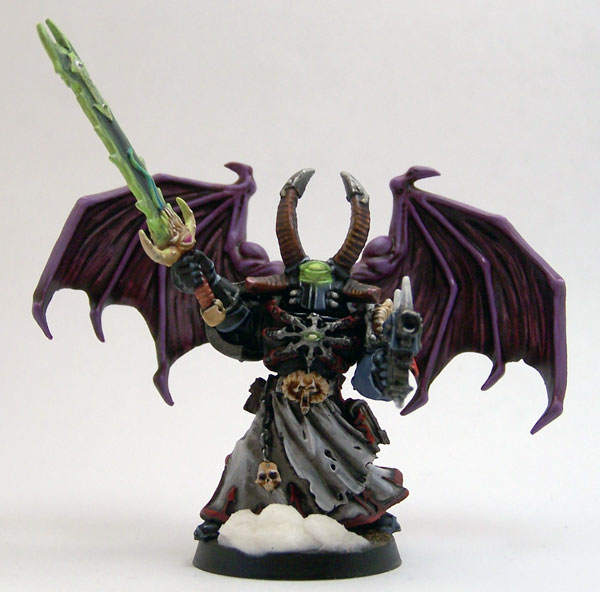
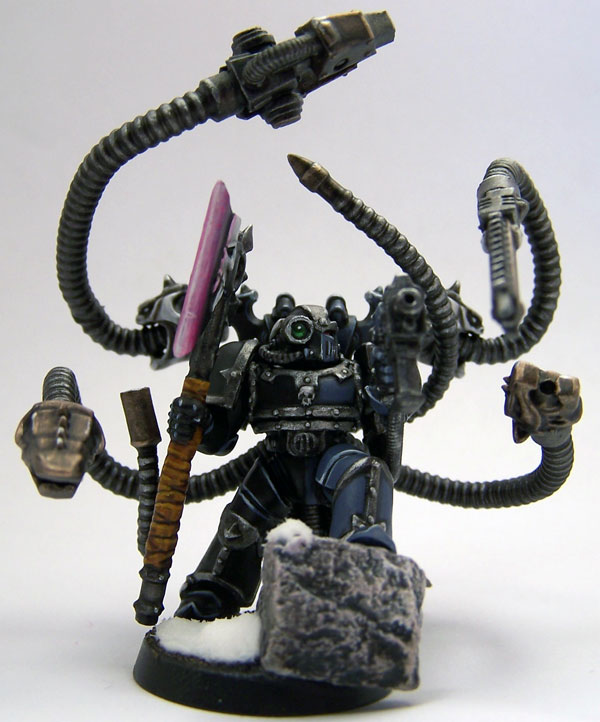
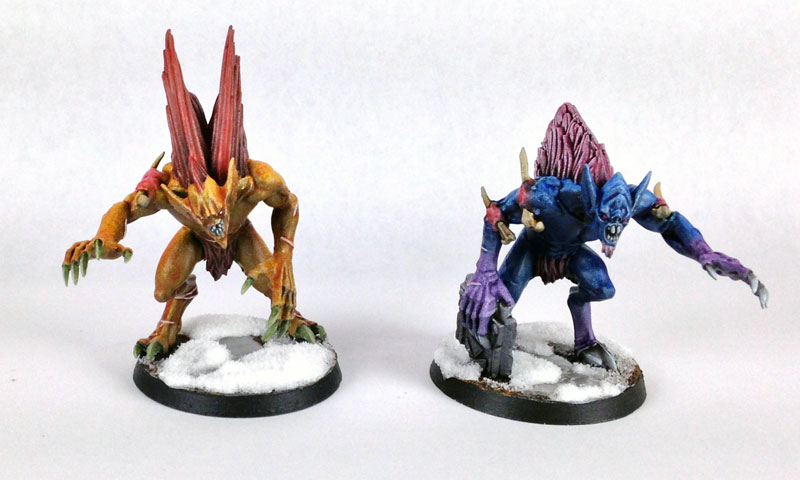
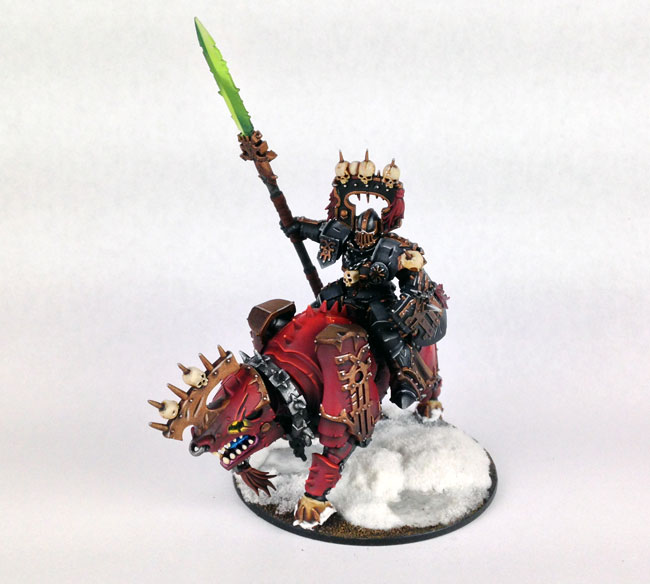
The pictures I now take in this setup look like these.
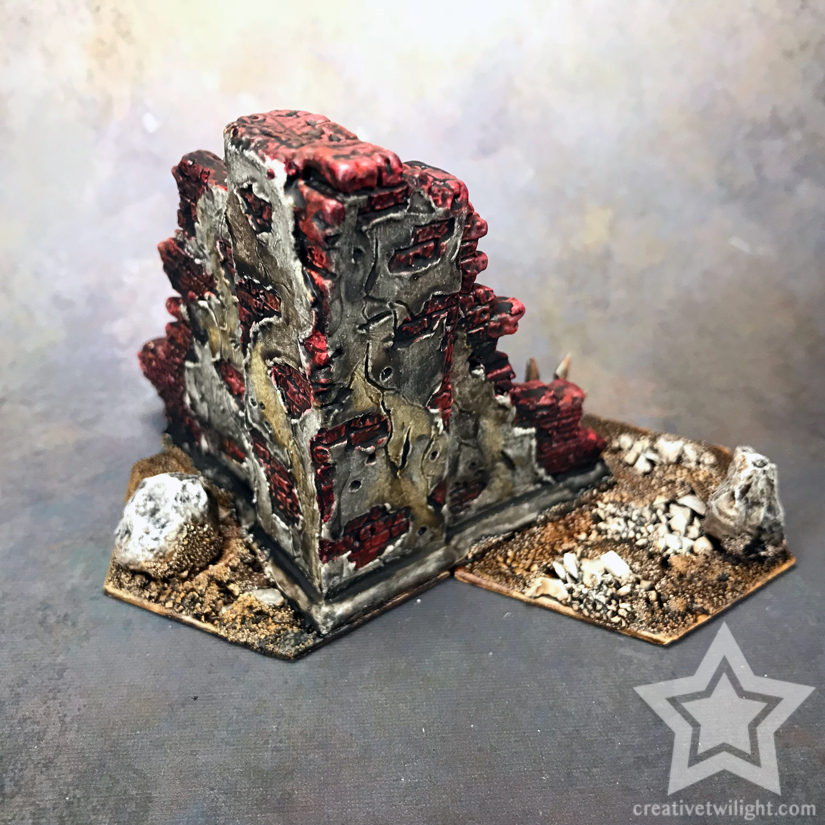
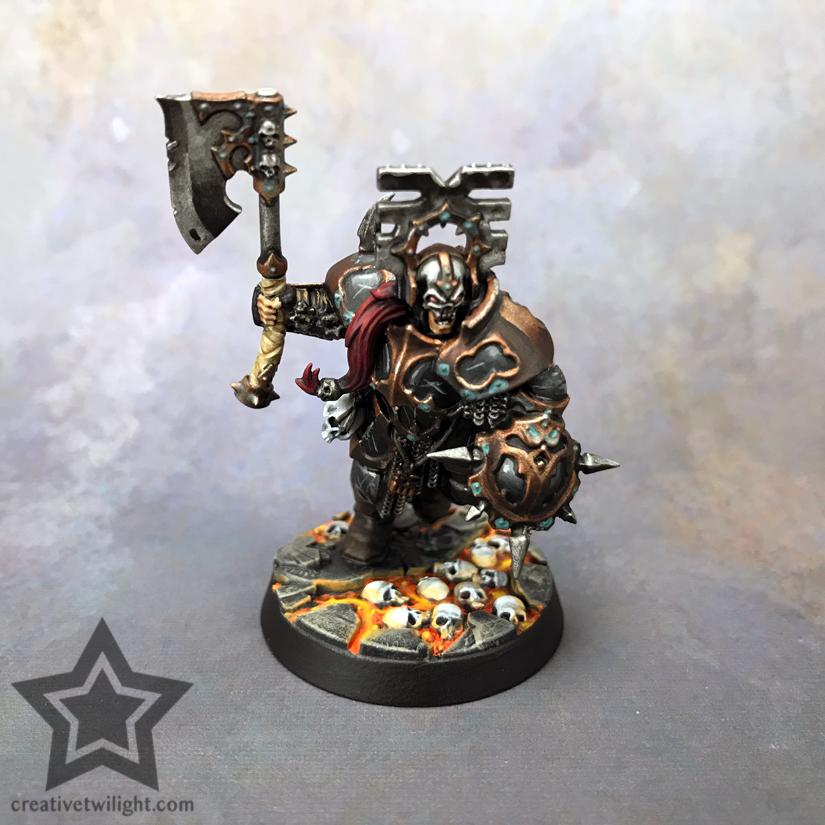
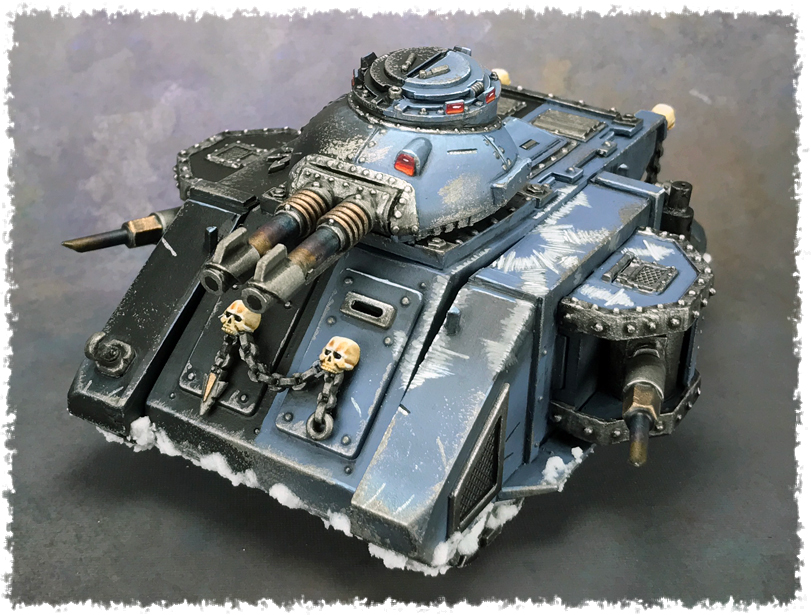
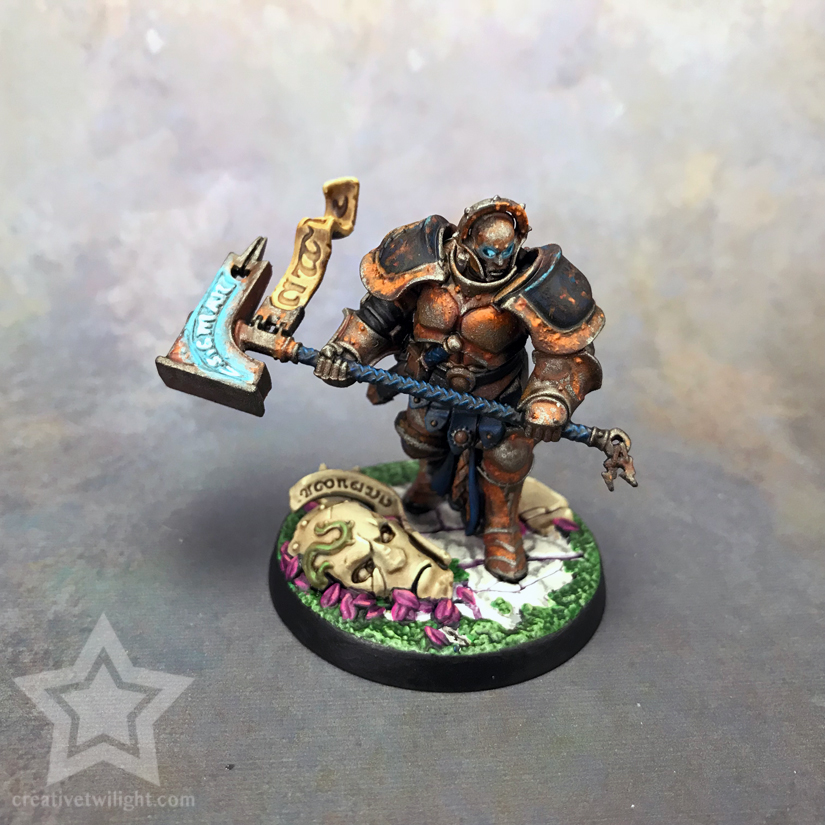


Pretty damn big improvement over the early days of a cardboard box.
Some Thoughts
I thought about cleaning up my photo setup for this article but opted to leave it be for a reason. I wanted to show you that you don’t have to have a very professional setup to take good pictures of your miniatures. It’s all about using the space you have as best you can.
Also, I wanted to show that you don’t need fancy lights or professional tools to do this. I have a plastic shelf with a backdrop and some LED lights with paper over them. It’s a pretty ghetto setup but it does the job.
For me, as I mentioned, the big thing was having a dedicated space. That shelf stays as you see it, so when it’s time for pictures I just turn on the lights.
The space I’m utilizing is pretty small. That shelf is 14 inches deep by 22 inches wide. That’s not much room. So, you can see that you can setup something that works well in a tight space.
Things I’ve Learned
Proper light diffusion is key. Like I said, I started off with one sheet of paper over the lights and have worked up to three pieces. How much you need to diffuse your lights is going to be variable for each setup, but you will need to diffuse your lights.
The reason being that if you don’t diffuse your lights then you will get visible light spots on your miniature that shows up in photographs. Also, the light will be too strong, in turn washing out your colors and all the subtleties of your paint job.
Now, there are more professional light diffusing techniques you can use. I’ve looked at a few but haven’t pulled the trigger yet. When I do I’ll let you know. Meanwhile, pieces of paper work and you can’t beat the price ;)
With the lighting, you’ll notice I also have a top clamp lamp in my shelf. I do not use that one often and only for certain pictures. I tried taking pictures with all 3 lights going but the top light was throwing things off, to keep it short. I found that pictures using only the side facing lamps were much more accurate.

I do use that top light, however, if I’m taking top down pictures of the models. In that instance, the side lights don’t illuminate the top surfaces enough, so I add a little extra lighting from above.
Using the LED bulbs has been great. By having lights that replicate daylight I’m able to get color correct pictures. Over the years I’ve used every type of light imaginable for taking pictures and the LED lights are easily the best choice of them.
Lastly, a real photography backdrop really helps. Before I got that I was shooting on white poster board and it was a struggle. The light was bouncing off the poster board and really messing with my phone camera. It might work fine with a real camera where you can adjust for things like white balance but my iPhone hated it.
I’ve really liked that one I showed you above from Hangar 18 Miniatures. It was cheap, has held up well over the years, and generally improved my pictures.
I do have a more thorough review of the photo backdrop if you’re interested.
Conclusion
All the miniature photography is done on my iPhone. Those latest shots were from an iPhone 7 with the earliest being an iPhone 4. Getting a real digital camera is my next upgrade in this photography thing.
So, there you have it, my ghetto photo setup! I just thought it would be fun to peek behind the curtain a bit and show you what things look like.
Also, I’m hoping to inspire people to try setting up something for themselves. The setup I have was very cheap to do and doesn’t use a lot of space. With a little thought and enginuity, you can have yourself a light box or photo area of your own. Setting this space up for myself really changed everything for me and just makes what I do seem more professional.
On that note, Games Workshop did a great article on this very topic too that’s worth checking out. So, I’ll leave you with that.
I love painting miniatures and teaching people how to paint. I also really love blogging, so I've combined those two passions here.
- Creative Twilight’s Future and My Thoughts (Feedback Welcomed!) - December 4, 2021
- My Top Gift Ideas for Miniature Painters & Hobbyists + Gifts to Avoid - December 2, 2021
- The Year That Was 2020 and Where I’ve Been - January 17, 2021

Thank you for sharing, some easy-to-implement and persuasive points in there!
Gladly!
Nice to get to see your setup. I spent $20 or so on a cheap light box a few years back, because at the time I could spare the money more than the energy I was investing to futz around with improvised setups. It has its issues, tho, like only one light source (overhead), and I can’t say that it’s in any objective way better than what you’ve got here.
I’ve seen a few of those. The ones that Foldio makes seems decent. I know I’ve seen some good shots out of those, but I believe they also only have an overhead light.
Whatever works though. I did spend some time working out my setup a bit. There’s some trial and error involved I didn’t dive into. So, as you know, it’s either time or money, whichever you have more of at the moment.
The one I got was even a bit cheaper than the Foldios. I’ll probably look into them more when this one eventually dies, tho, they seem to be the standard right now.
Very nice post, straight to the point and with easy and DIY tips! The shelf trick is awesome, I should find something similar, I feel I should improve my pics.
I’ve never thought your pictures were bad, but there’s always room for improvement, right? It’s surprising what a few little things will do to make pictures look even better.
Still better than my setup. (Which varies depending on when I am taking photos.)
It varies from using natural light (When the weather is decent and there is decent sunlight), to using LED lit areas to occasionally having enough room to put down my purple backdrop or even a white poster being held in place by clips. (then getting the camera to play ball is added to the mess and sometimes that thing just does not want to cooperate.)
Yeah, all reasons I went with a permanent setup. I struggled to get quality shots from set up to set up too. Some days they were awesome, other days I couldn’t get anything to look good. Now, I drop a model in there, take a picture, and I know exactly what I’m getting. Definitely makes life easier.
Heck, you could clamp some of those lights like I have to your desk for shots. It’s what I was doing for a bit before I setup the shelf system.
This was useful! I’ve linked your work in my article about the topic – https://alkony.enerla.net/english/the-nexus/miniatures-nexus/miniature-hobby/miniatures-photographing-miniatures
Thank you and I appreciate the link!
Great post. I found it very interesting to check out your photography set up. Mine also does not look professional. I have the same lamps and drape a gaming mat over objects on a back of a desk when I go to take pictures. The LED bulbs at daylight temperature work great too.
Thanks.
Yeah, it’s all about the lighting. You can have the best backdrop and setup going, but if the lights aren’t right, then none of that matters.