You spend countless hours putting together your models and painting them. Making sure they are protected is a priority. I’ve seen too many people toting around their models, unprotected, in things like tackle boxes. It’s all to save a buck, and to spend the money saved on miniature foam trays and army cases on more models.
My time is valuable to me, so going back to do touch-ups on models, where the damage could have been prevented, is not my idea of time well spent. All the models I carry around in my bag are in foam trays.
I’ve been making my own foam trays for a few years now, and they’ve held up really well. They’re really cheap to make too. I can make a foam tray that fits in a Sabol case that’s 1.5″ thick for about $3 – $4 a tray.
Around here a pluck and pull tray is about $9. So, I make 3 trays for the cost of one pre-made one; can’t beat that!
Below I will walk you through how to make your own foam trays. It’s easy to do, cheap, and you can customize them however you need.
Disclosure: Some of the links below are affiliate links, meaning, at no additional cost to you, I will earn a commission if you click through and make a purchase. The commission earned helps maintain this site.
The Materials Needed for Miniature Foam Trays
You only need a few items.
- PVA glue/Foam Glue
- Breakaway utility knife
- Foam (info below)
- Cutting surface. I like to use a self-healing cutting mat.
Some of these items are basic supplies you should always have around. For a complete list, see my article on hobby supplies. That article covers all the basic stuff every hobbyist needs, as well as a list of items that are just nice to have; that make hobbying easier. You might find something you hadn’t thought of on that list :)
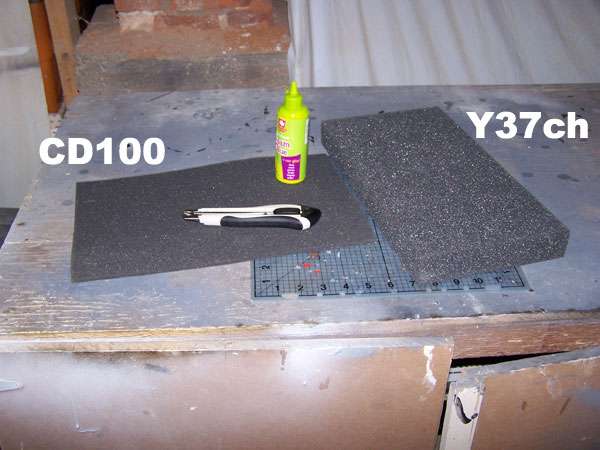
Here’s a shot of the materials you need. The glue I buy at a craft store like Michaels, Jo-Annes, AC Moore, etc. for about $2, and I can get about 4-5 trays out of it. This glue is called Foam Glue, and is made by Creative Hands. I’ve also used regular Elmers glue and it works just as well. Really, any PVA glue will work.
I’ve made a template that I use for this particular type of tray I’m making, which you’ll see below. I used a cardboard box, and just cut my slots out of that.
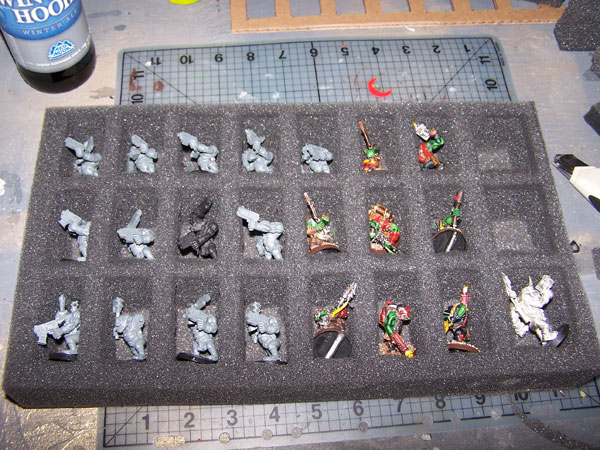
The tray I’m making is 1.5″ thick, and will fit 24 models, in my case Orks. The tray itself is 7.5″ wide by 13″ long, the same size as the Sabol trays.
You’ll see below that my tray and bottom are a bit bigger. I had ordered these ones a little long just to be safe, and I trim off the excess. Also, it’s cheaper if you order the foam in lengths, or widths, that allow you to get more then one tray from it. So, buying one piece of foam 26″ in length and 7.5″ wide and 1.5″ thick is cheaper then one tray at your exact dimensions.
Getting the Foam
What I do is order my foam from this site: http://www.foamorder.com/packing.html (link goes to their packing foam which is what I use)
I use the Y37ch foam for the main part of my tray, what the models go into. I then use the CD100 for the bottom of the tray by gluing it on once I cut the slots out.
The CD100 I get in 1/4 thickness, again for the bottom of the tray. The Y37ch I get in whatever thickness I need for my models.
The foam I use isn’t as dense as buying the pick and pluck trays, but you can get denser foam from them then what I use, it just costs more.
To order, just click one of the types listed above, it doesn’t matter which, and then click on the first shape listed: square or rectangle.
They will cut your foam to size, so just measure the trays you do have, and you can order it in that size from these guys. Then you just have to cut out your slots, which is easy and covered below. What I do is use a breakaway utility knife to cut the slots. I find these work best because you can extend the blade out a few inches, allowing you can cut through the foam easily.
How to Make a Foam Tray
Time needed: 2 hours
Alright. Now it’s time to turn the block of foam into a miniature foam tray.
- Create a Template (Optional)
If you’re going to do this a lot, say for infantry as I’m doing, then creating a template makes the process way faster and more consistent.
I have the measurements below in step #2, but all I do is measure everything out on cardboard and cut holes in it.
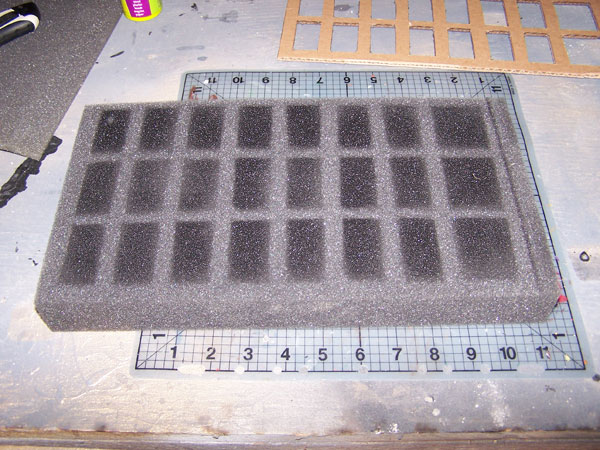
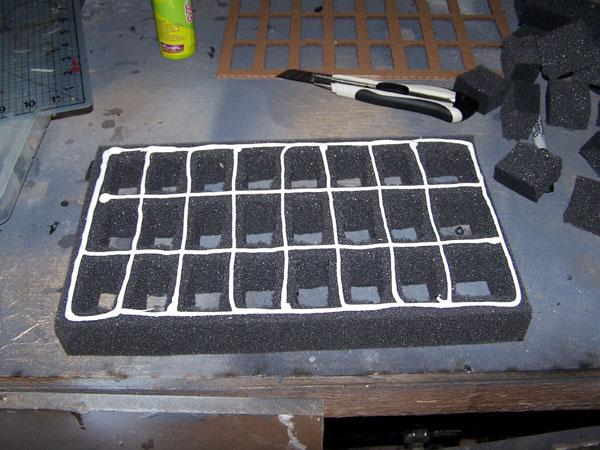
I just tape the template on the tray, and use black spray paint to define the slots. Let it dry for about 10 minutes, so you don’t get paint all over you when cutting the foam. - Measure Out the Foam Tray
The slots are 1″ wide by 2″ tall, and works equally as well for most Necrons, Tactical Marines, and things that aren’t overly dynamic in pose.
The last slots on the tray are a bit larger, being about 2″ x 2″, the result of measuring off the 1″ x 2″ slots, and they work well for things like my Nobz and other larger models.
I leave a 1/2″ edge around the sides and each slot for stability. Actually, the edge between the 3 vertical slots is a bit under 1/2″, so that I can fit 3 tall.
The line on the right is me marking off the excess which I trim off. For that I used a permanent marker. The permanent marker works great for marking your slots as well if you haven’t created a template. - Cut Out the Slots
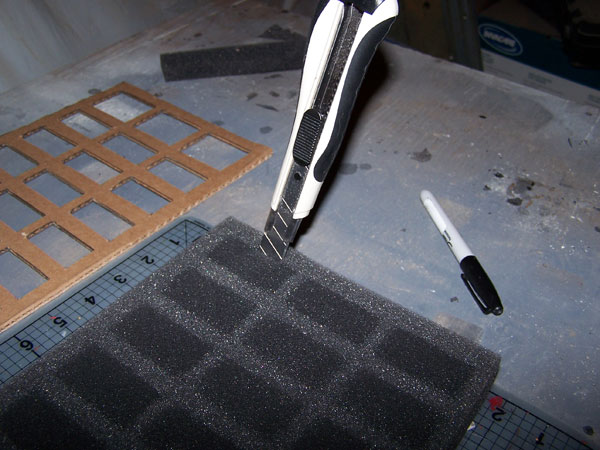
I start the knife at an angle to get my initial cut. Once I start cutting, I raise the knife 90 degrees to the tray. Then I use a sawing action, so that I can cut to the bottom of the tray and get a straight cut in the corners.
Once I’ve hit the first corner, I turn the knife around and go back the other way, towards where I started from, so that corner is cut. It takes a little practice, and you may find your own method, this is just what I’ve found useful.
I do my cutting on a self-healing mat to help avoid dulling the tip of the knife.
Just go ahead and make all your cuts. I find it’s easier to make all your cuts one way, say all the long sides of the slots, then turn the tray around and make the other cuts, the short sides. It’s a bit tedious, but after you’ve done a few trays you can make all these cuts in about 10-15 minutes. - Pluck the Loose Foam
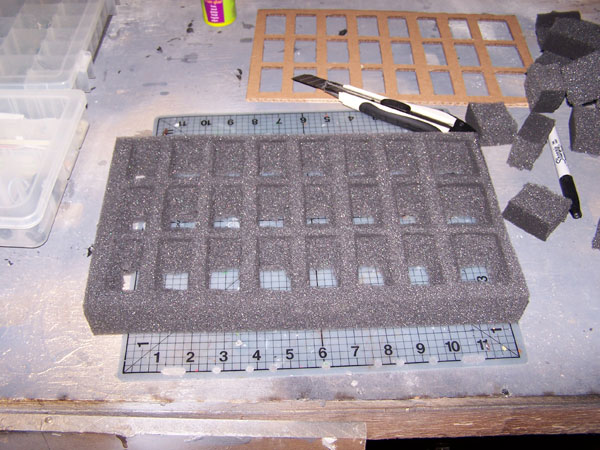
Once all the cuts are done, you pluck it out. Don’t pluck them out as you are making your cuts though, do it once all cuts are made. If you pluck them out as you do them then the tray loses density, and it’s harder to make the rest of your cuts. Plus, you can tear the slots easily this way.
If you did your cuts deep enough, and all corners cuts meet, then plucking it out is easy, but be careful. I keep one hand on the top of the tray while I pluck out the slots. - Apply Glue to the Back of the Tray
Now it’s time to glue on the bottom to the foam tray. I use a liberal amount of glue, and cover all areas on the bottom.
- Apply the Foam Backing
- Add Weight to Hold it Down
Now weigh it down with something to ensure even pressure. I normally let my trays dry overnight before I use them. However, I’ve also used them in a few hours after gluing when in a rush.
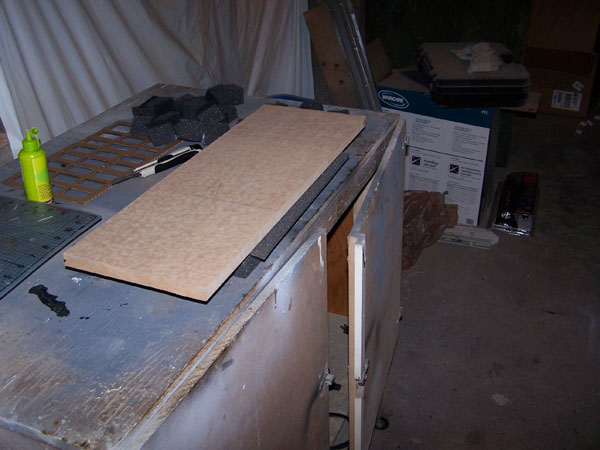
Once the base is thoroughly dried, I trimmed off the excess I had and I’m done. - Enjoy Your New Tray!


Foam Tray Wrap-up
Making your own foam trays is not hard. It takes a little time, mostly waiting on glue to dry, but saves you so much money in the long run.
These trays really do hold up well. I am still using trays today that I built in 2007. I have never had one of these trays fall apart, and they remain just as functional today as the day I made them.
If you’re a 40K player, and looking for more ways to save cash, then I’ve got a great resource for just that.
Also, if you’re a new hobbyist, and are looking for other things you’ll need, then check out our article on essential supplies you need.
Lastly, I have another site that focuses on storage solutions for miniatures called Miniature Storage. You may find some other ideas there as well.
You need to start with a thick slab and getting a straight cut through all that foam is difficult. The sides on mine came out very uneven. It’s also a waste of foam. You’ll probably pay more for thicker foam just to throw most of it away.
So, I came up with a variation that is cleaner, easier and cheaper.
Foam Trays for Tanks and Other Large Models
Kamui wrote an article on doing foam trays for larger models. It just made sense to merge it into this one so it’s a complete guide for foam trays of all sizes.
Materials
To start with, I’m using the same foam as Thor mentions in his tutorial, ordered from http://www.foamorder.com/packing.html. We’re not getting any kickbacks from them for this endorsement, so feel free to use another source if you prefer, but we’ve both had pretty good luck with this company.
Let’s start with materials.
As in Thor’s tutorial, I’m using CD100 in 1/4 inch thick sheets for the bottom of the tray. My trays are 7.5 inch by 14 inch so they fit the Sabol cases, but you can make yours to fit whatever container you’re using.
There is a minimum cost per piece when ordering from www.foamorder.com, so I buy a larger sheet and cut to size, so I can get the best price per tray. For glue I’m using Elmers Glue All because it’s cheap, easy to find, and works well for this application.
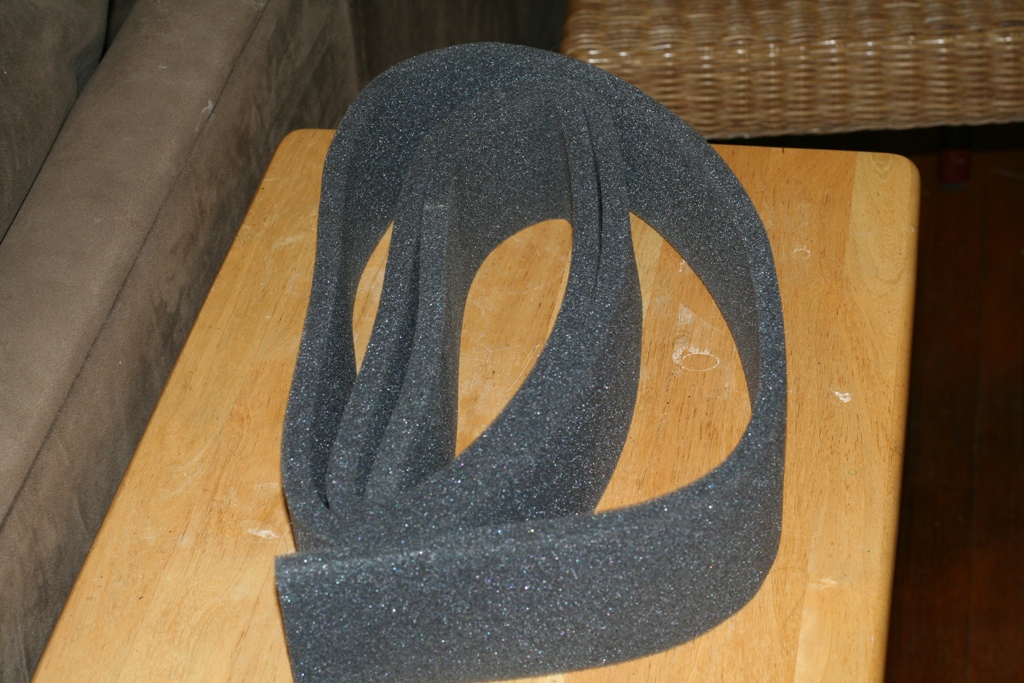
Here’s the major difference with this method vs. cutting from a slab. For the side walls I’m using 1/2 inch thick by 3 inch wide strips of Y37ch foam. The next time I order I’ll probably get the firmer CD100 for this, but the Y37ch is good enough. I bought a couple of long rolls like this:
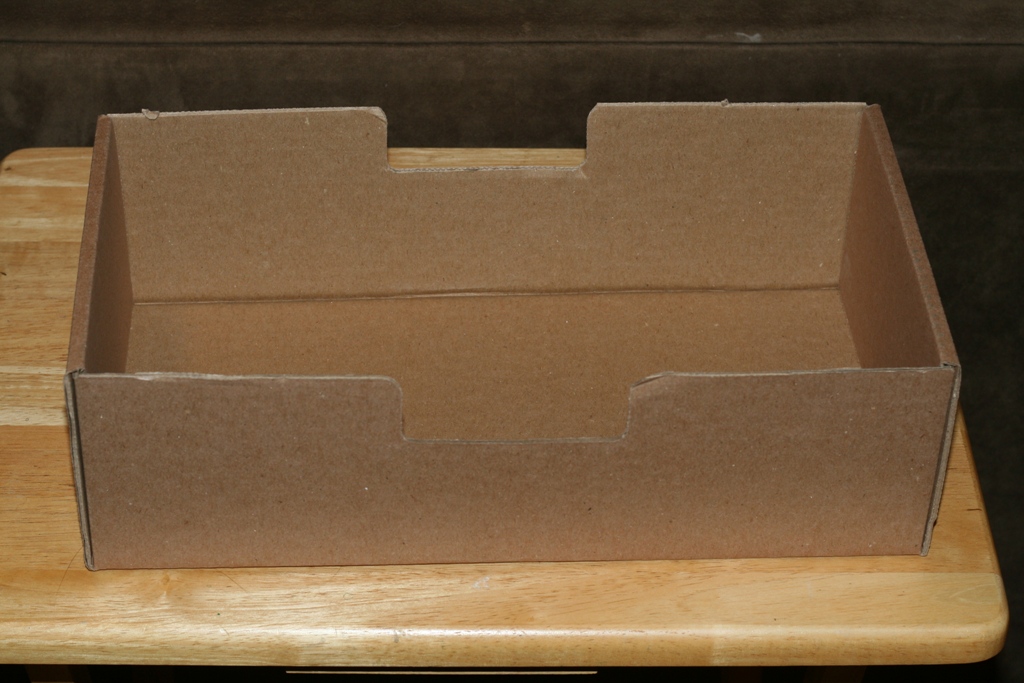
I also happen to have a cardboard tray that is just the right size to hold one of my foam trays. I use this as a form while building my vehicle tray. You could build your own form from cardboard, wood, or whatever. This could be done without a form, but I found it much easier with than without.
Cutting the Pieces
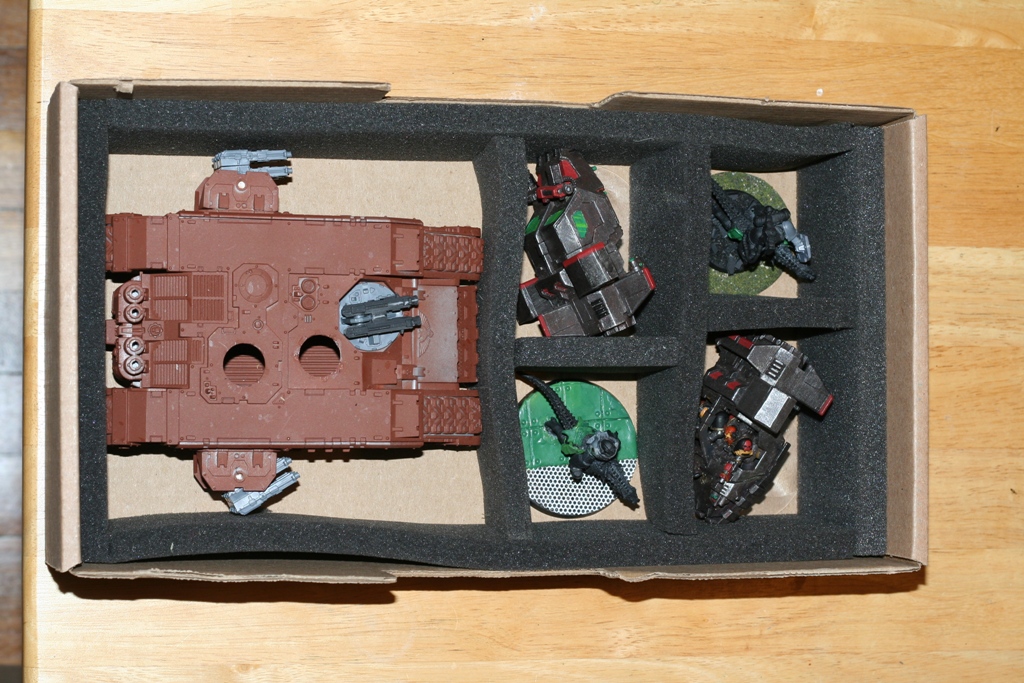
I use scissors to cut the lengths of foam that will be the outside perimeter of the tray and set them into the form. Then I put the models I want to transport inside and cut more lengths of foam to become the dividers.
Now that I have the pieces cut to the right length, I use a marker to mark where the pieces need to join. Then I pull everything out of the box and reassemble the tray inside the foam adding glue as I go.
I put the models back in as well to help hold the pieces in place while the glue dries, just be careful not to get the glue all over your models!
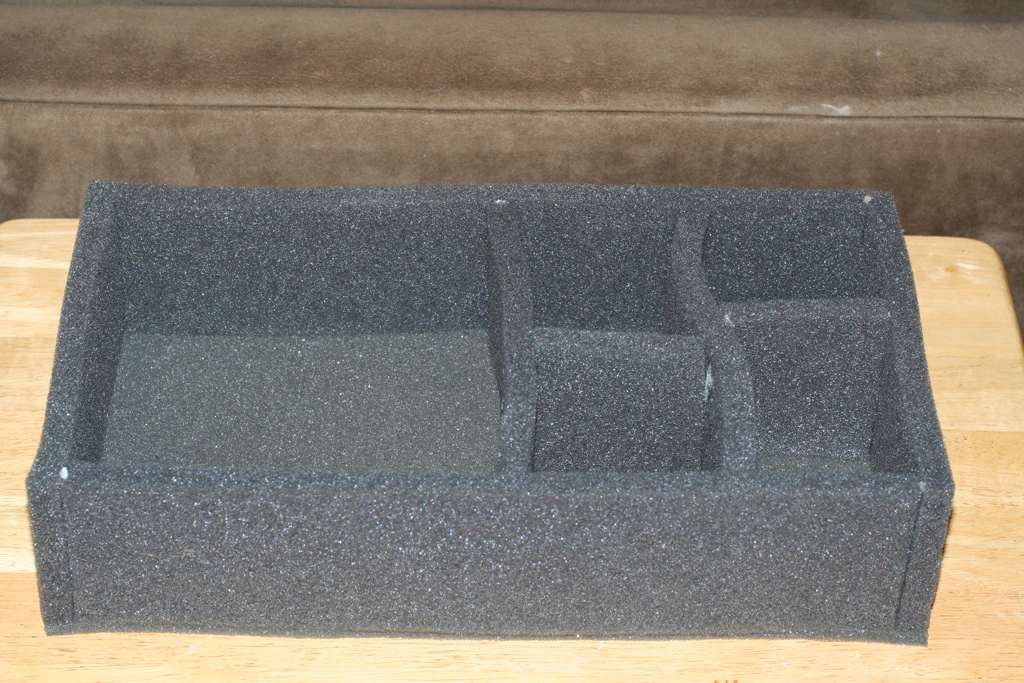
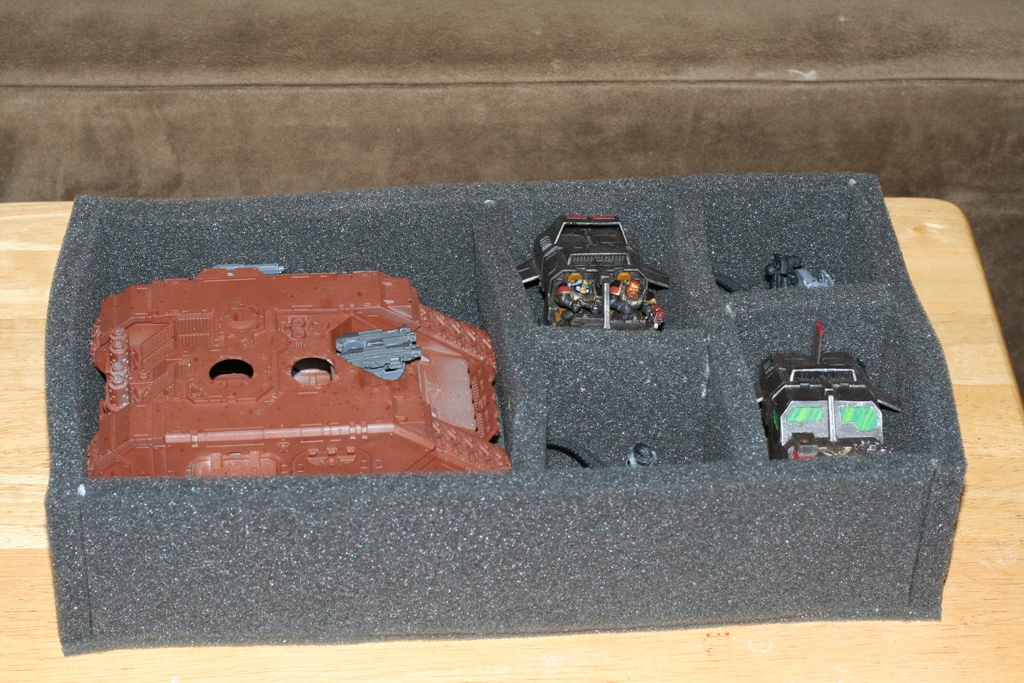
Finally I run a line of glue across the top edge of the walls, press the tray bottom onto this, and add a couple of books to hold it down while it’s drying. After a few hours you can pull it all out and see how the tray looks.
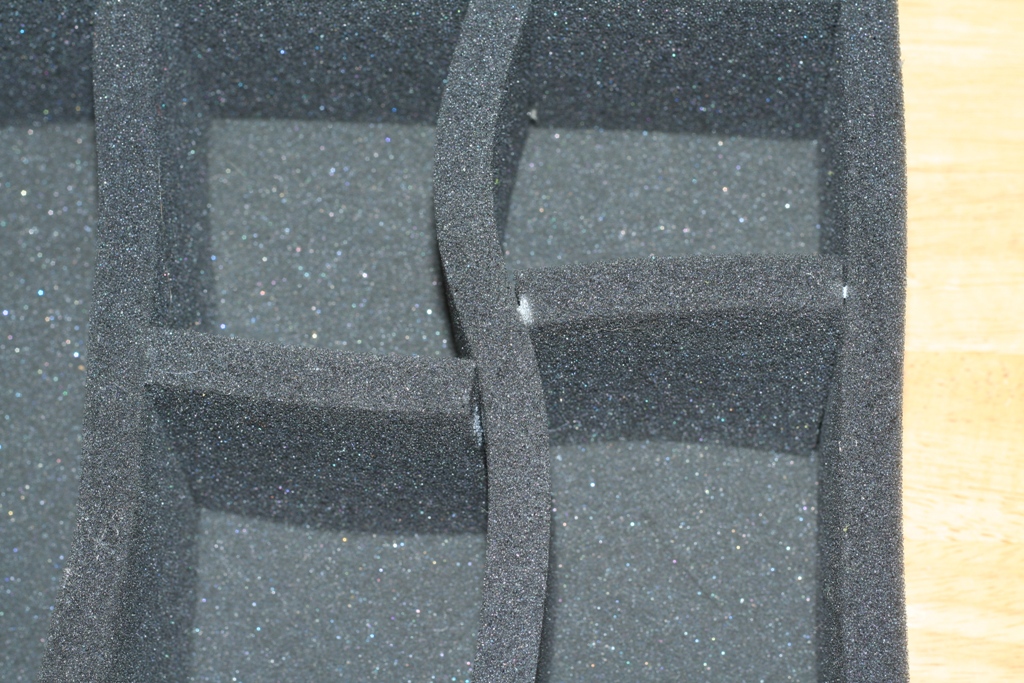
You can see I had a point where the dividers didn’t bond as well as I’d like. It could probably have been avoided by not staggering the divider but that’s how I wanted them. This is fixed easily enough by adding some glue and pressing, propping, or pinning the join together until the glue sets.
With that taken care of I have myself a new vehicle tray!
Wrap-up
I found this process to be quicker and easier than cutting voids into a thick slab, and the end result is cleaner as well. This tray cost about $2.50 in foam where the slab method would have cost $3.75. Using the firmer CD100 would cost $3.25 for this method, or $6.00 for the slab. It’s not big bucks either way, but it adds up over an army (or three), and when the easier way is also the cheaper way it seems like a no-brainer which to use.
It would probably be cheaper to use this strip method rather than the slab for infantry trays, but you would have a lot more pieces to glue together. I don’t know if that’s more or less work than cutting out all of the little squares, maybe I’ll try it someday. For now I’ll leave that decision to you.
Hobby Supplies, Tips & Tutorials
Various tutorials and guides for common hobby supplies.
I love painting miniatures and teaching people how to paint. I also really love blogging, so I've combined those two passions here.
- Creative Twilight’s Future and My Thoughts (Feedback Welcomed!) - December 4, 2021
- My Top Gift Ideas for Miniature Painters & Hobbyists + Gifts to Avoid - December 2, 2021
- The Year That Was 2020 and Where I’ve Been - January 17, 2021


Thanks and I’ll definitely check that out. Vehicles can be a chore.
awesome stuff. those look pretty much as good as sabol or gw’s stuff.
you might want to check out lauby’s take on custom fit trays for vehicles and such
http://lauby.blogspot.com/2010/08/wednesdays-in-progress-eldar-and-some.html
I had been looking for a inexpensive method for a while now. Much appreciative for your efforts to write up this article
Glad you found it.
I need to use this method for my next big models, especially my Heldrake who will need an entire tray to himself.
You’re right though, I’ve definitely pissed away money on a full piece to only cut away 80% of it. I was concerned with stability of piecing it together but after seeing yours it seems that’s not an issue at all.
So far they’re holding up fine. You could use the CD100 for a quarter less than the Y37ch slab and have a pretty solid tray.
nicely done!
Thanks. I wish I had more useful money saving tutorials to put up.
Just a thought what if you cut the pieces to interlock in the middle for your interior pieces? Basically make half depth cuts the same thickness as the foam and then in oppisate directions (one bottom to middle one top to middle) then apply glue and slide them together. Just a thought.
That’s not a bad idea! I’ll give it a try the next time I make a tray like this and update this tutorial with the results.
this is a very cool and a cheap way to get custom trays, thanks
Thanks.
It really is super cheap if you buy it in bulk as well. I usually wait until I need a bunch of trays and then put in a big order; usually combined with someone else as well. Every few years I put in a new order as I expand my armies.
sweet, I need to start doing this lol I have a buddy who might need some as well maybe we can combine our orders
I have a case still, but have no trays, so this is gold to me :D
Get together an order and you can fill that case inexpensively :)
Very nifty way of DIY. Thanks for sharing!
Thank you.
I know this is a little on the old side, but I want to thank you for the article anyway! I would like to do this for my paint, but I feel like doing circular slots cleanly would be challenging. Do you have an easy technique for that?
Hmm. I can’t really think of an easy way to cut small circles for paint. I would instead cut small squares. Far easier to get the shape and wouldn’t really take up much more room than circles.
I don’t know about this foam but some foam can be shaped via heat. I’ve recently been purchasing this stuff called layered foam. I haven’t used it for miniatures yet but I build a tool insert for my hobby stuff that holds all my nipped, files, knives, etc. I used a piece of metal wire heated over a candle to cut finger notches.
I have a thicker piece I’m thinking about using for miniatures.
Stuff is cool, cuts easily and then you just scoop out as many layers as you want. Fast and no glue.
Sounds interesting. Got a link? Curious to look at it.
I was thinking about heat but with this particular foam, from the tutorial, I don’t see it going well. I know I wouldn’t try it anyway.
I got mine from a local hardware store but you can get it from Fastcap as Kaizen foam. http://www.fastcap.com/estore/pc/Kaizen-Foam-p13435.htm
As I said, I haven’t used it for miniatures yet. I’ve realized that I don’t have a good way to carry my Warmachine stuff so I might use it for that and feature it in my series.
Interesting. I’ll definitely see if a local hardware store has it to check out in person.
This foam cuts very nicely with a hot wire cutter. I think a hot knife could work pretty well also.
Good to know. I never had a need to try before and just figured it would be a melted disaster or something.
Thanks for listing this article on your year in review. Transport and storage is a big issue for me.
Gladly!
What do you store the trays in? Is there a certain case or bag?
I use a Sabol case for storing them. That’s the case I had when I started doing this, so the trays are sized for that bag.
The beauty of this process is that you can size your tray for whatever case you’re using, even off the shelf luggage.
That said, I also use a Sabol case for carrying the trays. I also have several cardboard boxes I use to store the trays I’m not currently carrying around.
Good idea! Thanks for sharing…. <3
https://wickerhandmade.etsy.com
Interesting piece. I just bought Rising Sun, with all the expansions, so need something suitable to carry it around in that’s not the original boxes.
Thinking you’re missing the benefits of a metal ruler, here, perhaps even a metal carpenter’s square. That may be “duh”, but i don’t see any refernce above… Here are some of the products of which i speak at harbor freight…
https://m.harborfreight.com/hand-tools/squares.html?utm_referrer=direct%2Fnot%20provided
I do use a metal ruler when I’m not using the template I showed above. Thanks for the links. Those are some great prices.
The carpenter’s square, & the multisquare both seem useful. I have a set of the (3) L-squares, and it’s decent quality, no question. They also have solid, metal yardsticks. Buy a few of those and some quick release clamps and i bet you could make your cuts go a lot faster and smoother.
Much of their stuff is from China. I would say China, quality-wise, is about where Japan was in the early 70s. Great on non-complex mechanisms, and decent on complex mechanisms. So in value, Harbor Freight are a good first place to hit for many things.
I’m not overly picky about the straightness of the trays. I do measure it out, when not using the template, and try to keep things as square as I can, but I don’t worry too much. If it looks decent and can transport my models safely then I’m good :)
However, you are right that a square can be useful for this.