This is something I had learned years ago when I first got into Warhammer 40K, how to sculpt chains. I honestly don’t recall where I found the tutorial. Regardless, I claim no credit on this technique for sculpting chains I’m about to show you.
This is a very simple technique to sculpt chains that gives pretty impressive results. It’s a technique I feel anyone of any skill level in sculpting can do. In fact, this was one of the first things I learned to do with sculpting.
Disclosure: Some of the links below are affiliate links, meaning, at no additional cost to you, I will earn a commission if you click through and make a purchase. The commission earned helps maintain this site.
Sculpting Chains
I’m using Green Stuff to sculpt chains but any sculpting medium would work and the process remains unchanged.
For tools you can use anything really. However, having a few good tools is always recommended.

You can get some really affordable sculpting tools online. These were the tools I bought when I got into sculpting and there’s some really useful ones in that kit. There’s a bunch of tools you’ll probably never use, but at the cost it’s not like you’re overpaying either.
I also like using silicone sculpting tools for smoothing things out. I use the metal tools for shaping and then silicon for smoothing. These are a bit pricey but great to have when you start doing more and more sculpting.
How to Sculpt Chains for Miniatures
Time needed: 4 hours
I will be doing this tutorial on a flat area. However, it works the same on a miniature, I just don’t have one that needs chains at this moment :)
I apologize that some of the pictures are a bit blurry. I got so caught up doing the tutorial itself that I forget to check the pictures I took as I went. I’ll learn some day…
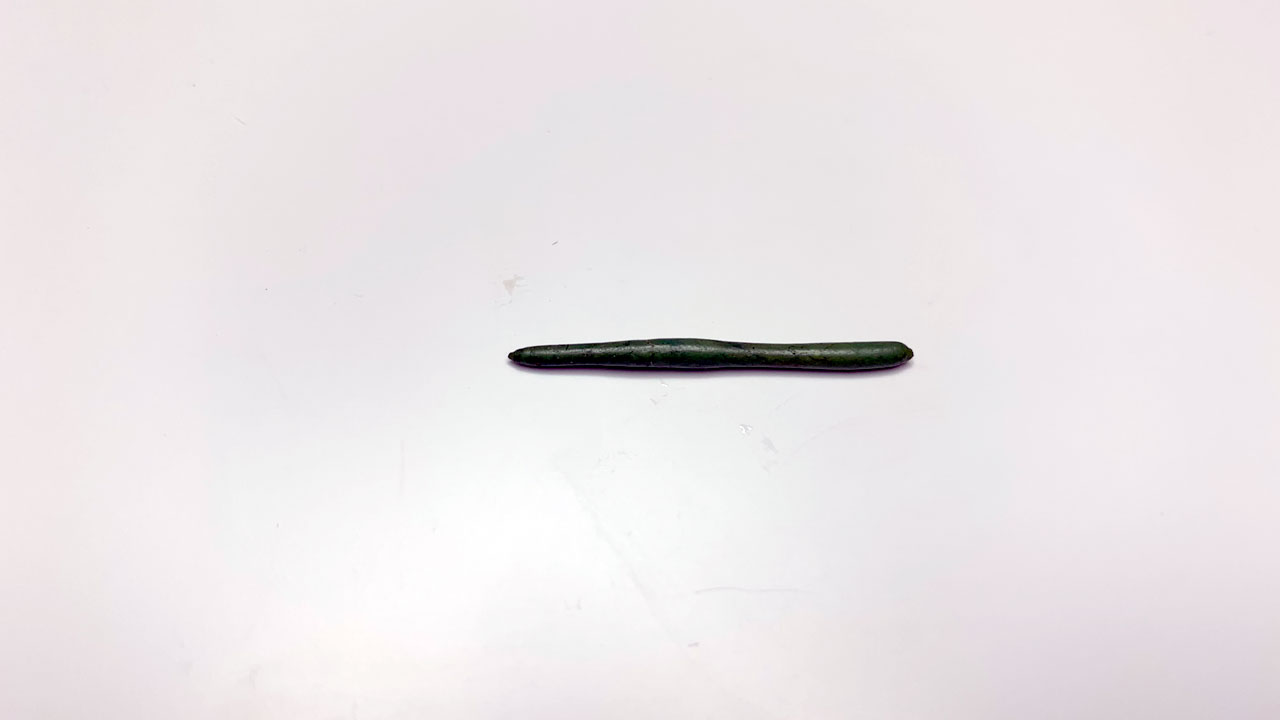
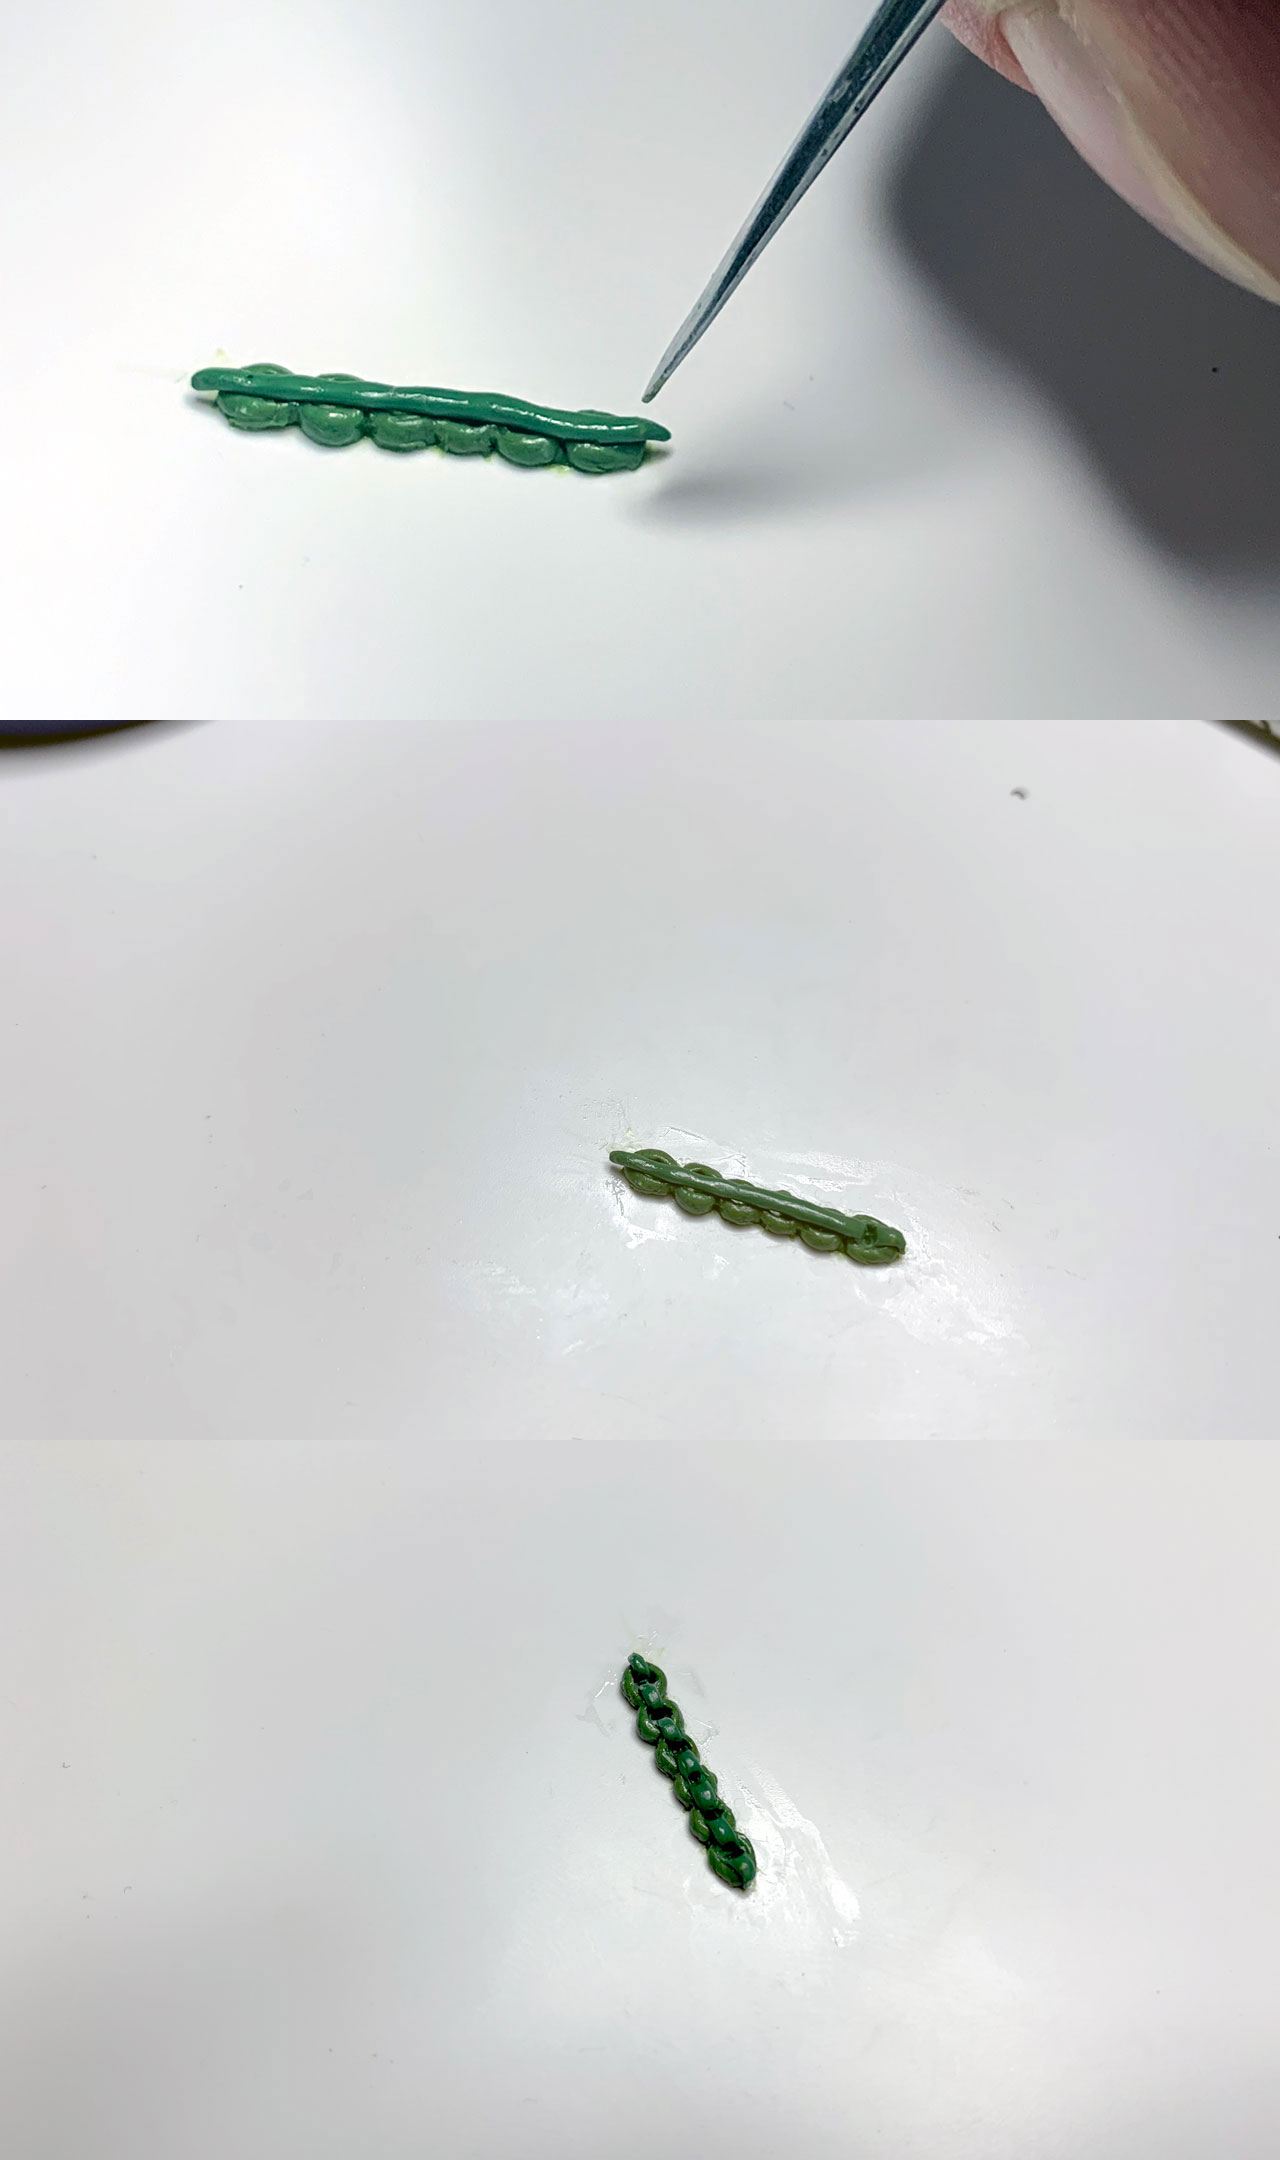
- Roll Out the Green Stuff
Roll out a thin piece of Green Stuff like so.

- Place the Roll
Then lay that piece on the miniature where you want the chain.
From there you want to gently smooth the roll out a bit to push it down and attach it to the surface of the miniature. If you don’t do this step then the next part will be annoying and nearly impossible.
You don’t want to push too hard and flatten it out otherwise you’ll lose the roundness of the chain links.
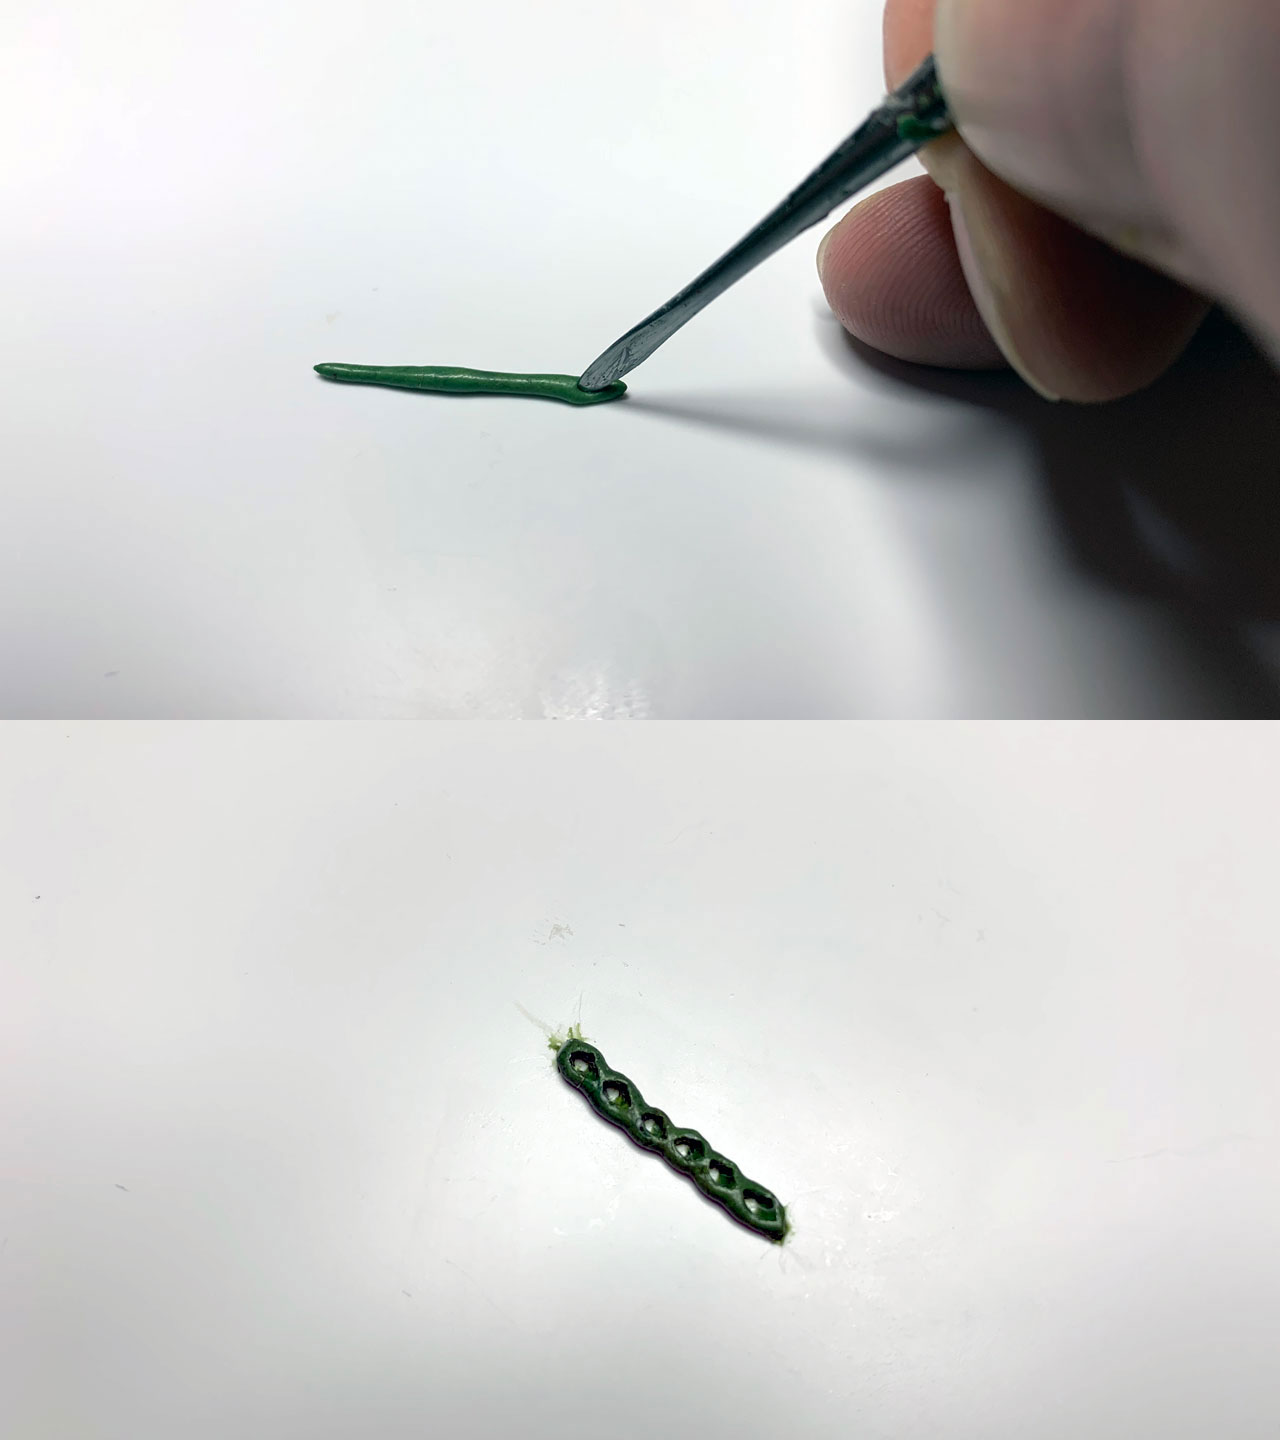
I like using Nivea to lubricate my sculpting tools. It’s a skin cream you can find at virtually any store in the US. The stuff is amazing at keeping your tools from sticking to the Green Stuff. - Poke Holes
Now you want to poke holes into the Green Stuff. Yep, holes.
Do this for every link in the chain you want to create.
Not shown was a step where I cut off the excess on the end. Odds are when you poke in the holes for the links that you’ll have some extra on one end. I just used my sculpting tool (lubricated) to cut off the excess so it ends on a whole link. - Cut in the Shape
The final step for this first half is to separate the chain links. You do this by pressing a sculpting tool between each chain to create an indent and define each link.
Since there’s holes in it, you’ll notice it’s nicely created a separation already so I’m just defining it more.
I wasn’t aiming for perfect with the cut-ins. I’m going to widen the holes a bit more below so there’s no need to get too fussy yet.
I also noticed in the image that I forgot a few links. That’s fine, again things will get defined a bit further below. - Smooth it Out
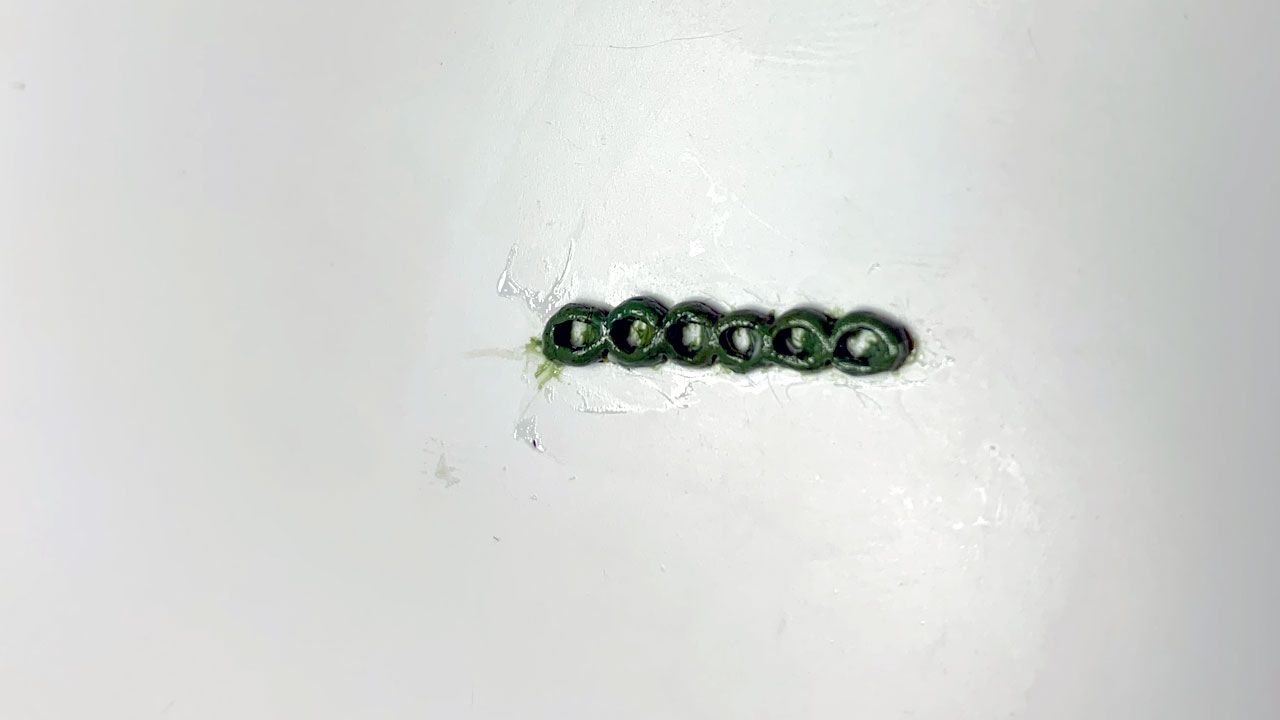
What I like to do after is a bit of smoothing out. I gently go around the outside of the links to smooth that. I then also reaffirm the holes from earlier, just pushing them out a little bit more to define them once the sides are cut in.
At this point the Green Stuff has firmed up a little so it’s easier to widen the holes without moving the entire thing around.
From here you want to let this dry fully to make the next step easier. If you’re impatient then you can proceed – I’ve done it in the past. However, any mistake will ruin everything. So, I suggest letting this dry for a few hours at least. - Roll Out More Green Stuff
Now, you want to start by rolling out another piece of Green Stuff like earlier. Then you place that over the previous chain links.
You’ll also want to press this down a bit over the other chain to stick it down. Again, go lightly to not flatten out the links. - Creating the Final Links
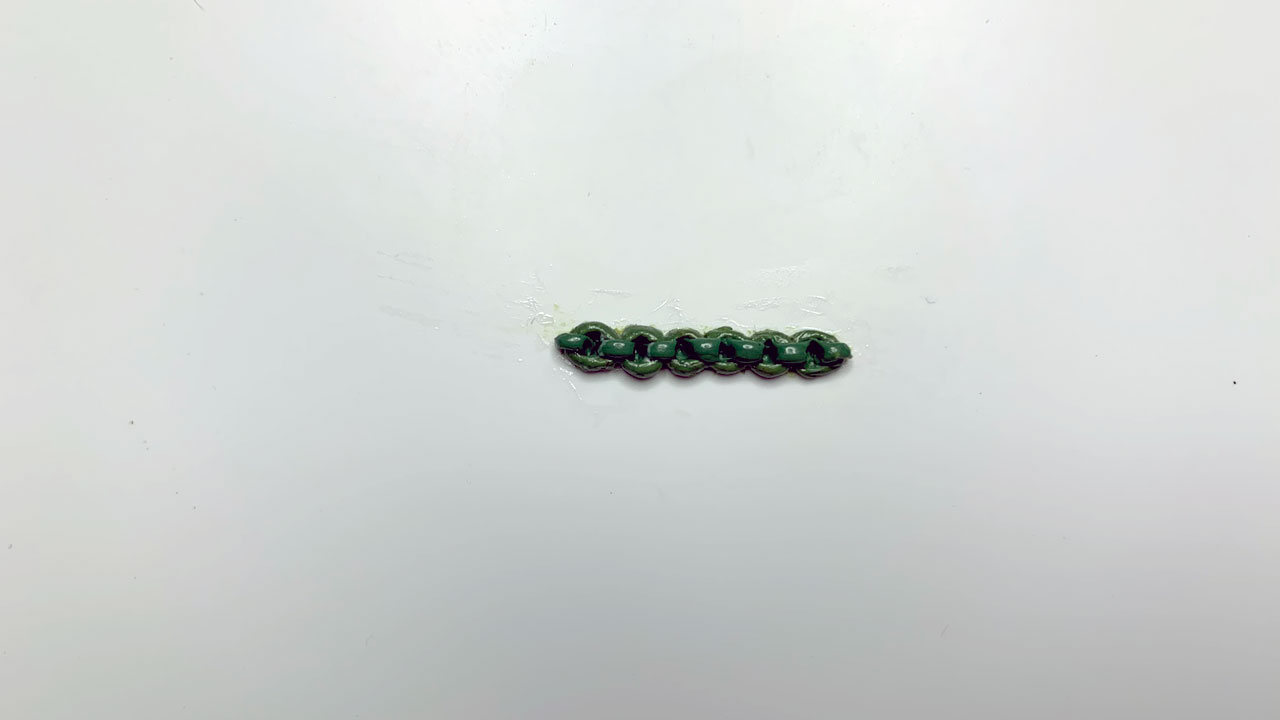
Now the fun part that brings it all together!
Using a sculpting tool you want to push the Green Stuff roll into the holes of the previous chain. This is why letting it dry is useful; it prevents you from mushing the bottom layer.
Push down right in the middle of the hole and it will create two chain links attached to the one underneath.
Do this for every chain link and that’s it!
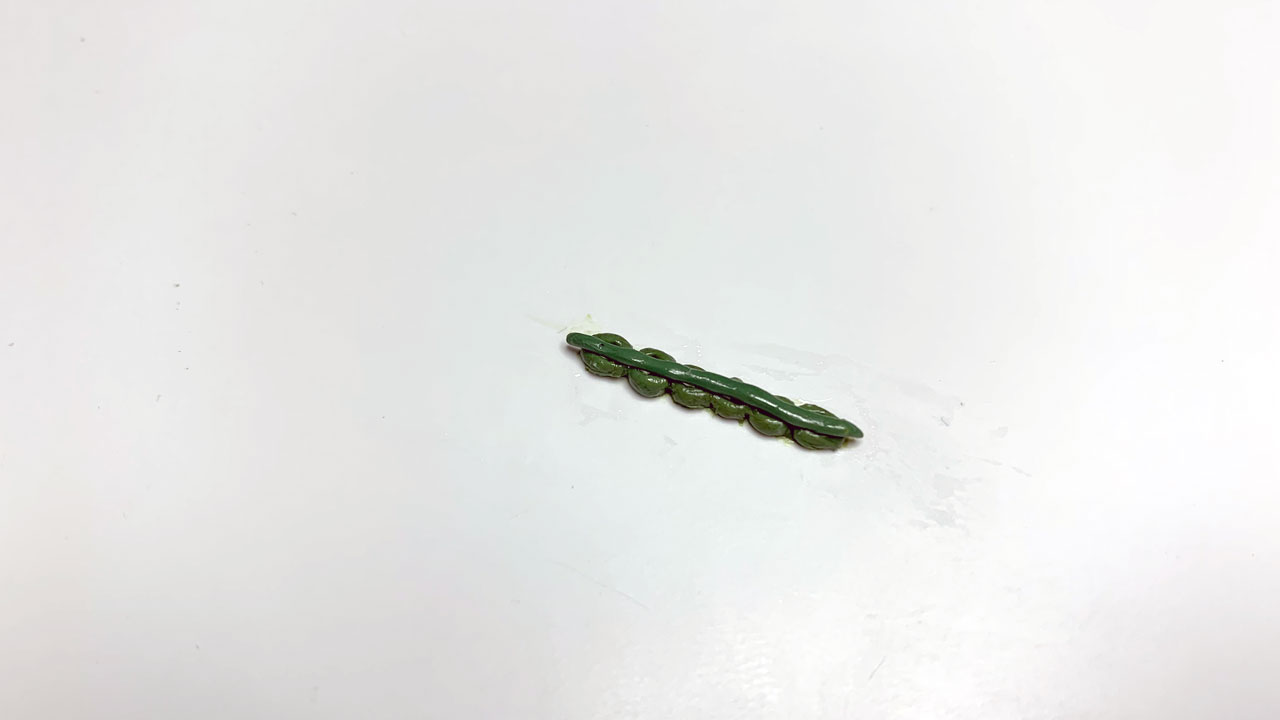
- Final Smoothing
Now, you could work this a bit and smooth everything out. Here’s a last shot where I did a little smoothing out but nothing major.
I could definitely spend some time refining this a bit and making it all perfectly smooth but I just wanted to show you the quick and easy.
Since I did this tutorial on a flat surface, I could let this dry and then peel it up to use later on a miniature.

Sculpting Chains in Practice
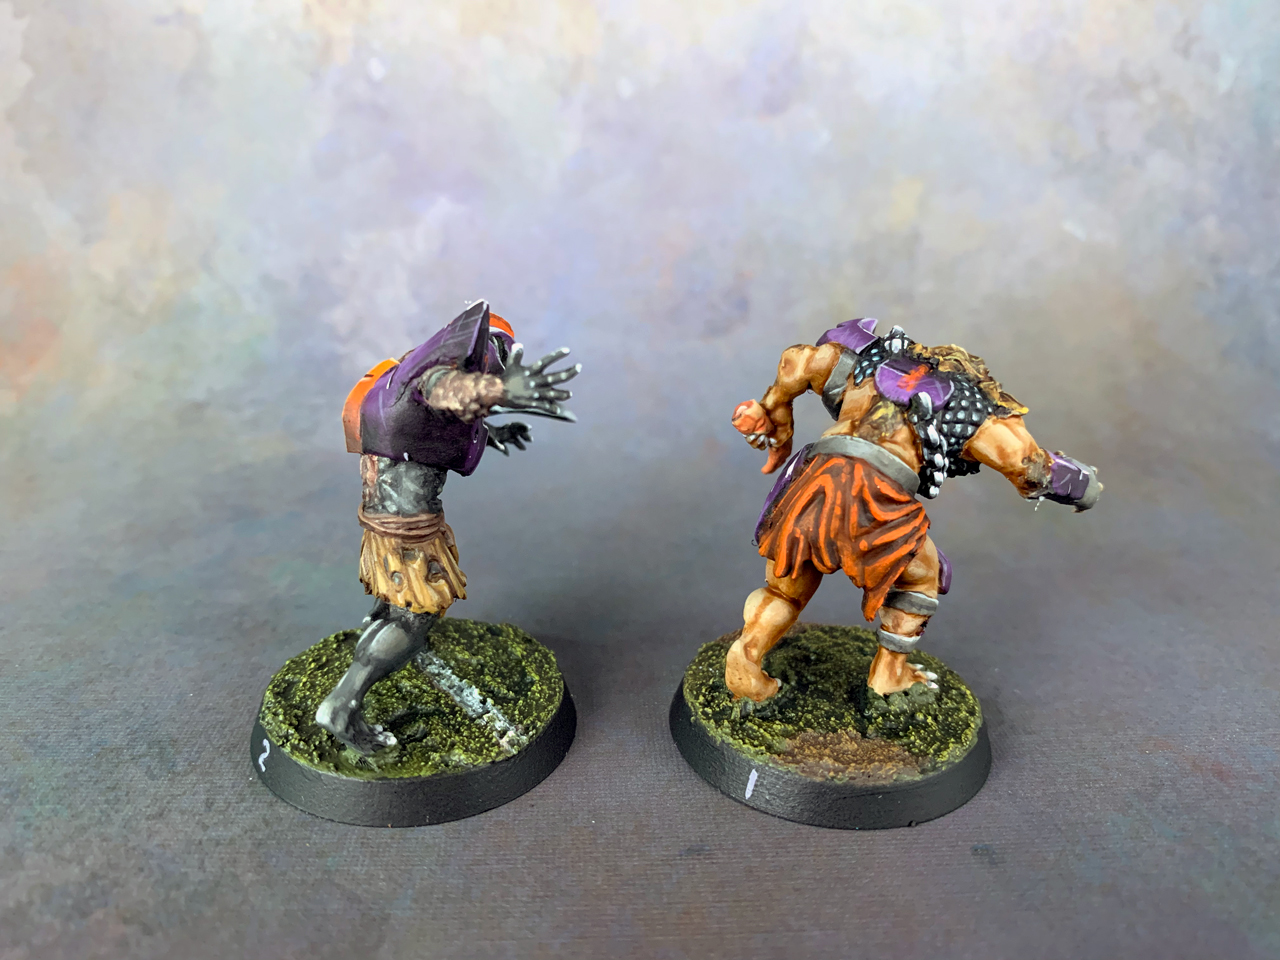
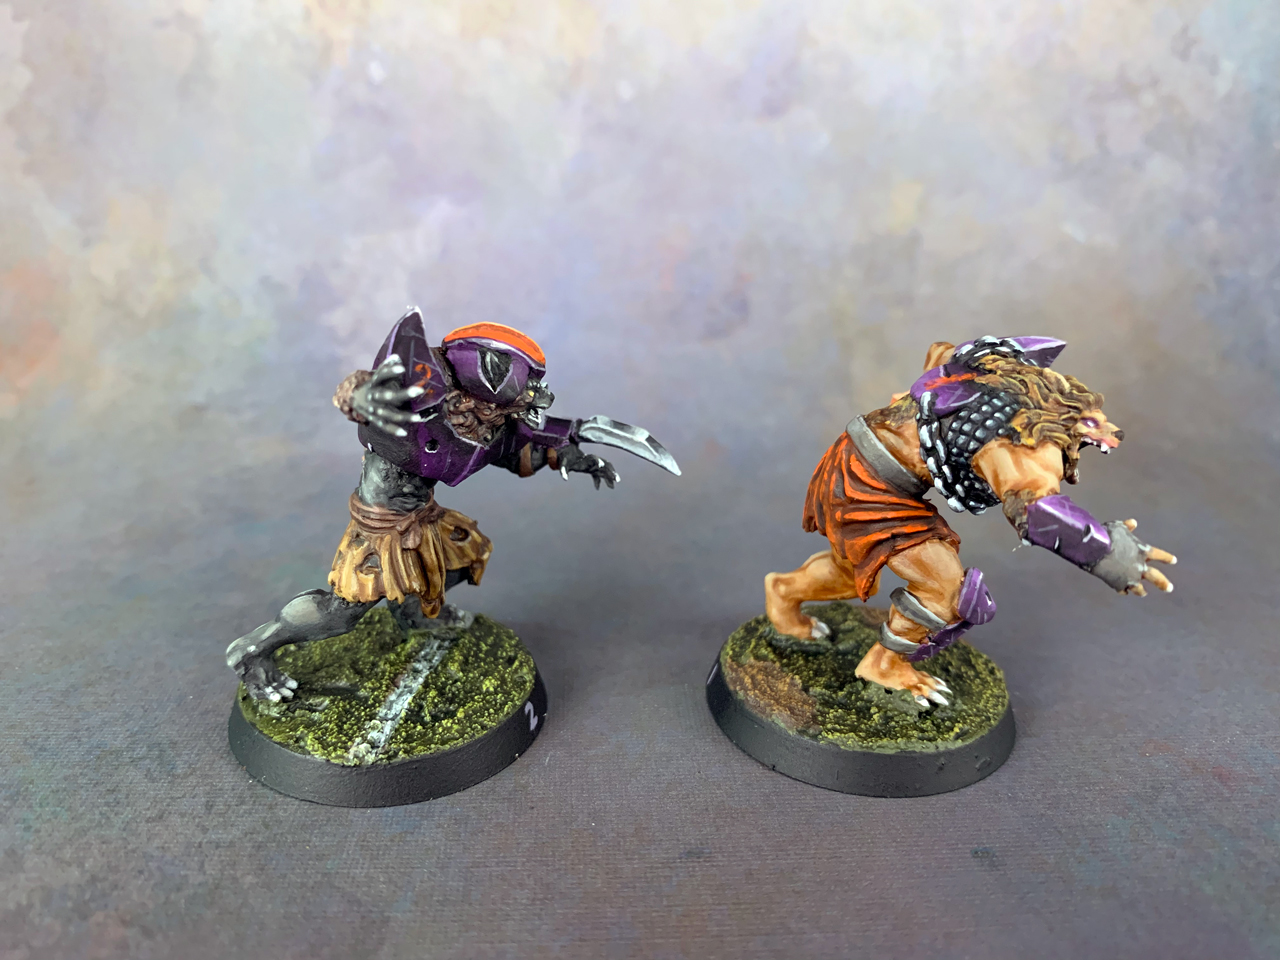
Here’s a Werewolf I’ve been working on for my Necromantic Blood Bowl team. I sculpted a chain on him, which is what gave me the idea for this tutorial, so you can see how it looks on an actual model.
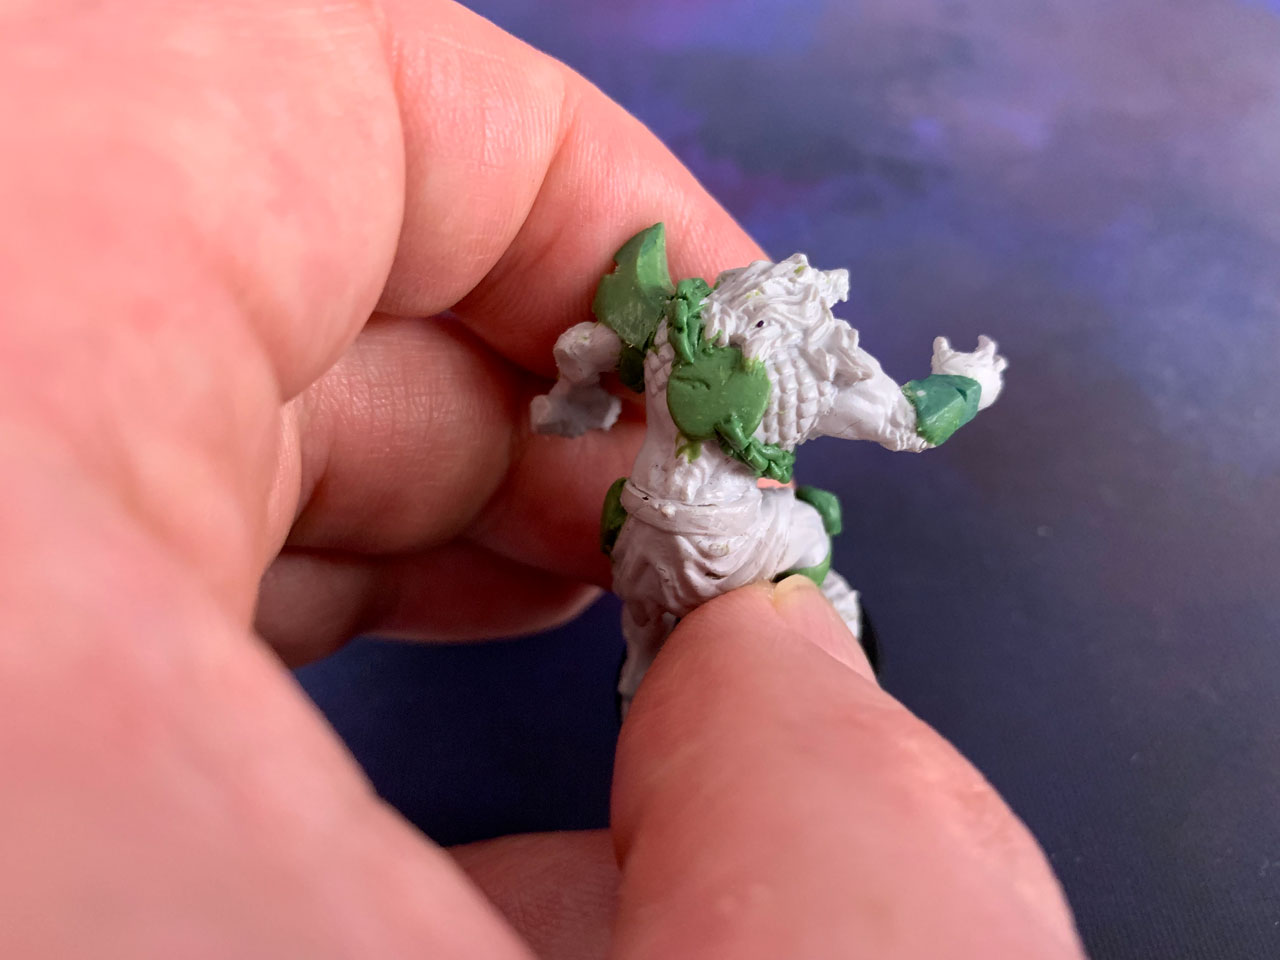

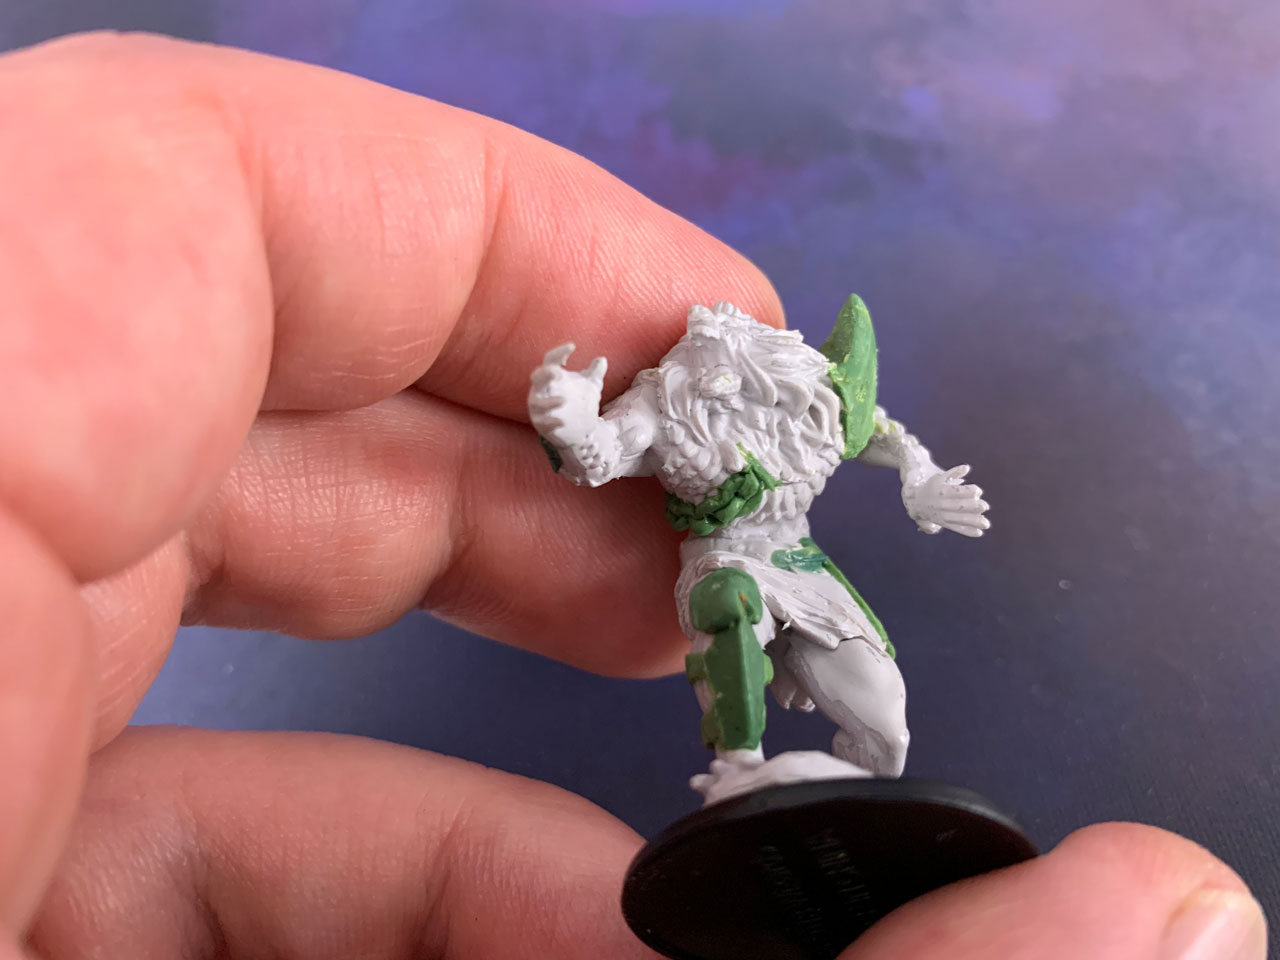
I followed the exact same process given above to sculpt that. For something that only took a few minutes (minus drying time), I think it looks pretty damn good!
I have admittedly only done this a few times, this chain sculpting method, so my results are mediocre. However, with some practice these chains would look even better.
As an aside, if you’d like to see this Werewolf and its partner in a bit more detail then check out this video I did.
Chains All Painted Up
If you’re curious what this looks like when done, then here’s a few shots of the Werewolf painted showing the chain I sculpted.
Conclusion
There you have it, the super easy way to sculpt chains. Obviously this only works when it’s going against the surface of something and not if you want a hanging chain.
I’m not expert at sculpting, but I did do a fully sculpted model for my Undead/Necromantic Blood Bowl team. It was the first time I sculpted a model and it was a lot of fun.
I also recommend checking out Mr. Pink’s videos on sculpting. He’s an amazing sculptor that does a great job making sculpting tutorials. I’ve learned a lot by watching his videos, including the use of Nivea.
Here’s his second video in his series on learning to sculpt. The first one is on the tools, which is well worth a watch too.
Is there anything you struggle with for sculpting? I’m totally open to tutorial ideas.
Hobby Supplies, Tips & Tutorials
Various tutorials and guides for common hobby supplies.
I love painting miniatures and teaching people how to paint. I also really love blogging, so I've combined those two passions here.
- Creative Twilight’s Future and My Thoughts (Feedback Welcomed!) - December 4, 2021
- My Top Gift Ideas for Miniature Painters & Hobbyists + Gifts to Avoid - December 2, 2021
- The Year That Was 2020 and Where I’ve Been - January 17, 2021
That is nice! The one time I tried sculpting chains, they came out alright, but kind of bulky, because I basically made a ton of individual links and then stuck them together. It was for an Ork thing, so it worked reasonably well, but this looks easier and comes out way nicer.
If you wanted a hanging chain, I’ll bet you could get a decent one by waiting until that was completely set, and then flipping it over and repeating Step 2 on the other side.
This really is quick and really only takes a few minutes. Most of the time it comes out smooth as long as you rolled it out smooth but this one fought me the whole way. Murphy’s Law when you’re doing something for show and all. Anyway, it really is just rolling it out and pushing on it a bit.
Good idea on the hanging chain. I’ll give that a shot the next time I need one.
Yeah, Murphy’s Law always kicks in hard when you’re doing something to demonstrate.
That looks deceptively easy, I may have to try it out myself.
Very easy to do and adds a nice detail to any model. Might be worth doing on your Knight project.
That is exactly what I am thinking, help break up some of the more clean lines of the former loyalist knights.