This tutorial will show you how I make simple rubble bases. The intent is to create something that looks like broken concrete or stone slab. Other than the base, there are three things you will need to create this base:
- Vinyl Composite Flooring tile
- Pre-mixed Grout
- Super Glue
Also, if you’d like a list of some basic hobby supplies you should have, then check that out.
How to Make Rubble Bases
For the rubble bases, I start with a 12″x12″ vinyl floor tile that I found at Home Depot for 70 cents. You can also get them at Lowe’s and probably many other hardware stores.
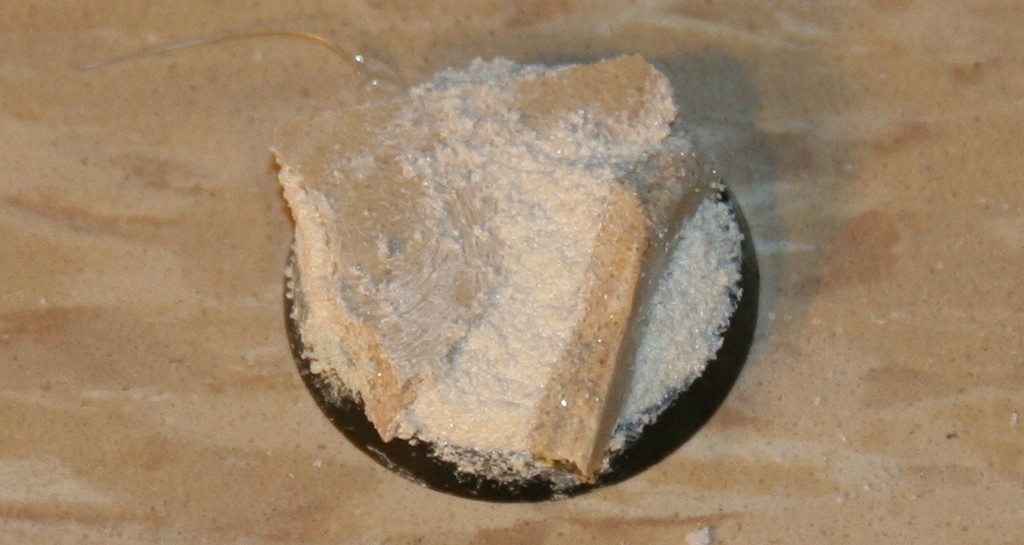
This is not an adhesive backed tile, both side look the same as the one shown. It is soft enough that you can break it up with your hands or a pair of pliers.

You can see that it breaks with nice, uneven edges that look similar to broken concrete slab.
Time needed: 1 hour
Here’s how you make rubble bases with a few simple ingredients.
- Add the Tile to the Base
I attach a couple of pieces to the base using super glue. Sometimes I will line them up so that it looks like a large crack running through a crumbling slab. Sometimes I set pieces at angles or on their sides to represent pieces that have moved around more. You can also put something under one end of a larger piece so that it sits at an angle for a nice, dramatic pose.

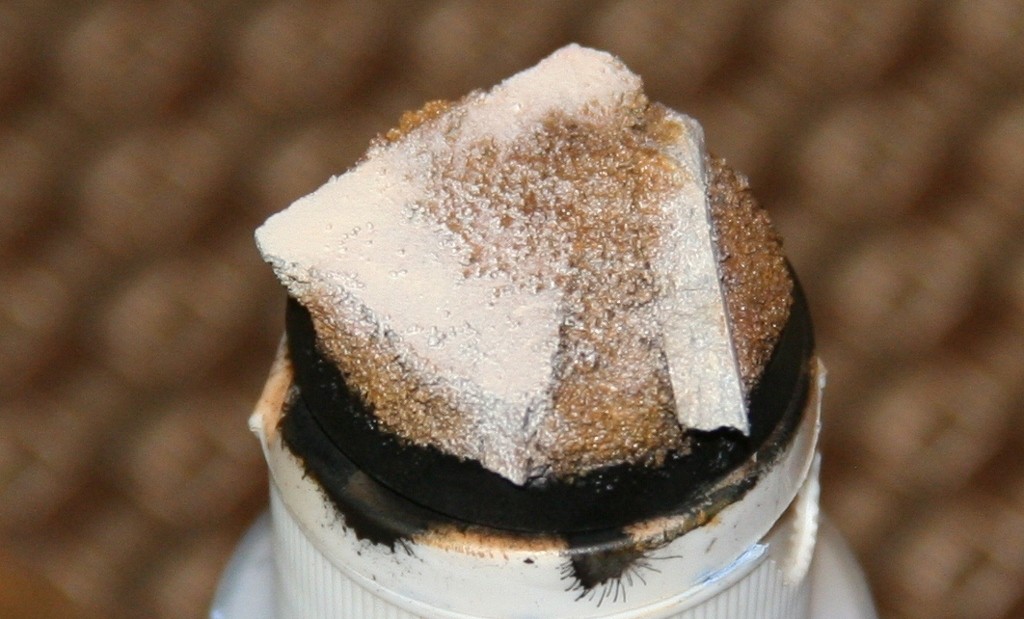
- Apply the Grout
After the glue has dried, I fill in the gaps with some pre-mixed grout. I am using a tub that I found in the garage when I was moving into my current house. The previous owner had done some grout repair in the shower before putting it up for sale. If you don’t feel like buying random houses in hopes of finding leftover grout, you should be able to buy it in pretty much any hardware store for around $10. Look for pre-mixed, sanded grout.
I used a sculpting tool to place and form the grout, but your finger or a popsicle stick could work as well. The grout fills gaps much better than sand and can be built up. You could achieve a similar effect by mixing sand a glue into a paste, but it’s much easier to just take it straight from a tube and get to work!

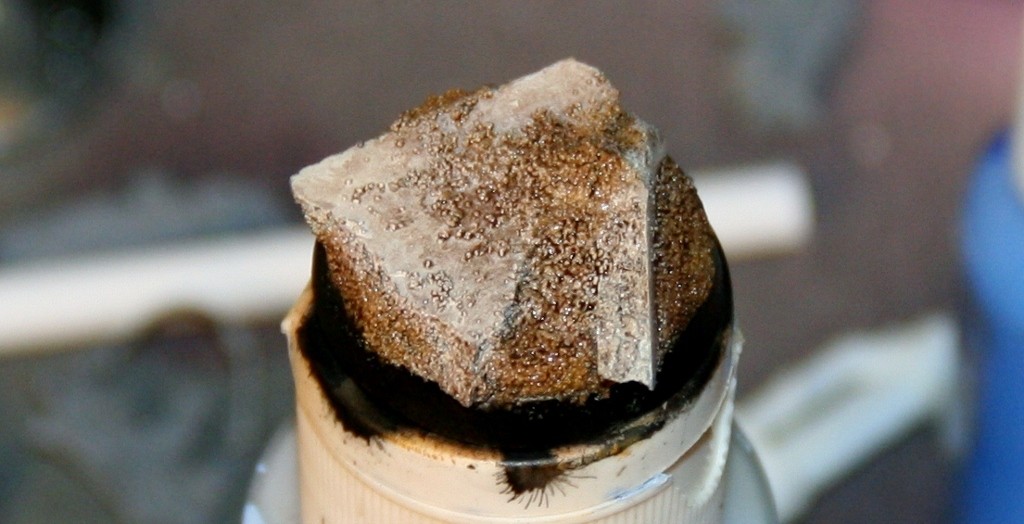
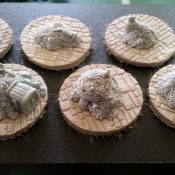
The grout has a nice, sandy texture for rubble bases that paints up nicely. - Painting the Base
After the grout had dried, I primed this base black and painted it with a darker then lighter shade of brown. Then I picked out the slab with a lighter tan.

- Apply a Brown Wash
After that I gave it a simple wash with brown to bring out the texture a little more.

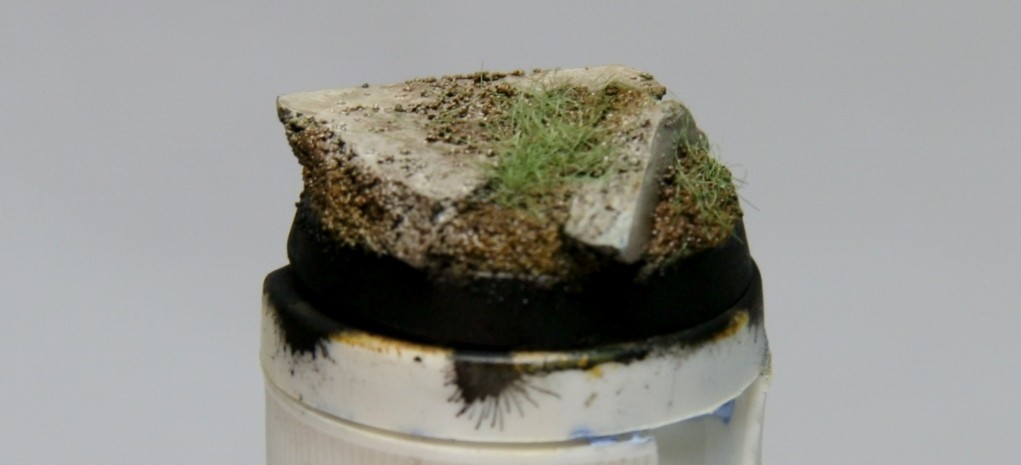
This is enough to give you interesting rubble bases and help your models stand out a bit more. It’s also easy enough that you can crank out a lot of them without killing yourself. - Some Extra Details
If you want it to look like it’s been sitting around for a while, you can add some flock or static grass to represent plant life starting to take hold in the cracks.

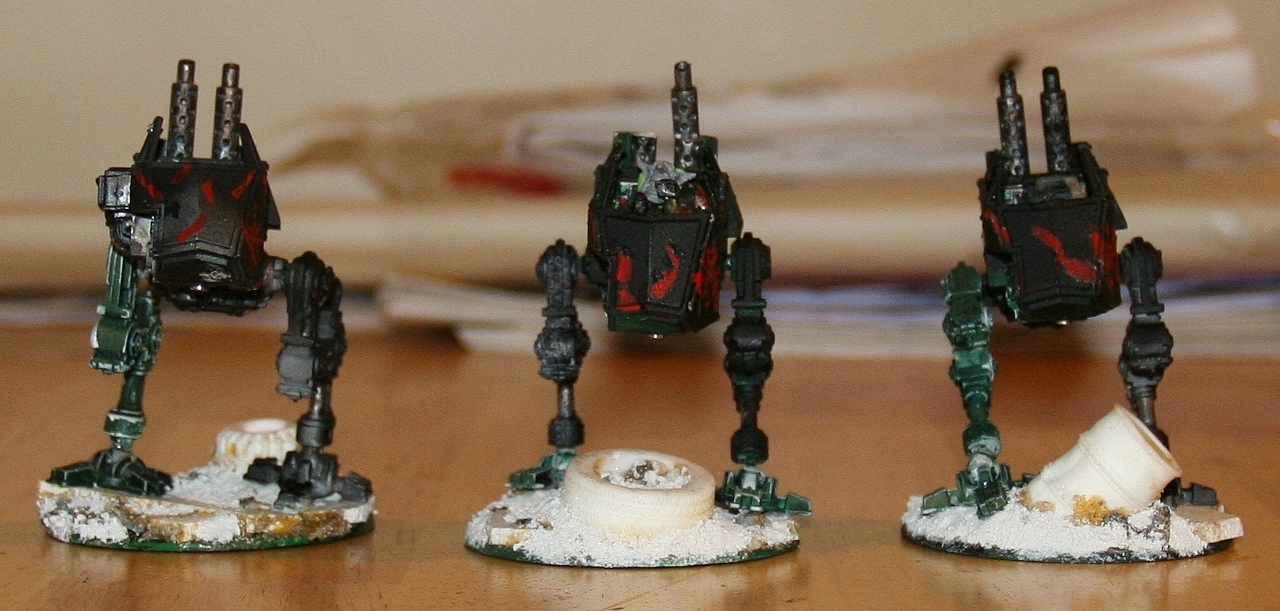
For a little more variety for your rubble bases you can add other bits and use the grout to make them appear partially submerged in the rubble. For the sentinels shown below, I added some larger gravel pieces and bits before putting on the grout.

This is a simple but effective way to add more character to your models, and it’s just one of many techniques you can employ. What’s your favorite basing technique?
Miniature Basing Tutorials
More ways to create unique and interesting basing for your miniatures.
- How to Make a Wargaming Table & Terrain Cheaply & Easily - November 6, 2017
- First Rebel Grot Armored Sentinel Painted! - December 19, 2016
- Assassinorum Execution Force Product Review from Games Workshop - May 6, 2015


Nice tutorial. Quick, simple and effective. Well done.
Thanks. I think it is worth putting a little extra effort into the base, but not too much.
I lol’d at this: ” If you don’t feel like buying random houses in hopes of finding leftover grout, you should be able to buy it in pretty much any hardware store for around $10.”
The paint on both Mars boards at the shop came from cans that were left in my basement when I bought my house.
Good tutorial.
Houses do usually come with some interesting hobby supplies! I’m glad you enjoyed the tutorial.
Great use of cheap and effective material. These types of guides are always insanely useful for the community, as it helps us all save money. Thanks so much!
Thanks! I have learned a lot from online tutorials over the years, so I’m happy to give back to the community what I can. I hope it helps!
Totally making bases now using this technique.
I’m glad you like it!