Liquid Green Stuff is one of the best technical “paints” (not sure what else to call it), that Games Workshop has produced. In the old days when we had to fill in gaps we would mix up traditional Green Stuff, or whatever your preferred medium was, and smash it into the gaps and then work on blending it into the model.
It wasn’t terribly hard if you were working on a tank or something with large flat areas, but if you were working on small, fiddly infantry then it could be a huge pain. For example, these Bloodletters I’m working on I figured would be a great showcase for Liquid Green Stuff and how to use it.
I’ll walk you through the process of filling in gaps with Liquid Green Stuff. There’s a few simple trick to using it to get great results and that’s what I’ll show you.
Disclosure: Some of the links below are affiliate links, meaning, at no additional cost to you, I will earn a commission if you click through and make a purchase. The commission earned helps maintain this site.
The Models
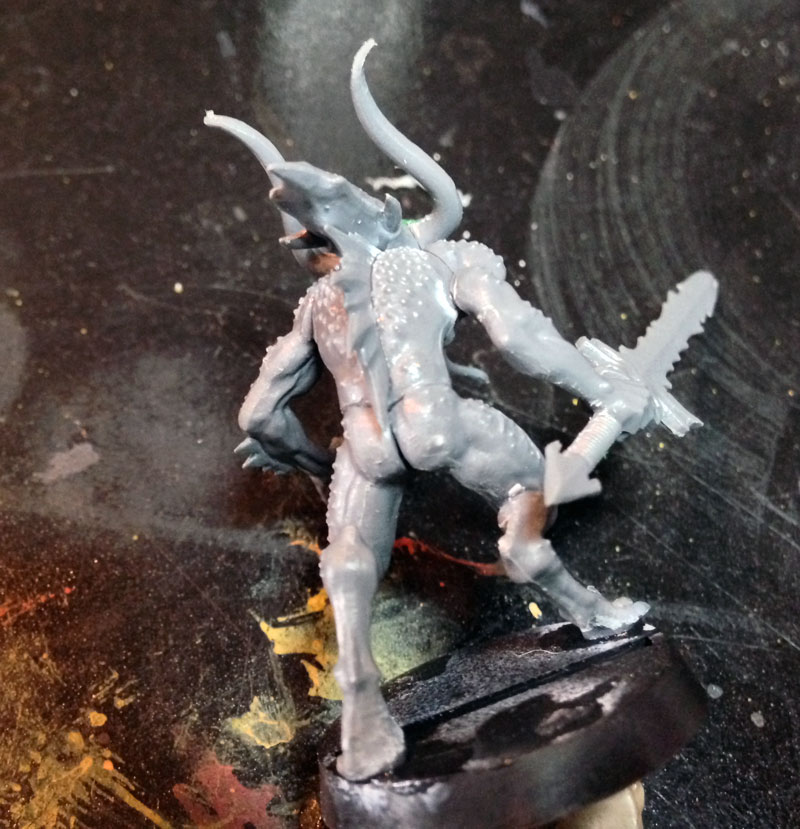
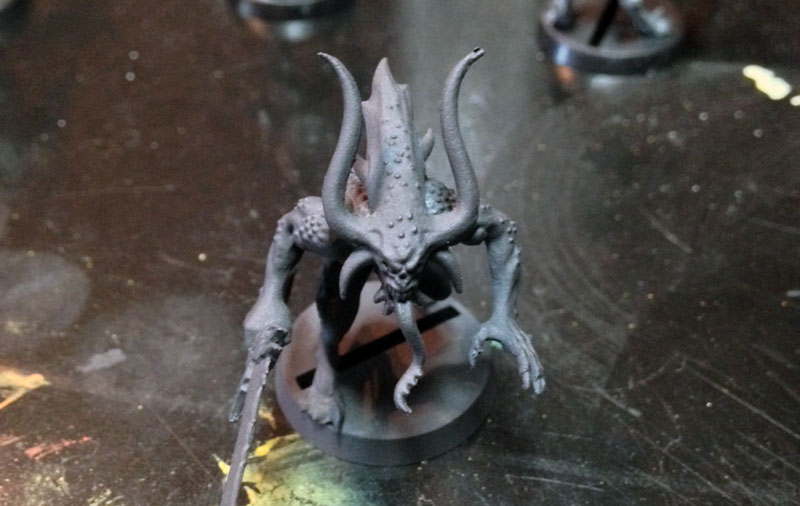
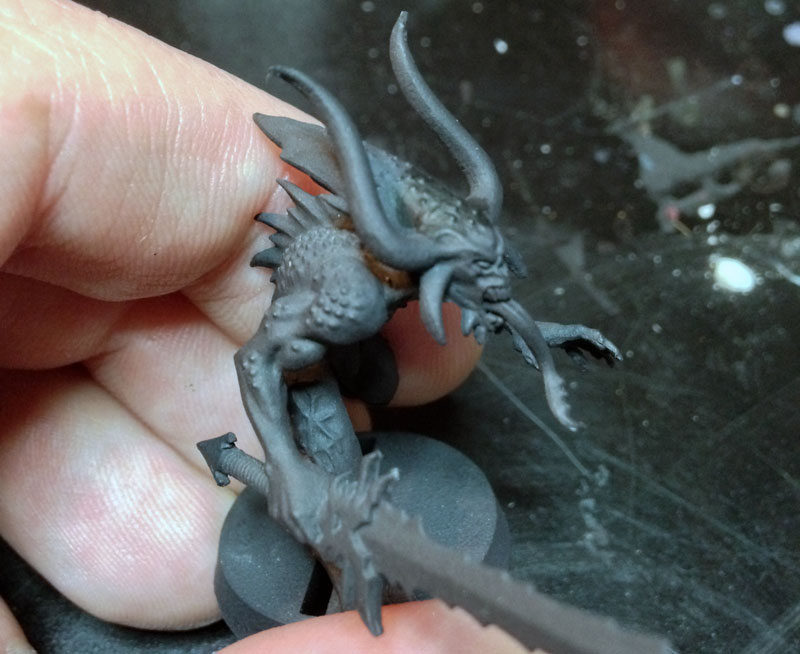
I personally find the Bloodletter kit to be a bit of a chore. There are a lot of parts for something so simple and despite the fact it’s only supposed to go together one way, the fits aren’t always perfect. Here’s a shot of the five Bloodletters I’m working on.
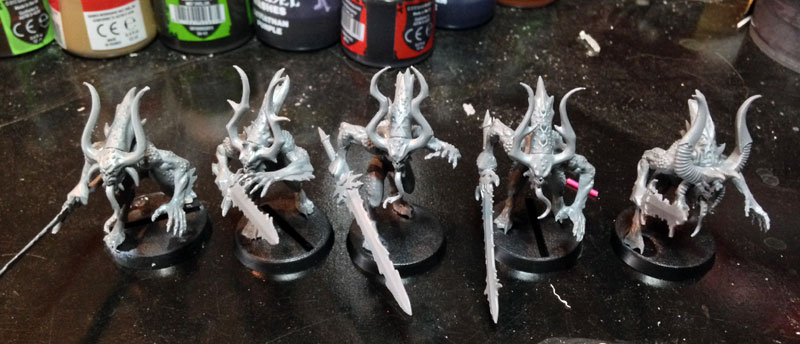
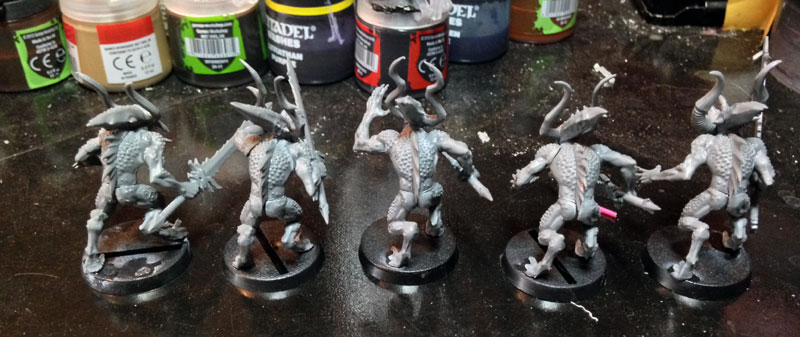
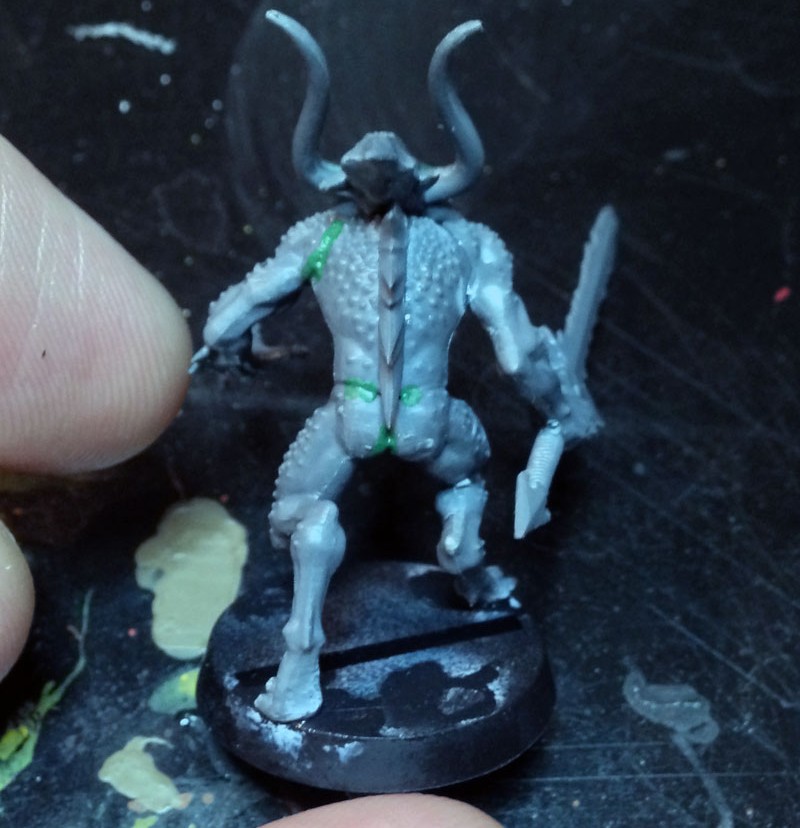
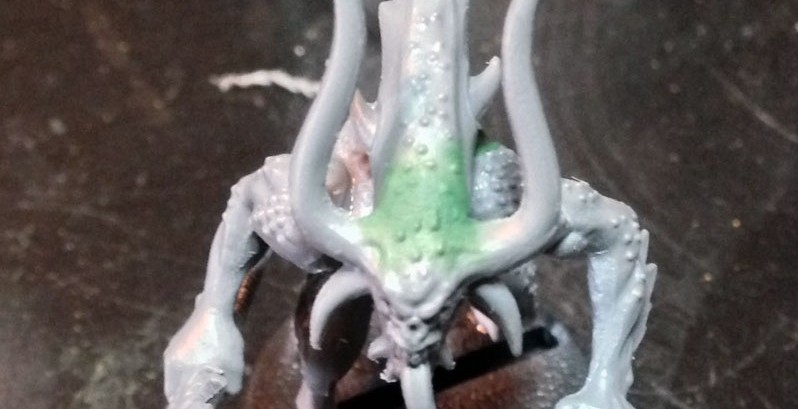
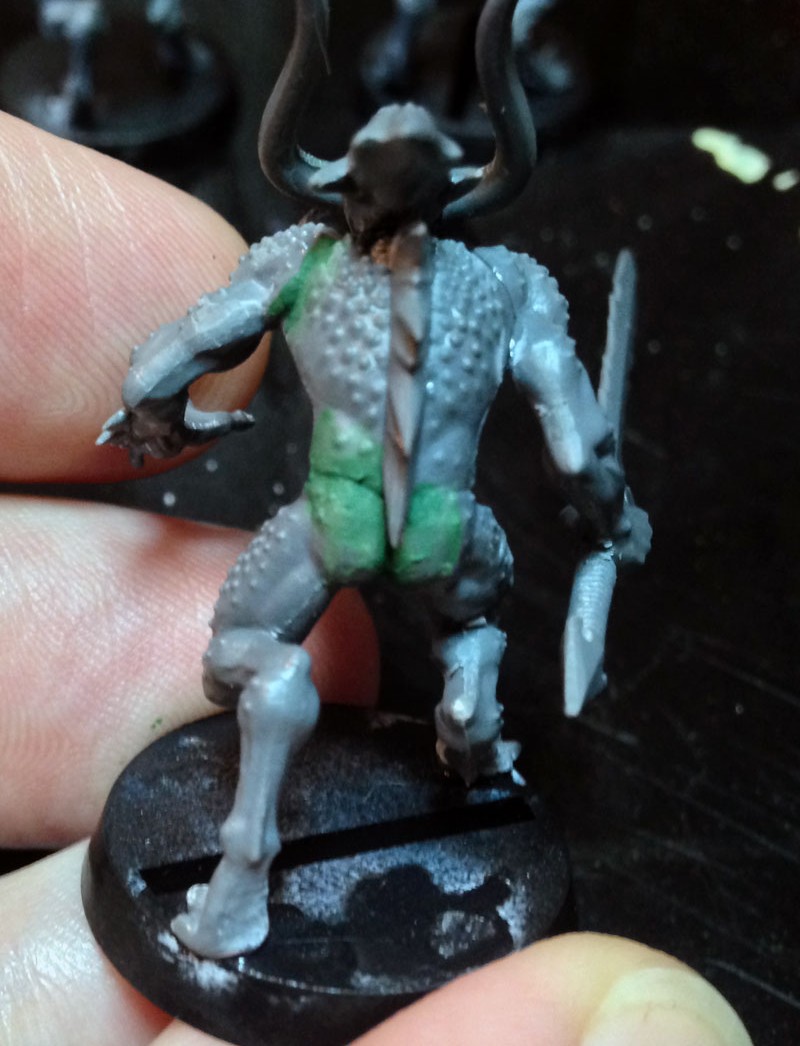
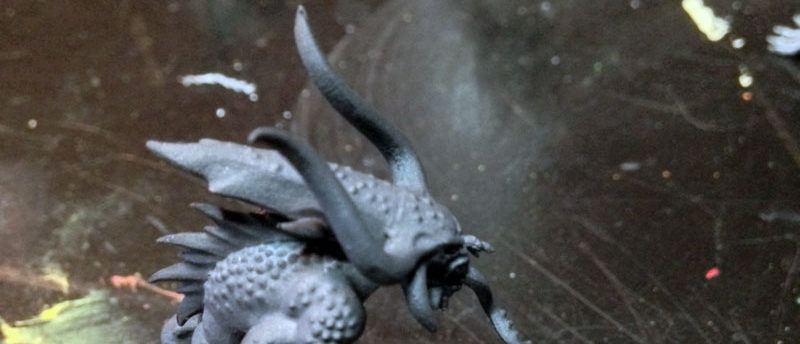
You can see the infamous gaps where the two parts of the head goes together. On the backside you can see some gaps where the legs join the torso. Try as I might, this always happens to me when building these guys. Enter Liquid Green Stuff to fill in those gaps.
Enter Liquid Green Stuff
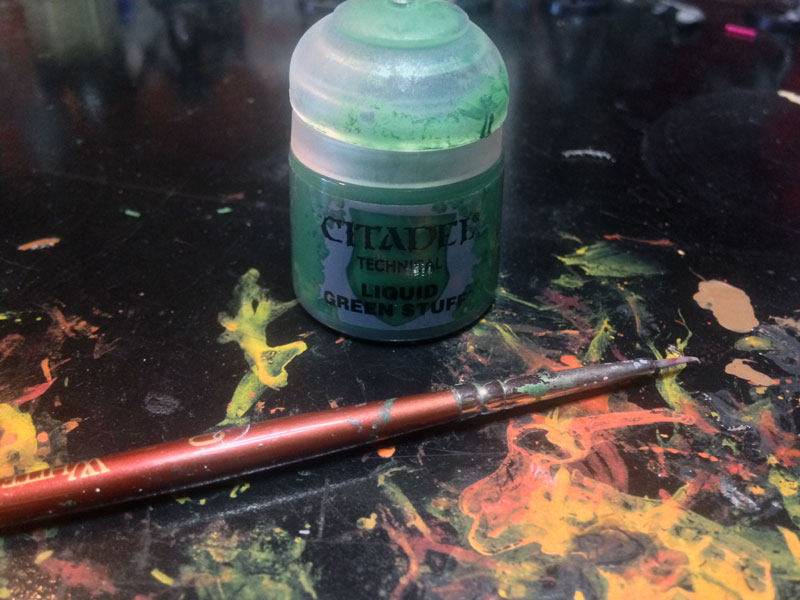
You can pick up Liquid Green Stuff in a local gaming store if they carry the Citadel line of paints, or you can find it online at places like Amazon.
First of all the only thing you need beyond the Liquid Green Stuff is a brush. I would recommend an old brush, but one that’s not all frayed. You want control but you don’t need precision.
Time to Do Some Gap Filling
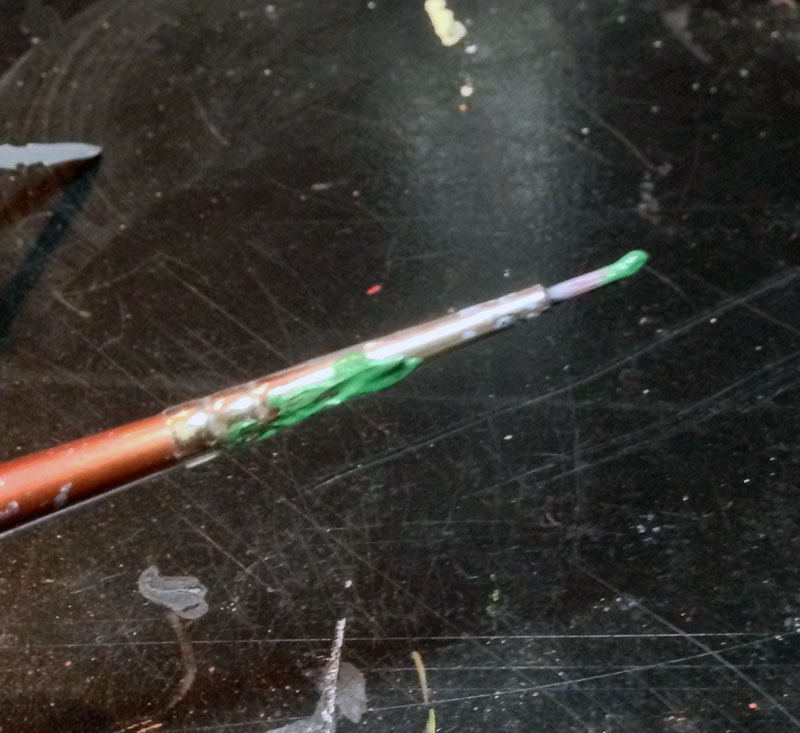
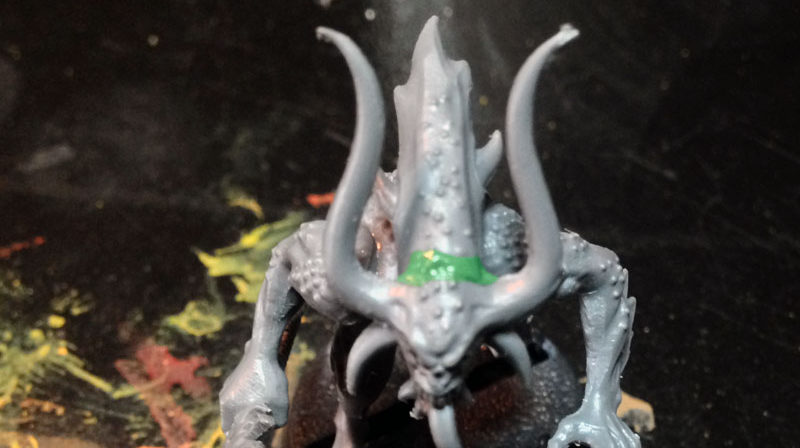
Make sure you’ve shaken up the Liquid Green Stuff, and then dip in your brush. You want to load it up and get a glob on the end, but not too much. You can always get more as you need it, but starting off with too much to begin with can be messy. Plus, you will do this process a few times, and build it up instead of getting it nailed the first time; at least in most cases. The idea is to make this seamless and that’s far easier by building up thinner layers.
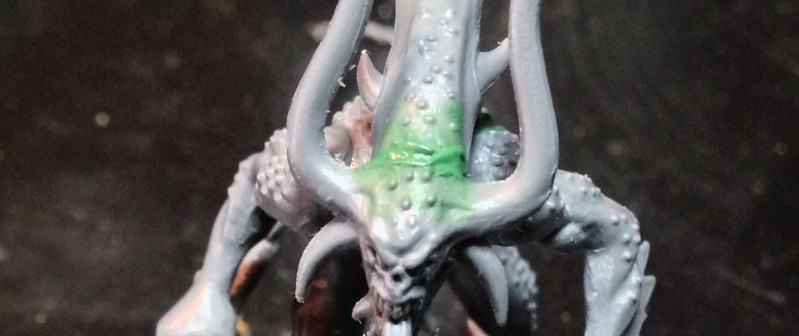
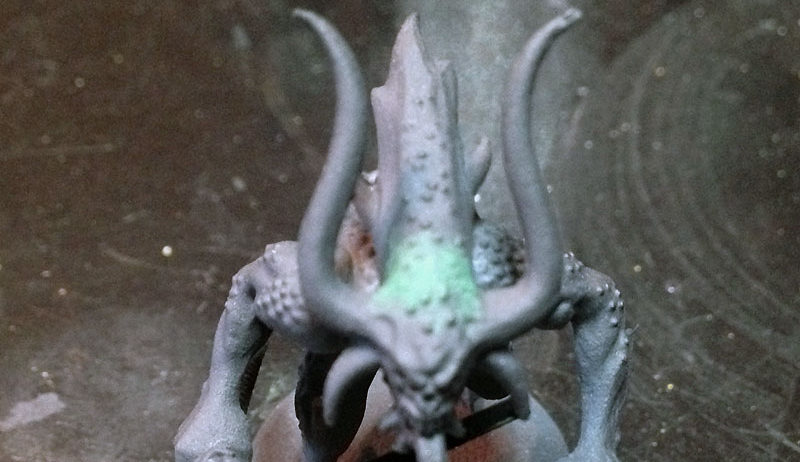
First I glob (super technical term here) the Liquid Green Stuff into the gap. I had to do this a few times to get the gap filled as you see it here.
Smoothing it Out
Once I’m satisfied with that, I then clean off the brush. I wipe off the excess water but don’t thoroughly dry it. I want the brush a bit wet for blending in the Liquid Green Stuff. You don’t want the brush so wet that water runs off it when blending, just moist.
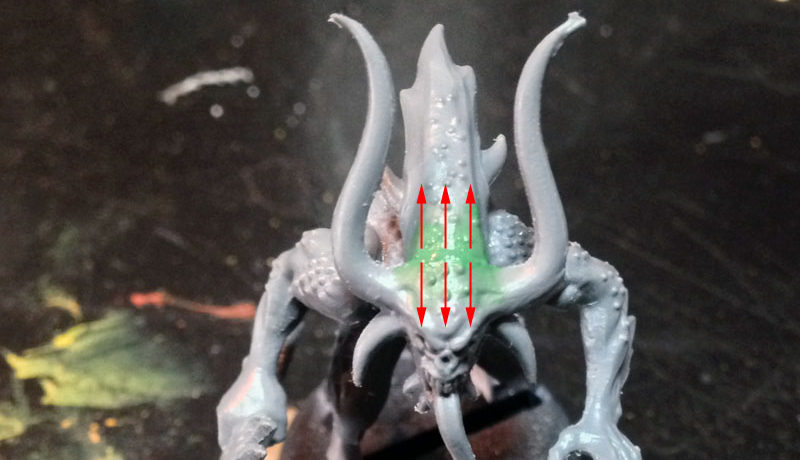
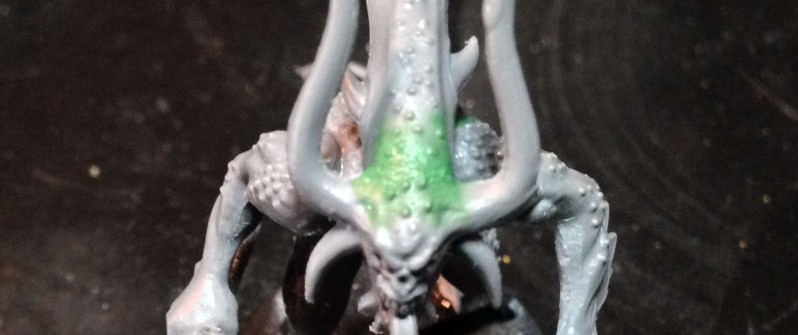
I blend by placing the brush below the gap I filled and pulling down gently. The brush should glide, and not be so firmly on there that it just removes the Liquid Green Stuff.
I do this all along the gap, and with the wet brush it thins out the Liquid Green Stuff the further from the gap. I then do the same above the gap: wet brush, pull from the gap upwards to thin it out.
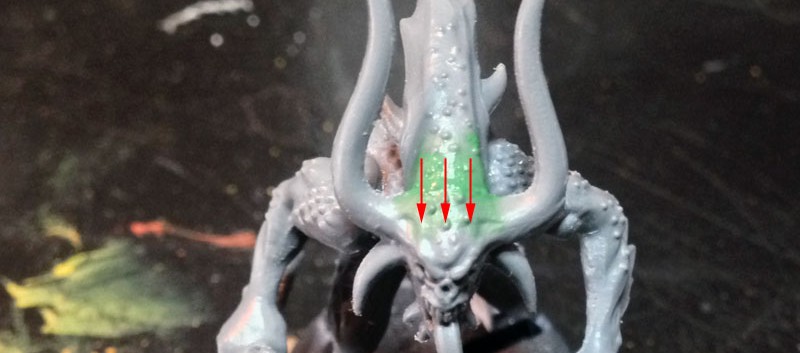
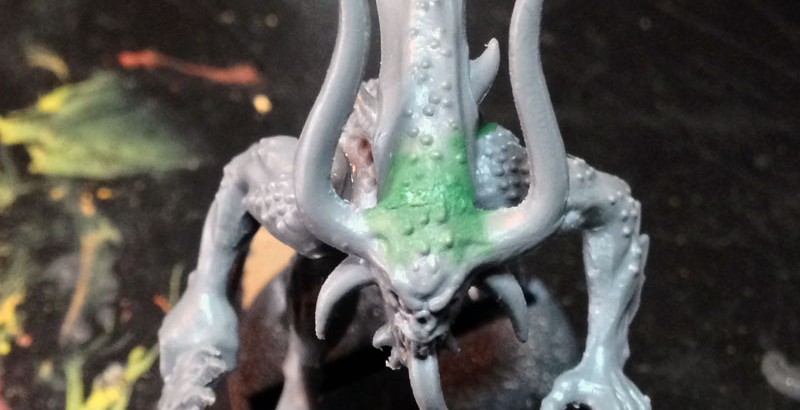
Next I clean up the part over the gap since it’s a bit globbed on there. I start by pulling the brush towards the gap’s high point.
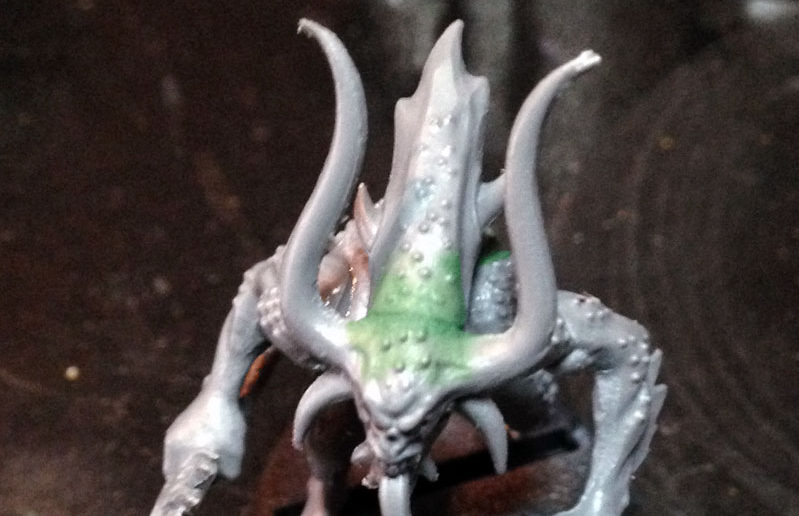
See, the lower half of the head (face), sits a bit higher than the upper half so I want to pull towards that point, and in turn move the excess Liquid Green Stuff into that point. So, I place my wet brush above the gap on the upper half of the head and gently pull down towards the face over the gap.
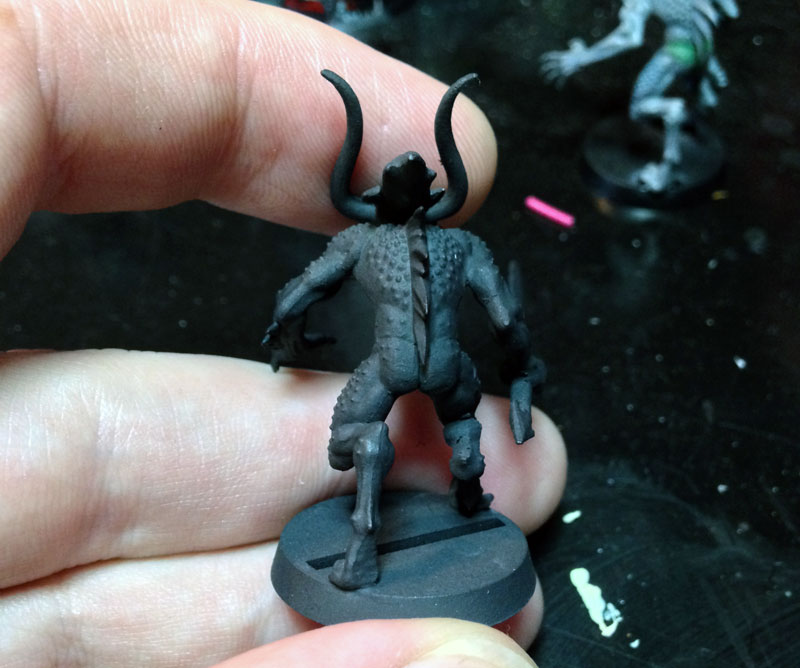
I then went ahead and did the same on the backside.
Aside: It’s worth noting that having a good hobby light helps a lot with this process. When you’re dealing with a crack that’s maybe a millimeter, it’s not easy to tell if you’ve got enough Liquid Green Stuff in there, or maybe too much. Of course, a good light is something you want in general for this hobby too.
Letting it Dry
I’ve found the drying time for Liquid Green Stuff to be only about 5 minutes; sometimes less, depending on how thick you’re putting it on. For what I am doing here, 5 minutes to dry is plenty.
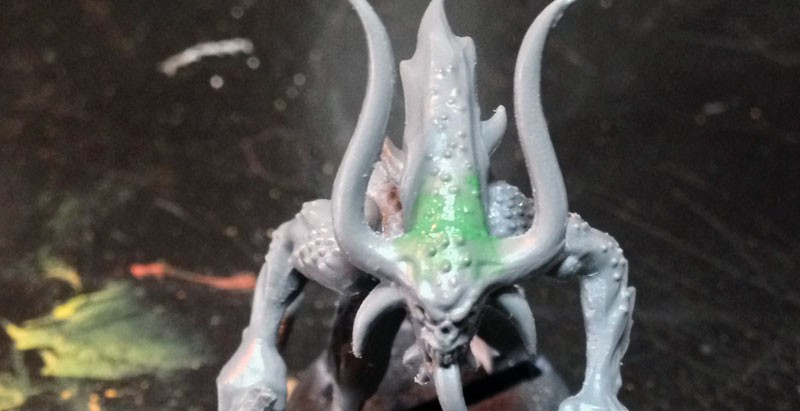
Once the Liquid Green Stuff dries, it looks like this.
Repeat & Rinse
The first layer isn’t bad, but there’s still a gap there, so I go back and repeat everything I already did to build up another layer. The Liquid Green Stuff will shrink some when it dries so this is expected.

After that second layer it’s close, but not quite done, so I do a third layer.
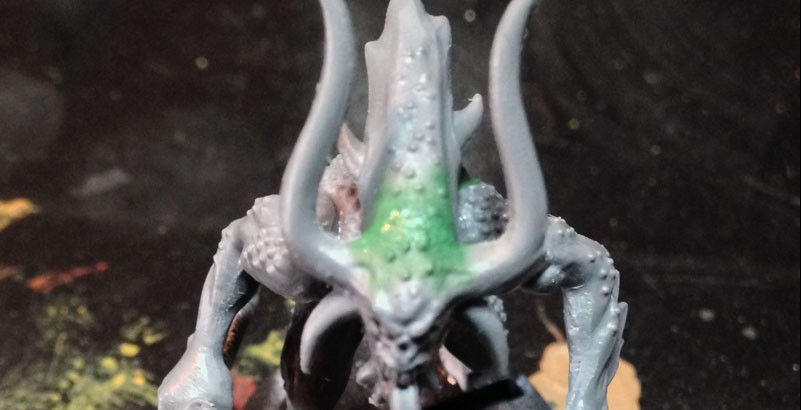
Much better!
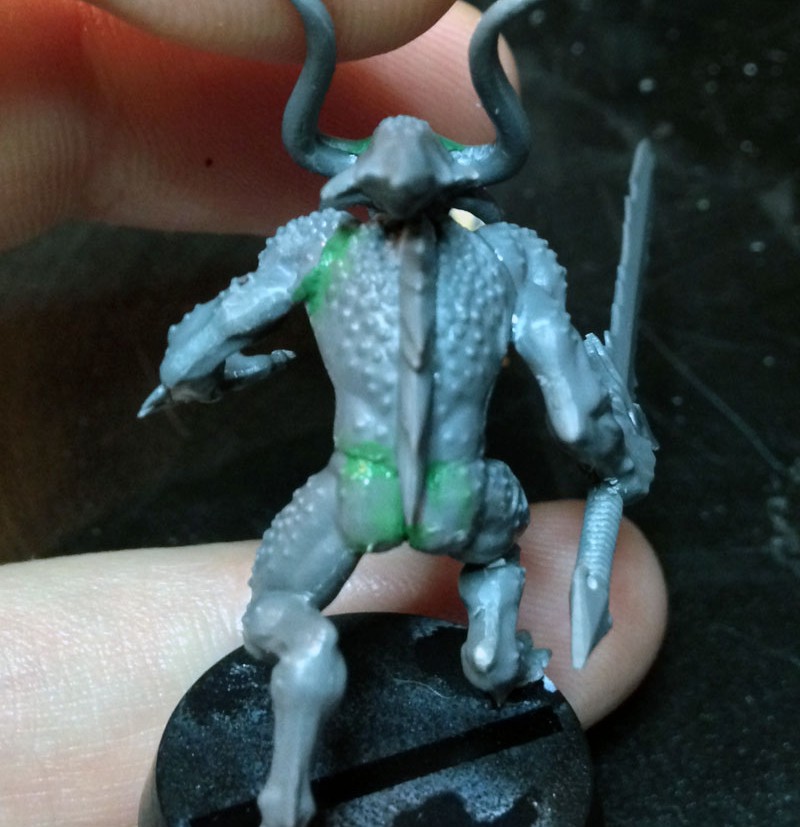
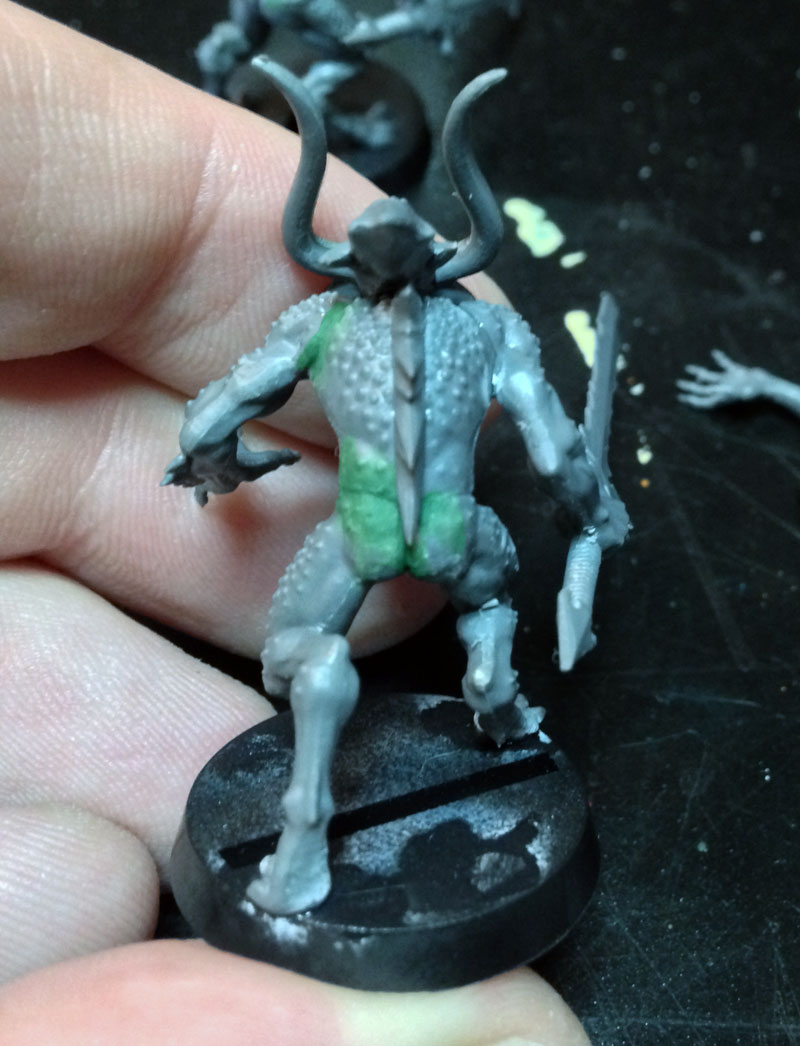
I also had to do three layers on the back until I was happy with it.

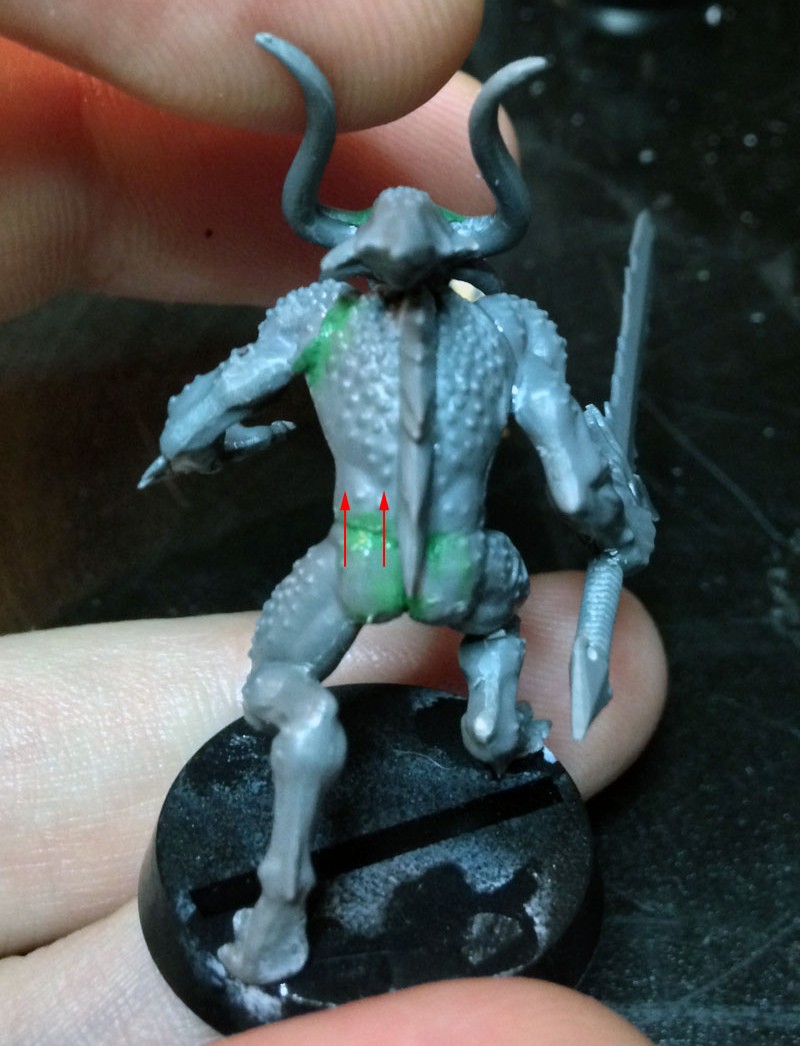
On the back I’m less concerned with a perfect smooth transition from torso to the butt. The model is moving and there will be natural crease there from the movement, so I really just want to make sure the gap itself is filled. The head though, there’s no reason for that gap I was filling so I wanted a much cleaner transition there.
Priming the Model & Fixing Gaps
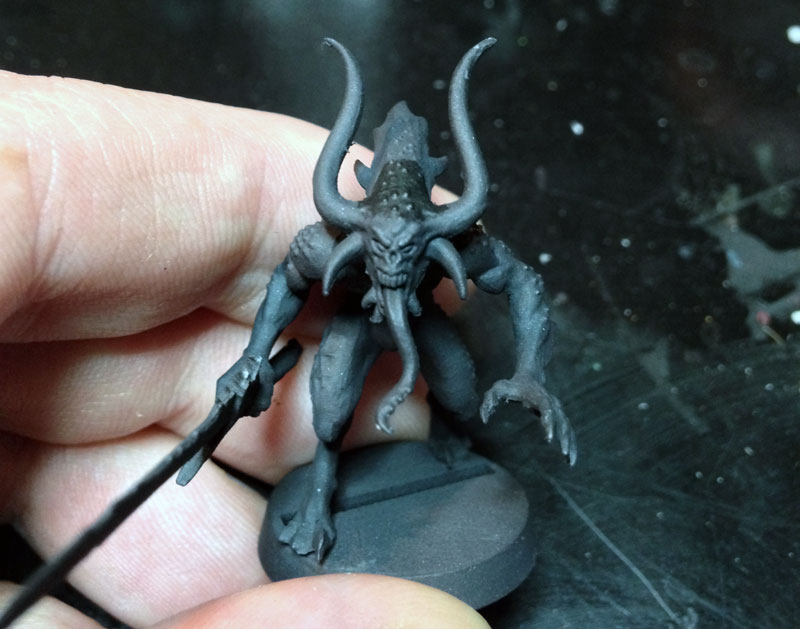
Now that I’m happy with the gap filling it’s time to prime it. Priming the model is where the real test is. Once everything is a single color you can see how the blending worked out.
Here is the Bloodletter primed. It looks pretty good from this angle.
Then when you look at the side you can see a small gap still. Normally this is something I would be OK with. It’s not going to stand out once the model is painted, but for the sake of this tutorial I’ll show you what you can do at this point.
As I’ve been doing, I fill in the gap, smooth it all out and let it dry.
Re-priming the Fix
Since I spray primed the model, I don’t want to re-prime the entire thing for this small section. So, I use a brush on primer for the area. I use the GW Imperial Primer, but any brush on primer will do. All I do now is prime over that area and it’s done.
Here it is complete.
It’s not quite perfect still, and if I were being really picky then I would keep at it. However, like I said, once this guy is all painted up it will look fine. He’s one model in a larger unit of really cheap troops. So, I don’t plan to spend an hour on it. Still, it’s looks way better than when I started.
Pot Drying Out Annoyance
The one big downside to Liquid Green Stuff is that the pot will dry out on your – without fail. It doesn’t matter how well I take care of the pot, how tight I close that lid, it always dries out on me. Generally it takes a few months after opening, so be forewarned.
Conclusion
I know it might seem like a lot of work repeating the process over and over. However, once you get good with it then it only really takes around 30 seconds each layer. If you work on a group of models at once, like the unit I showed, then once you get to the last model then first model will be nearly dried, and you can just run down the line again.
Going the traditional method of Green Stuff gap filling would let you get it right in one sitting. However, then you have a longer dry time before you can prime, and usually excess Green Stuff that gets wasted. Both methods have their use, and I find Liquid Green Stuff to be great for small organic things like this.

Liquid Green Stuff is on my list of must-have hobby supplies. You should see what else is on the list. The article covers everything from the things you really need to have, as well as some upgrades for down the road to make hobbying easier. You may find something you hadn’t thought of.
I also have a great article on the painting supplies you’ll need, seeing as once you got that model prepped it’s time to paint it, right? Same idea as the modeling one where it has the basics you need, and also stuff you don’t need but is damn nice to have.
I hope you found this useful. I enjoy doing these tutorials so if you have something in mind please let me know.
Hobby Supplies, Tips & Tutorials
Various tutorials and guides for common hobby supplies.
I love painting miniatures and teaching people how to paint. I also really love blogging, so I've combined those two passions here.
- Creative Twilight’s Future and My Thoughts (Feedback Welcomed!) - December 4, 2021
- My Top Gift Ideas for Miniature Painters & Hobbyists + Gifts to Avoid - December 2, 2021
- The Year That Was 2020 and Where I’ve Been - January 17, 2021

Yeah this stuff is great, I use it all the time. A good tip I have learnt though is to use poly cement to fill the large gaps, which can be scraped or covered over with the green stuff if needed
So, glue together normally and then use the poly on the gaps after?
Yes. I do it on all join lines and then scrape them down after like I would a mould line. Works great
I’ll have to try that out. Thanks for the tip!
Nice! Another trick for really fine cracks or partial mold lines is to use gloss varnish in the same way pulling against the raised part to blend it with the rest of the area.
Interesting. Wouldn’t have thought of that. I’m finding out all sorts of new tricks.
I had been wondering about liquid green stuff so thanks for that. Another one checked off the list.
Also I must try Nafnafs idea of the poly cement. As I have that but not the liquid GS.
When you get the chance definitely snag some Liquid GS so you have it in your arsenal. We use what we have on hand though and it sounds like a good trick too.
Money has sadly always been a big issue when it comes to my hobby armoury. It is on the list, a long list but on it none the less.
I hear ya. It’s why you rarely see me post about buying and putting together new kits. Thankfully though the Liquid GS is only $4; hard to pass up.
Great tutorial Thor. I don’t think I’ve ever not had a shakable liquid greenstuff. It’s always showed up at my door as a solid block of dry green stuff.
Thanks.
My first pot of it was the same way. Think it started normal but dried out before I really got to using it. We’ll see how long this pot lasts.
This has been my experience as well, the second pot was a bit more liquid and I was able to add airbrush medium to get it workable again
Hmm. I’ll have to try that out.
Mine semi-solidified from lack of use. However, it’s still malleable and more like putty than paint. Still works a treat for filling in gaps though.
I’ve got some like that too. It’s fine for flatter areas and does the trick.
great article Thor, I really liked the idea of pulling the gs away from the seam to even it all out and doing a second coat after priming. There has been many a model that I’ve started painting only to realize my gs didn’t actually fill the gap
Thank you.
Yeah, once you prime it you can really see how well you did. Done the same myself, thought I had it perfect and then had most everything painted and eventually saw the gap wasn’t filled very well.
I will definitely be picking some up for my “water nymph” army to smooth out some of my green stuff work! Awesome article
Thanks and good luck. The beauty of doing an army like that is you just go down the line, one model at a time, and by the time you hit the last the first should be ready for more.
thanks very much! this is helping me work with green stuff right now. :)
Awesome! It’s pretty easy once you’ve done it a few times. Way easier than learning to gap fill the traditional way.
I had some good luck with LGS in certain circumstances, after previously using exclusively the two-part putty. However, the pot drying out after a couple months is a bit of a showstopper. I tend to paint incrementally, so a couple month sabbatical is pretty common. I happened to buy a tube of Valejo liquid putty at the same time I bought the LGS, but liked the LGS better. However, the VLP is still as fluid as ever. It comes in a squeeze tube rather than a pot – my guess is that the airtight tube container is probably just a better approach for a liquid putty. Trying the VLP now – it doesn’t work quite the same way as the LGS so I’ll have to see if I can get used to it / learn how to use it best.
I agree about the drying out. In general GW’s approach to using pots for everything is just not practical. I’ll have to check out the VLP next time I need to do some gap filling.