There are countless techniques and methods for painting battle damage and weathering on your miniatures. I couldn’t begin to cover them all.
I did want to talk about painting battle damage and weathering, the concepts behind it, and show you how I do it. Learning to do battle damage and weathering is a great way to add some detail and life to your miniatures.
Disclosure: Some of the links below are affiliate links, meaning, at no additional cost to you, I will earn a commission if you click through and make a purchase. The commission earned helps maintain this site.
What is Battle Damage & Weathering?
First things first, what’s the difference between battle damage and weathering? Battle damage is what happens to something in combat, during battle, where weathering is the effect of use and time.
So, a tank gets shot and has a huge hole in its armor and the paint is chipped around it – that’s battle damage. The paint in the bed of a truck is worn down from years of carrying things in it – that’s weathering.
They’re both very similar yet distinctly different. Some people will use the terms interchangeably.
When to Use Which?
In terms of painting, you can do one or both, and it’s totally up to you. Let’s say you’re painting a truck that’s been sitting around, not something that would be in combat. That truck is going to have wear and tear on it, worn off paint, scuffs and scratches. It might even have corrosion and rust as well.
In that instance just working with weathering makes perfect sense.
By contrast, you might be painting a tank. That tank, in your mind, just came back from a battle. The tank will also have scuffs and scratches, but it may also have deeper gouges, armor chipping, and holes in the armor.
That tank could be painted with purely battle damage to show its recent combat. However, you could also add weathering to it as well.
Maybe that tank has been fighting in battle after battle, sitting outside in the harsh conditions of war when not fighting, and hasn’t been repaired and painted in countless months. It would have a mix of recent battle damage and some weathering from the climate and inattention.
Ultimately it’s up to you on the approach. I do find mixing it up, weathering and battle damage, is great for selling a truly battleworn miniature.
Also, this is a guide and not the end-all-be-all for painting battle damage and weathering. There’s just too many approaches to cover them all.
How to Paint Battle Damage and Weathering
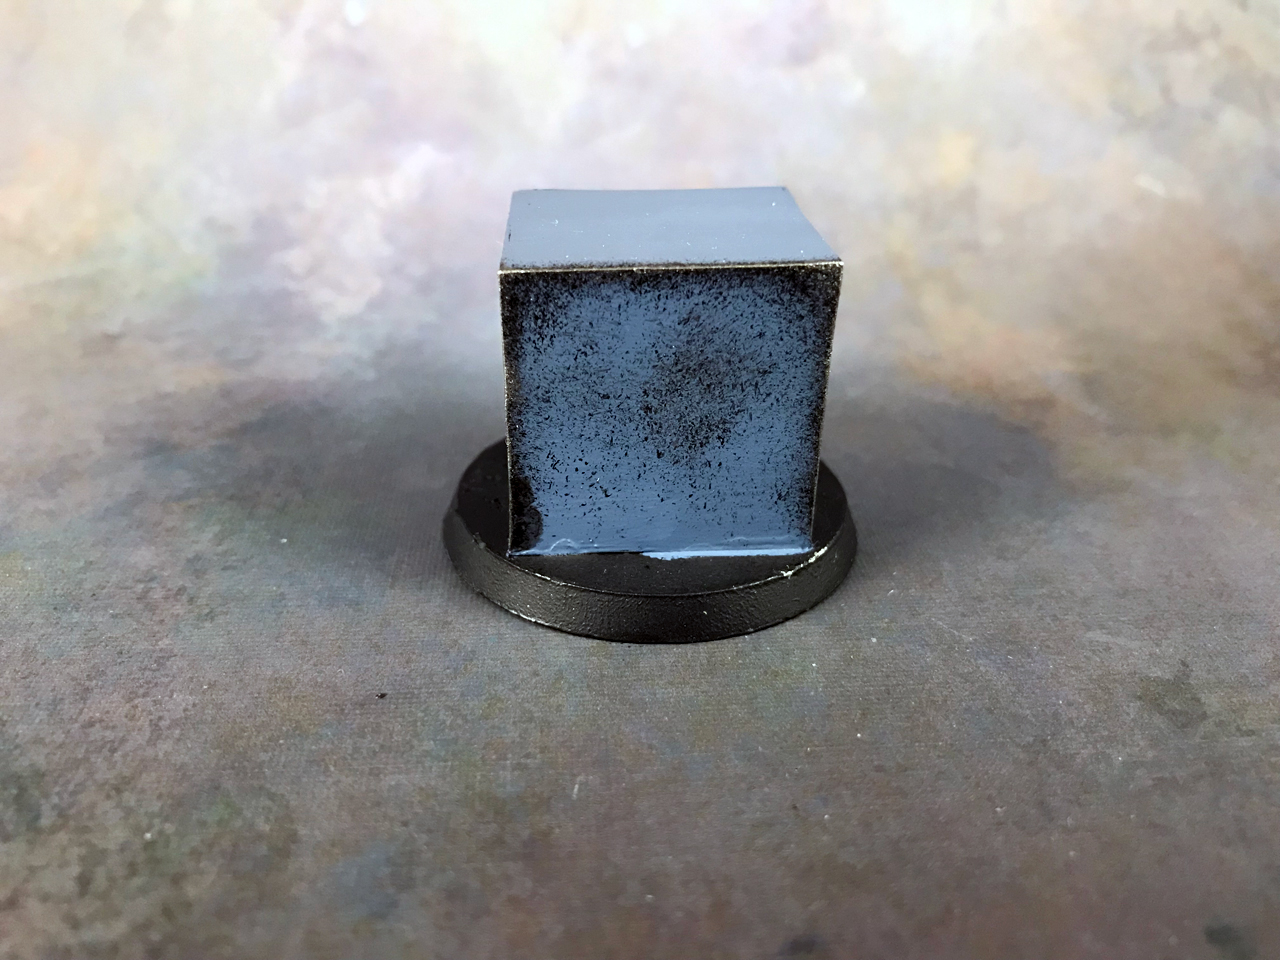
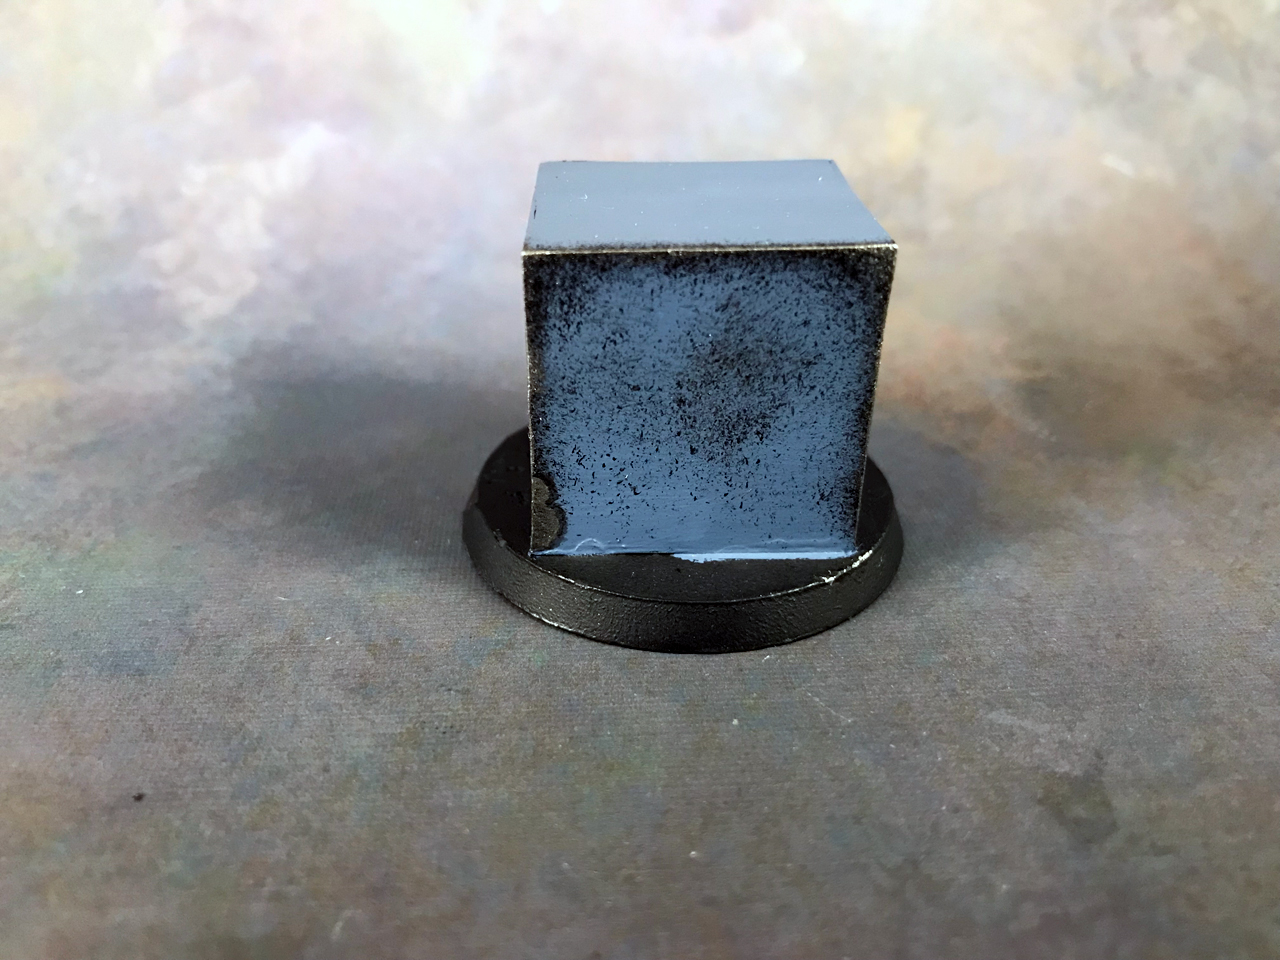
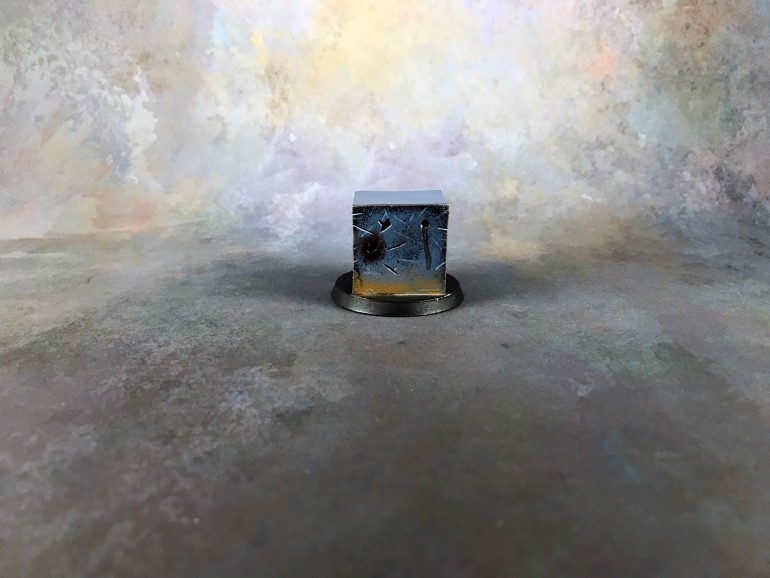
I didn’t have a suitable model to demonstrate on, so I made a box out of plasticard. I’m going to call it Cubie McCuberson!
For the sake of discussion, we’ll say Cubie is a tank and we’re working on the armor.
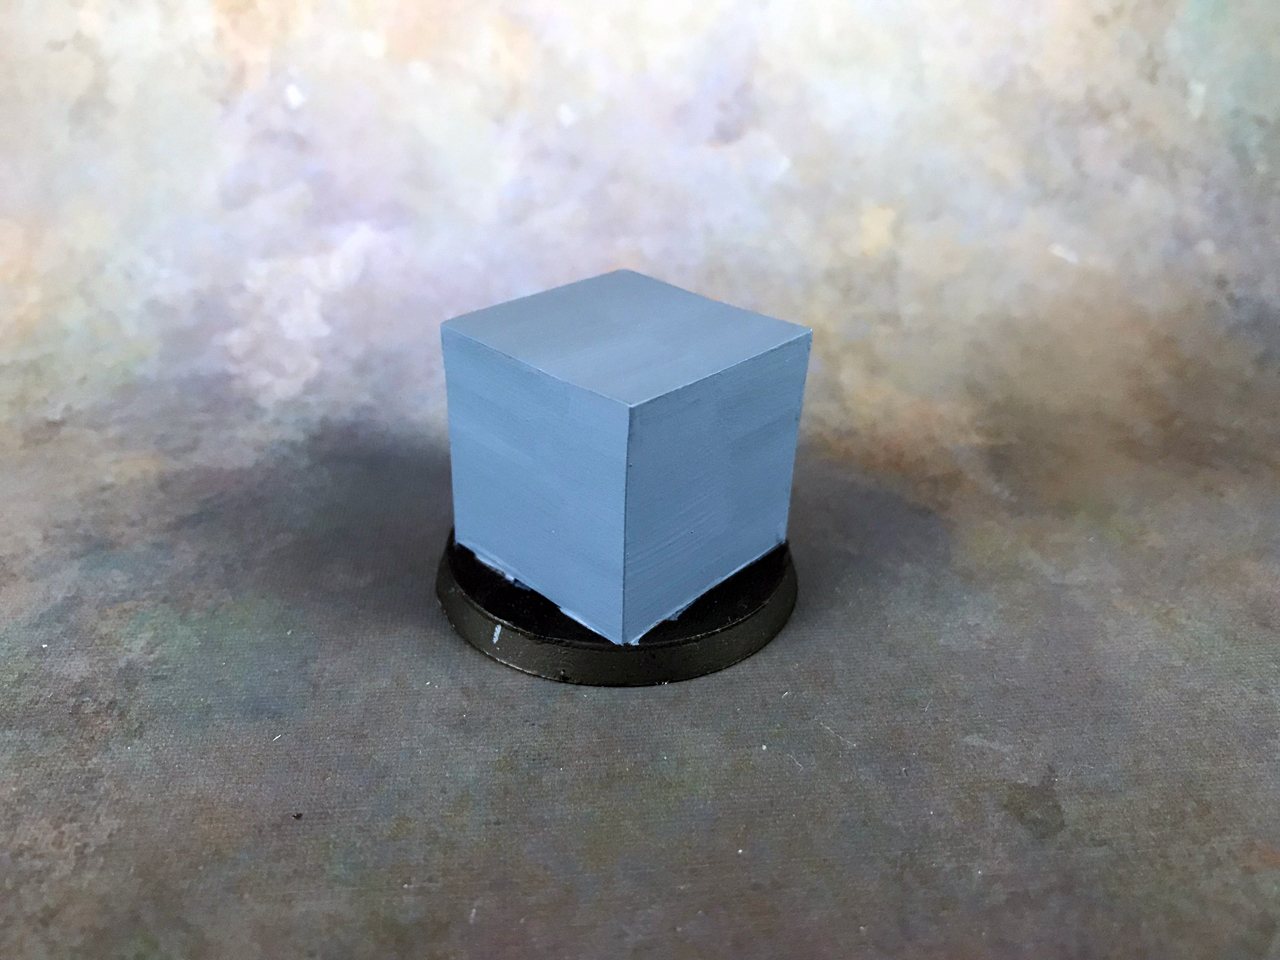
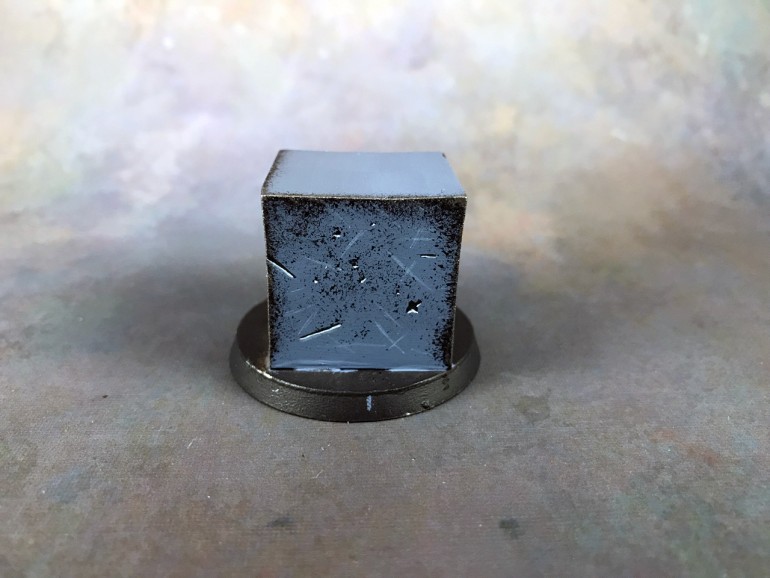
You’re going to want to start off with a base coat on your model.
Notice my base coat isn’t perfectly smooth and even. That’s by choice as I feel it helps sell the effect I’m going for. I painted two thin layers over it very quickly to get that unevenness.
I’m going to break this out into battle damage, weathering, and a combination of the two. That way you can see how they work on their own and together.
As for brushes, you can use anything really. You will want something for dry brushing and/or stippling (covered below), and also something for painting clean, thin lines (scratches and scuffs).
In the past I’ve had good luck with the Citadel Small Layer Brush for doing this. That’s what I used for years.
For the tutorial I’m using the Raphael 8404, Size 2. It’s a larger brush that holds an incredible tip, making is perfect for all-around use. That’s my workhorse brush that I use for almost everything.
The Rule of Cool
I want to preface this by stating that everything you do for battle damage and weathering should be the rule of cool. Meaning, if it looks cool then do it, whatever it is. Don’t get bogged down in trying to do everything realistic.
I used to spend hours, literally hours, working through realistic approaches to battle damage and weathering in my mind. It was exhausting.
Eventually I let go of trying to get everything right and just focused on what looked good. When I started doing that then I started having fun with it.
So, what you see below may not be the most realistic approaches you’ll find, but I think they look good.
Painting Battle Damage
This will walk you through the entire process of painting battle damage but broken out into segments.
Scuffs & Scratches
Scratches are what you’ll see the most for battle damage by other painters. It’s easy to do and effectively sells the concept. What you rarely see though are scuffs or light scratches. Many painters just don’t paint them.
A scratch would be a deep cut in the metal, something with depth. I use the term scratch, but it would also cover say a slice in metal from a weapon.
A scuff would be something that didn’t break the paint. We’ve all seen them on our cars, those surface scratches that break through the sealer on the car but not the paint underneath.
By utilizing both of these you can really sell some serious battle damage.
This is the easiest thing you can paint and it’s also the foundation for scratches.
Take whatever would be a highlight color for your base coat and apply thin lines to your models in random directions. I like to thin this color out a little so it’s semi-transparent when it goes on.
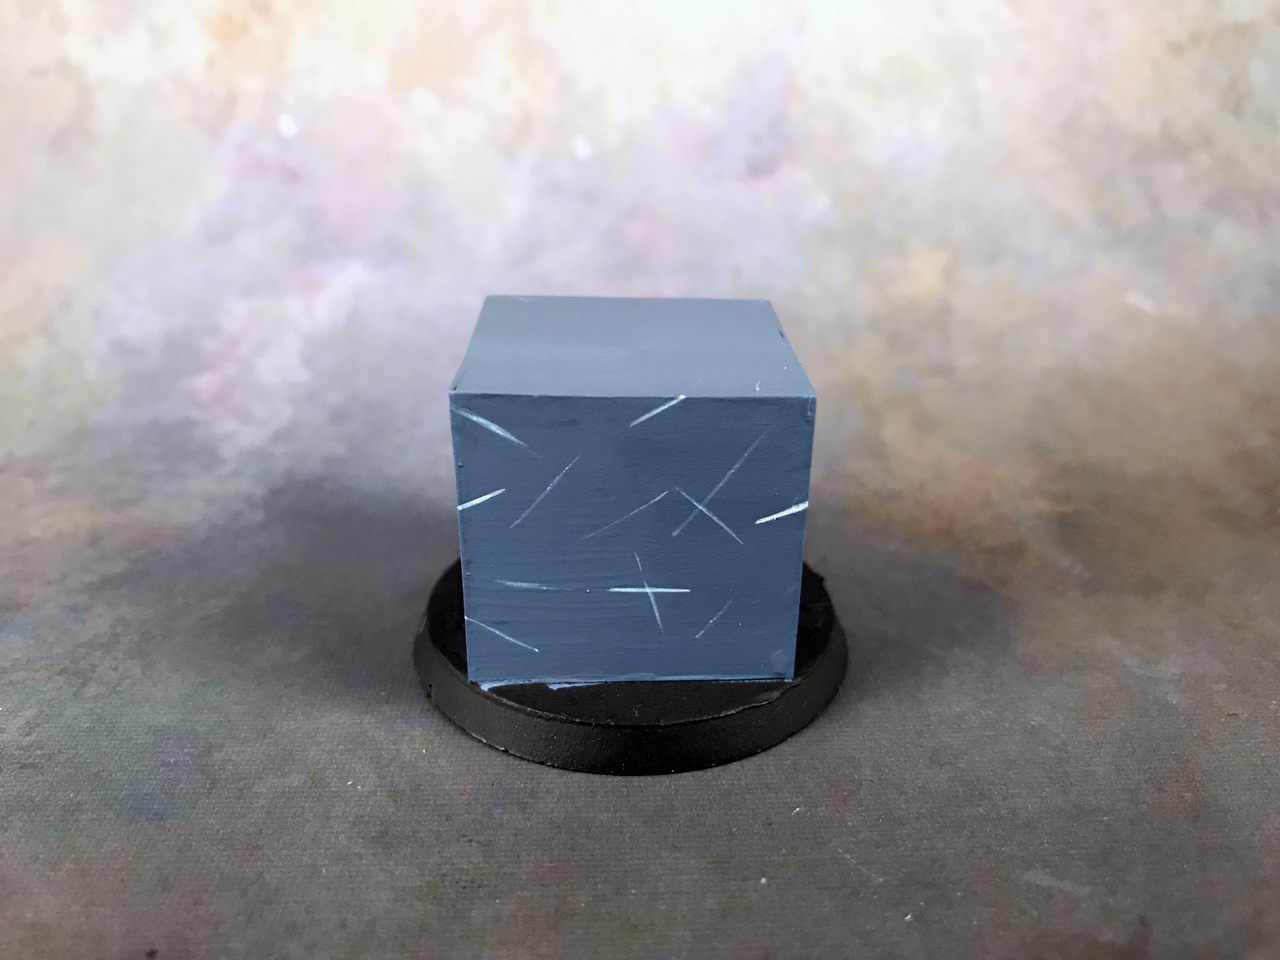
Now we’re going to turn some of these scuffs into scratches.
Notice how some of those scuffs are pretty bright? Those are the ones that will become scratches and to make it a scratch only requires one step.
All I do is take black and paint a thin line above the highlight.

In 2 steps I now have scuffs and scratches!
The reason the black line goes above the highlight is that I’m envisioning the light from above. So, if the light is above and shining down then the highlight will be at the bottom where the light strikes the lip of the scratch.
If your light source is coming from a different direction then you’d highlight opposite whatever that lightsource is.
Now, I don’t recommend using black for all colors that need scratches. I used black in this instance because the color I’m using is relatively dark to begin with.
However, if Cubey were red, yellow, or orange then I would use a very dark brown instead of a black. Basically, I’d use the darkest version of a color I could instead of black on brighter colors.
The reason being that the contrast of black scratches on yellow (for example) tends to be a bit too glaring. Ultimately though it’s a matter of person preference, but it’s food for thought on approach.
Also, sometimes I will use a different color for scuffs and scratches. Scuffs tend to be lighter compared to a scratch, as a scratch is catching the light and reflecting.
So, when I’m putting more time into my damage I’ll use a shade lighter than my base coat for the scuffs. In the above picture I’m two shades brighter. Then when I highlight my scratches I’ll go a shade brighter than that to sell the effect of the scratch by contrast to the scuff.
Holes, Gouges, and Chipped Paint
We’re going to add a few holes/gouges to the armor. This is done easily by drawing in the holes and/or gouges with your darkest shade color; black in my instance.
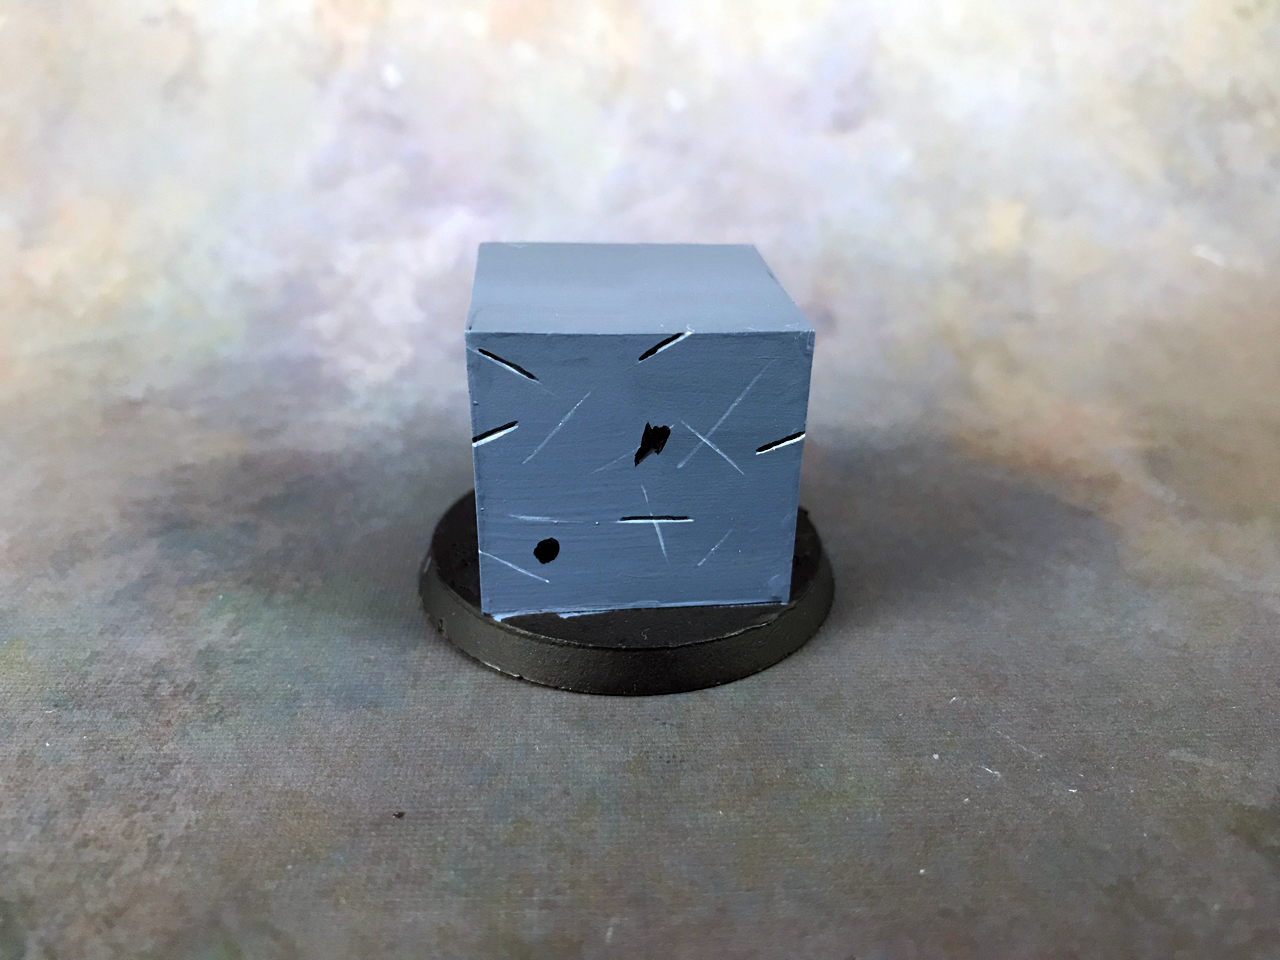
Now we just need to add a highlight underneath them.
That’s it. Create as many of those as you need in various shapes and sizes.
If you want to do paint chipping then do the same as above but smaller.
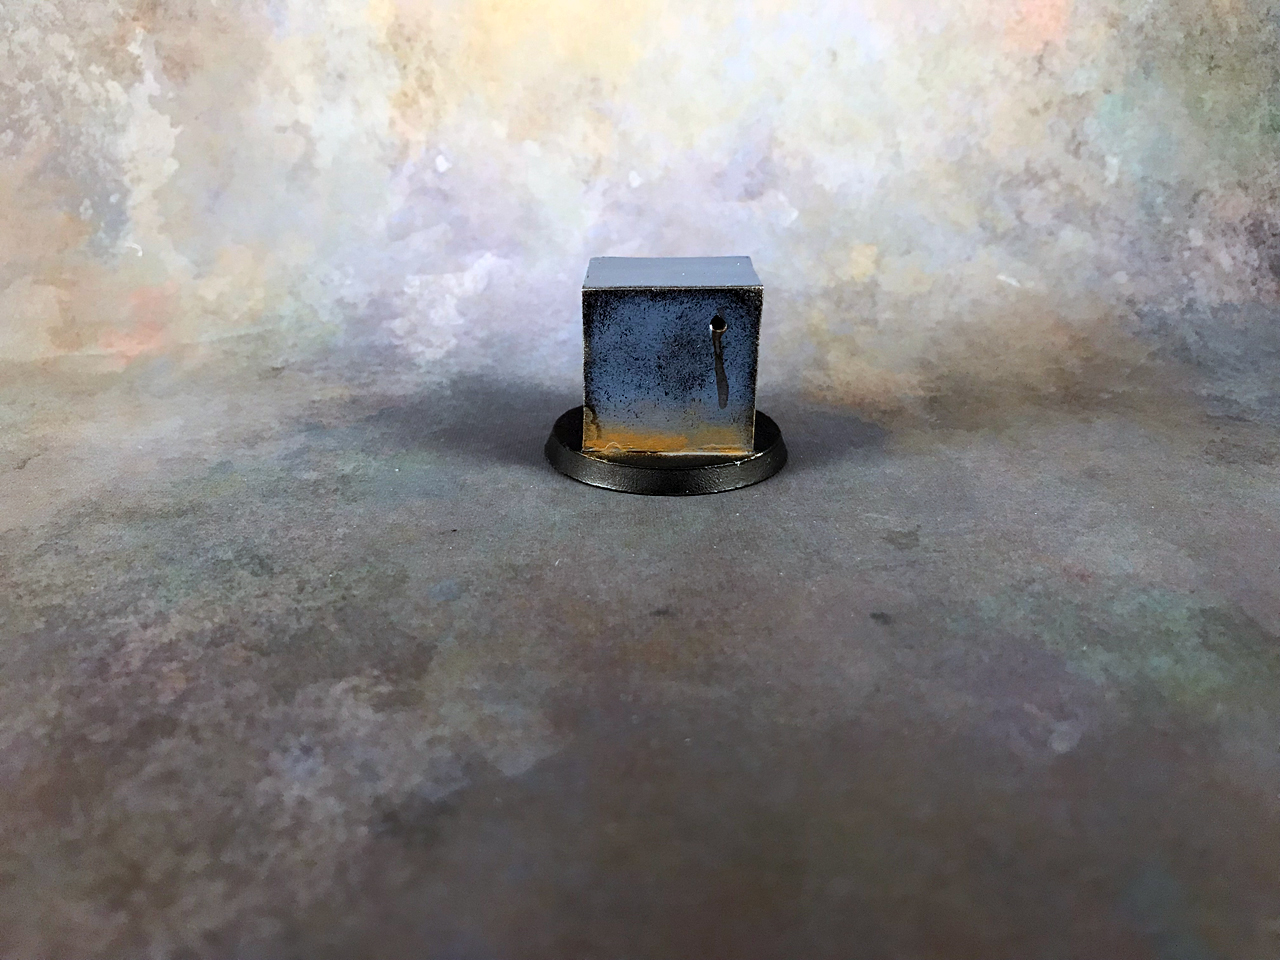
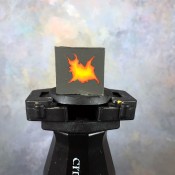
Scorching
Let’s add a small but visually interesting detail to this, scorching.
We’ll assume the hole in the bottom left was made by a rocket or some other propelled explosive. Maybe it was a plasma weapon. Either way, I need to add some scorching to sell the effect.
The first step is to grab a crappy brush. We’re going to be stippling a bit (stabbing) and dry brushing with it.

Load it up with a very dark brown and stipple and dry brush in the area of the hole.
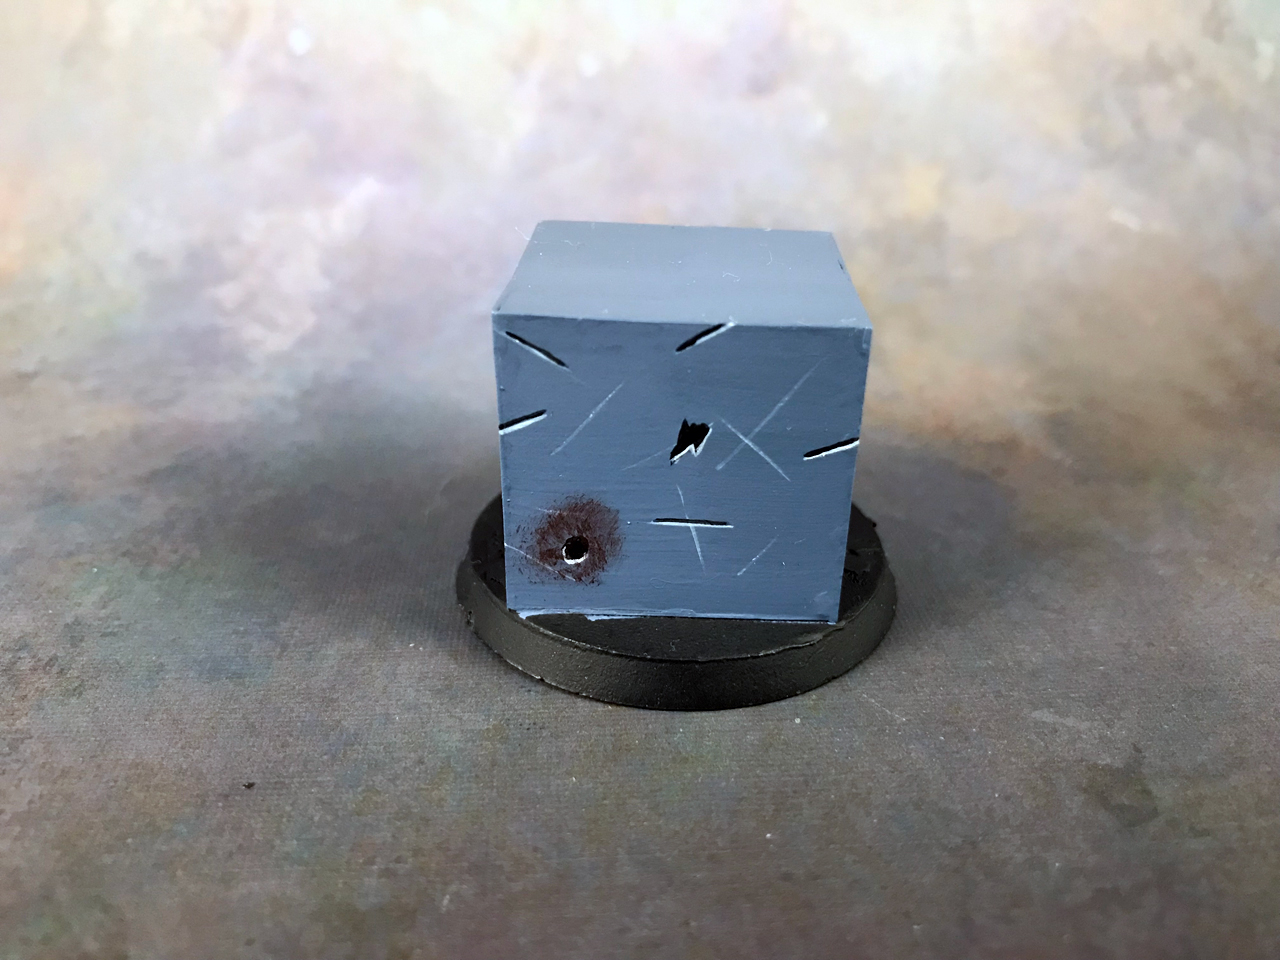
I missed a picture, but from the above picture I decided to spread a bit wider with the dark brown. So, you’ll notice that in the below shot.
Next, do the same with black but focus closer to the hole, leaving some of the brown on the outside.
That’s it, the scorching is done.
The cool part in doing it this way is that the previous highlight gets a brown tint to it, which is what I want for this. That very light blue would be wrong for a highlight here.
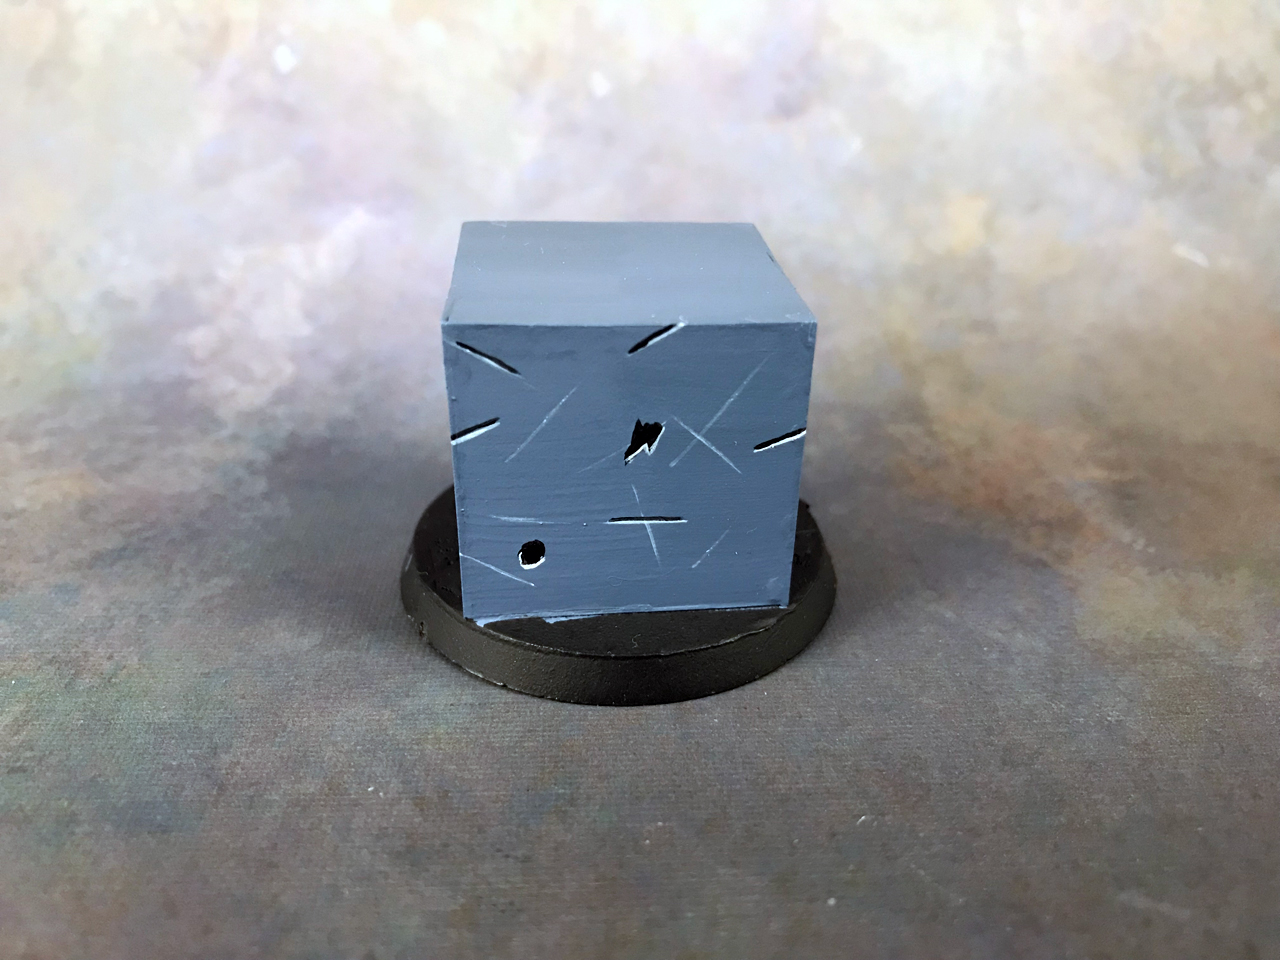
Final Details
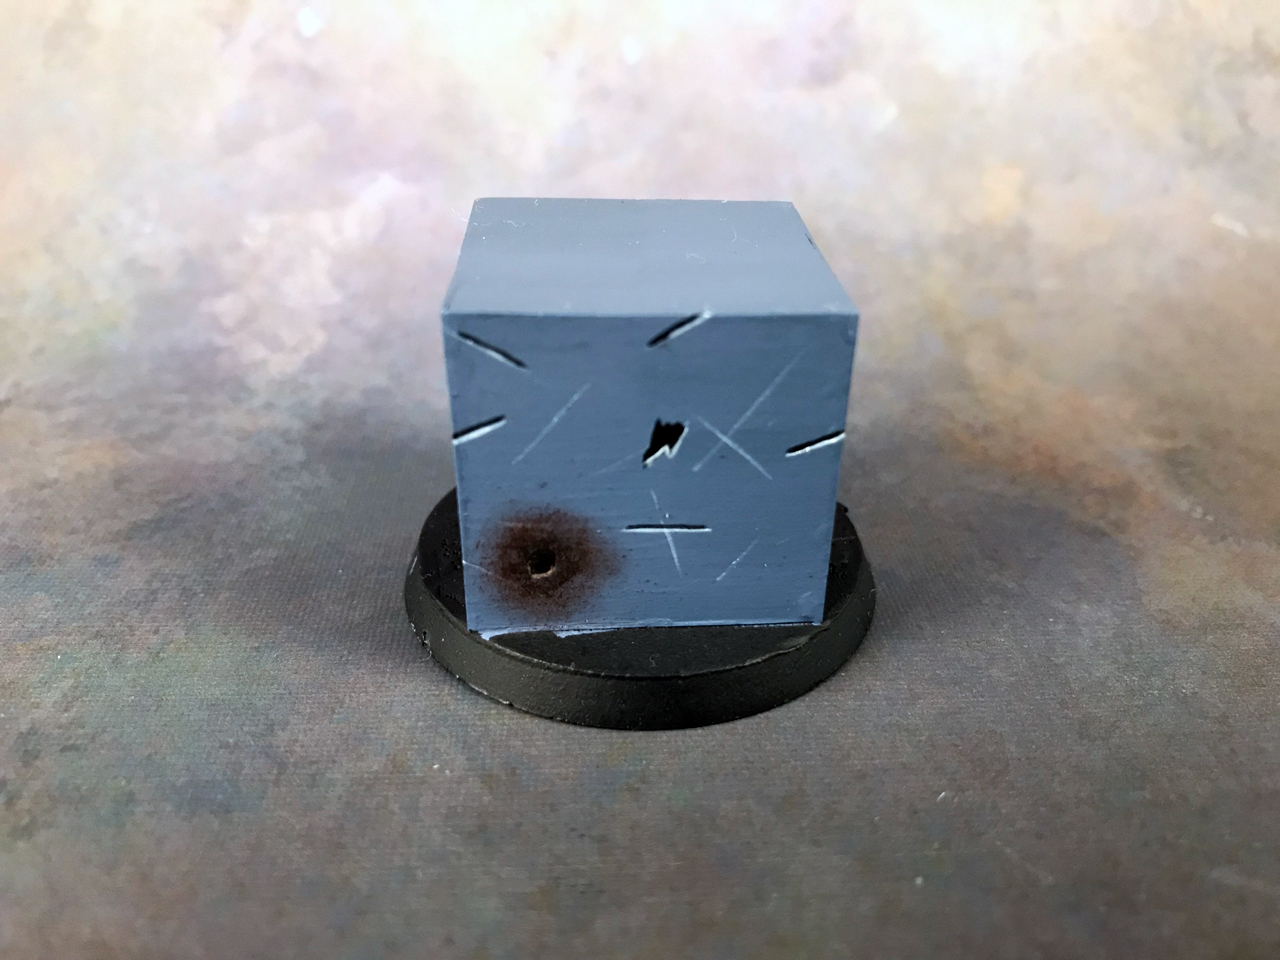
I decided to add some more scuffs, scratches, and another gouged area. You have to feel these things out when you’re painting battle damage because it’s not always quite how you want it the first time.
In this instance I thought the scuffs and scratches were too similar in length, so I added some shorter ones and lengthened a few others.
I also focused more scuffs on the edges. Generally speaking that’s where scuffs are most prominent, the edges of something.
I put in the gouge at the top just to show another idea of damage.
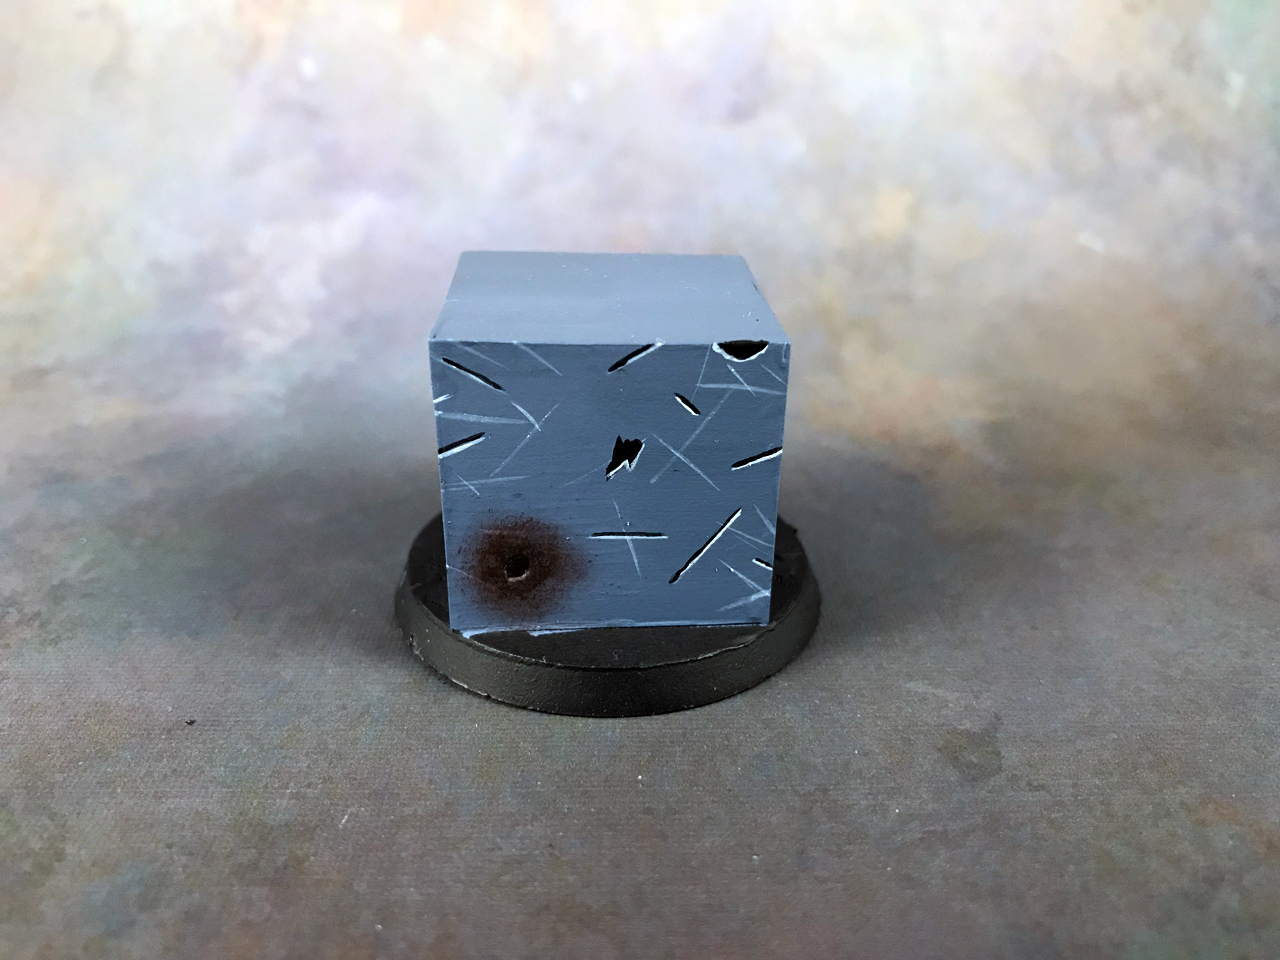
Here’s the same shot but zoomed out a bit more to show more what it would seem like in a tabletop setting.

Battle Damage Conclusion
I realize having a plain cube battle damaged isn’t ideal. It’s a bit hard to sell the idea on something that isn’t anything in particular.
However, this is about teaching you how to do it, showing you what it looks like, so you can then apply these techniques to a real tank or miniature’s armor.
That is also why I didn’t go over the colors I was using. The colors don’t matter, it’s the concept and technique that does when painting battle damage.
Painting Weathering
I’ll also be breaking down weathering into sections.
Paint Chipping
You can do this a few ways. First I’ll show you how I do it, and then I’ll give you alternatives.
What I like to do for chipping when I’m working on a large flat surface is use a sponge. Sponges give amazing results for something like this.
I have some sponge remains from making miniature foam trays. So, I tear off a piece to use.
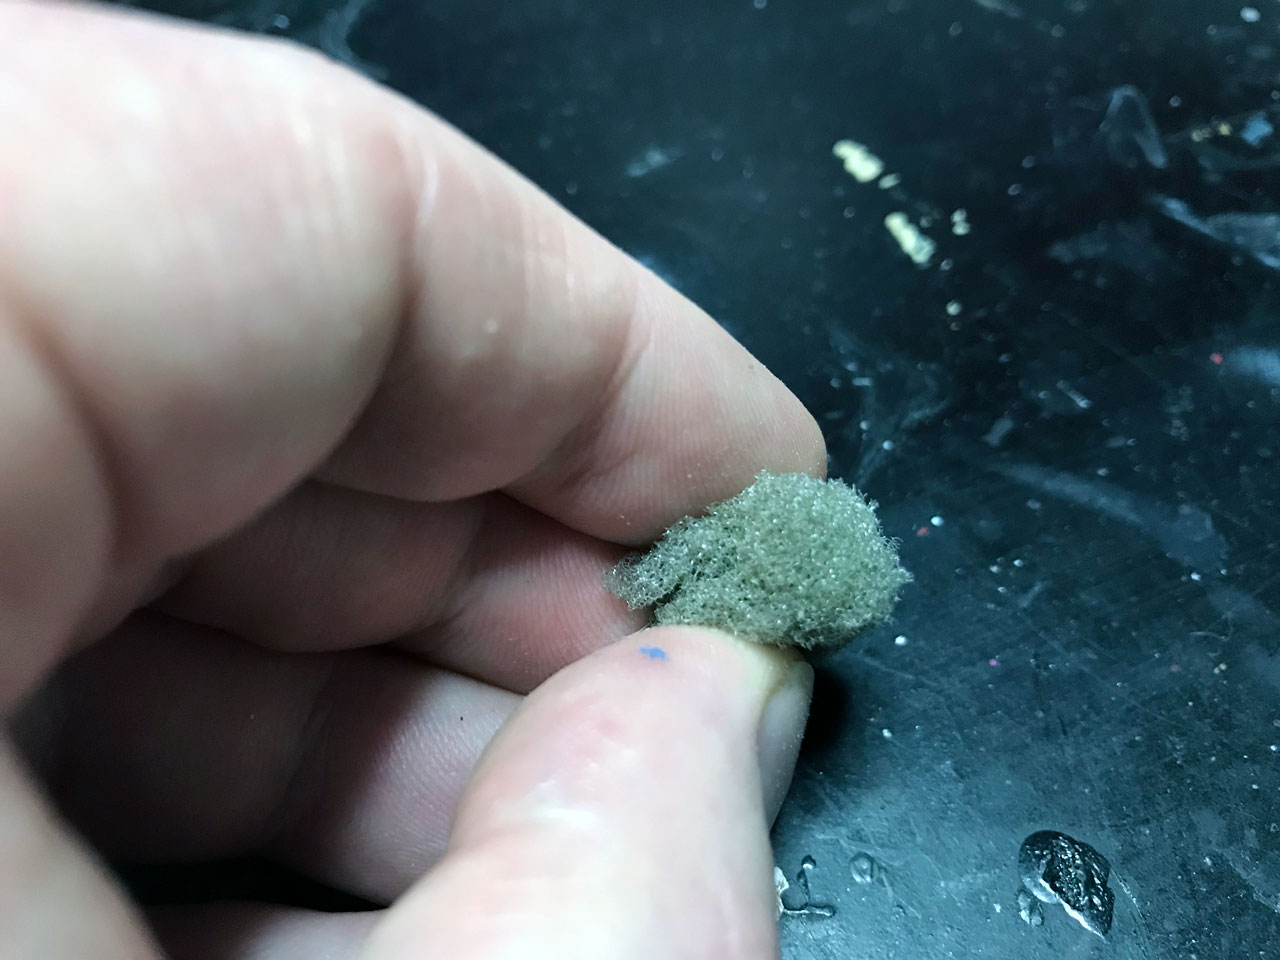
If you buy blister packs of miniatures, and it comes with that thin layer of foam, you can use that too. Really any sponge will do. The goal is to have something that will create a random pattern.
To do this you dip part of the sponge in the paint you’re going to use, in my case black, and then dab most of it off on a dry paper towel, much like if you were dry brushing. Then just gently dab the sponge to the area.

I focused on the edges as they get the most weathering, but I also did some on the inside area as well.
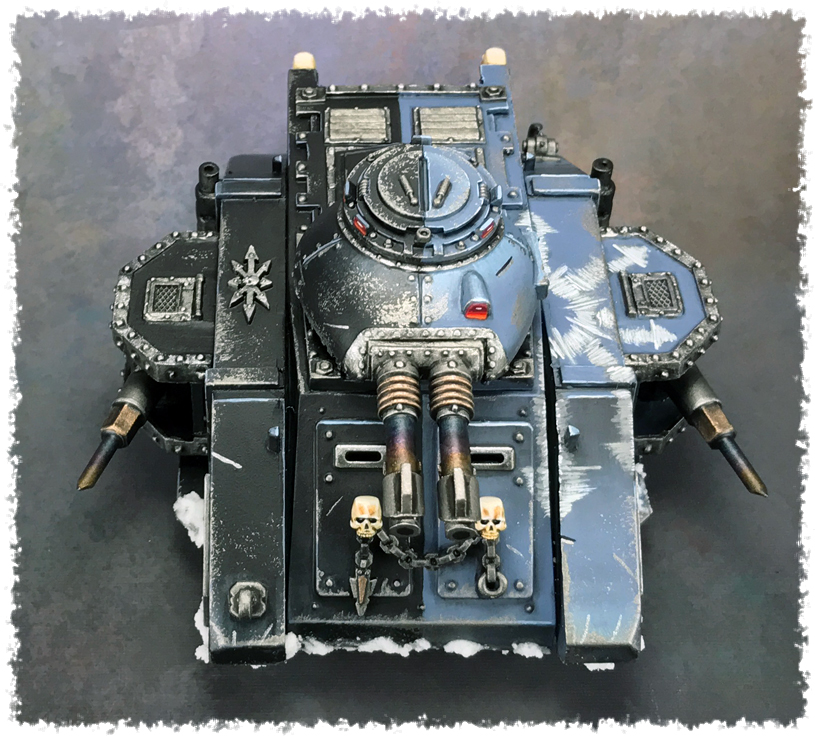
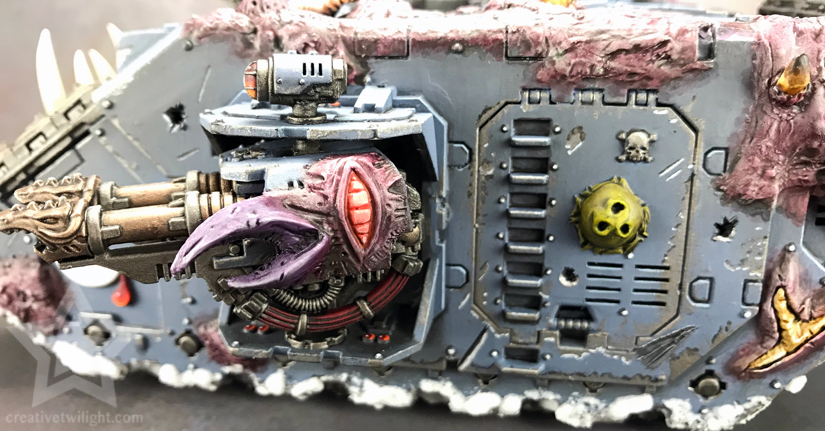
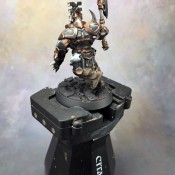
Alternative to this, you could just sponge on a metal color. I’ve done this in the past as well, like you can see on this Predator.
It depends on the look you’re after.
If you do not have a sponge to use then you can instead do this by stippling. You want a brush with some stiff bristles, like this one.
That’s just an old brush and I cut the ends of the bristles off because they were going everywhere.
You load up paint and wipe most of it off, same as dry brushing, and then repeatedly stab the area with the brush. This is why you want stiff bristles.
Just keep moving it around and stippling (stabbing) the area until you’re happy with it.
From here you want to give a metallic edge highlight to show that it’s exposed metal.

From here it becomes a bit of a stylistic choice. Some people like to leave it like that for chipped paint. However, you can go a bit further if you want.
Take some metallic paint and load up the sponge. Now you’ll dab it in the same areas that the black was done while trying to stay back a bit to leave some black showing for depth.

It’s hard to pick up the metal color in there, as it’s lightly put on over black, but it’s there. I want the metal dark because it’s weathering, so the metal would be darkened and corroded anyway.
Worn Paint
Sometimes you want to create an area where the paint has worn down to the metal. This would be commonly seen in areas that get a lot of repeated use, like the edges of doors, the bed of a truck, any area that gets walked on a lot, etc.
For this we’ll add some black to the area that’s being worn down – the bottom left.
Now, all we do is paint in the metal color while leaving some of that black on the edges. The black on the edges represents the primer. So, the wearing has worn down the paint to primer and then the primer to metal.
If you instead wanted a huge paint chip then you could follow the same process but leave only black showing at the top to represent shading and to give depth. So, those side edges wouldn’t show any black, the metal would extend over that in the above shot.
Leaking Oil
Let’s say that a bullet hole punctured something and it started leaking oil. What you do is take a brown wash, or a really thin dark brown paint, and create a streak.
To do this you want to start your brush below the hole and then drag up to the hole. The reason being that wash or paint will deposit the most where you stop. Since the least amount of oil would be at the bottom, we start there and pull to the source.

Then you want to add a second layer. Doing the same as before, but starting up a big higher than the first time, add a second layer of the wash or thin paint.

You can add as many layers as you like until you get the desired look. Just start a bit higher each time as it’s darker towards the source.
Painting Dust & Dirt
Another common weathering element is dust and dirt. This one is really simple too.
Again, assuming Cubie here is a tank and it’s driving around a lot through dirt roads, it’s going to pick up some dust from the roads.
All you do is take a light brown and dry brush it on the lower part of the model.

That’s it. I did a few layers of dry brushing to build it up more at the bottom and fade out as it goes up.
Now, if your miniature was based on a Martian soil or something, then you’d use whatever color the base area is, like a Martian red. Generally speaking, just use whatever color is on the base and dry brush it on the miniature.
Lastly, here’s a more zoomed out shot of all that weathering.
Rust
Rust I’m not covering here because that’s a topic on its own. However, I will give a few quick tips.
If you’re painting rust on painted surface, like Cubie where the rust is coming through the blue paint, then you can sponge/stipple a red-brown instead of black as done above.
From there you can use an orange and add thin layers over the red-brown to represent the newer rust. You can even create rusty streaks in the same way we did the oil above.
I do have a tutorial I did on painting realistic rust though if you want to check that out.
Mixing it Together
Putting these various techniques together creates a great look if you want worn and battered. So, let’s do that.
I didn’t document the steps as I’ve already shown them. However, here’s the end result of mixing everything together for a really battered Cubie.

And zoomed out to better see it like normal.
Now, I wouldn’t normally pack that much into such a small area, but I just wanted to bring it all home.
Here’s another version I did that’s more refined and less chaotic. I just focused on some basic weathering and minor damage.
You’ll notice I went lighter with the scuffs here so that the scratches are more prominent. I also added some small highlights underneath some of the chipping I did to give a bit of emphasis here and there.
You just have to play around with the techniques until you find something you’re happy with.
The final shot of Cubie, I swear. I worked on the top so I could get an angle showing 3 sides and bringing everything together.

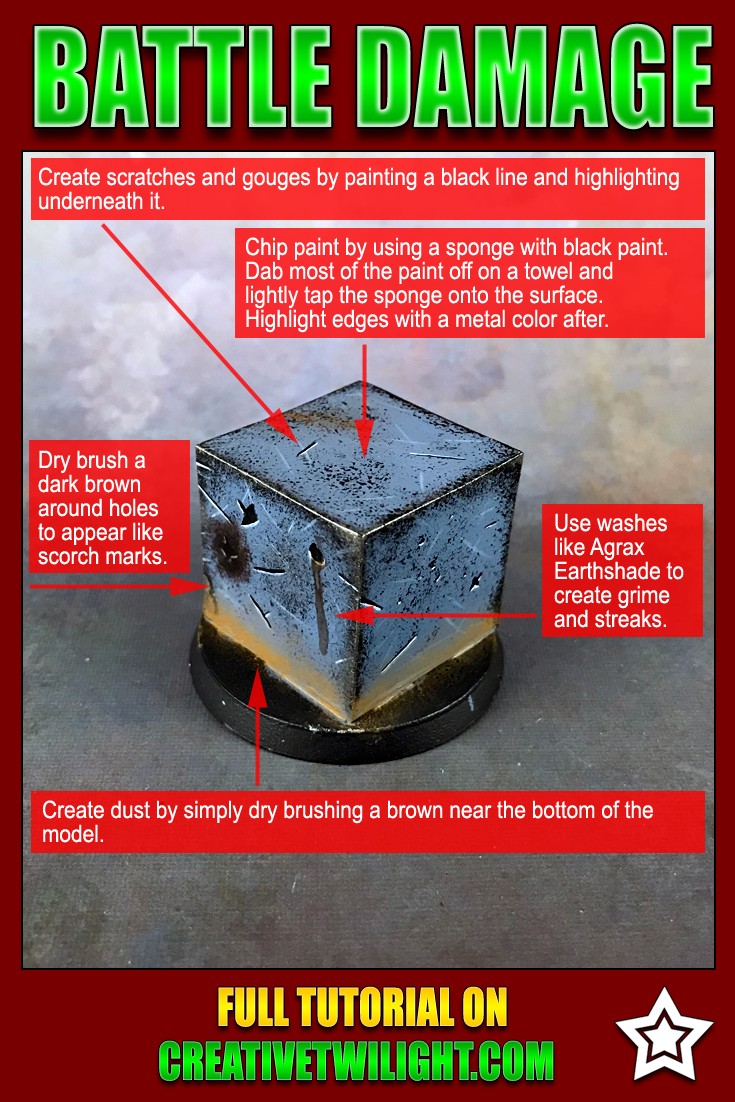
Battle Damage Reference Sheet
I put together this handy little image that covers all of the above techniques. Feel free to save this for later, like on Pinterest :)
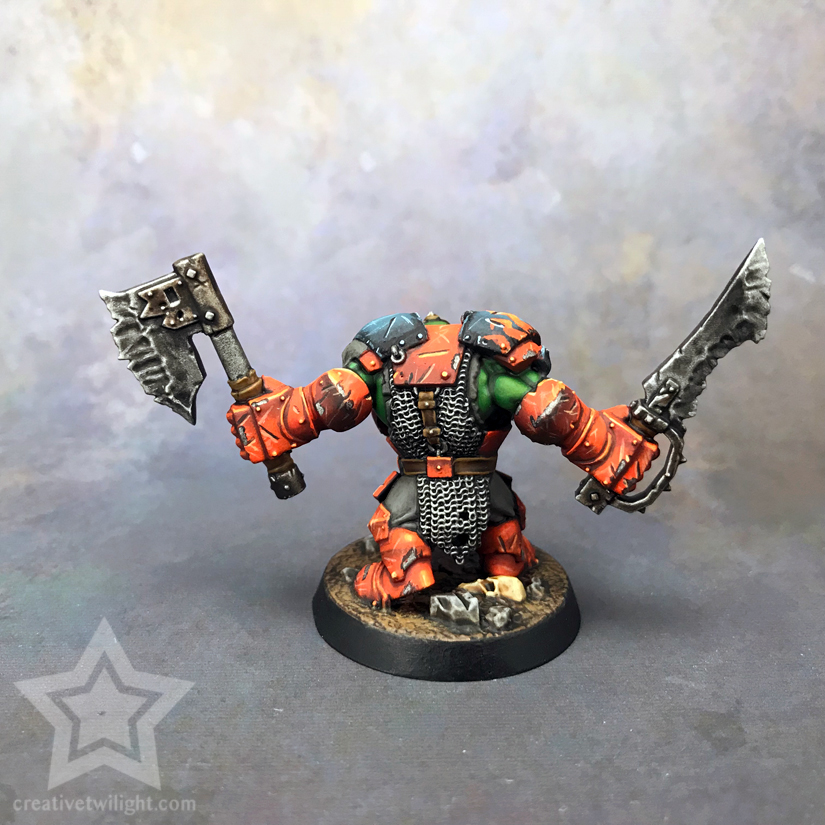
Other Examples of Painting Battle Damage & Weathering
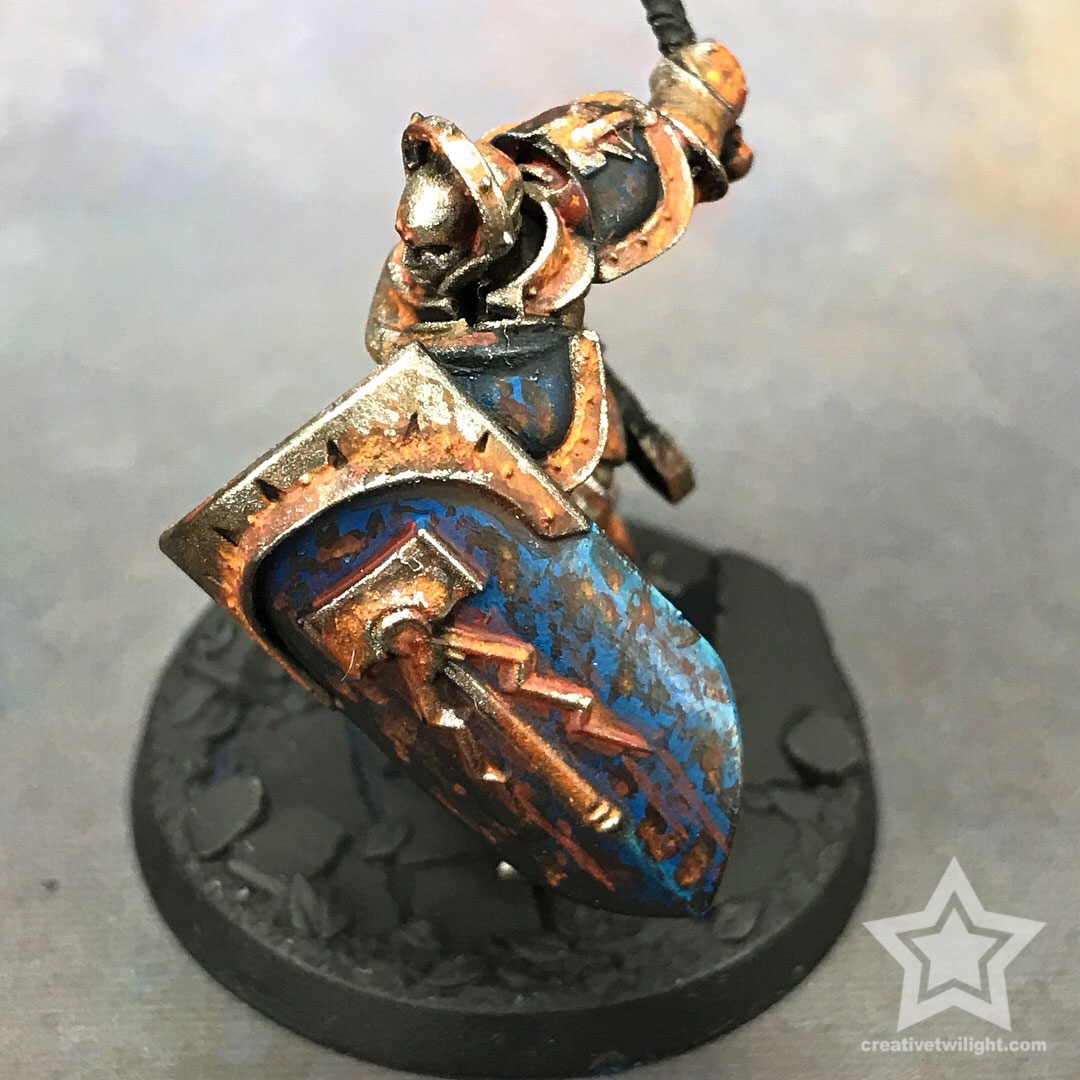
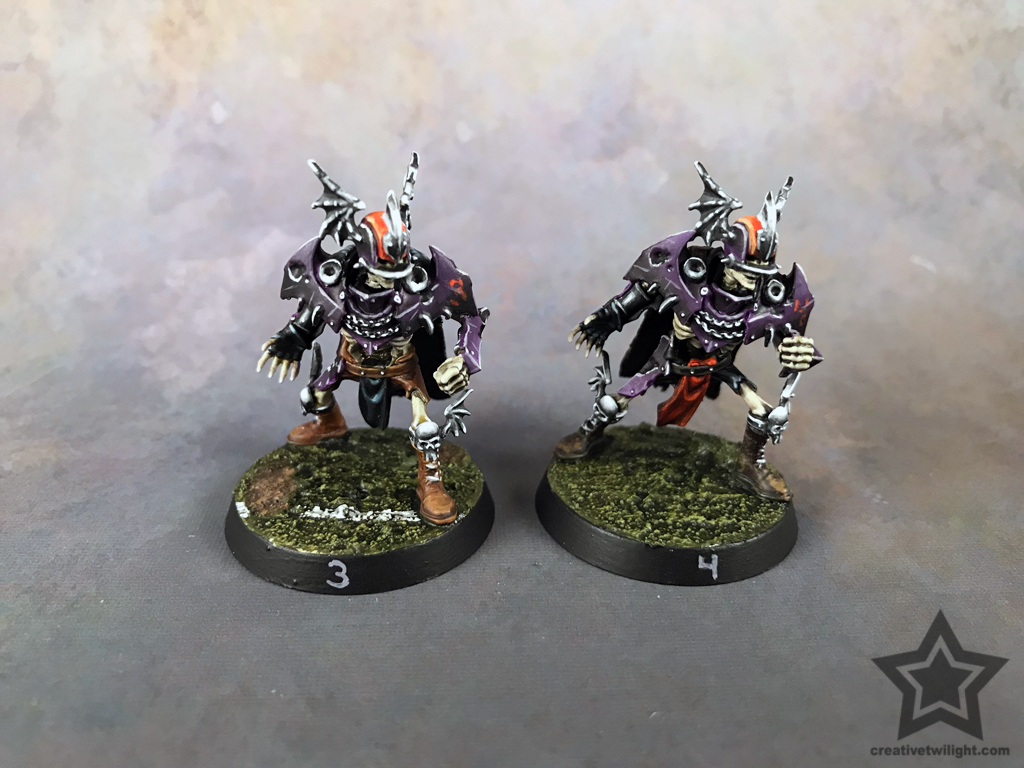
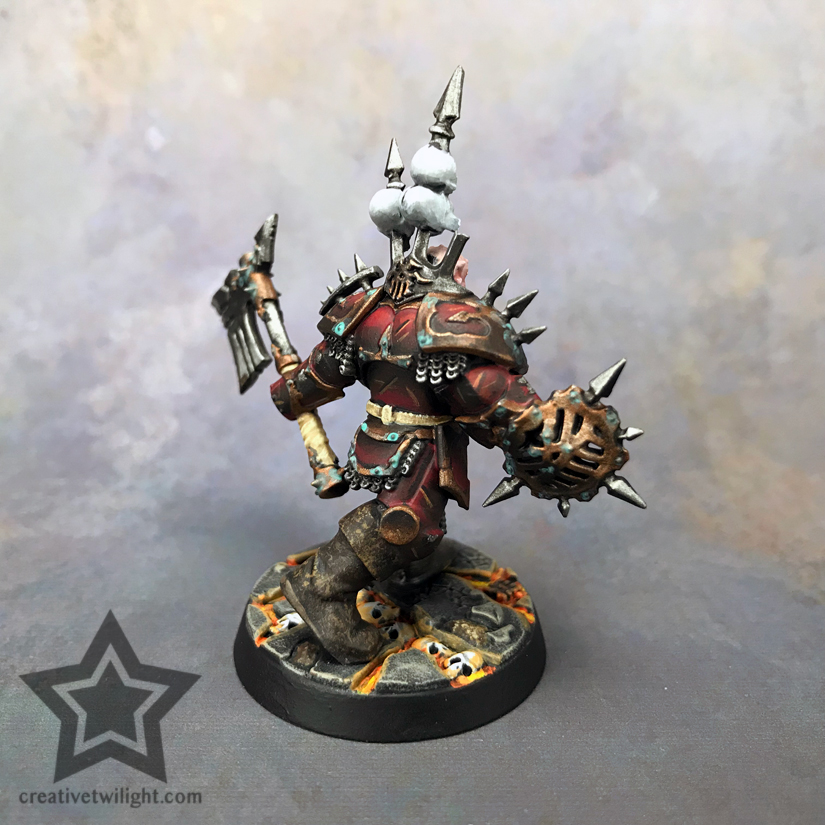
Now that we’re done with Cubey, here’s some other examples of models where I’ve painted battle damage and weathering.


More Resources
Games Workshop has a nice video showing you how to paint battle damage if you prefer video tutorials.
Some of what I learned and showed above was from these wonderful folks: Light Miniatures, MiniWarGaming, and The Dark Fortress.
When I first began learning about battle damage and weathering it was through those articles that I began to put it together.
Conclusion
My goal with this tutorial on painting battle damage and weathering was to give you some easy and approachable ways to get good results. You don’t have to follow what I did exactly, it’s not a template, but use it as a guide to play and explore on your own.
I feel like I could have added in a few more examples of things as well, but really they were more of what I’ve already shown but in other situations.
Being that my goal was to get you thinking about the techniques and approaches, not how to copy what I did, I figured I’d leave you with a few things to work out on your own ;) You’ve got the tools already.
You really can’t go wrong with painting battle damage and weathering either. Like anything in painting, it’s up to you on how it should look. I’ve seen some extremely realistic approaches that looked amazing, and I’ve also seen some very stylistic approaches that looked amazing as well. It’s about what you like the look of and what suits the models.
Lastly, you’ll continue learning the more you work the techniques. This is an area I’m always trying to improve in. You’ll notice varied approaches in my examples above and that’s because I’m always experimenting.
Keep at it, keep pushing, and enjoy the process.
Also, if you’re interested in other painting techniques then check the links below, and also check out my guide to miniature painting. That guide goes over all the things I know about the subject.
Miniature Painting Techniques & Guides
Learn the basics, as well as the advanced techniques, of miniature painting.
I love painting miniatures and teaching people how to paint. I also really love blogging, so I've combined those two passions here.
- Creative Twilight’s Future and My Thoughts (Feedback Welcomed!) - December 4, 2021
- My Top Gift Ideas for Miniature Painters & Hobbyists + Gifts to Avoid - December 2, 2021
- The Year That Was 2020 and Where I’ve Been - January 17, 2021
Now that’s what I needed, everything clearly and concisely explained in a single post! Thanks for taking the time to compile it all and share! :)
Thank you! I was aiming to teach and guide with this article so I’m glad I pulled it off. I know I had a hard time finding a single article that covered everything when I was learning, and I had to read quite a few to get everything I needed.
Nice overview! It’s an awkward topic to try to cover, because so much of it depends on exactly what you’re painting, but because of the way you talked through the reasoning for each bit, this covers enough that it should be a nice solid base for people to build from and adapt to whatever they’re working on at the moment.
Thank you.
You’re right; this type of thing is so variable and I was hoping to explain the thought process enough for it to be useful to everyone. Ultimately, if it looks cool and you’re happy with it, then run with it.
Hello!
Many thanks for the great article. Indeed, having a lot of information in one place is very handy so thanks for taking time to collect it first and then putting it all together, including the description of your experiences.
I must admit that when it comes to battle damage I have a dilemma. It seems to be perfect for tanks or models representing warriors that fight often but do not necessary care about their weapons. Like Orcs!
How would you approach applying some battle damage to the models representing Elves, if at all? Apart from the fact that there should be less of it, would there be something completely different in the process?
Thanks in advance!
Thank you!
You’re right in that some races are notorious for not caring for their equipment, like Orks/Orcs/Orruks (whatever version they are these days…). A race like Orcs would have additional elements introduced, like rust, corrosion, pitting on weapons, etc.
Even Elves are going to be dealing with battle damage, possibly weathering, yet they won’t hit that same level as Orcs who are dealing with rusting and such through complete neglect. Battle damage is what you walk out of a battle with and Elves battle. Weathering could happen with Elves if you envision them in a prolonged war, away from home for a year or more.
So, Elves wouldn’t let it degrade to rust and corrosion, but chips in paint, cuts in armor, and worn down paint are all par for the course in combat for anyone.
Thank you for your quick reply!
I will definitely check the weathering effects. Perhaps the next project, War Chariots, will be a good testing ground. I was also thinking about gentle weathering to add dust to the cloaks or such.
Cheers!
Ultimately it’s up to you and what you think looks good on your army. That being said, for Elves I’d probably stick to dust (like you said), some scratches here and there, and light scuffs. Just enough to show they aren’t just lounging around all the time.
Beautiful tutorial, you get excellent results without any fancy pigments or weird color. Cubey is gorgeus, seems nice idea to have “neutral” surfaces and shapes to test ideas, I used shields but this is very cool.
Thank you.
Pigments and stuff like that are great too. However, I think you need a good foundation for them to enhance the work you’ve already done. Combine the two and you get awesome results.
You’re right, having a neutral surface to work on is perfect for testing stuff out. I think Cubie is going to get a lot of paint on it very soon.
Yes I generally use them, forgetting that with some classical paints and skills you can reach great results.
More Cubie!
I actually don’t own any pigments/powders. I need to buy some…
Really great tutorial.
I’ve always shied away from doing battle damage as it has looked crap whenever I tried it. Reading through this I can see why. Just didn’t have the basics down to make it effective. Good points for me to improve my weathering too. Def be referring back to this again. Great job man :)
Thank you! I’ve been putting this tutorial off for a while now. So, I was glad to finally get to it, and I was happy with how it came out.
Yeah, it’s tricky. You think damaging something up would be easy, and it can be, but I think everyone’s first attempts are just bad. Then you just put it off and forget about it. Like you said, with the right foundation to it you can pull it off easily and convincingly. I’m no pro at it, but I can at least get someone on the right path with it.
Love these tutorials, fairly new at this and always blown away by the work i see here and other sites. Lights, making objects glow and shiny metal is my sticking point at the moment.
Thank you.
There’s a lot to learn when you’re new. It’s part of the fun though frustrating at times too.
I do have a tutorial on OSL (object source lighting) that can help with some of what you’re after: https://creativetwilight.com/osl/
I do also run another site that’s a collection of tutorials submitted by various painters too: https://miniaturehobbytutorials.com/
Lots of great stuff there.